|
My plan is to put the pc case on top of the battery cover using
special suspension mechanism and the radio (without its face) below
the case (between case and battery cover). Battery cover seems solid
enough to hold the weight of these two. then, cables will be routed
from trunk, below the rear seats, through the middle of the car and
continue under the handbrake, gear stick, ashtray, and end-up in
dash.
I have bought:
1. VIA Mini-ITX motherboard (£60 - Ebay)
2. 512 MB DDR SDRAM (£13 - Ebay)
3. 80GB 2.5" Fujitsu HDD (£55 - My PC shop)
4. 3x 40mm Cooling Fans (£4 - Local electronics shop)
5. Laptop hard drive to IDE converter (£5 - Ebay)
6. Full aluminum case (£39 - Ebay)
7. Xenarc 7000 TSV Touchscreen (£200 - Ebay USA)
8. M2 160W ATX DC-DC Power Suppy
9. Kenwood KDC-W6531 (£110 - Ebay)
10. BMW Multistalk Adapter to keep steering wheel control (£33 -
Ebay)
11. Antenna extention plugs
12. CUSTOM Made Bezel to accomodate the Touchscreen in the place of
OEM radio and climate control. I have fabricated the bezel using
fiber glass. Will be painted with black metallic paint to match
interior trim.
13. OEM BMW climate control relocation unit
14. BMW ISO plug to Kenwood plug converter
15. Lots of cables:
- 60m of cable (to wire Radio from dash to trunk (You need 13 wires
total for the BMW ISO Radio connection and 2 for PC On/Off)
- 10m of shielded computer cable (To link radio faceplate with the
rest of the radio, radio in trunk, faceplate next to hand brake)
- 6m Shielded RG-58 cable for antenna extention + plugs
- 6m Shielded 2-wire cable for multistalk adaptor connection
- 4m XGA Extention cord (NOT VGA)
- 3x5m USB Extention leads (1 for Touchscreen and 2 for extras)
- 200 male/female connectors
...AND LOTS OF PATIENCE
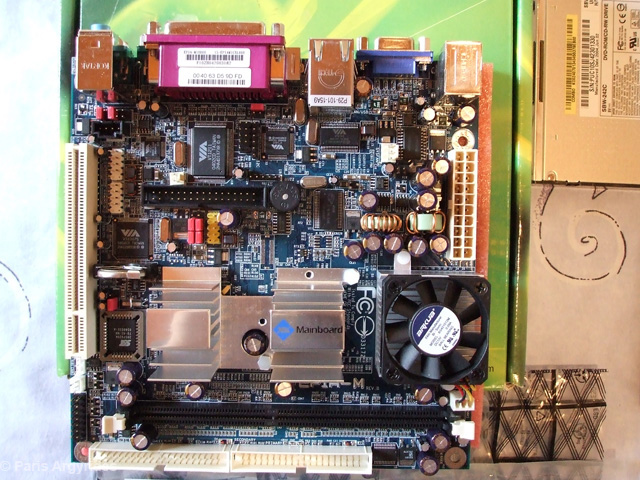
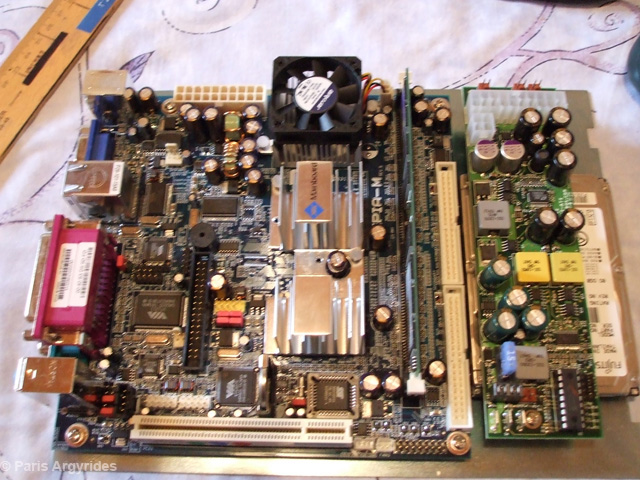
The hardware part; motherboard, hard disk, RAM, connectors, etc
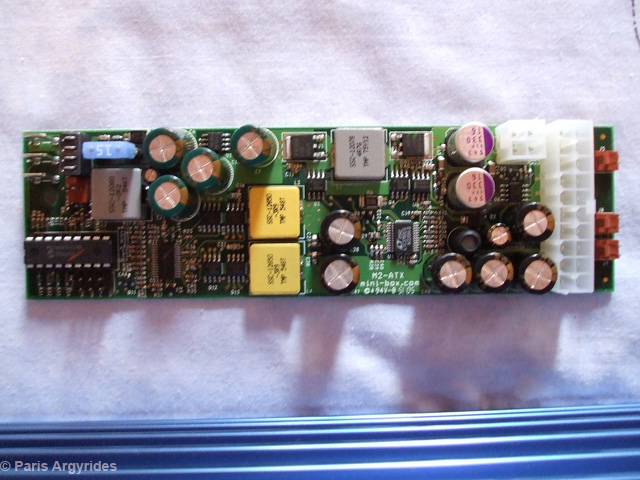
The DC-DC M2 power supply. I chose this product because of the very
good reviews and its ability to provide 12v even when the engine is
started. I have set it so that it will send an OFF signal after
30seconds when I switch off the car from accessory key position.
This psu monitors battery voltage and will switch off immediately
when voltage drops below 11v to prevent battery drain.
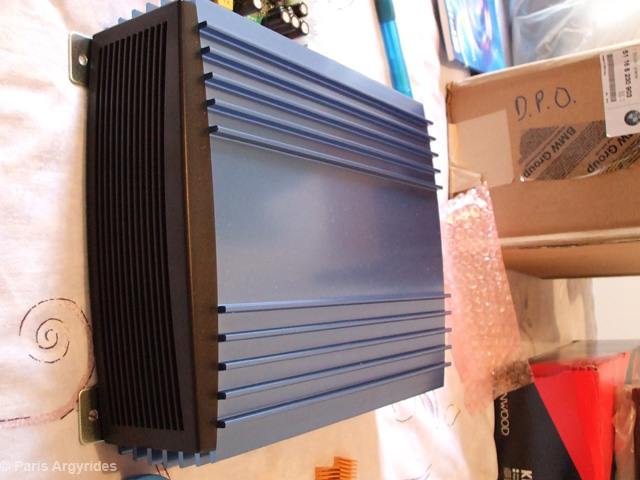
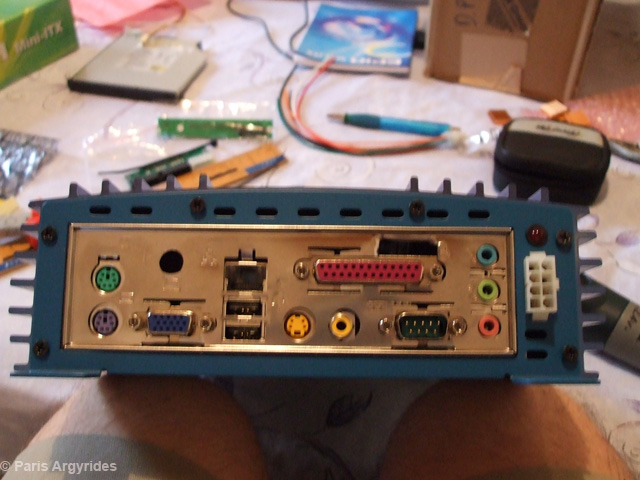
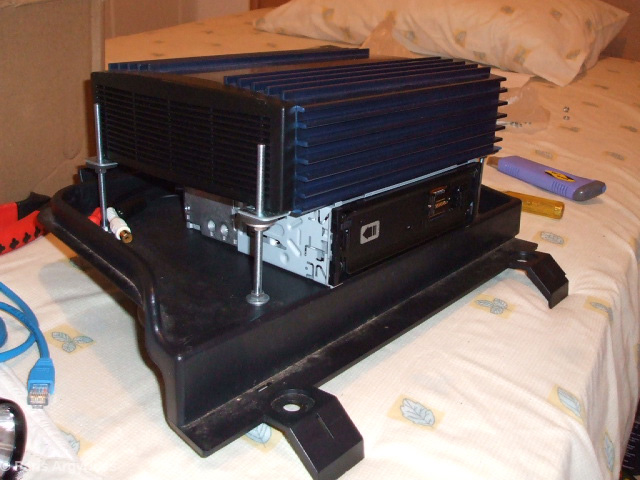
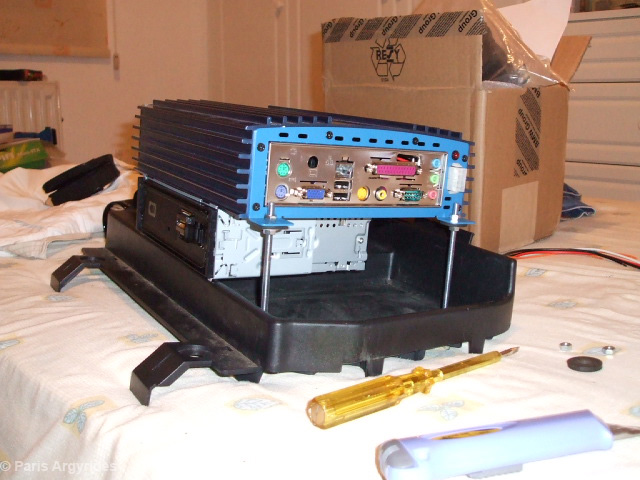
The case. I got this from Sweden and it's a perfect box for such a
project. Solid 5mm aluminium with 3x40mm fan slots and air filter.
Fits just fine over the battery cover. It provides mounting points
for PSU, mobo and hard drive.
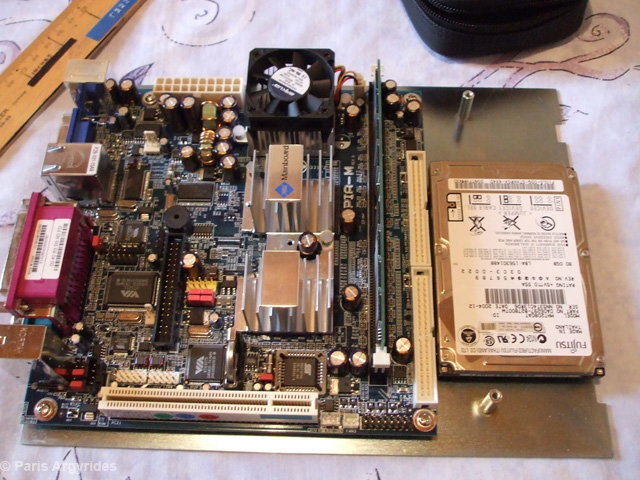
Motherboard, Hard Disk, and M2 Power supply mounted on the base of
the pc case. The hard disk is mounted below the power supply which
makes it a bit time consuming to change a hard drive but hopefully
the silicone mounts and the suspension system will keep the disk
fit. I also installed the 3x40mm fans on the other part of the case
and connected them all together to avoid having 3 huge molex
connectors hanging around.
I temporary closed it to test if it works and to install Windows XP
stripped to increase performance.
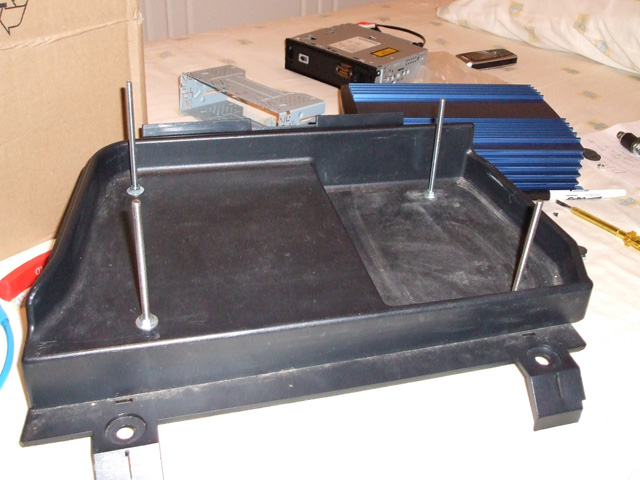
The battery cover:
I have secured 4 10cm screws that will hold the pc in place. Why so
high? The radio will be below the pc and I also need some extra
height to put the shock absorber springs.
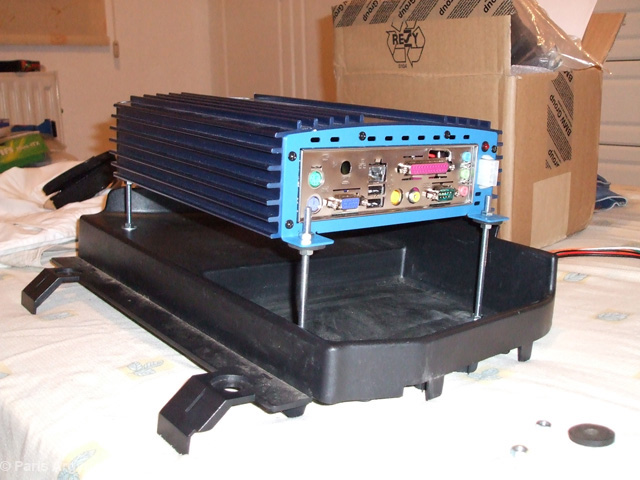
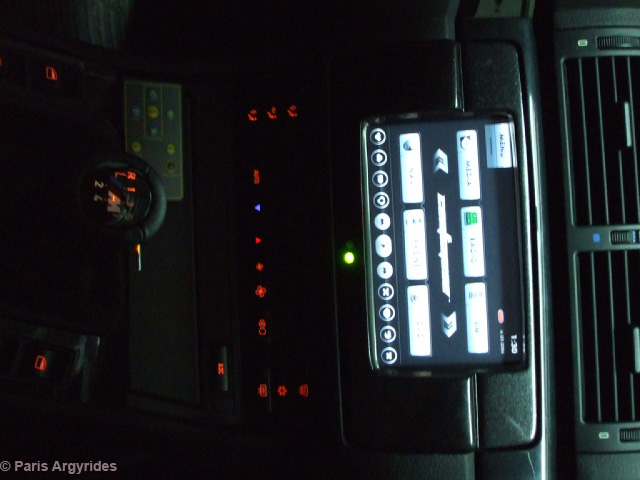
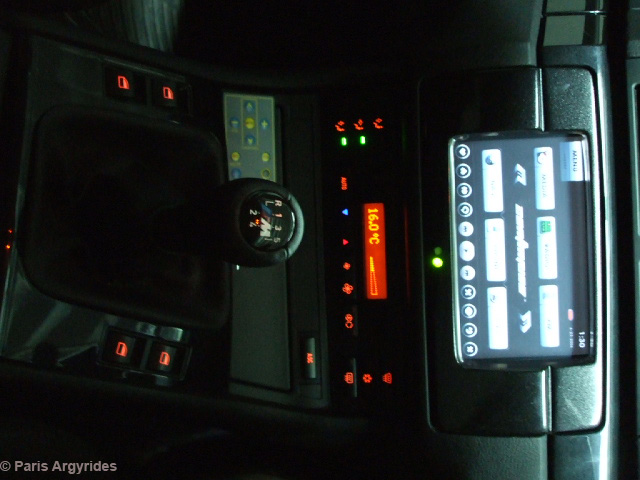
The PC mounted and the radio
With the word stripped I meant
removing non-essential windows services, backrounds, themes etc, not
a RAID configuration [
I don't think heat will be a problem, the motherboard has a VIA CPU
which runs at room temperature when idle and max 44 degrees when
fully utilized. Besides the extra 3 fans, I incorporated another
50mm fan on the chipset, and used arctic silver as heatpaste for the
cpu.
The suspension:
8 springs: 4 below and 4 above the case so that the case can go up
and down. the 4 screws are mounted on soft rubber and the battery
cover sits on soft rubber as well. A friend of mine has been using a
normal 3.5" hard drive for a year without any problems and without
such suspensions. And by the way, roads here in Cyprus are 90%
potholes, 8% bumps. If the hard disk fails after all these I'll just
put Compact flash memory.
The car management program is
the "Centrafuse". It's quite nice, I like the interface, it also
provides large buttons to access functions which come handy when
driving. I'll put it in the startup folder of windows so that it
automatically loads when the pc is booted. I'll probably get or make
a nice BMW theme for it. I have also uploaded 70GB of music, videos
and movies. Also ordered a USB Wi-Fi module for easy home-to-car
uploads.
Autologic software will be installed as well to access error codes/
test scripts/ etc using the USB-to-BMW Link cable. Quite an
expensive bit; £85 from ebay for 1.5m cable and I still have to make
sure I get the correct one. You have to know the protocols BMW is
using for the OBD.
I also found a VERY cool software, that enables you to connect the
phone via Bluetooth to the car pc, and it converts the touchscreen
to a huge telephone keypad/screen where you can do all the things
you do with a phone. I don't remember the name right now..
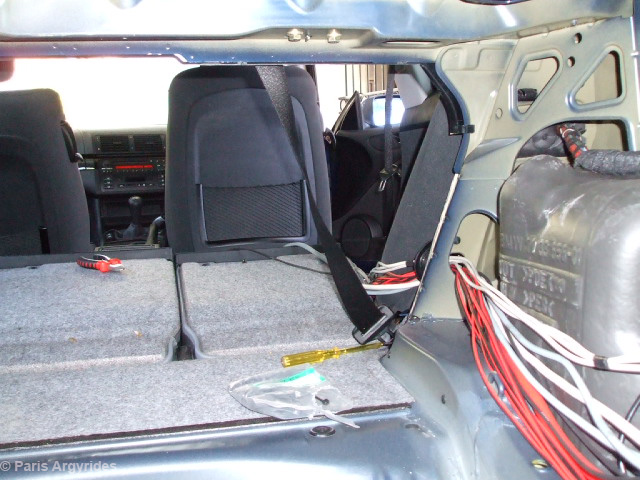
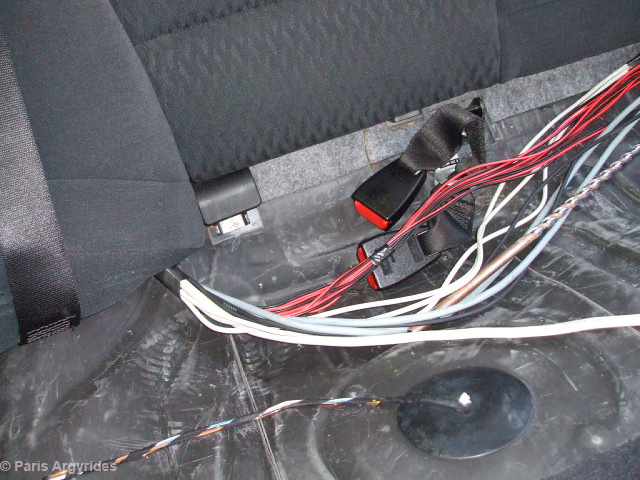
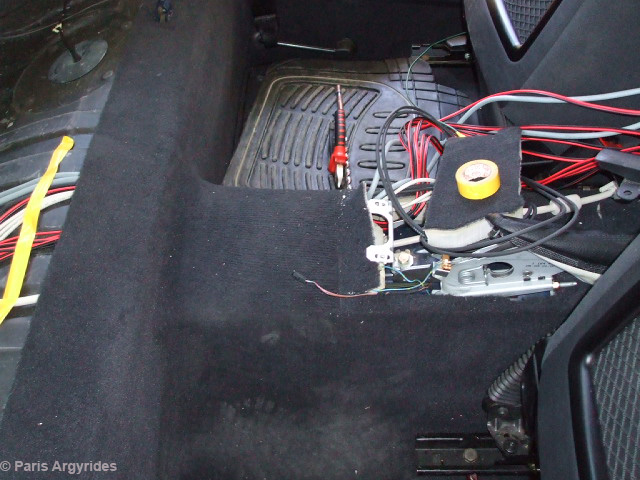
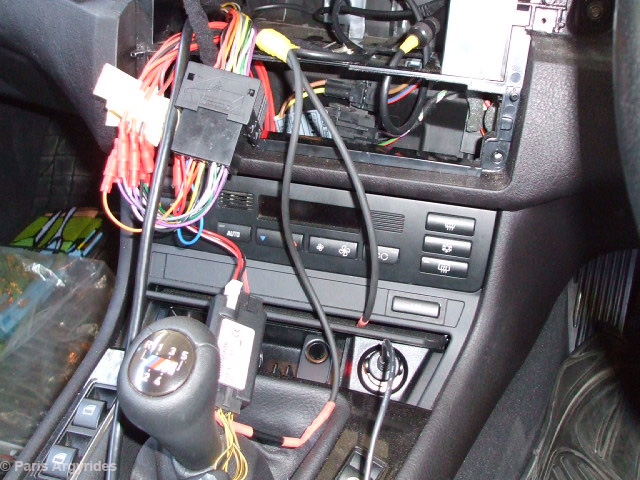
wiring day:
I run all my cables through this hole behind the rear seatbelt. Good
thing the car is pre-drilled and there's a rubber cover which I cut
according to the diameter of my cables.
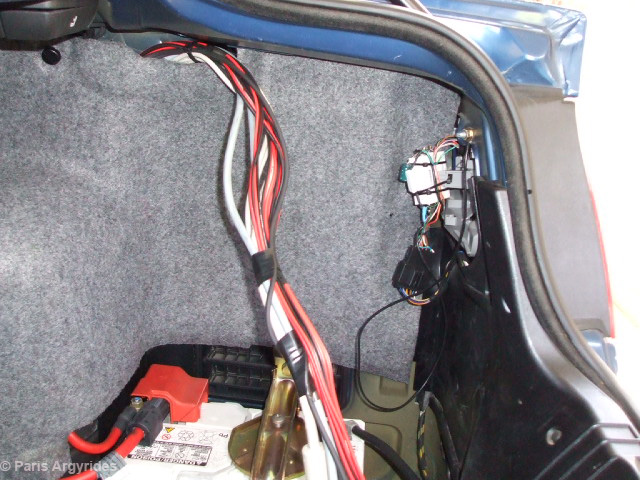
LOL that small black box where the positive battery wire goes to has
a fuse branded "LITTLE FUSE" .. it's 250 Amperes.. Car will probably
melt before this fuse blows..
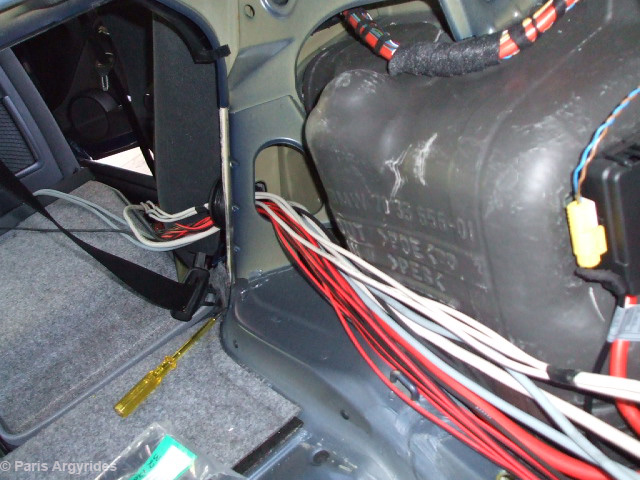
This is how all the wires look.. Just found out that my rear window
has been changed.. under the seats is full of broken glass..
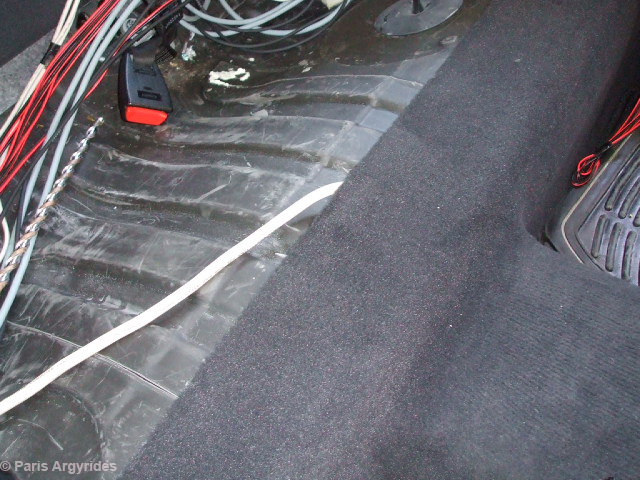
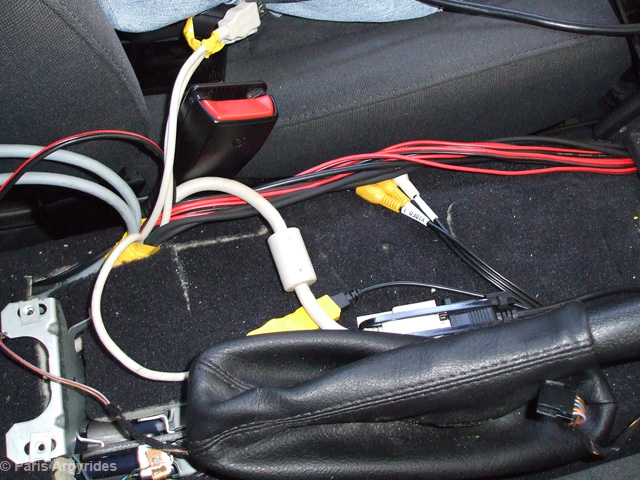
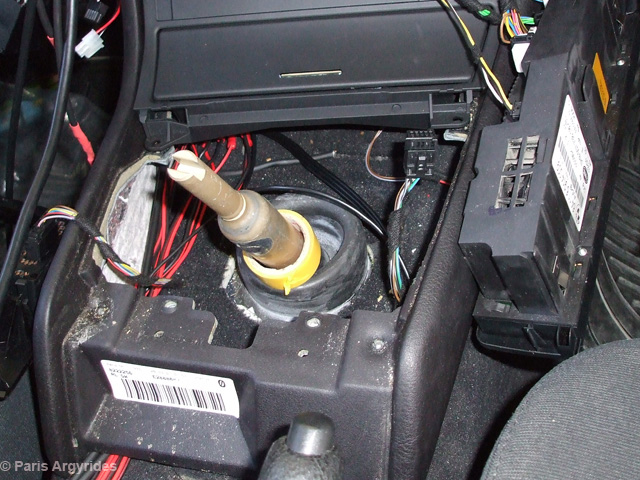
Now I have to get the cables under the carpetting and route them
where the handbrake is located. The carpet is 50mm thick with soft
foam underneath which is good because cables will not be pressed
hard.
First the XGA cable must go through. Almost impossible because of
its 15pin connector. I slightly lifted the carpet and managed to
pull it through by attaching it to another flexible cable, like the
one electricians use to pull cables through the walls.
The XGA cable coming out of the handbrake. Use XGA instead of VGA
for the extra shielding.
I tried to spread the cables so that the rear seat doesn't press
them too hard..
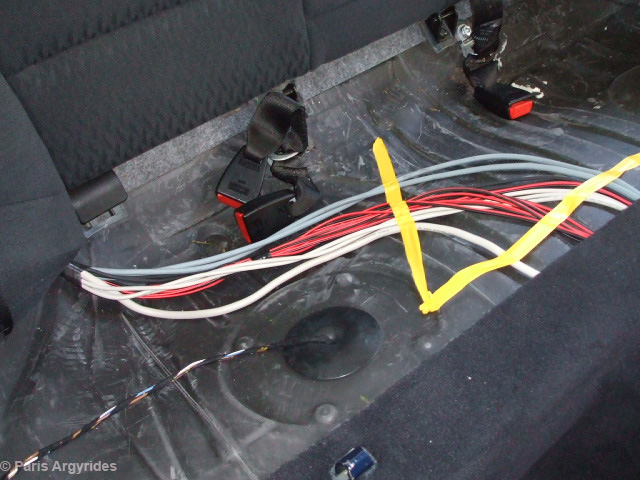
Wiring under the middle section of the carpet done..
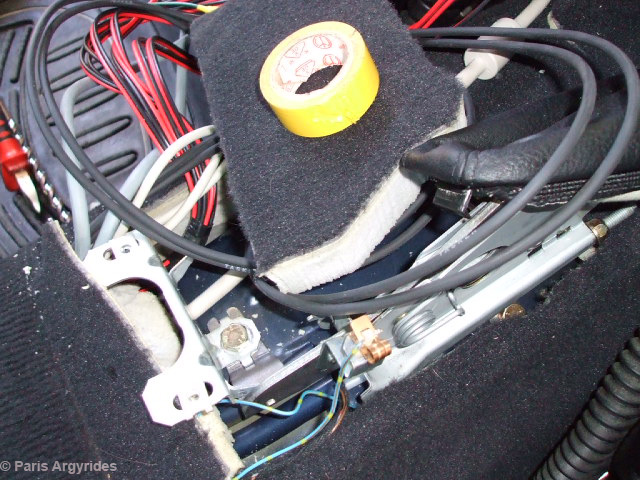
Wires must go now under the handbrake assembly, gear stick covers,
and ashtray
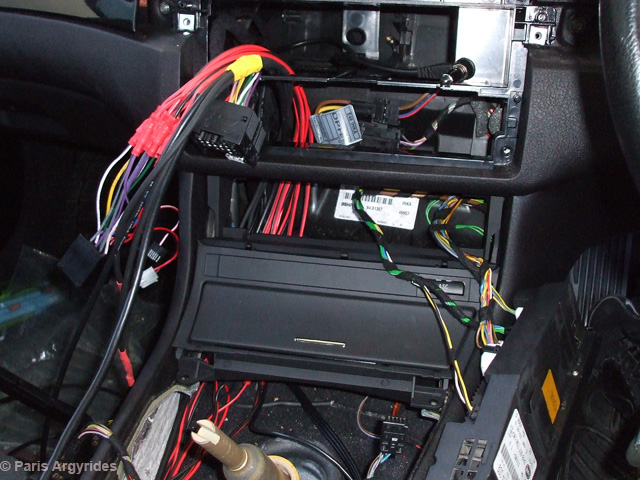

I have installed the climate control relocation unit and the climate
control migrated below.
FYI, I did not cut ANY BMW
wire. I used BMW to ISO converter for the radio and used plugs to
connect them with the long wires going in the trunk. The XGA
extention stops just under the handbrake which is ideal because the
Xenarc touchscreen already has a 1.5m cable.
For the Touchscreen, I took power from the radio switched line. 10W
is not much to require any fuse upgrades.
I will also incorporate 2 USB ports somewhere for USB keyboard/mouse
and memory sticks. PC control is mainly via the Touchscreen and the
Centrafuse Car PC control software.
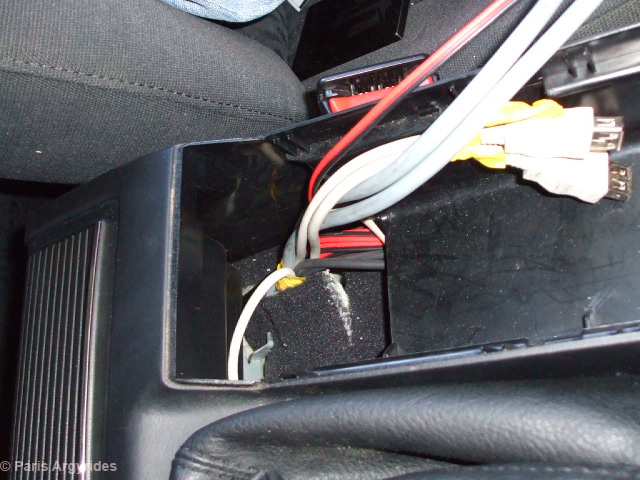
Initial testing..
As you can see, most of the cables go underneath the handbrake
cover. I have left outside 2 sets of shielded computer cable which
will be used to connect the radio faceplate with the rest of the
unit in the trunk. Also, I have 1 pair of wires for Hard ON/OFF (in
case I'm going for a small ride and don't want the PC on) and 2 USB
2.0 which will all be somehow mounted over there.
This is the initial testing. TFT connected and system boots. Windows
is loaded in 9 seconds or 4 seconds after hybernation. I got the
latest Xenarc model with high brightness which makes a world
difference during daylight.
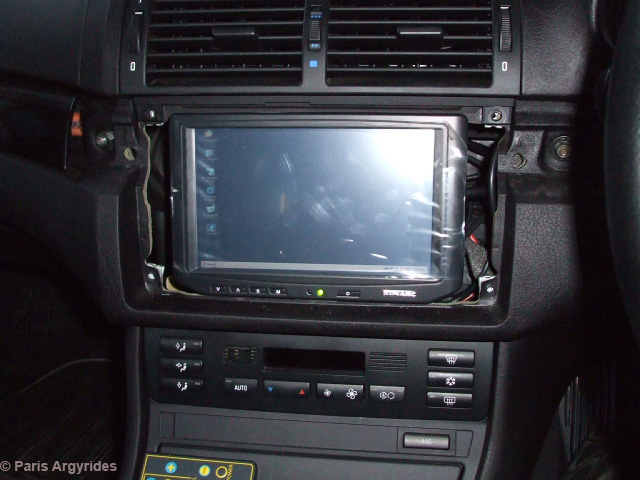

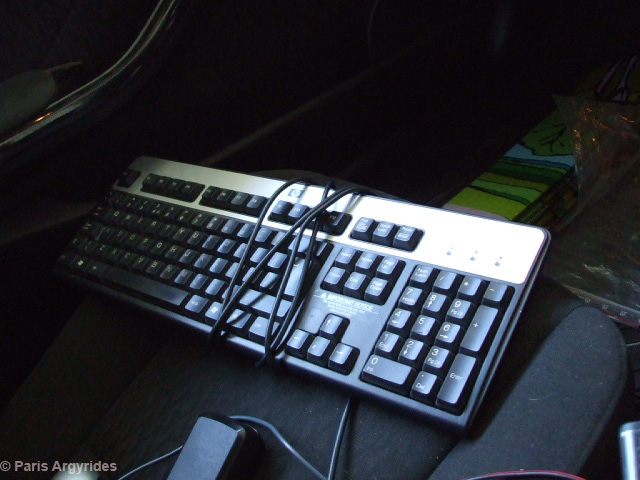
A keyboard/mouse really helps
and the 2 usb ports come really handy. I'll probably get one of
those palm type mini keyboards to have it in the glovebox, just in
case.
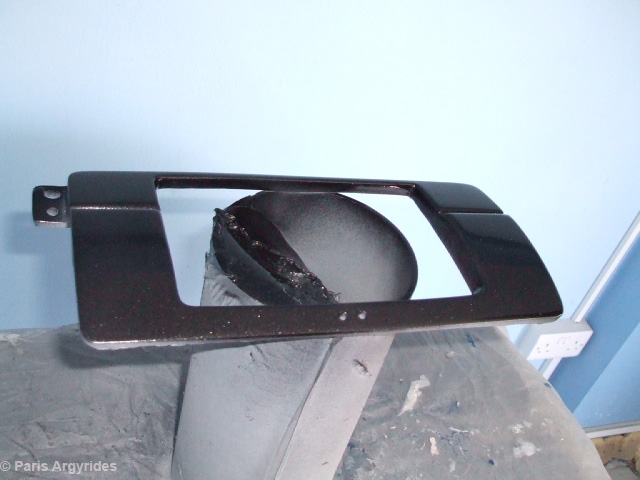
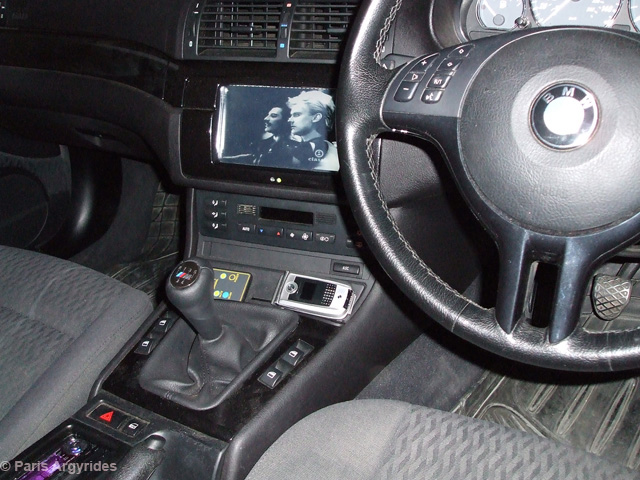
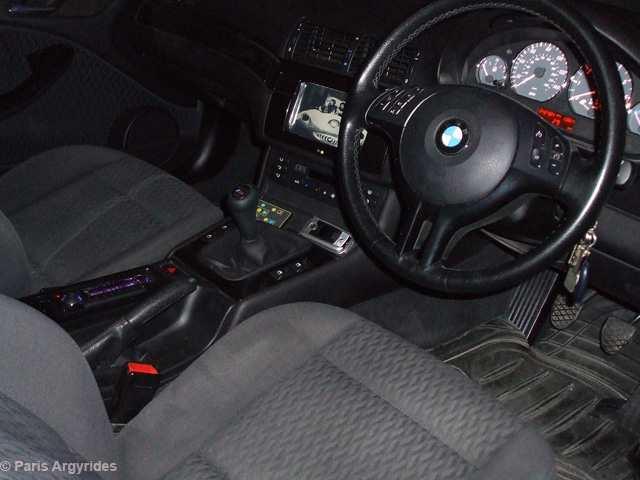
The almost completed system. The double din bezel that will
accomodate the TFT is painted with Metalic black paint and is left
to dry until tomorrow. I have a friend done the paintwork who is a
professional. 23 coats to get the OEM look. The handmade bezel..
ready for fitting the tft after a whole week of sanding, painting,
sanding painting... to get a good fit for the double DIN of the car
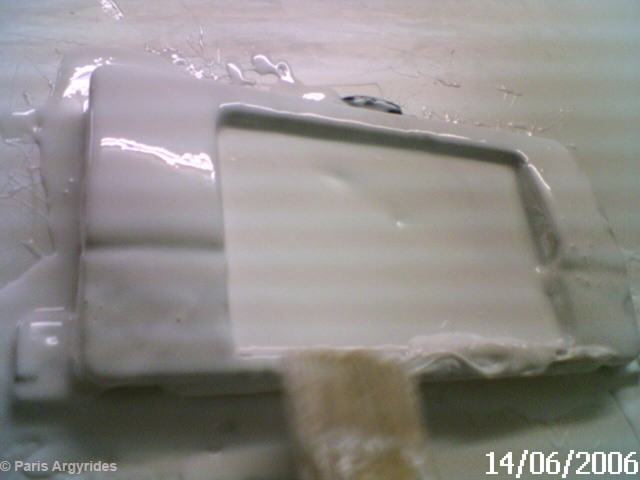
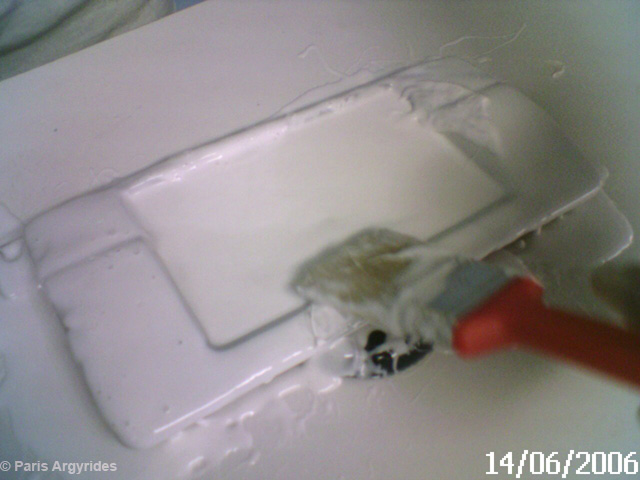
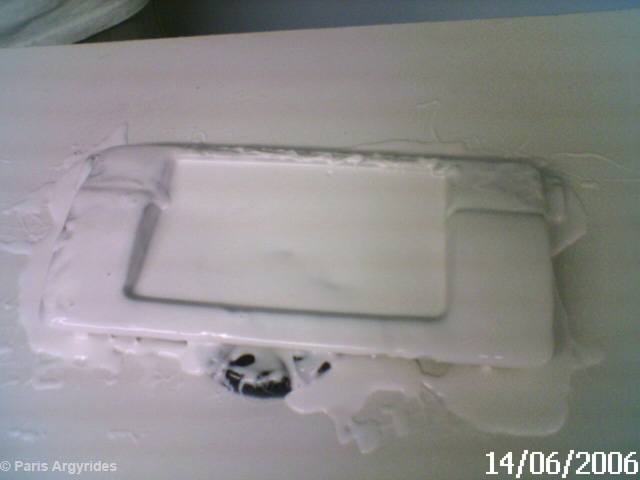
and to accept the TFT.
A good time to make rubber
mold of the trim in case I want to mass produce!
Bezel in place. I had to use
longer screws to reach the back of the leather dash to secure the
bezel.
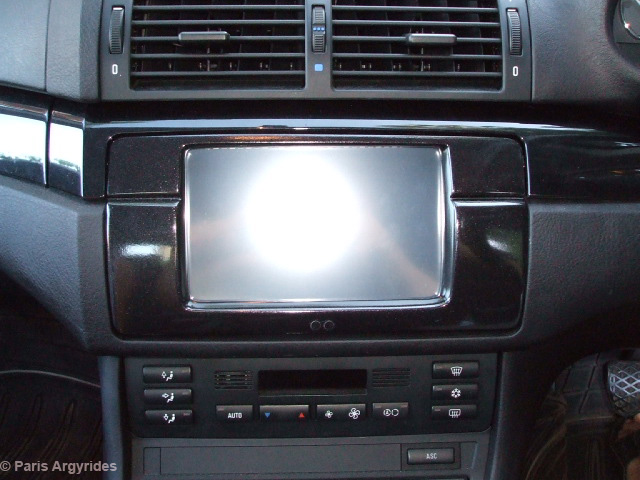

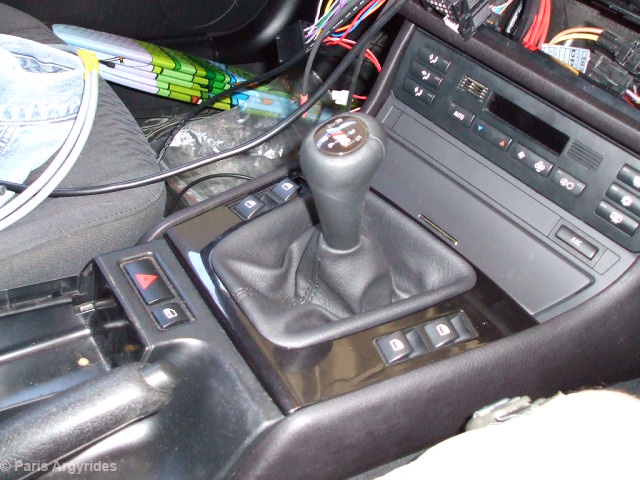
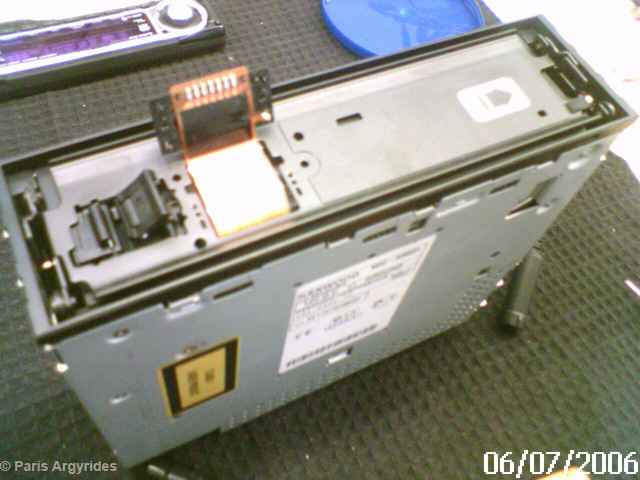
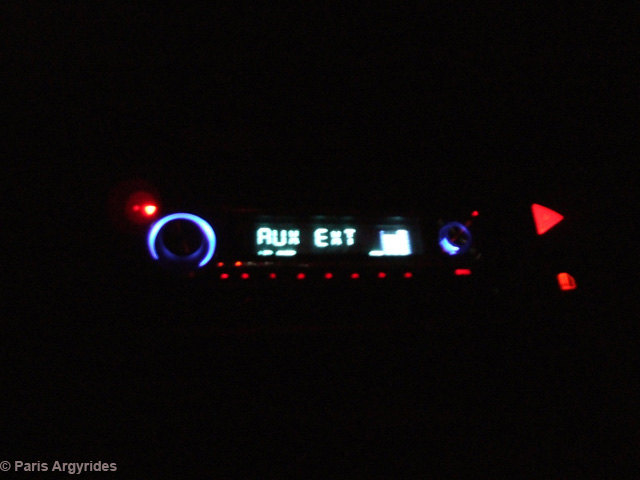
Now radio works fine. It was a nightmare to make that BMW ISO
extension with all the plugs. Reception is perfect even with my 6m
extra cable.
Also got a new leather gear gaiter, original M-Tech gear knob to
complete the refreshing of the interior.
The autoleads multistalk adapter I got from ebay works like a charm.
Links the steering wheel controls with my new Kenwood system. I also
had to extend the multistalk interface wires (2 only) using a
shielded cable as well.
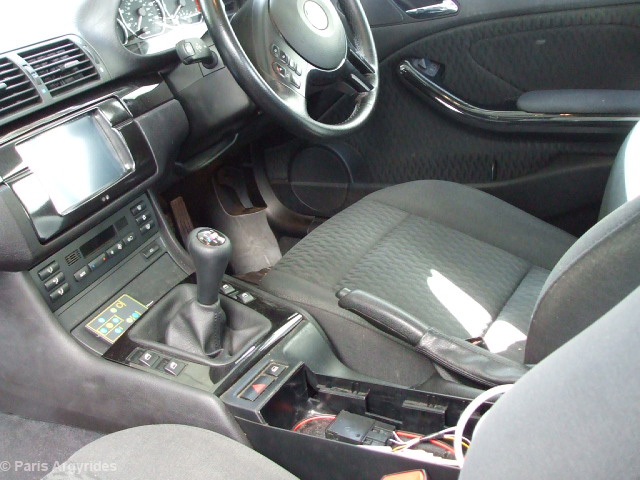
The project is almost done.
The bezel, painted in metallic black and the Xenarc TFT fitted. Went
for a ride a few minutes ago and it works fine!
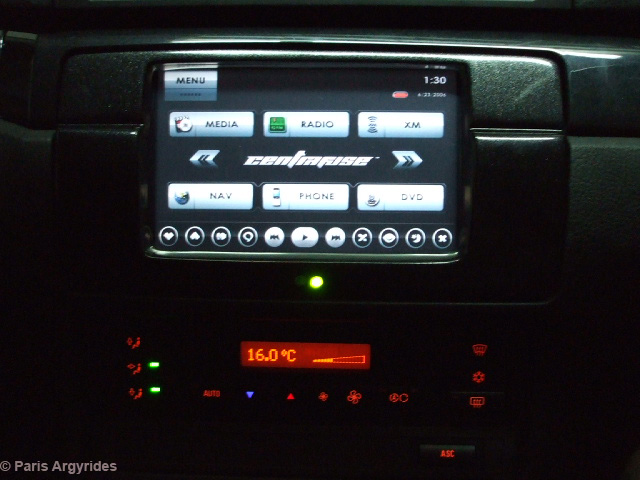
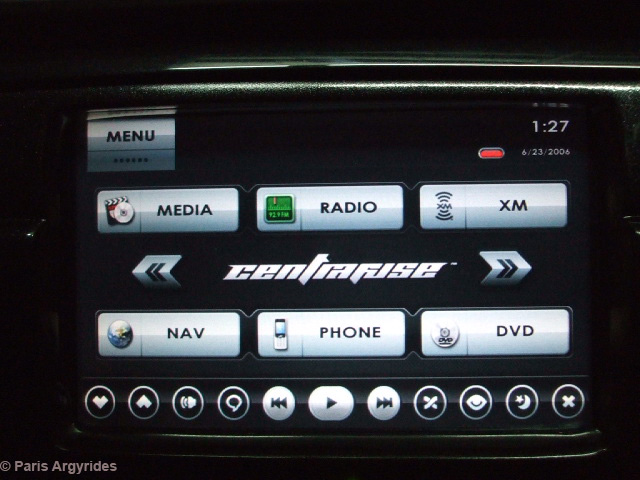
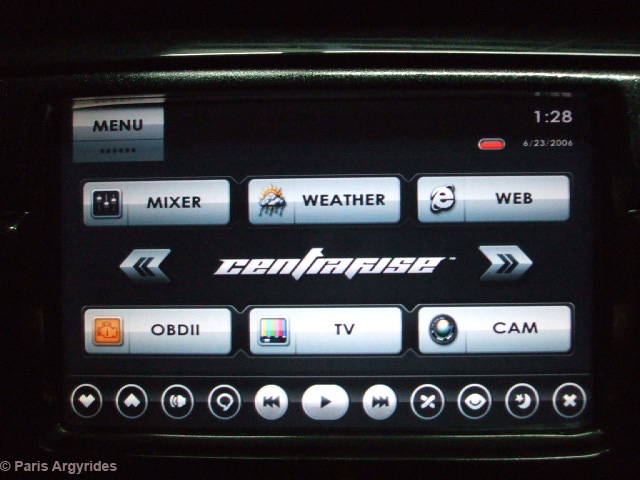
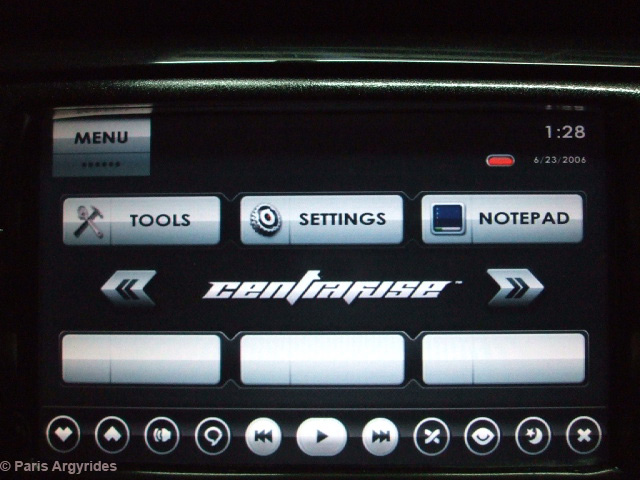
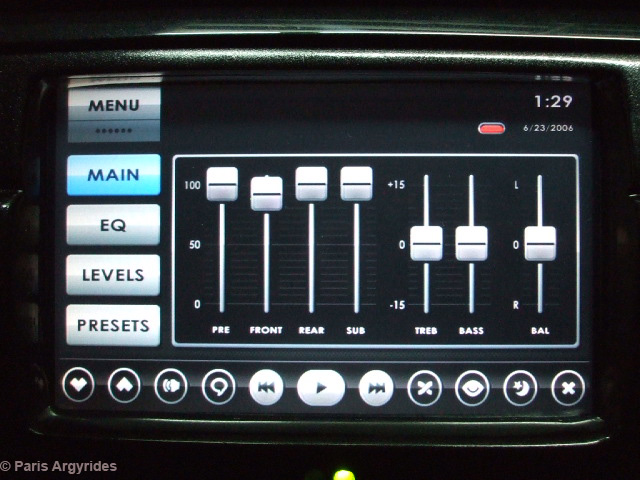
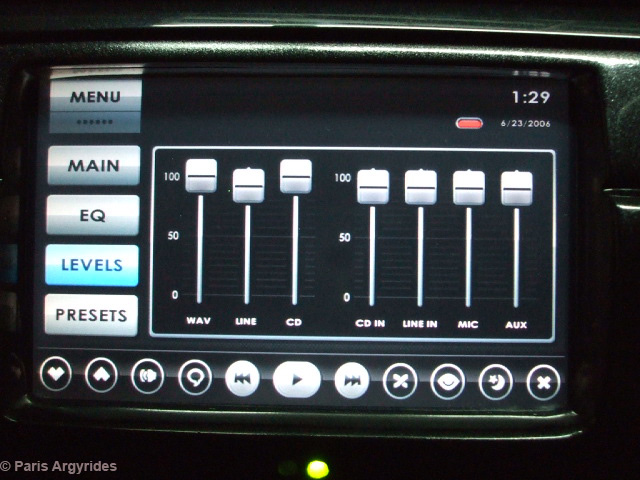
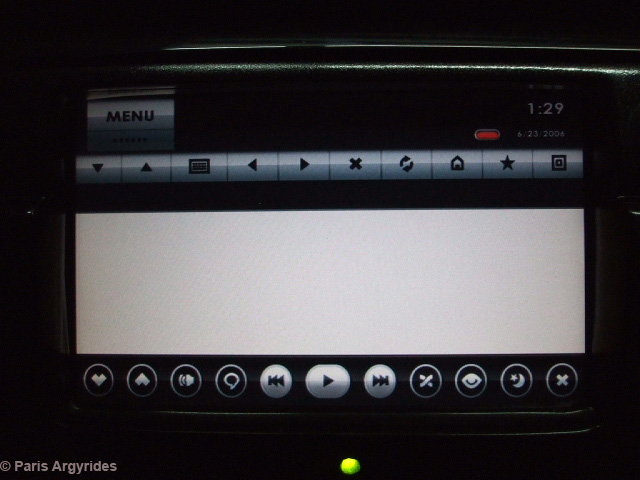
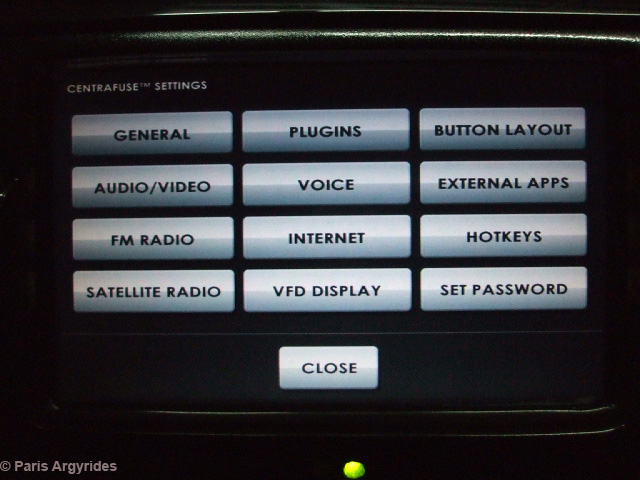
I just installed Centrafuse and I must say the interface is lovely.
Large buttons providing internet, media, tools, dvd player, OBD etc.
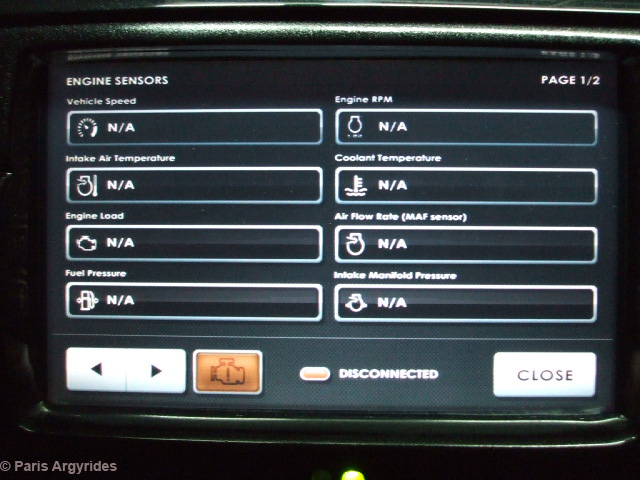
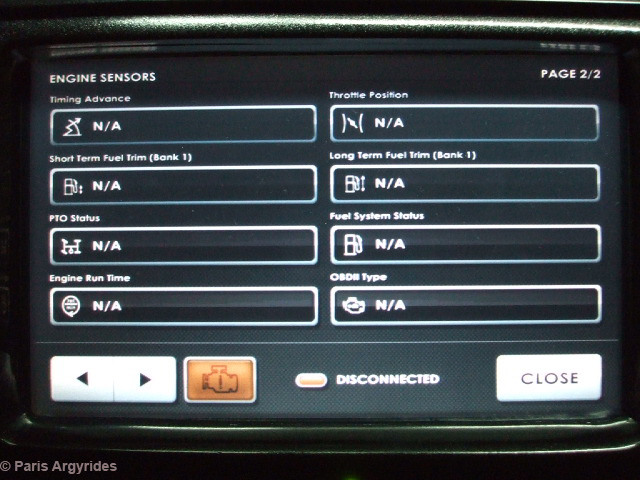
The OBD menu provides access the car's sensors i.e. MAF readings,
cam positioning sensor readings, speed, fuel pressure, basically
whatever the OBD port is capable to output. There is more
specialized software which I will installed later, I'm missing its
name now, which provides full diagnostic checks and readings. It can
also read the error memory and possibly clear it - not sure about
this.
The link will be via a OBD-II port to USB cable. This is not a
simple cable, but it has its own electronics inside to communicate
with the ECU/OBD protocols used by BMW.
Phase-2 of
the project...
Radio face must move from here:

To here:
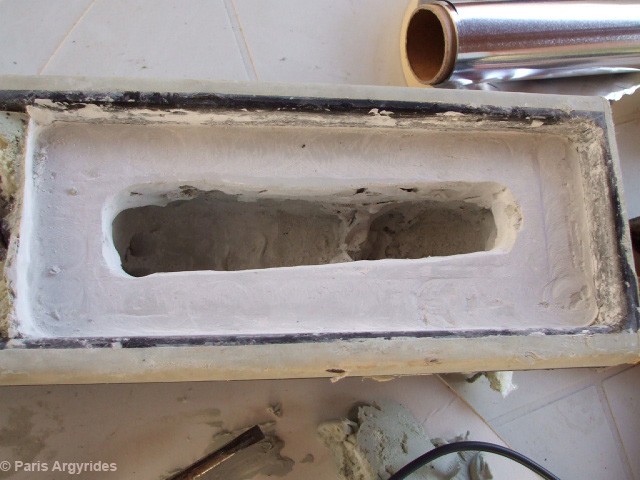
I use this filler for the job. It's ready to sandpaper it within 20
minutes of use therefore I can work fast. Once hard it can also be
drilled.

This is the rough shape of the radio base
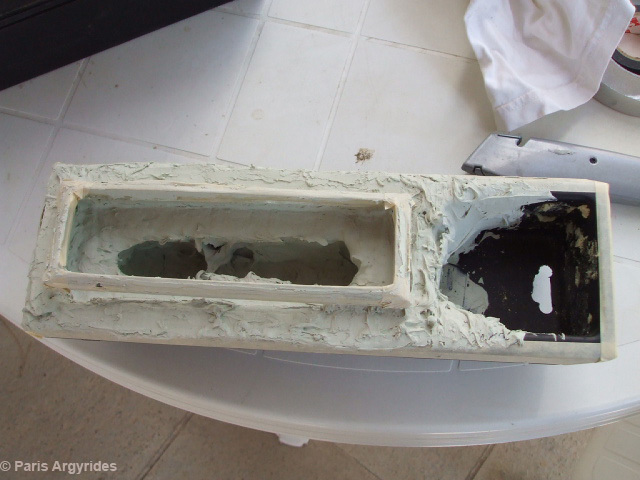
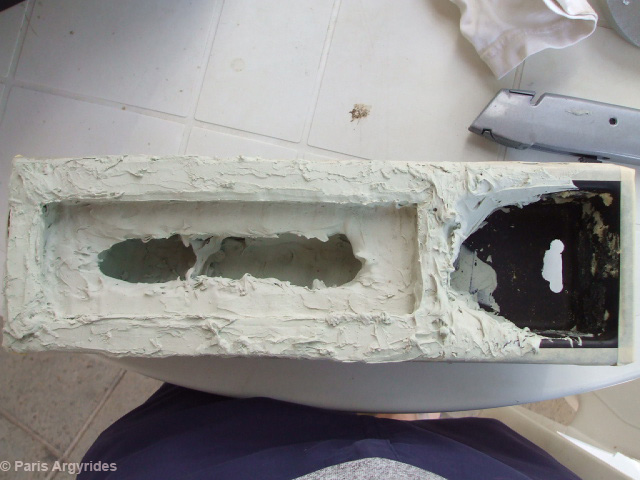
Lots of sandpaper-ing to have a flat surface for the radio faceplate
to sit on.
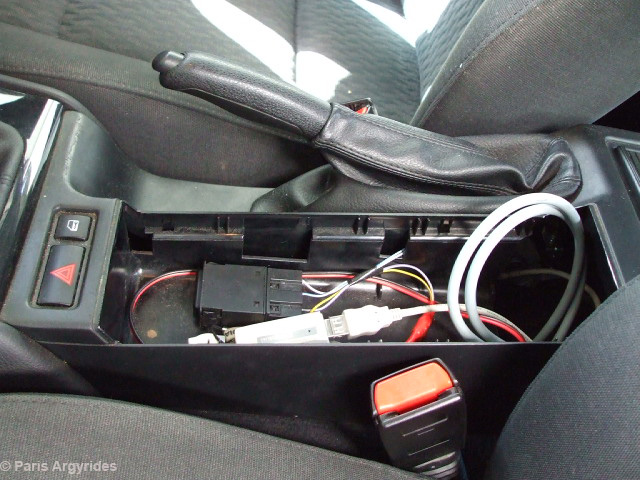
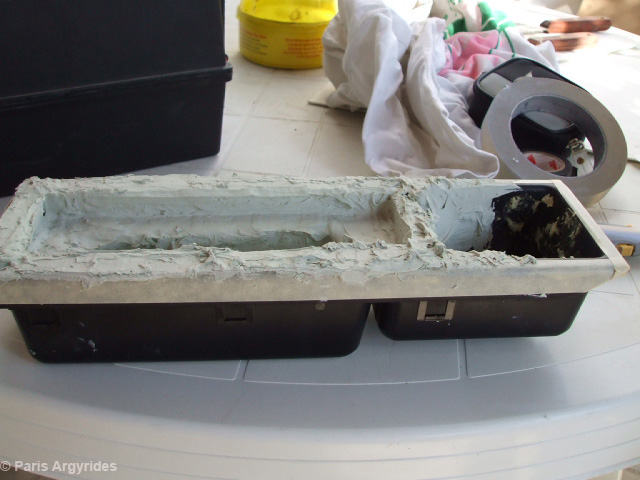
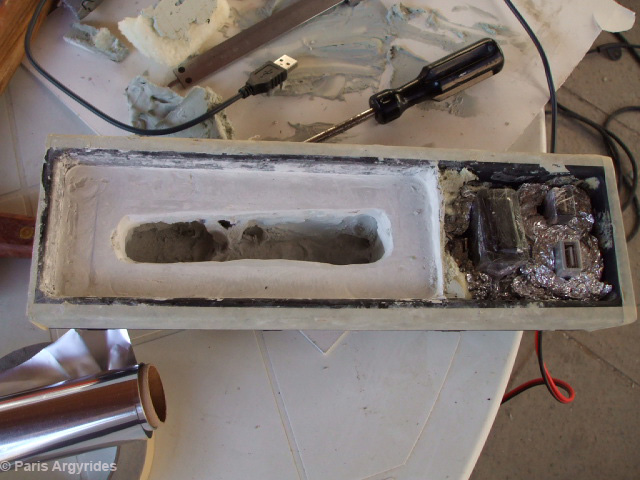
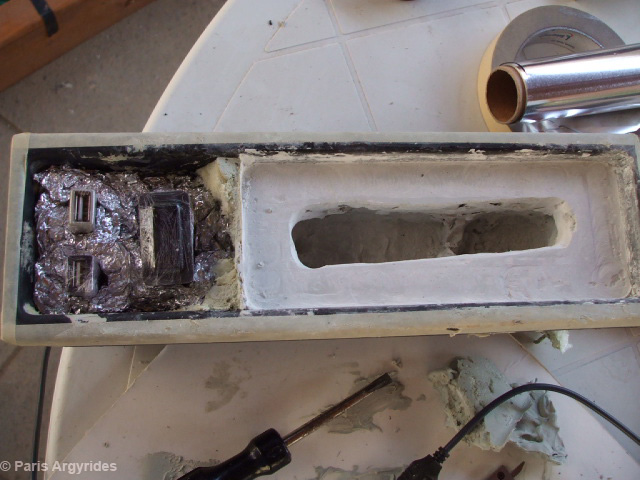
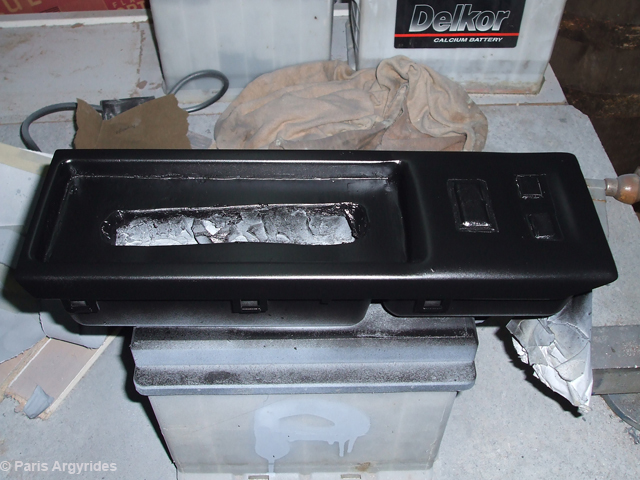
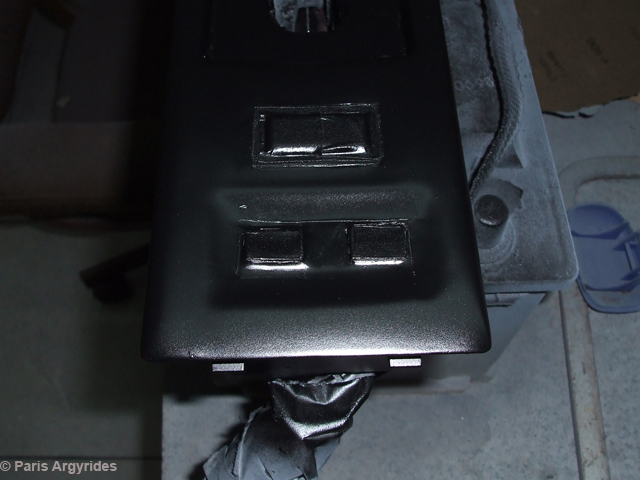
I have secured the USB and On/Off switch using some aluminum foil..
USB ports and the on/off switch have been sealed with plastic film
to prevent filler getting in

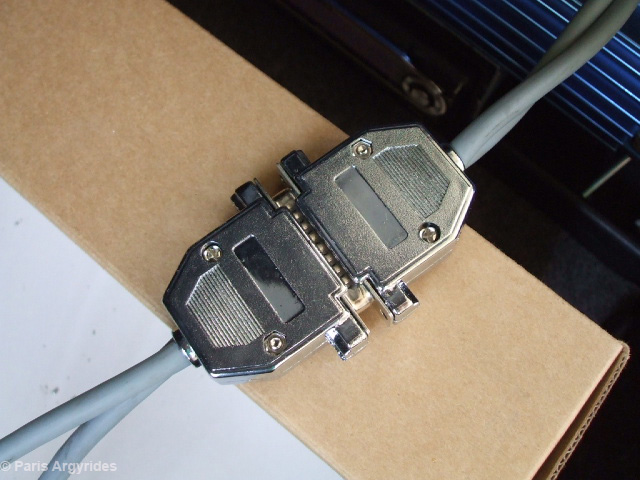
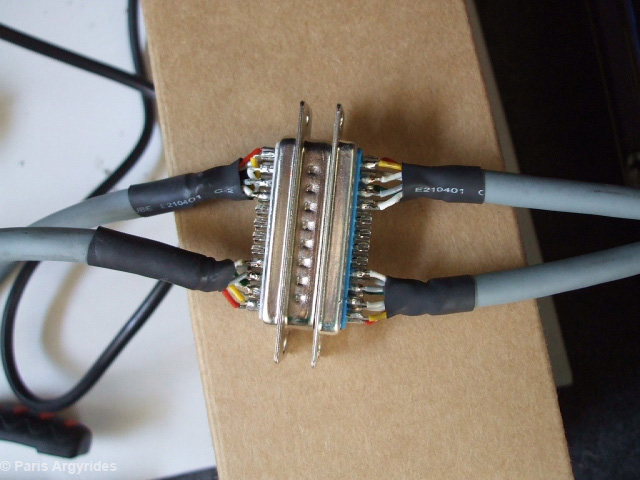
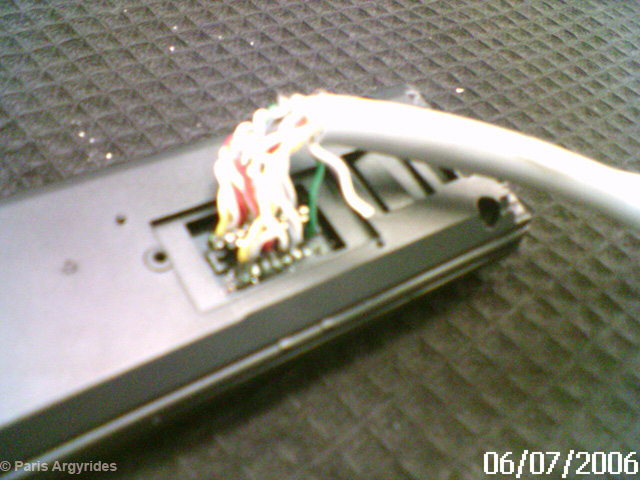
Soldering.
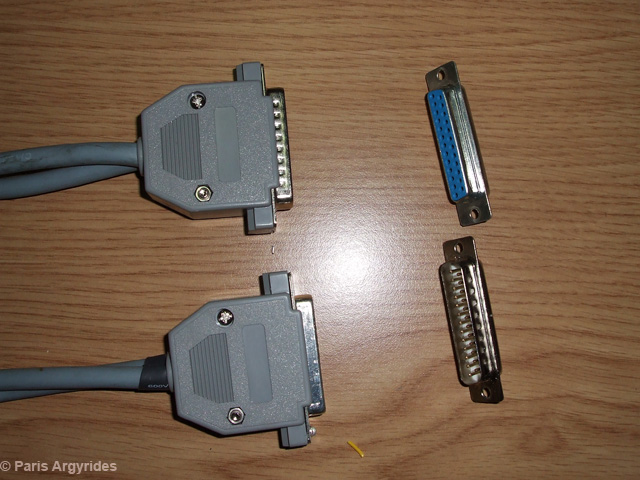
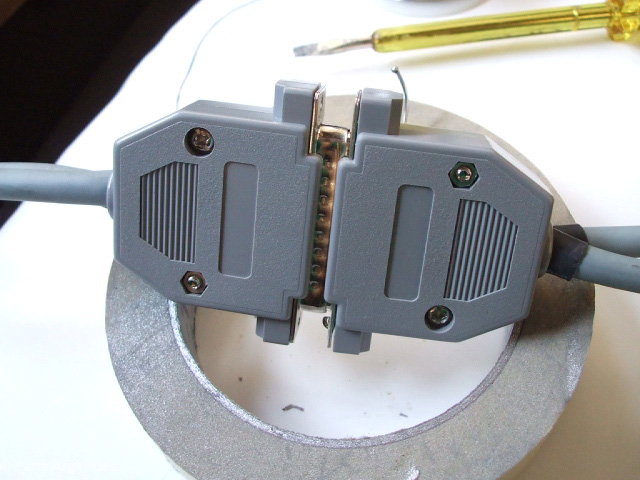
I need 4 parallel ports for the faceplate moving. I would like to be
able to disconnect both radio and faceplate without cutting wires so
the parallel ports is the best solution.
The first 2 parallel ports will be placed in the space near the
handbrake and the other 2 ports back in the trunk.
The parallel port on the left
is soldered with the wire going under the carpets up to the trunk.
The right part of the parallel port is soldered with the wires that
will be connected on the radio faceplate
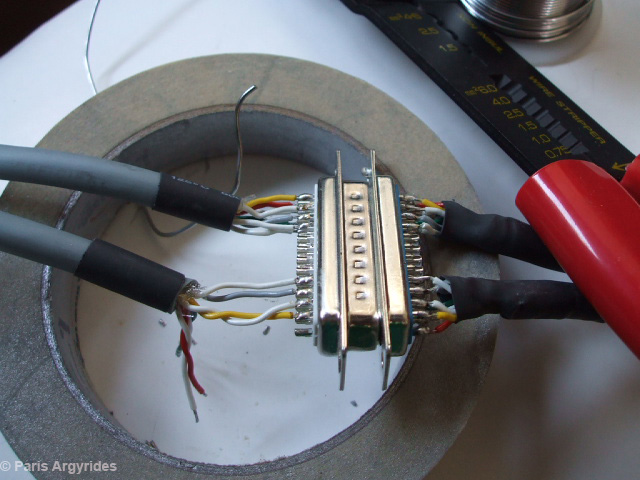
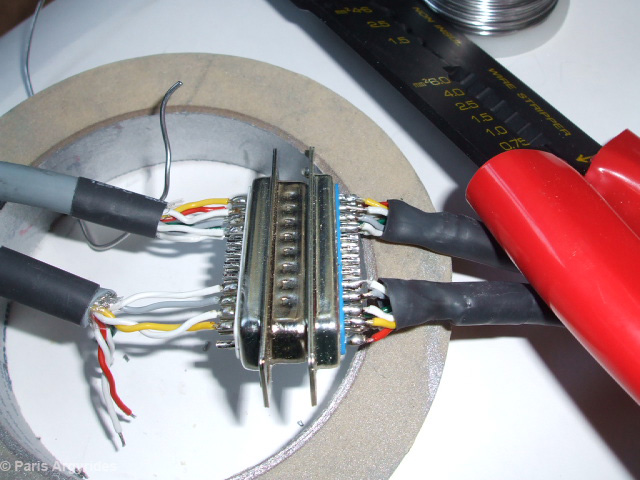

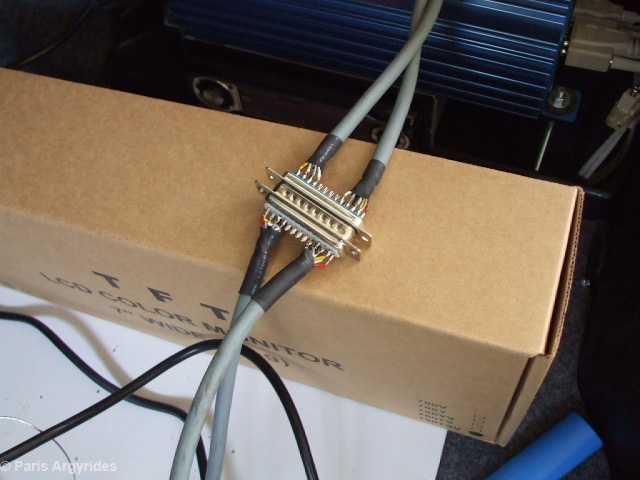
And the connections in the
trunk.. A bit difficult but I did it eventually.
You have to be careful with the connections not to short anything
and make sure the yellow/red/green/gray wires in front do end with
the corresponding yellow/red/green/gray wires in the trunk
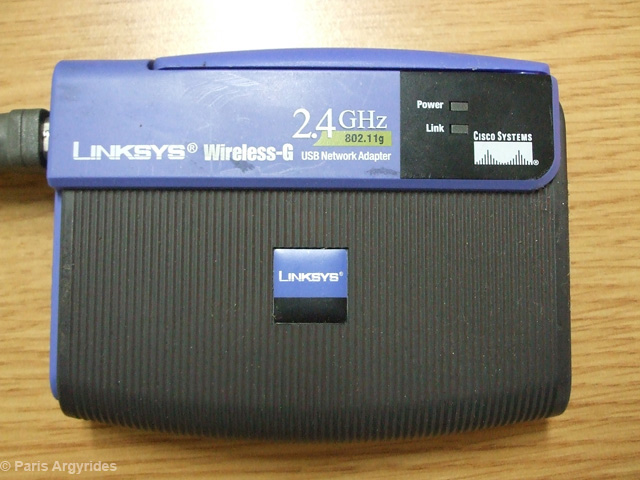
Also my Linksys Wi-Fi USB is here.. A quick ride and scan revealed 226 open
networks and 45 locked..
More work.. Finished
sanding and painted in primer. Did 5 coats until now to get an even
surface. For the final paint I chose Black semi-gloss to hopefully
give a nice tone in the car.
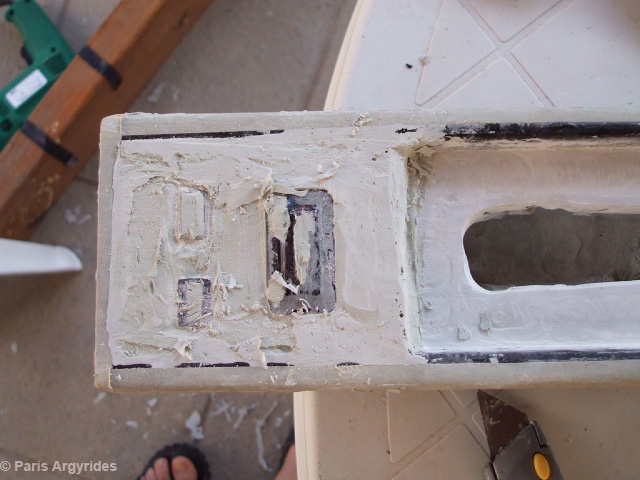
A bit of sanding is required on the perimeter of the USB ports. I
did a thin coat of black paint just to see where it needs improving
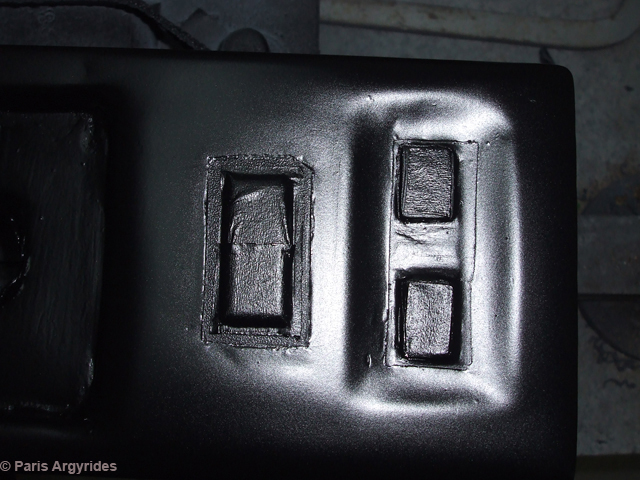
USB and On/Off are covered with paper tape
Tomorrow or the day after I'm going to a friend of mine who is an
electronics engineer to do the radio-face splitting. I decided not
to solder the 15 cables on the port where the face connects with the
rest of the tuner but instead to open the radio and solder straight
on the PCB.
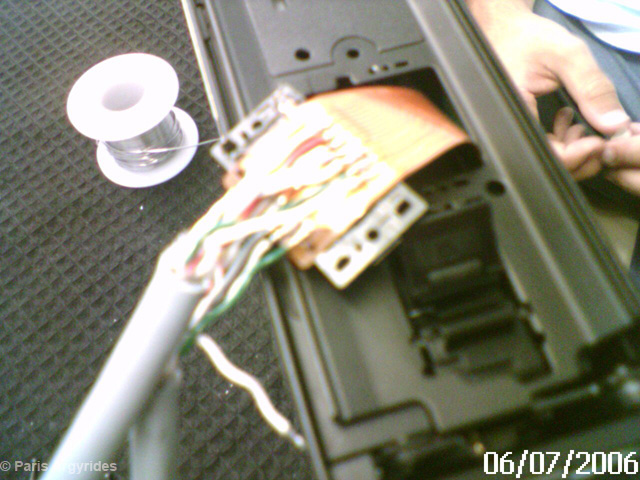
6/7/2006 update..
Task: Stereo faceplate relocation from trunk to the space near
handbrake
Problem: Even with high quality shielded communications cable the radio
refuses to operate when the wire distance goes over ~1m. This must
be due to some interference created by the long distance wires.
Problem solved.. Cat6 UTP
cable worked just fine and radio is successfully relocated next to
handbrake. I can say that the project has come to an end.
Some night shots
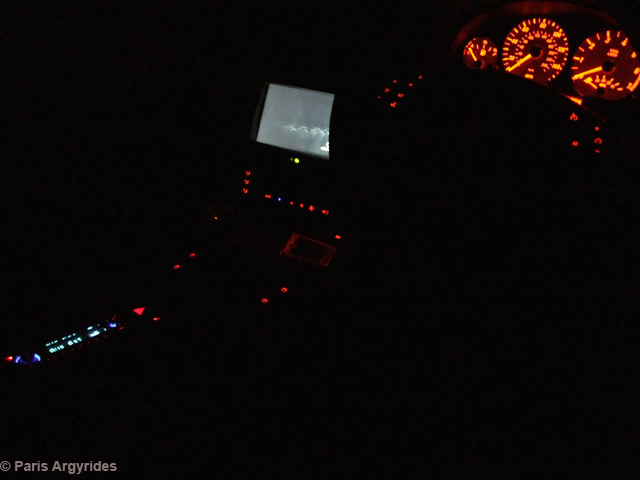

The tuner in the trunk..
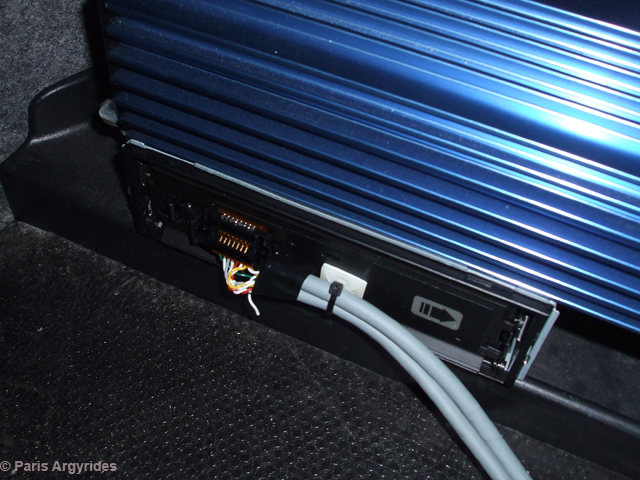
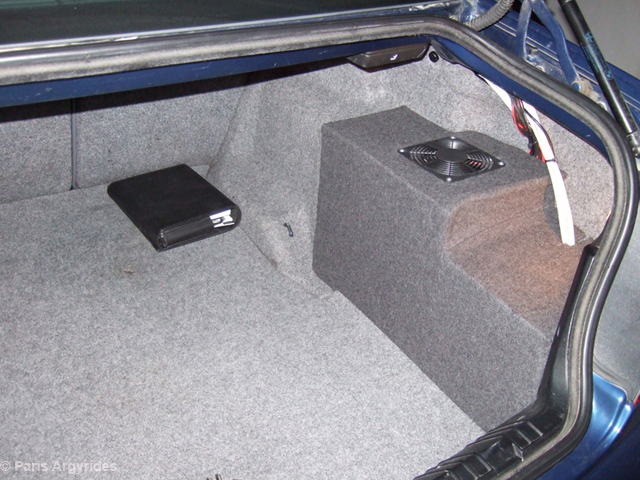
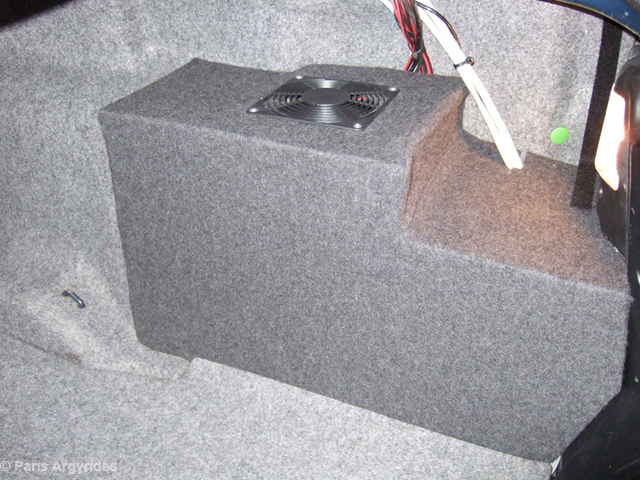
And the final &
finishing touch.. Couldn't leave the carputer/radio exposed like
that in the trunk so I decided to create some sort of cover.
Solution came with fiber glass! I created the cover first with small
pieces of 2mm acrylic and then secured all the pieces together using
fiber glass. Strong and light!
Also found some cloth similar to the one BMW uses for the trunk
interior. Mother did the stitches. I sprayed glue on the cover so
that the cloth sits properly and glued the cloth from the inside.
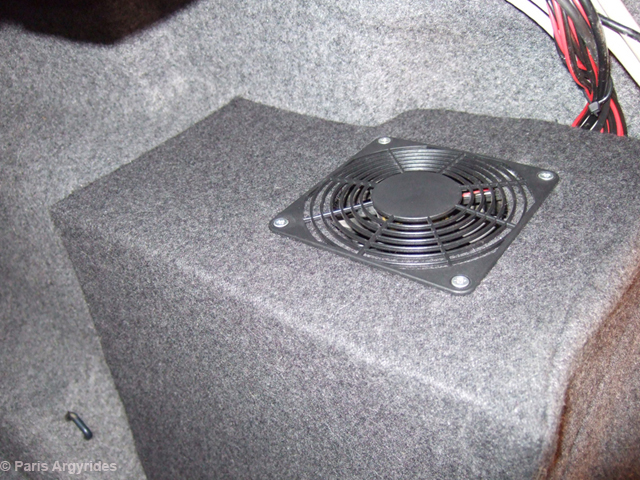
I also drilled a 120mm hole and put a fan for ventilation which is
activated when the computer is turned on.
I didn't have to secure the cover in the trunk, it just sits there
perfectly.

|