| THE QUAD BI-XENON - FXR PROJECTOR RETROFIT |
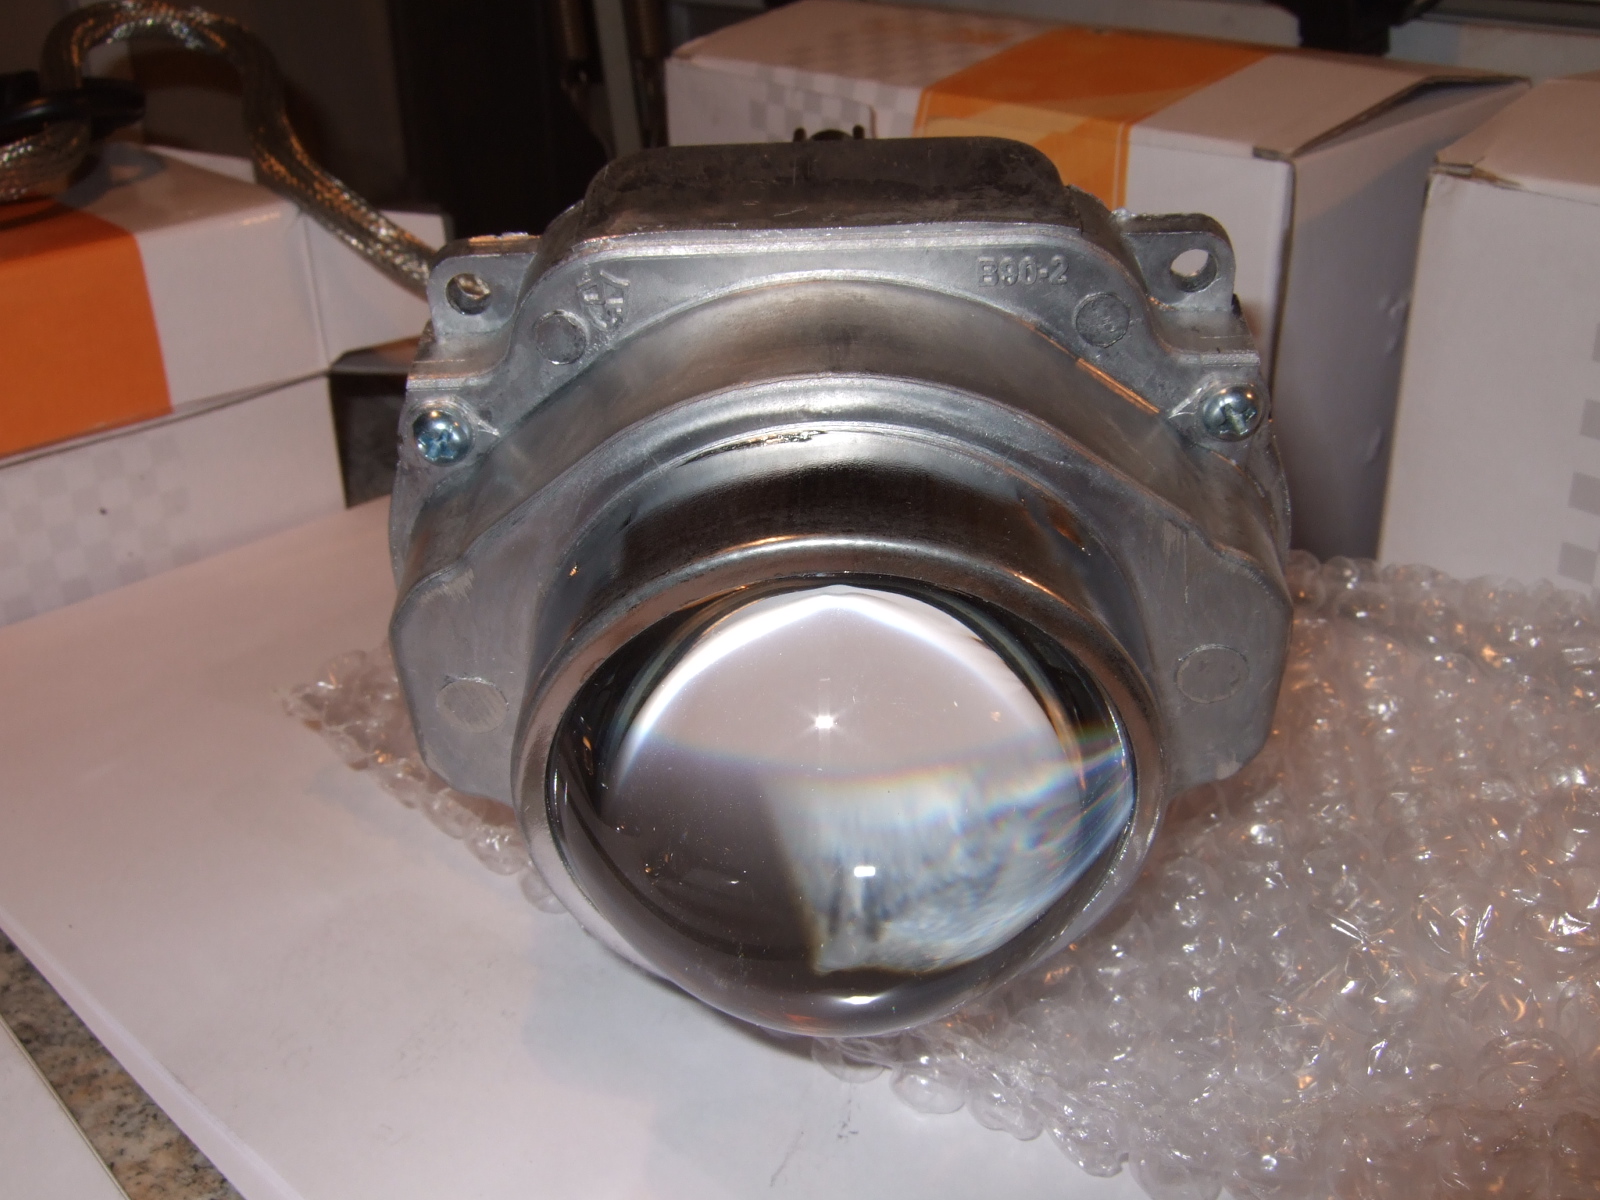
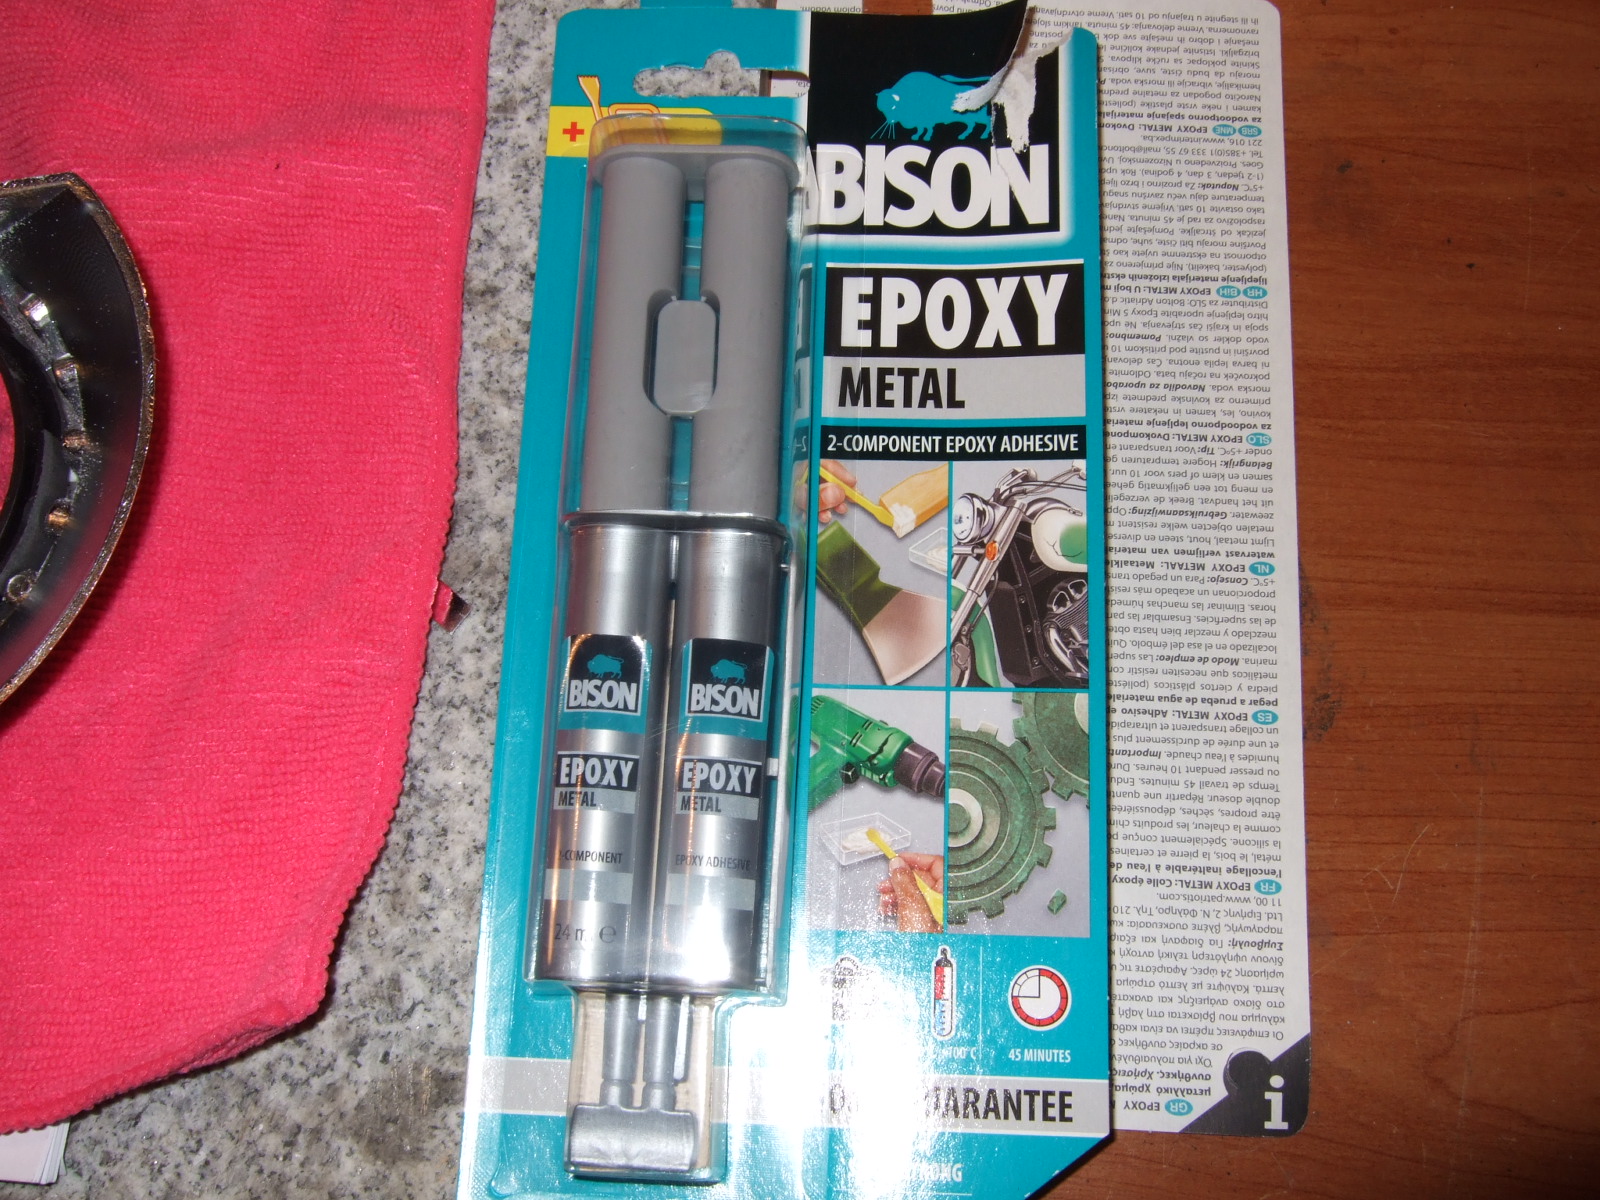
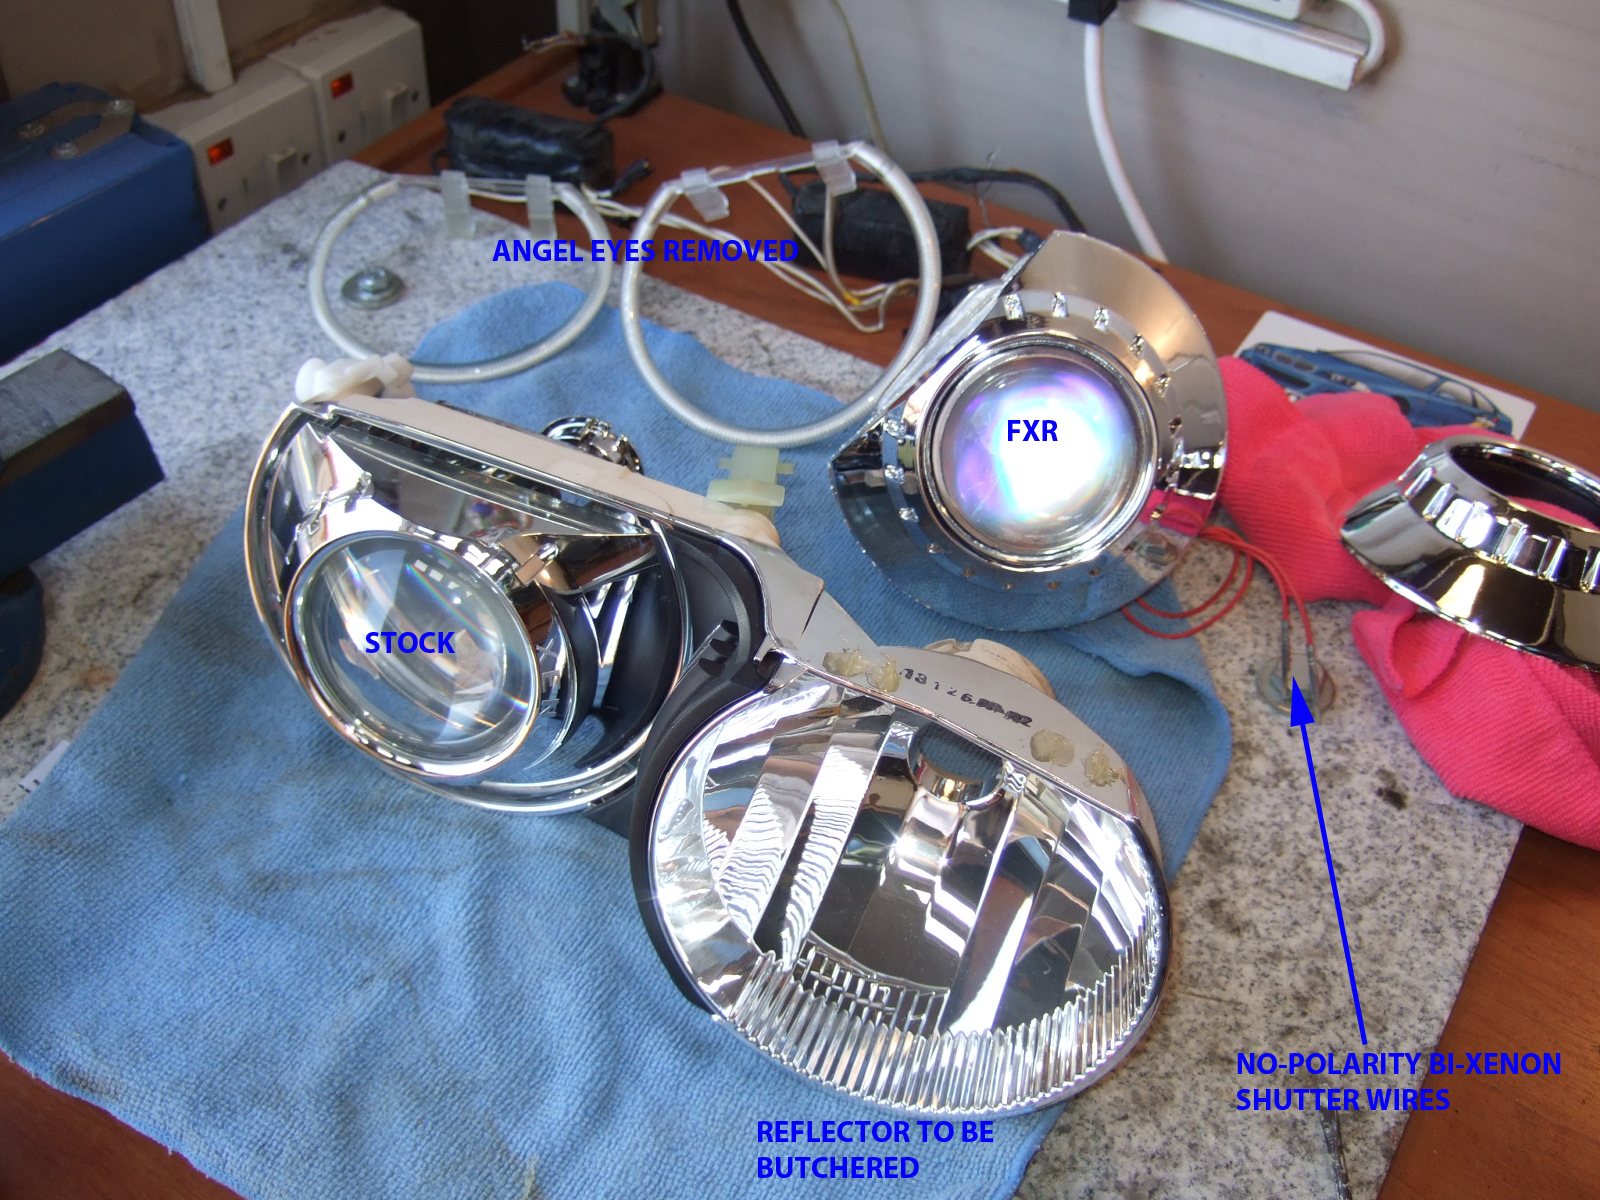
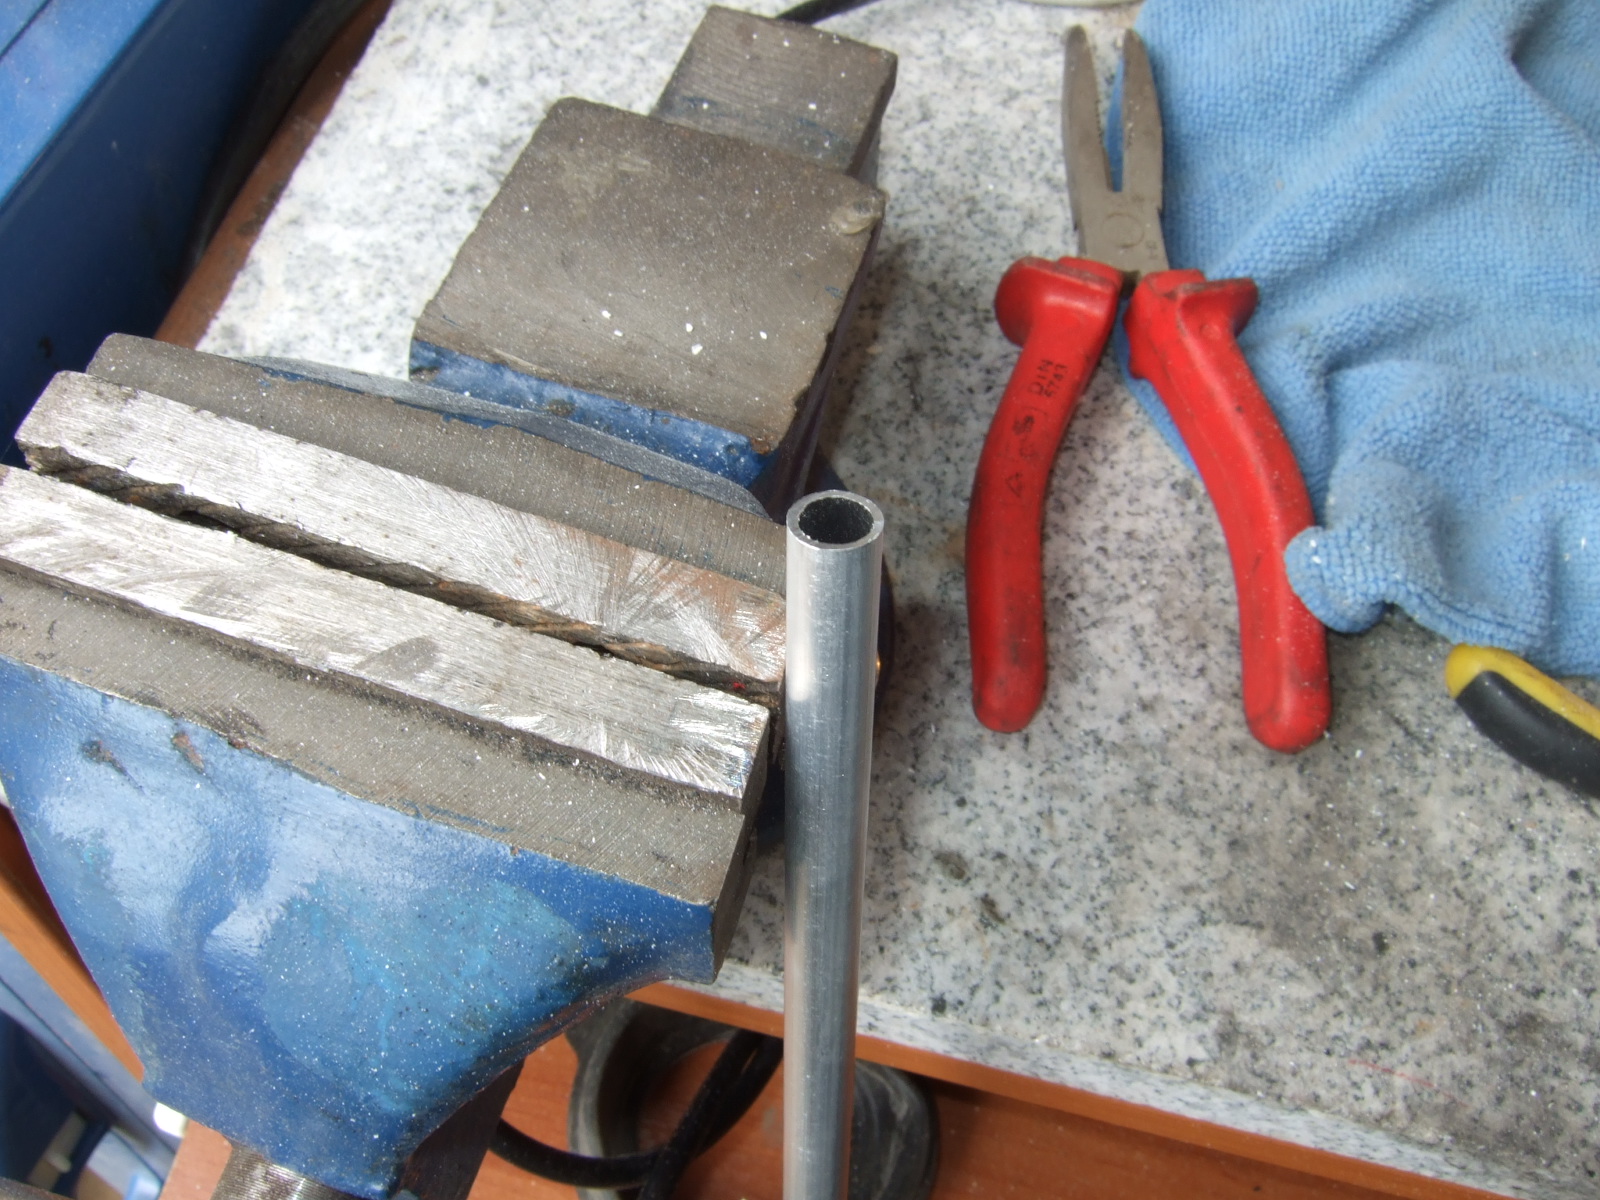
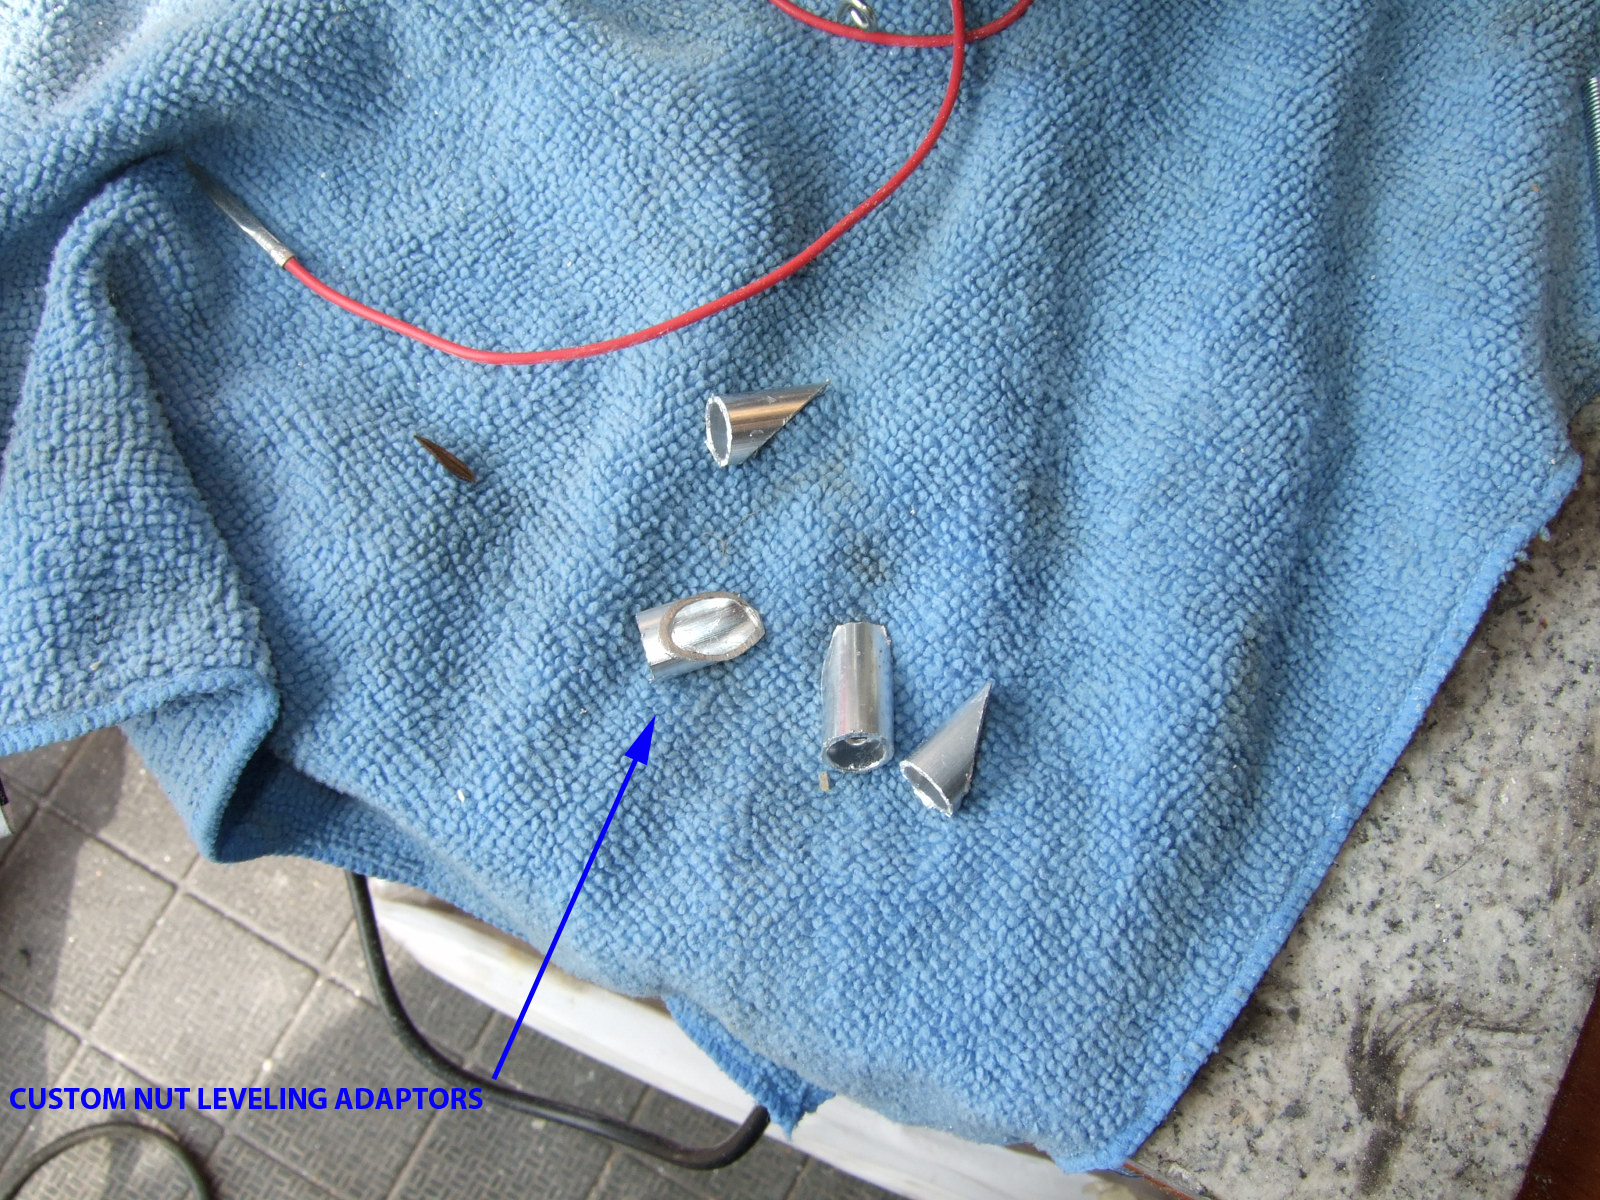
After getting used to the "normal" light output of my Bosch Bi-Xenon projectors, I decided to make a "small" modification. To retrofit another set of Bi-Xenon projectors in the place of the high-beam halogens. This will essentially give 4 driving lights and 4 high beams. The only downside to this mod is that the flash-to-pass capability is lost, since when you flash with the lights off, the only thing it will be accomplished, is to open/close the bi-xenon shutters. However, there is a workaround for this which will be covered in a new mod after my hands get well from this one. Parts List: 1. 2x FXR Bi-Xenon Projectors for RHD Vehicles with 2x 35W Ballasts and 2x 35W D2S Bulbs (www.theretrofitsource.com) 2. Wiring loom (2x Relays, Ground, 12v Power source, Signal Source, 2x 12v Out) 3. High-Beam splitters to feed both Bi-Xenon shutters (I didn't use them as I preserved the original Bi-Xenon source and for the FXR I used the high-beam power source directly) 4. 2x E46 Projector Shrouds with Adapter Rings 5. High Temp Epoxy, High Temp Silicone and Loctite 6. Aluminum tube, 6mm internal diameter Shiny shrouds Ballast closer 23KV. Enough juice!
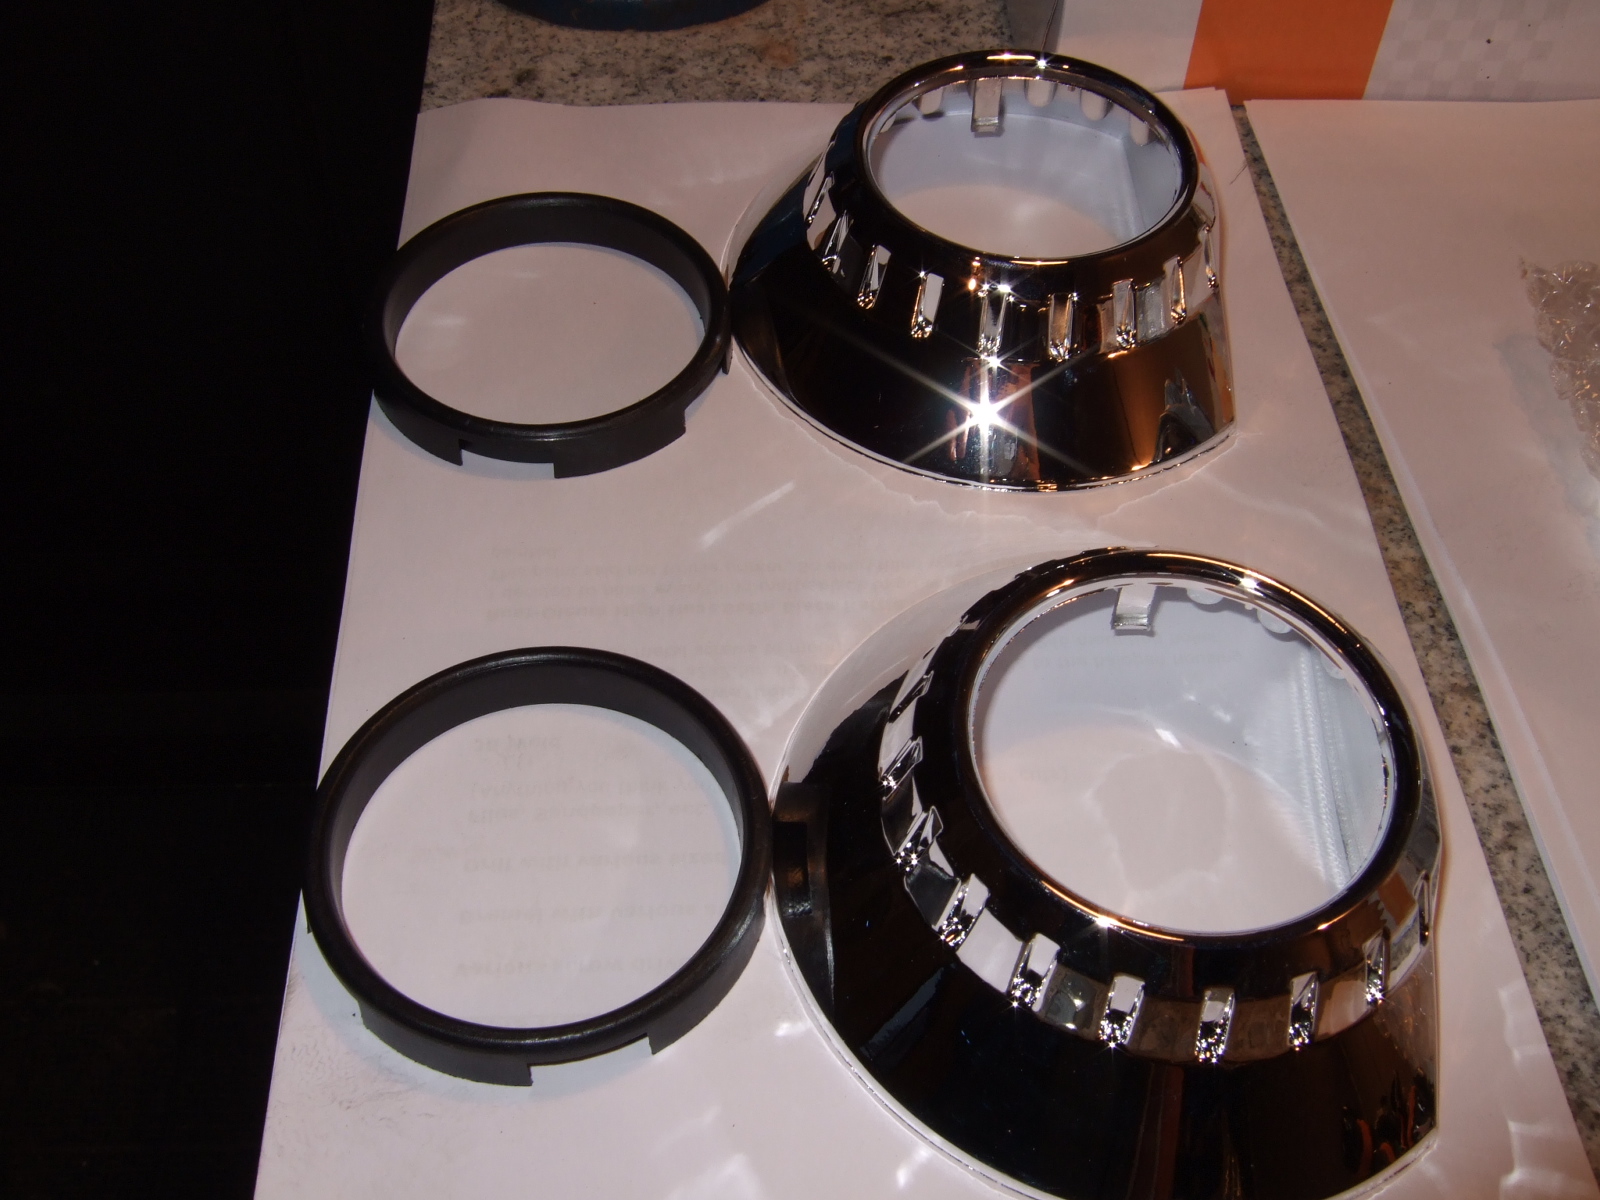
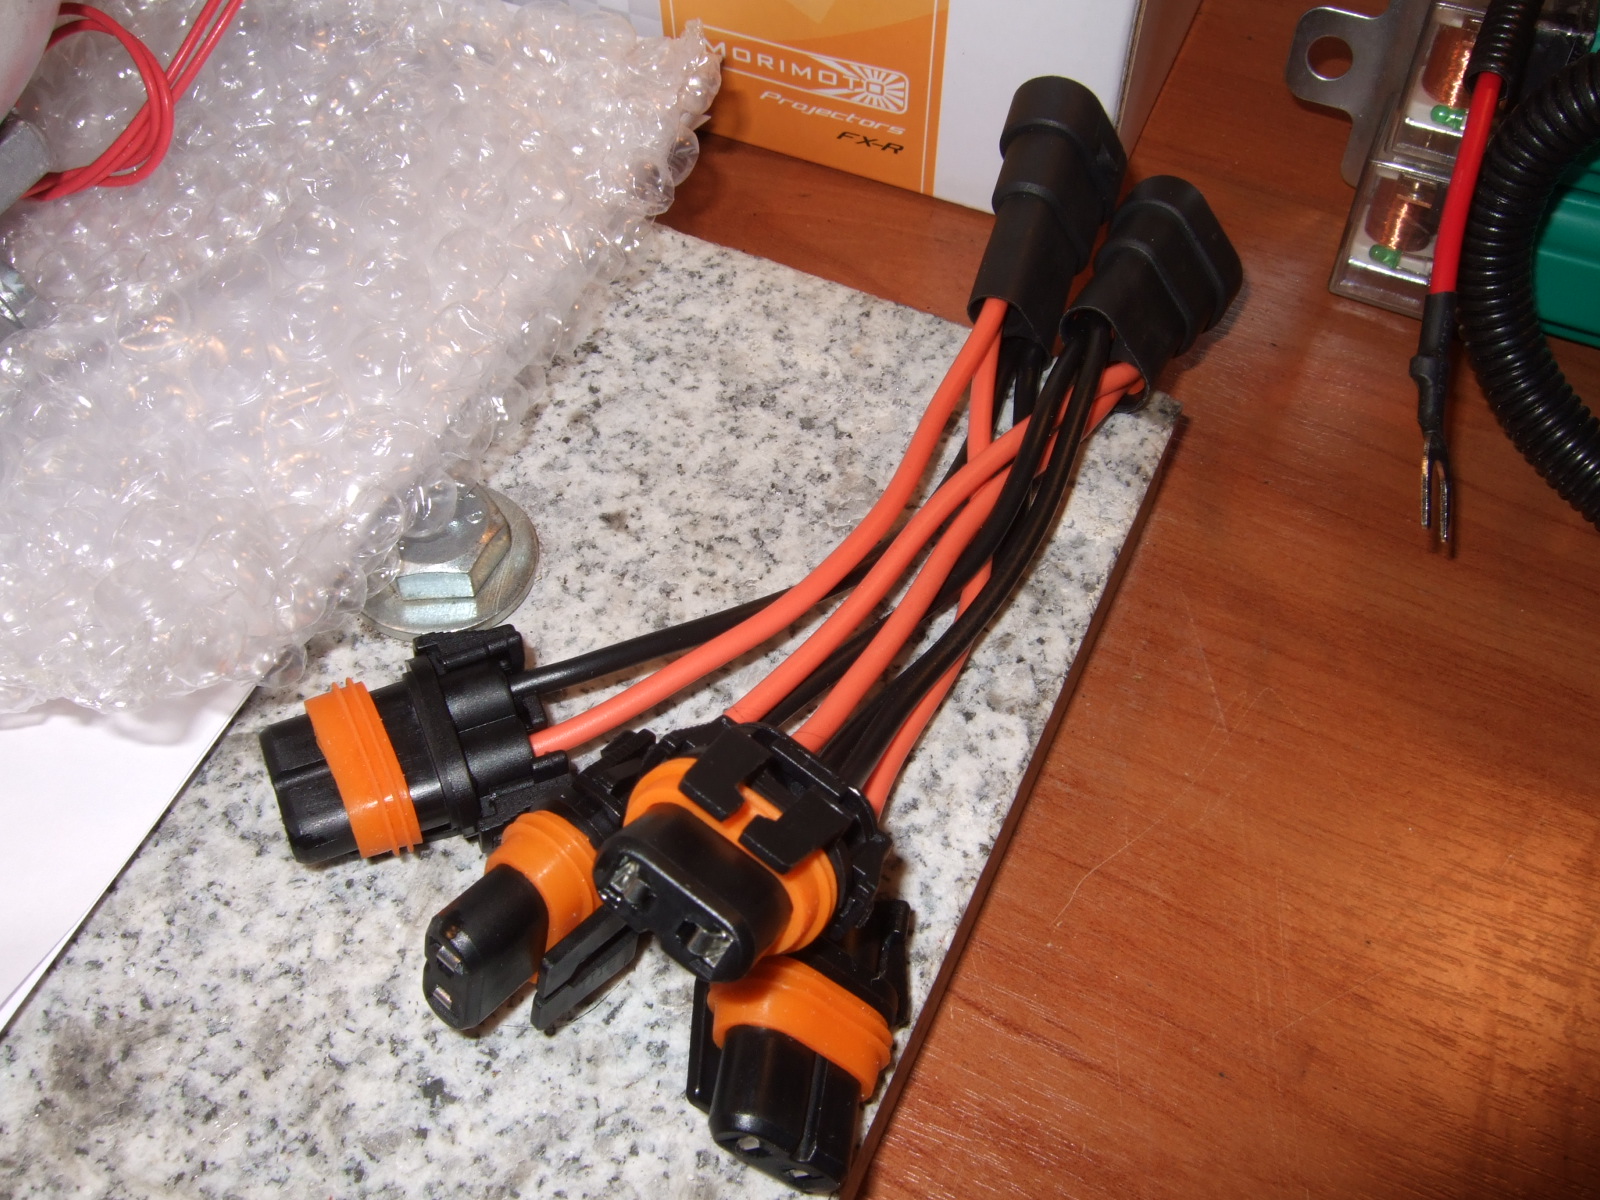
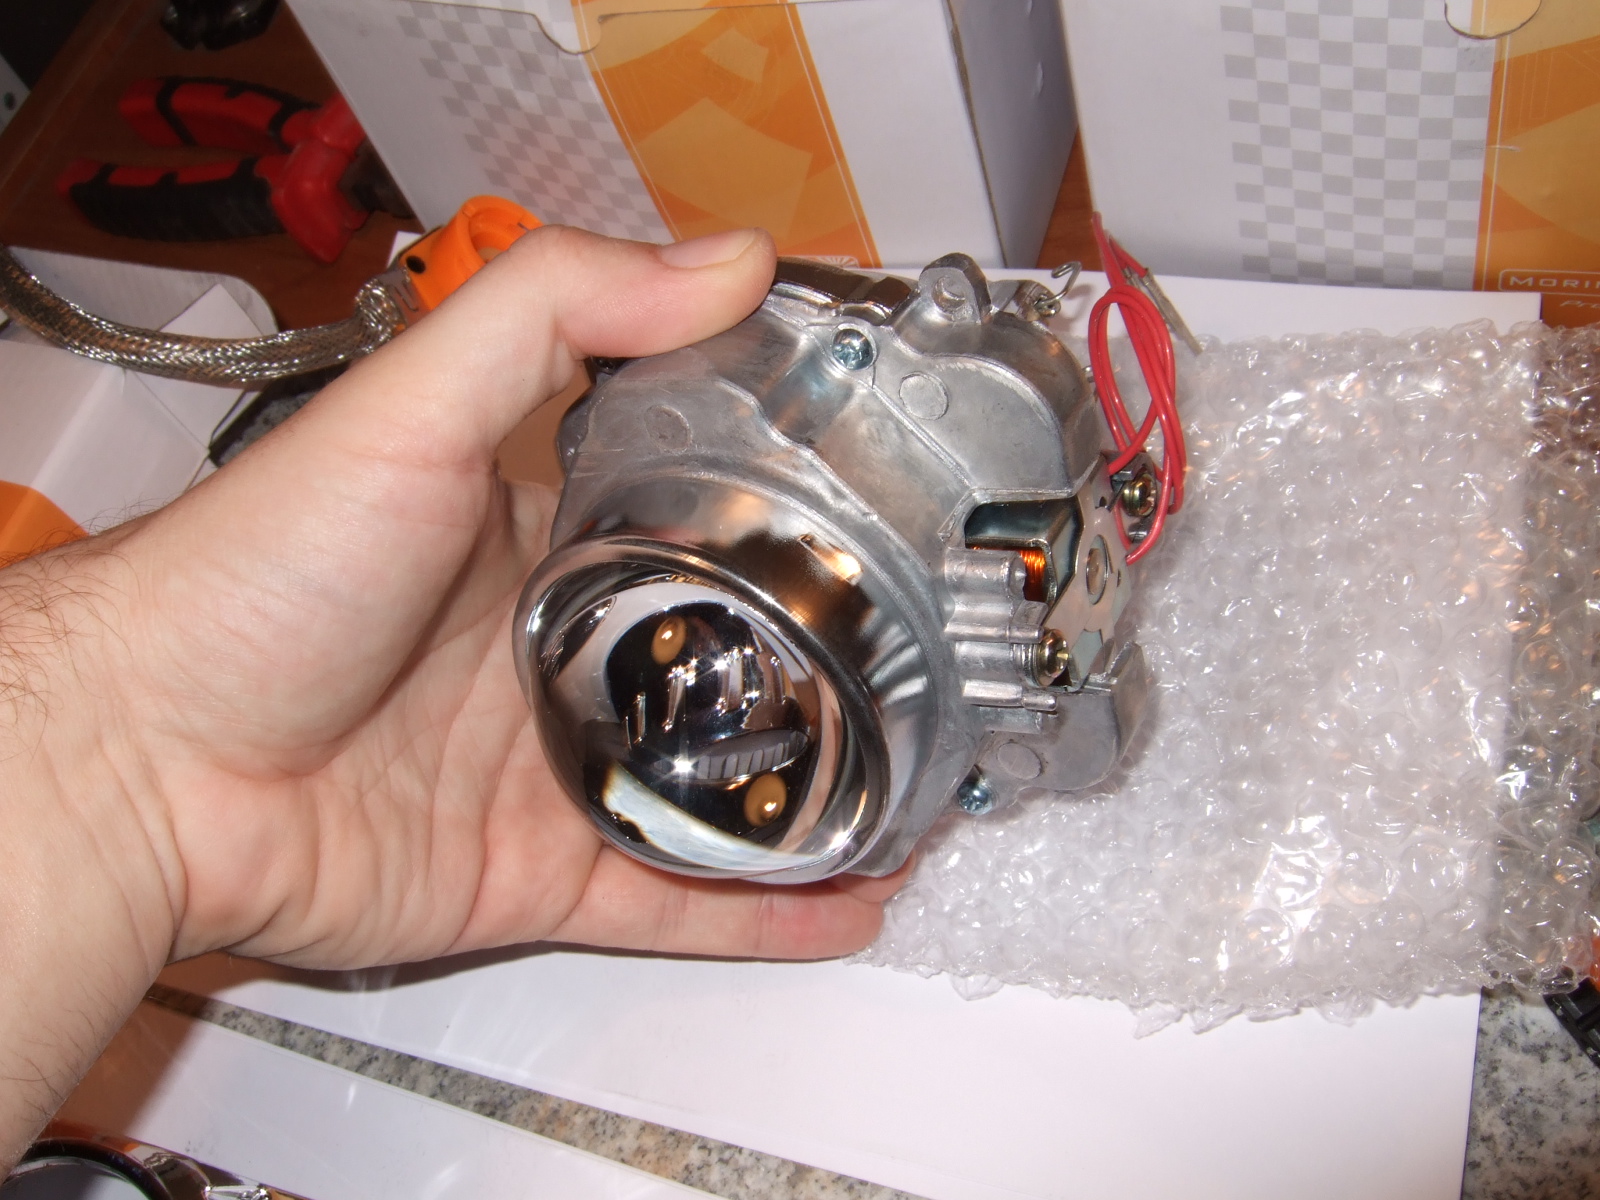
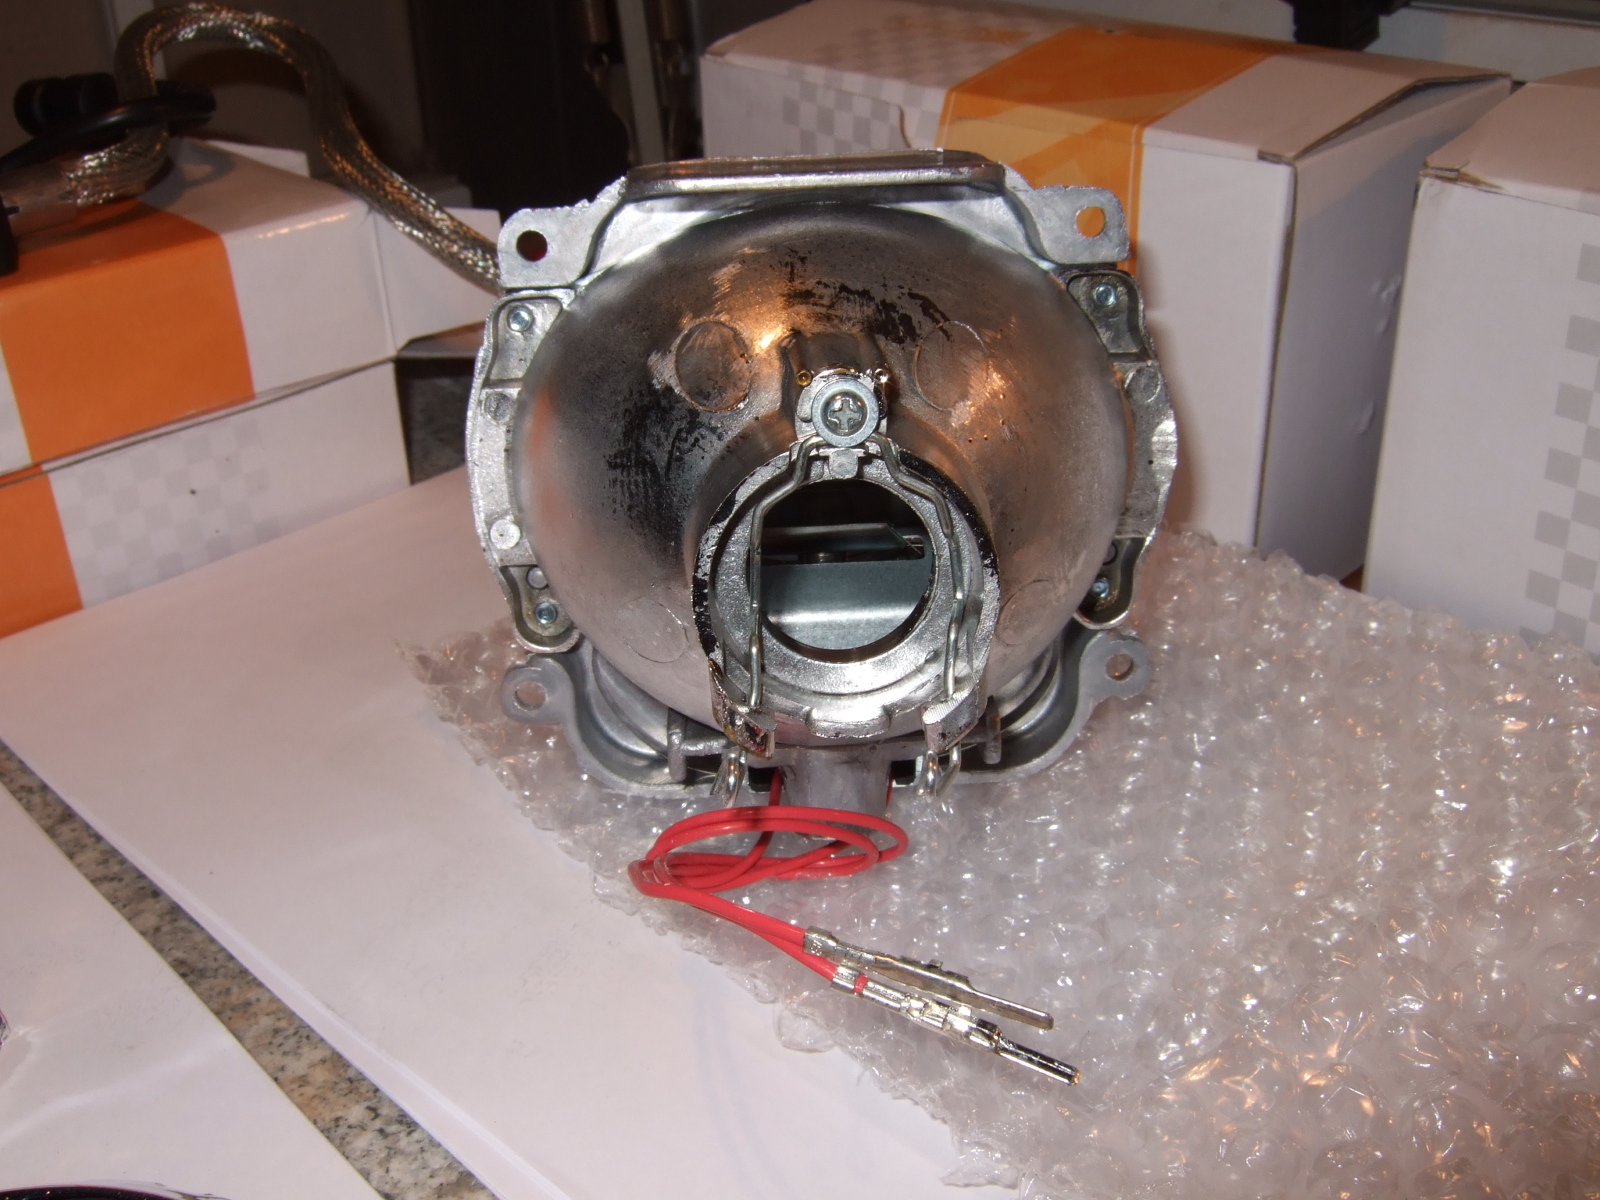
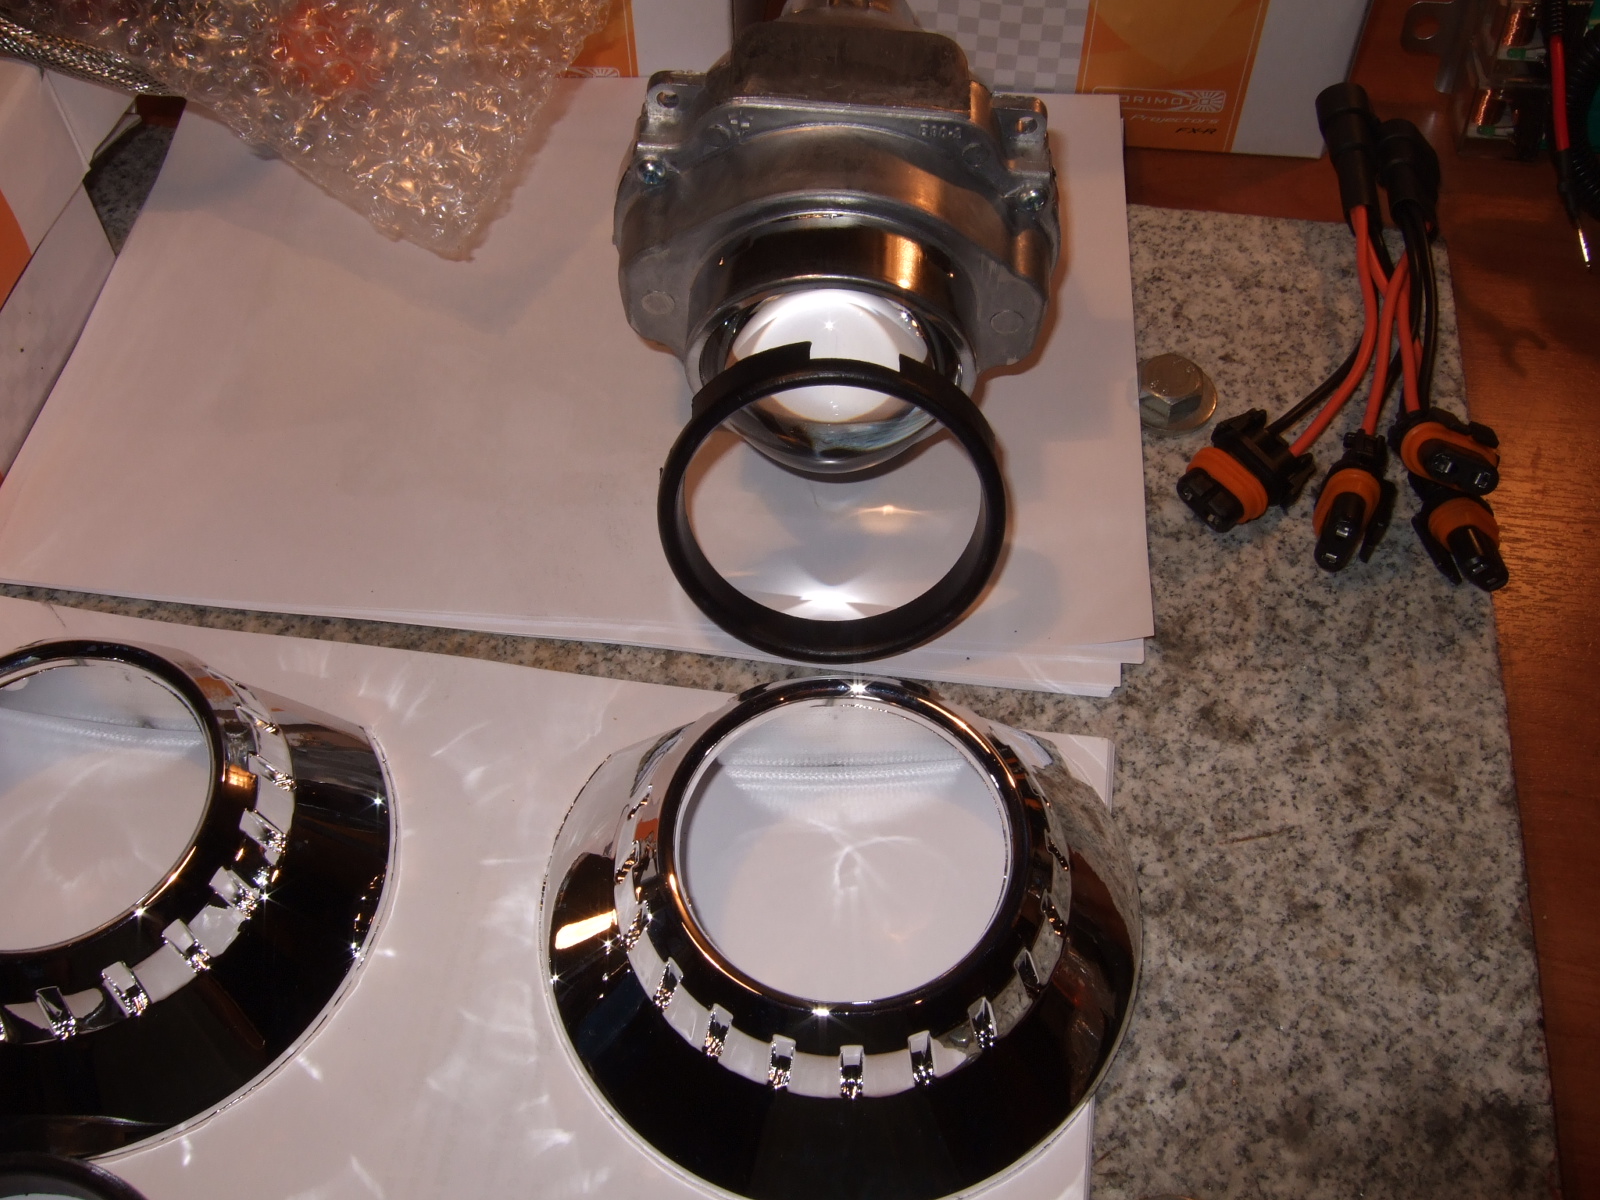
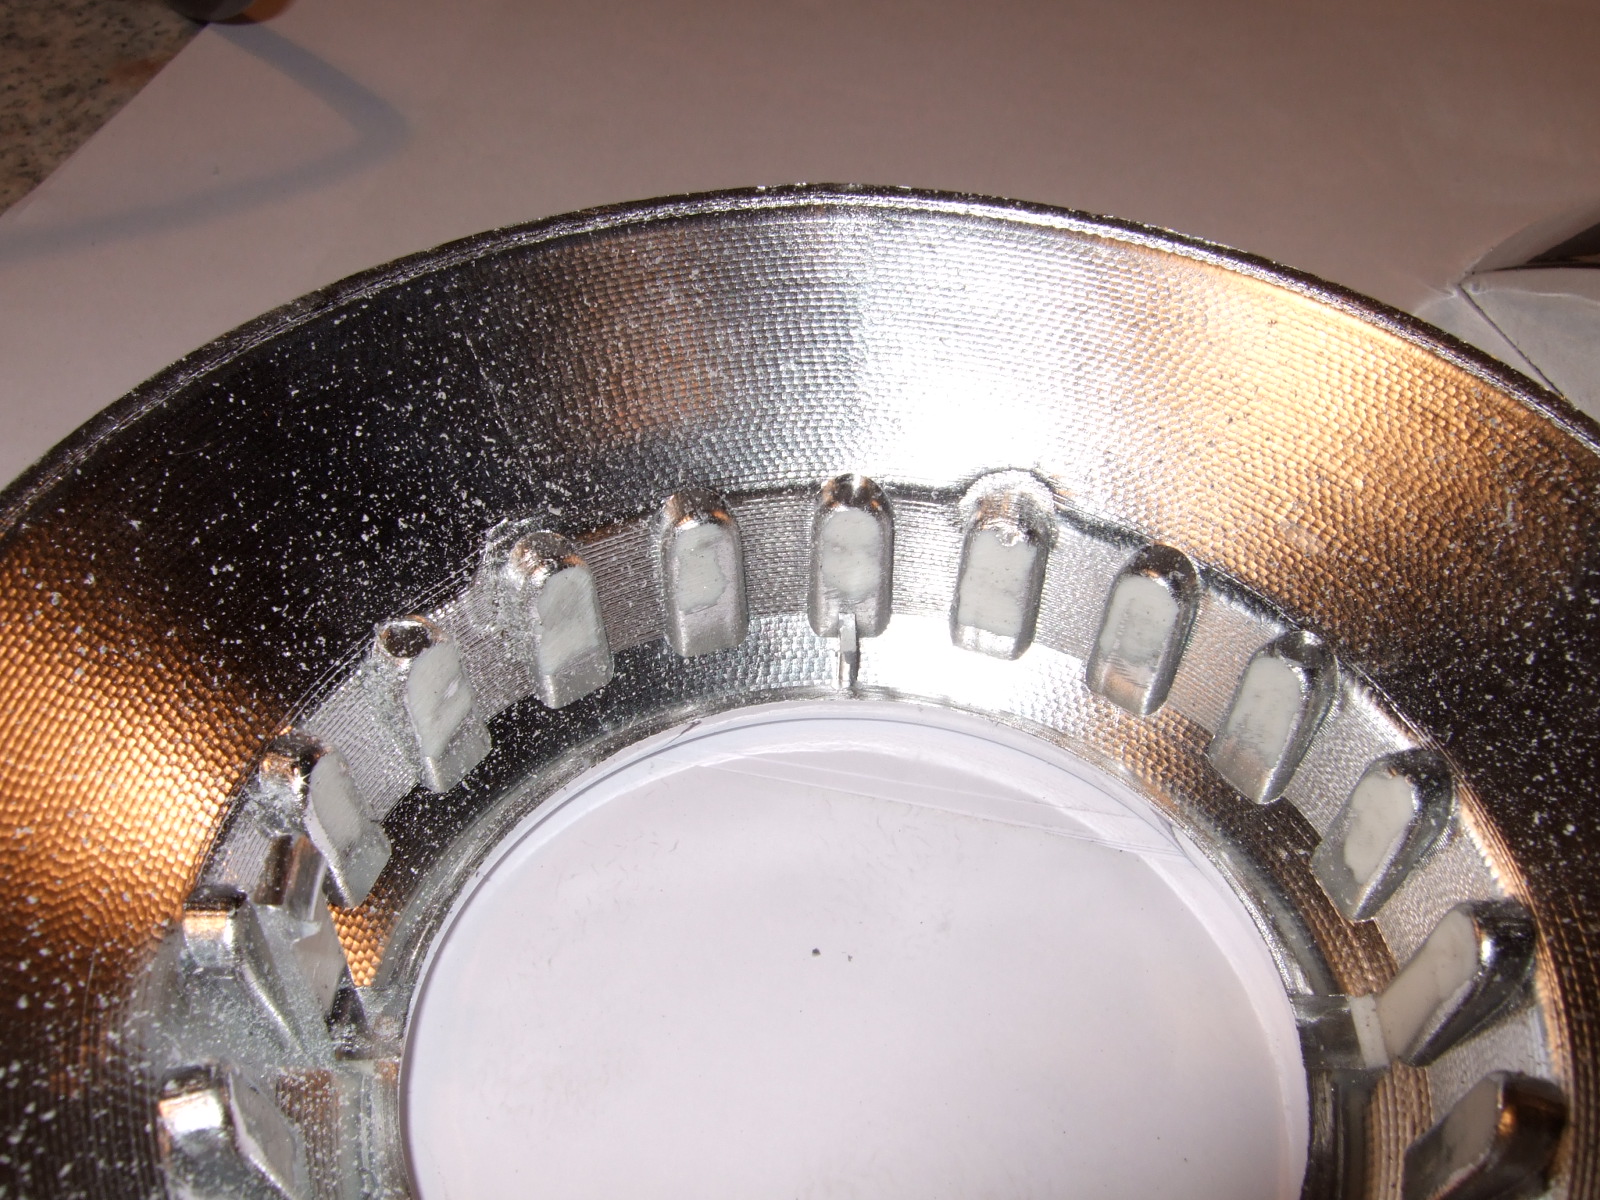
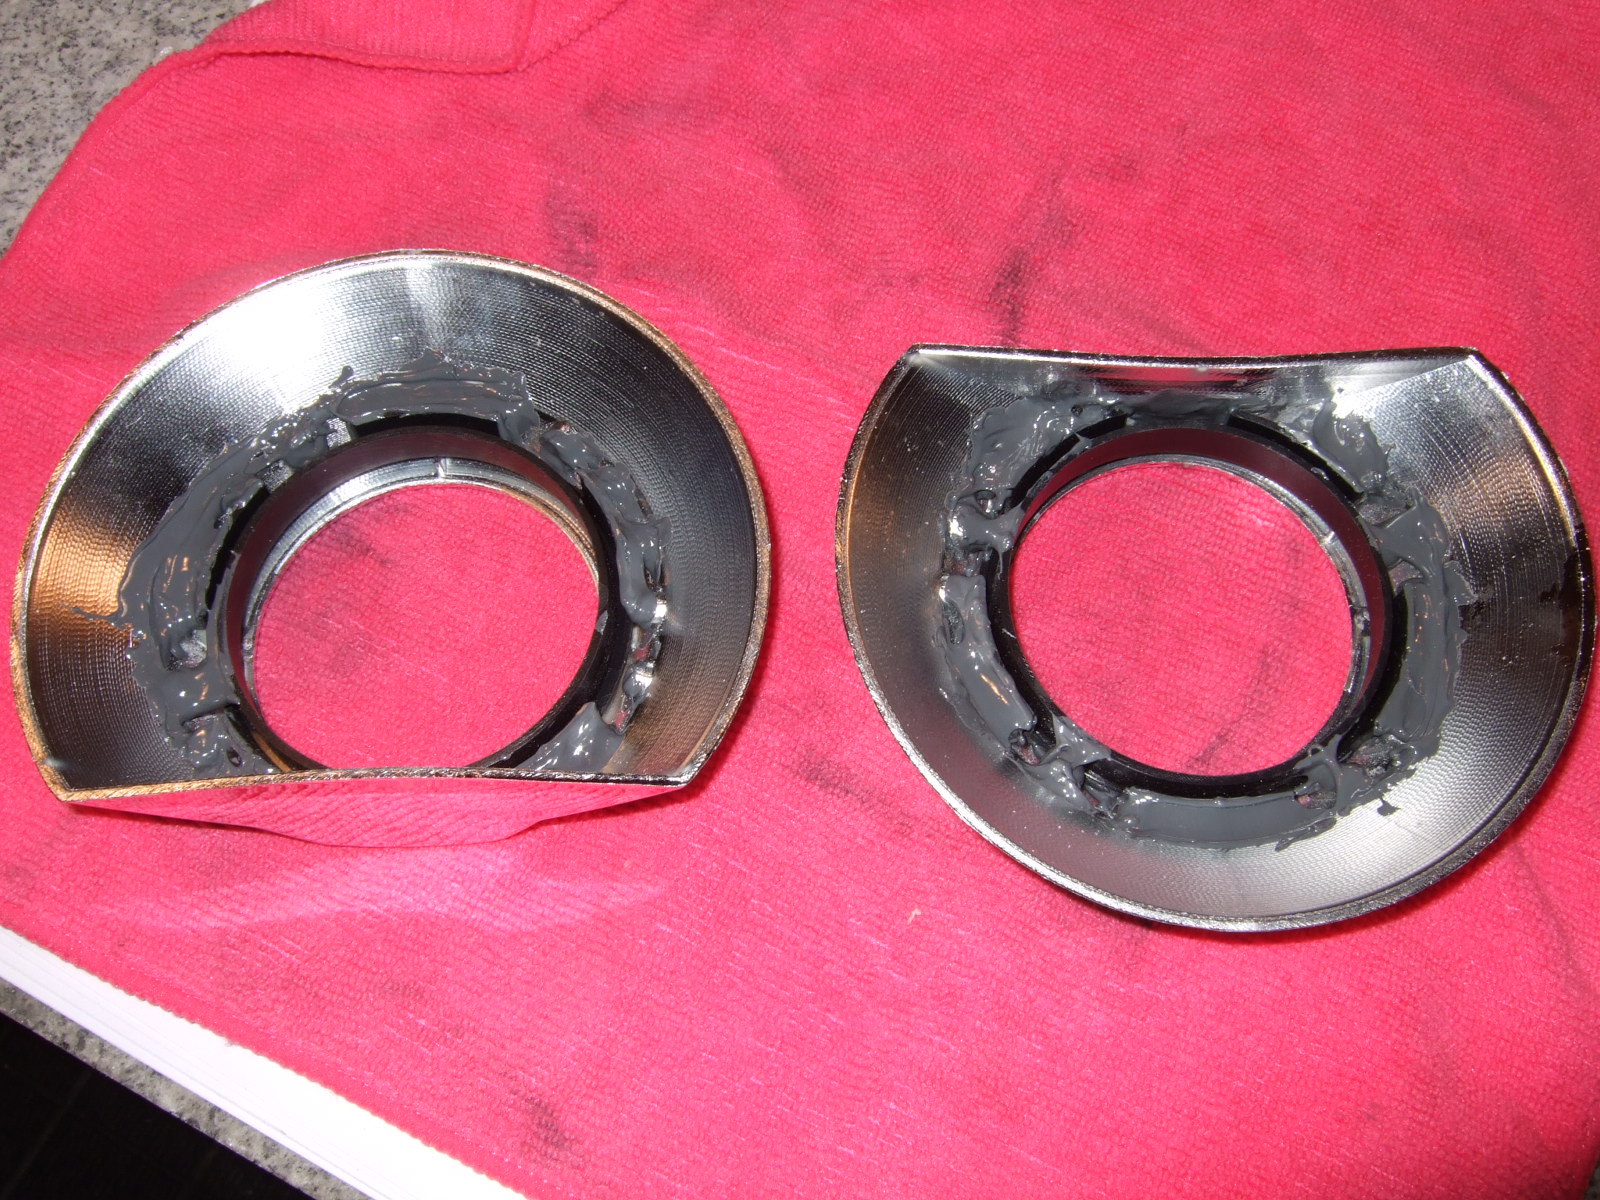
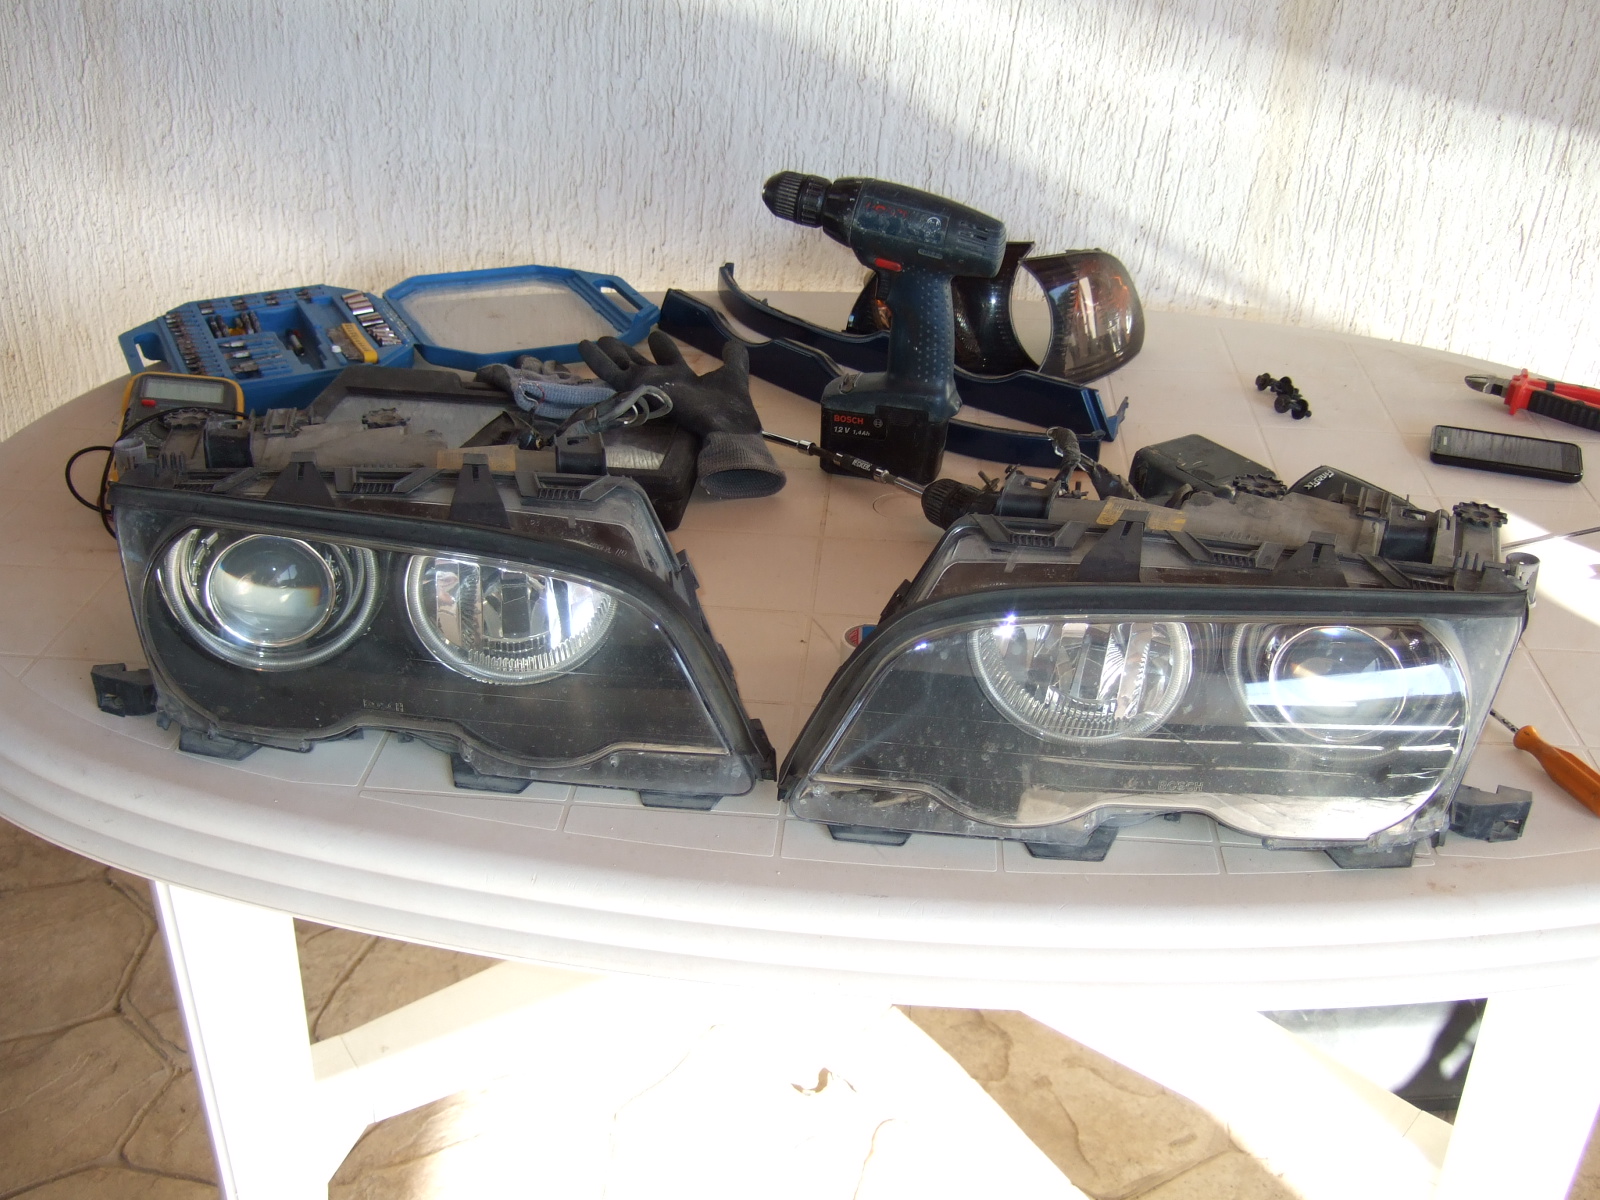
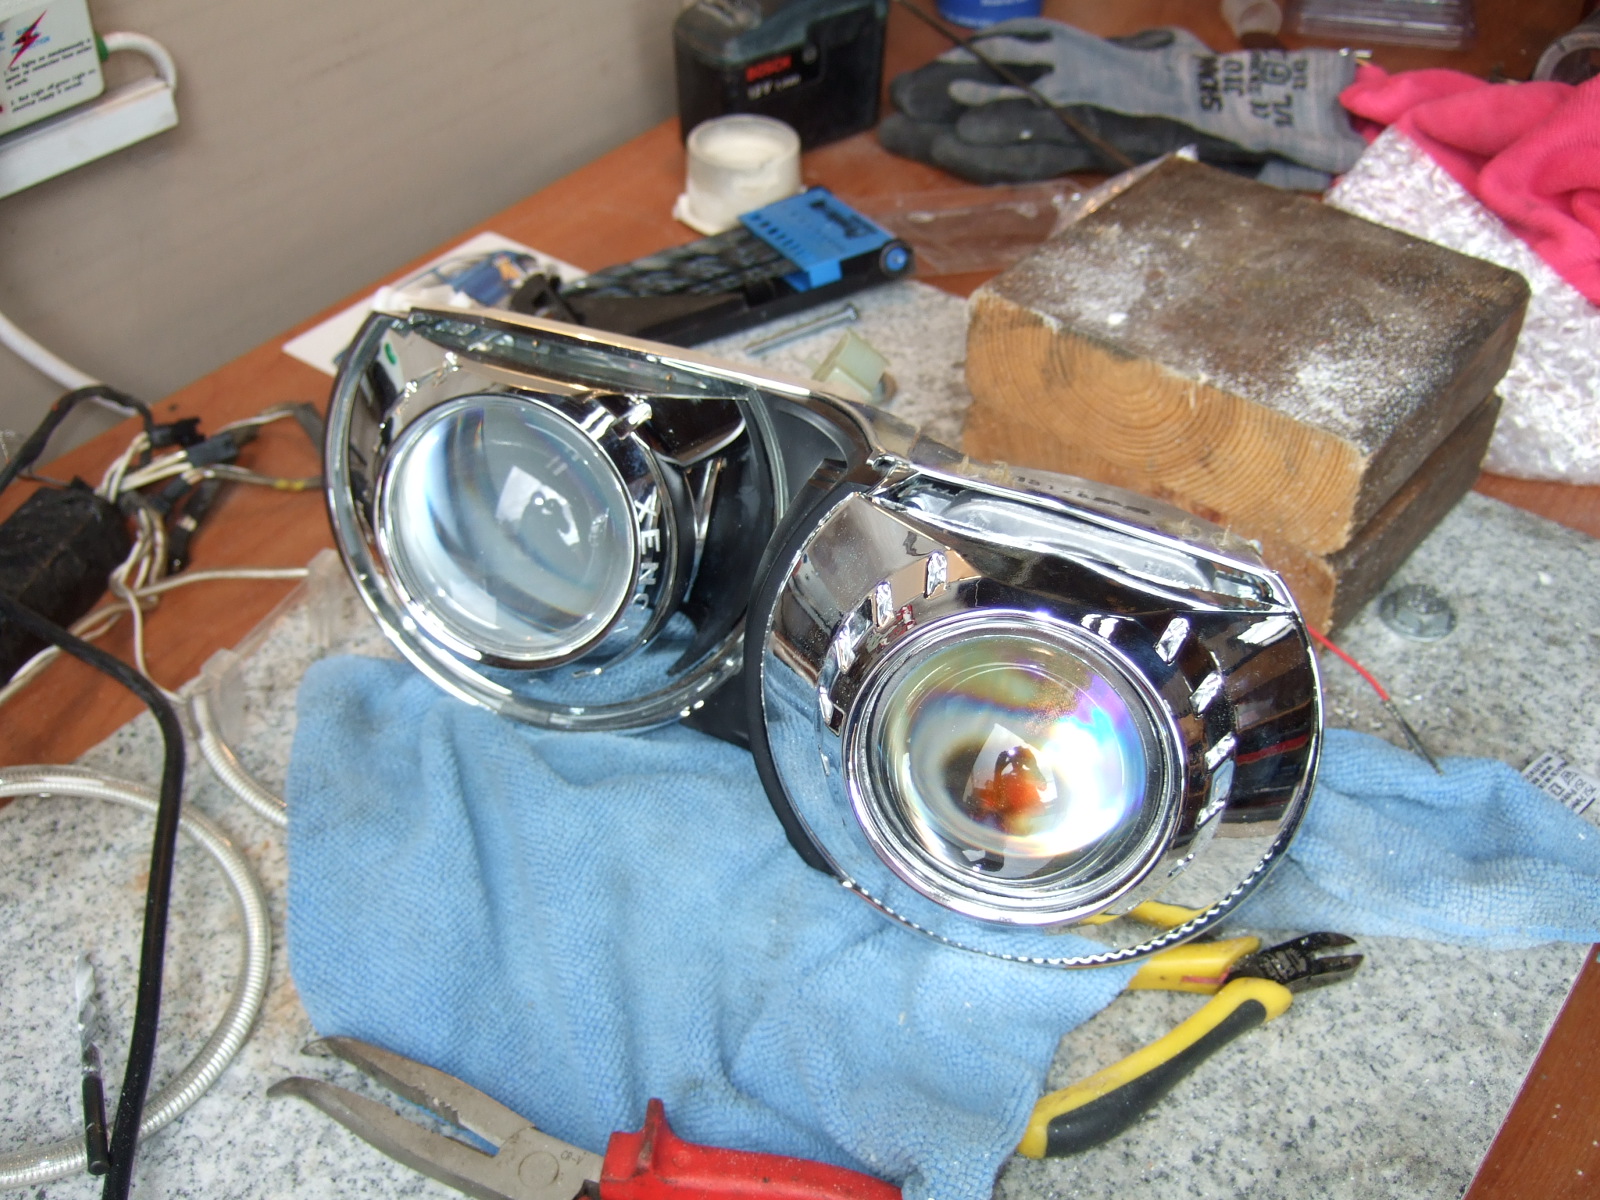
Weather-proof wiring loom connectors High-Beam Bi-Xenon splitters (single source in, dual out) FXR Projector. The Bi-Xenon shutter does not have polarity therefore 2 Red wires coming out of it. D2S Bulb Holder Projector Front Test fitting the adapter rings
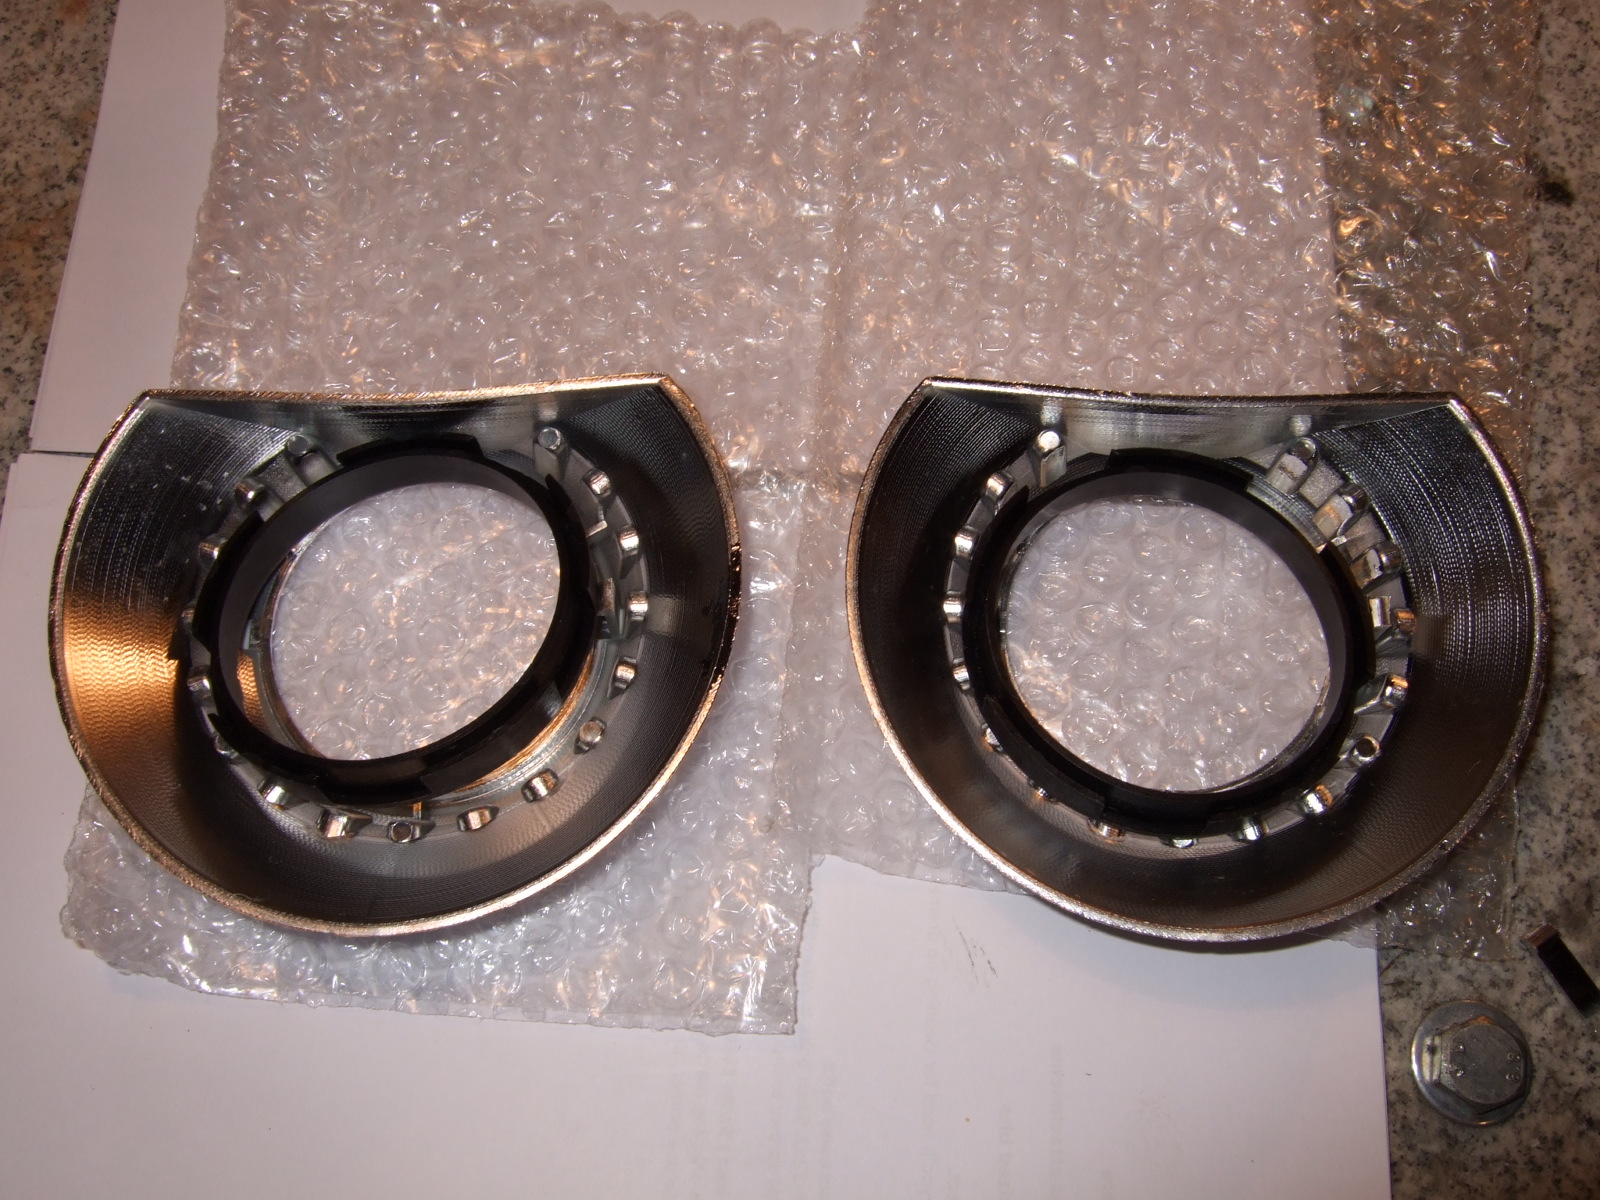
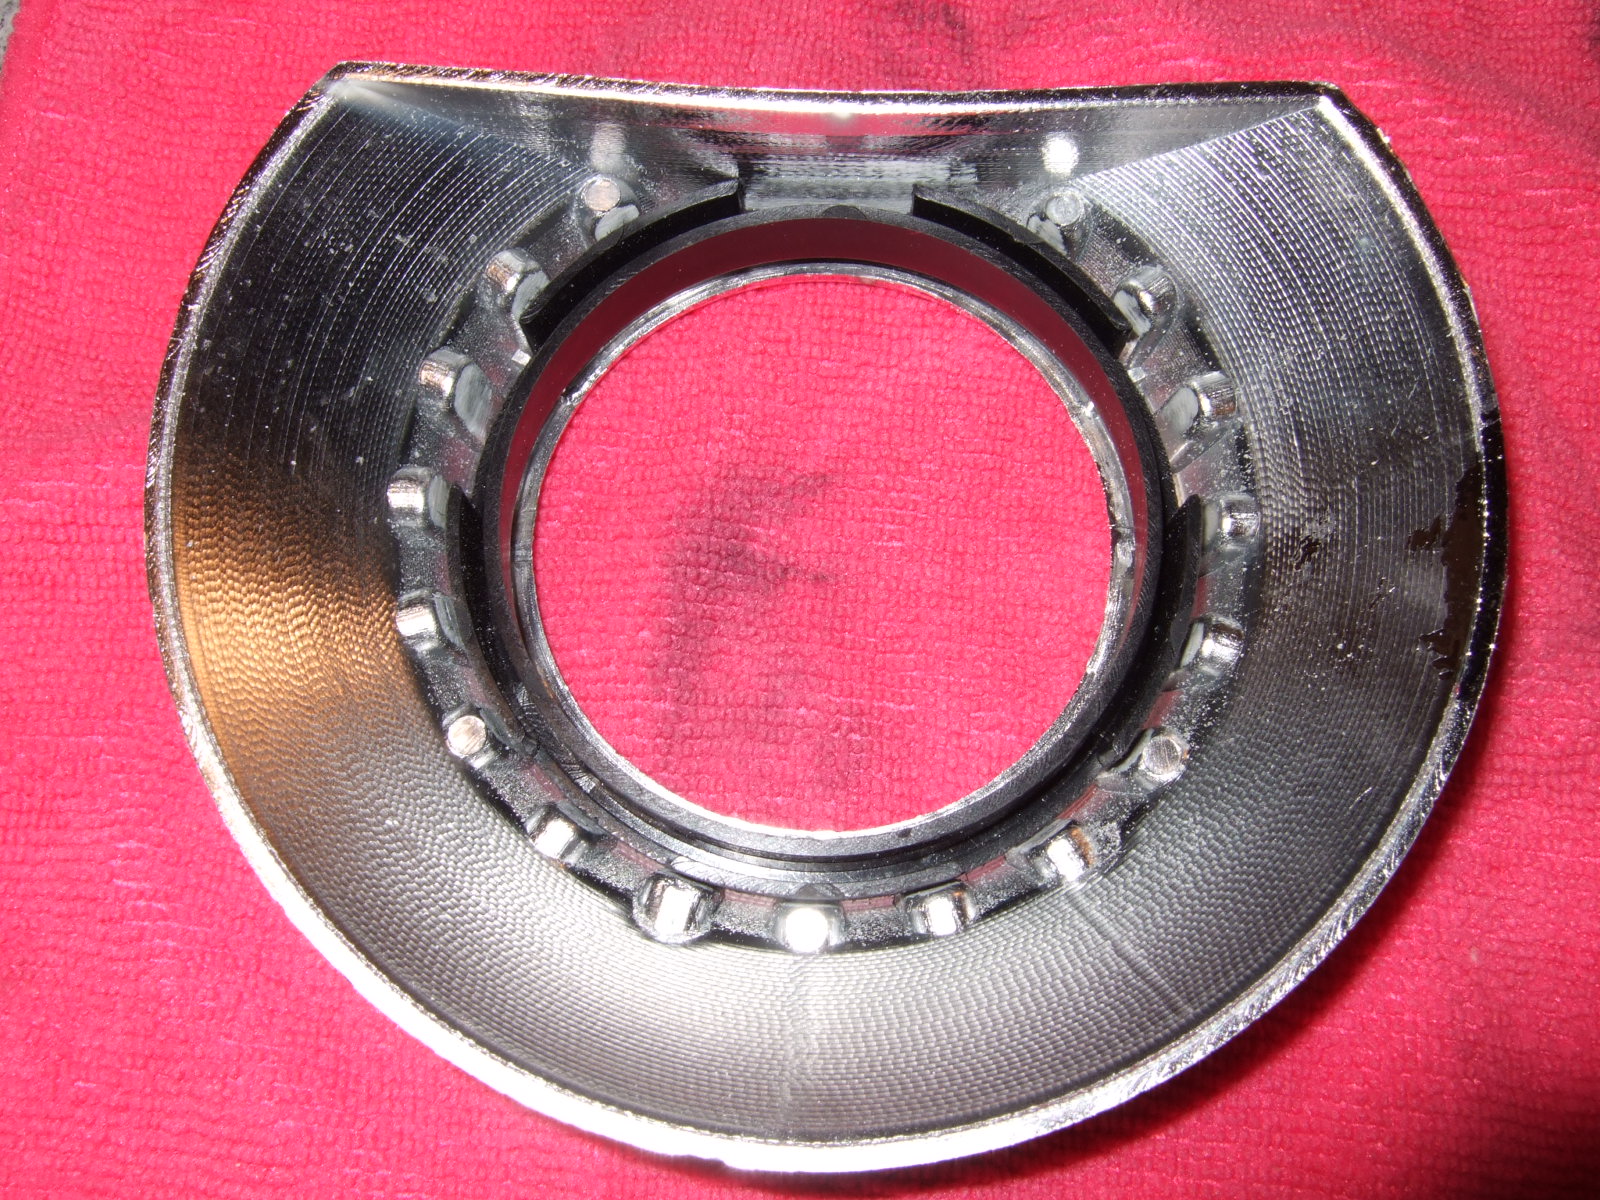
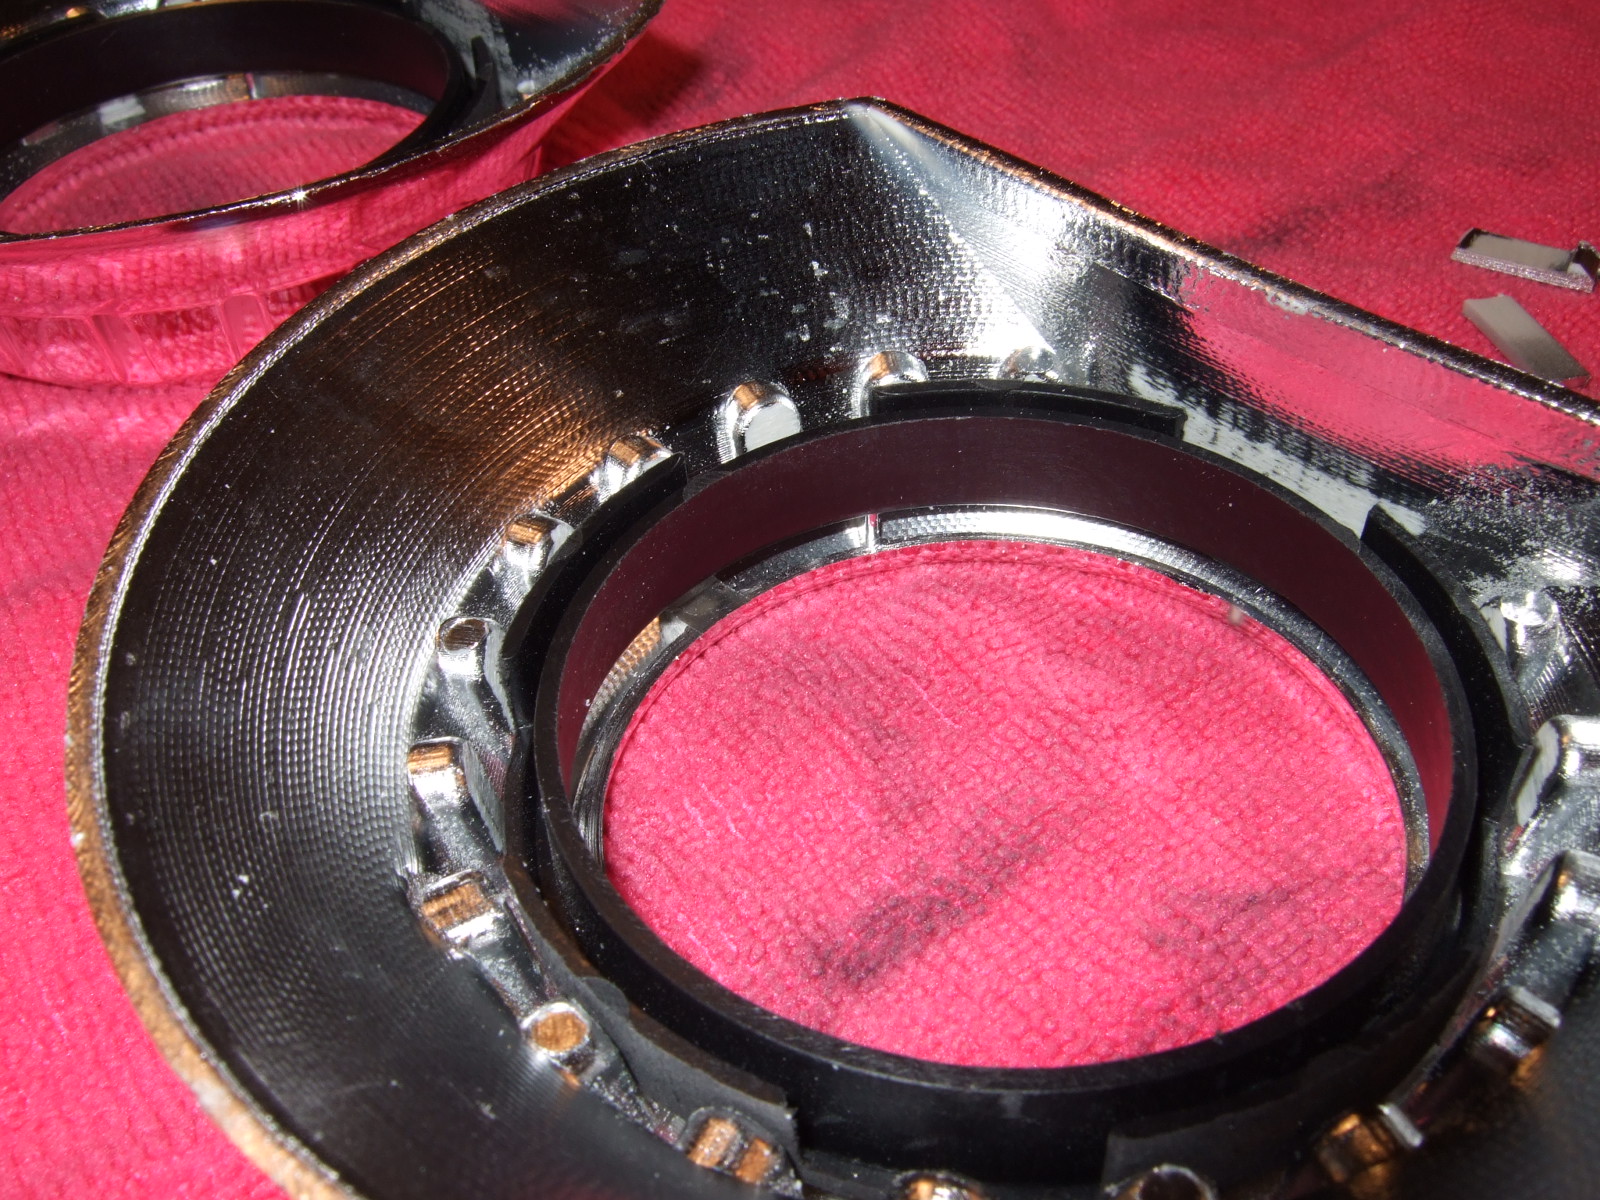
Flimsy plastic brackets (will be removed) to give way to epoxy glue.
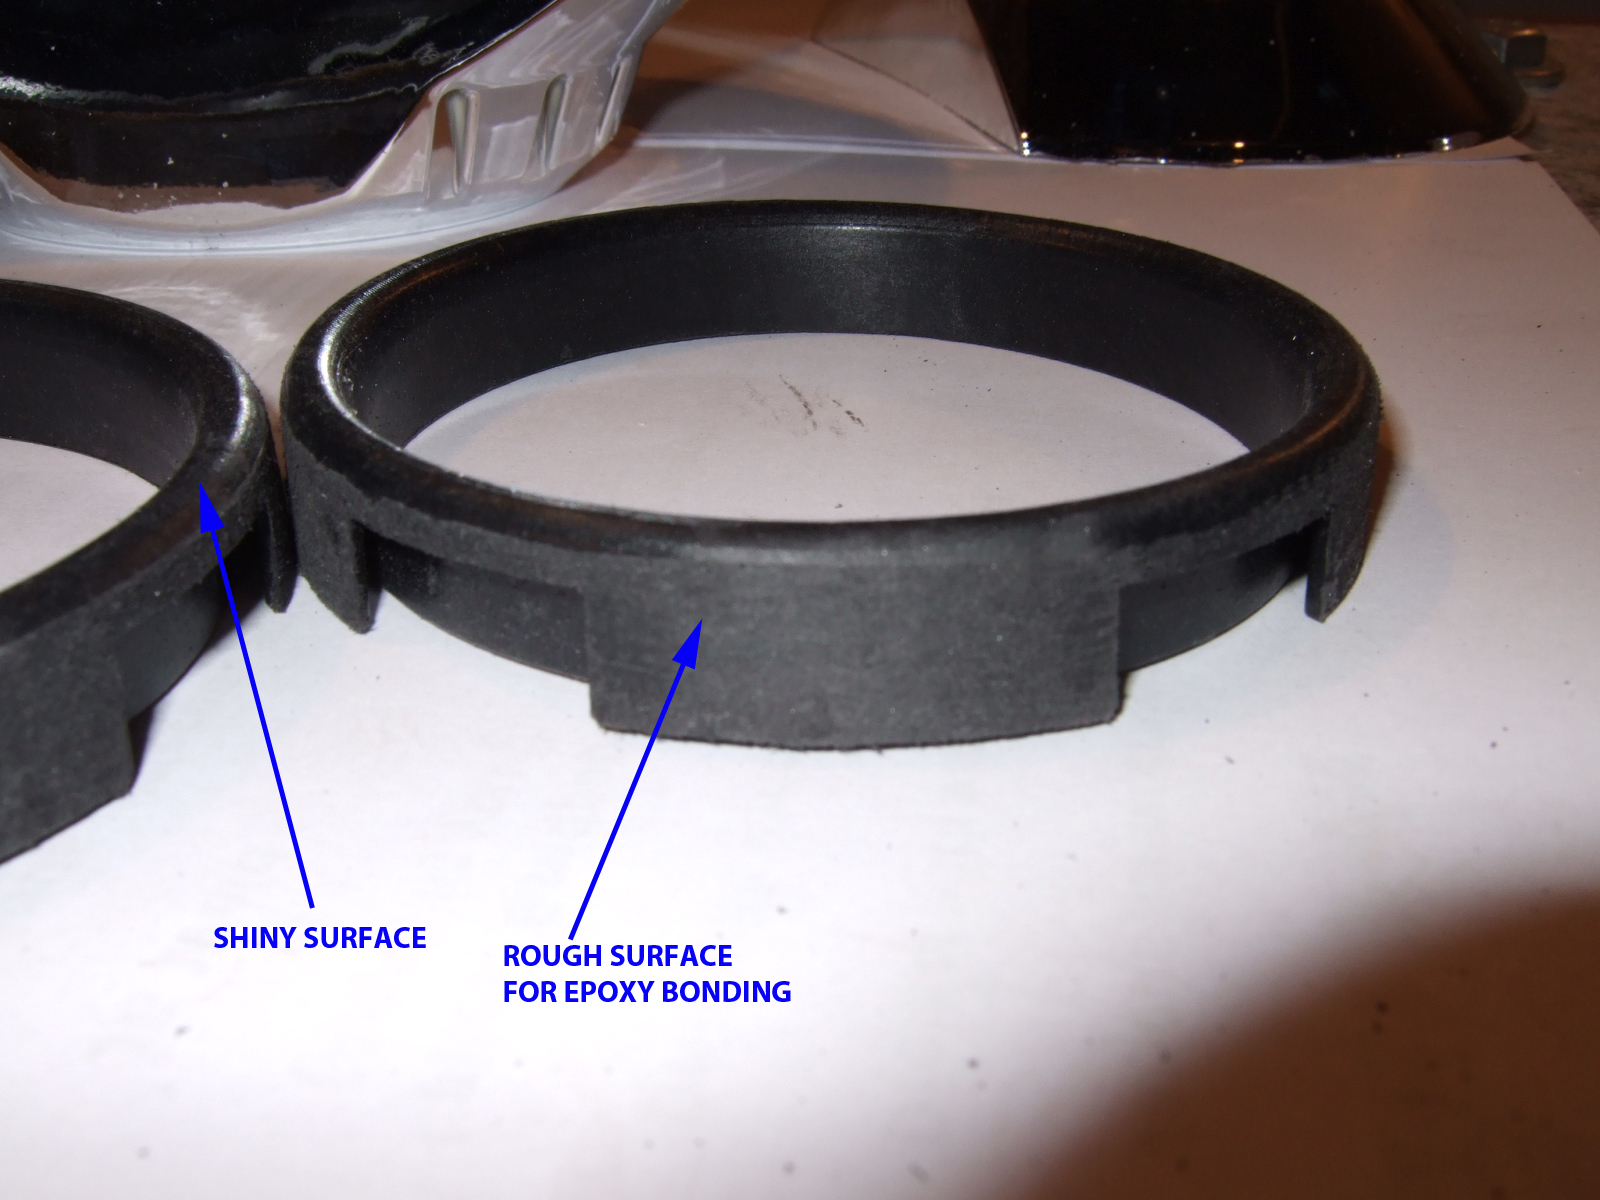
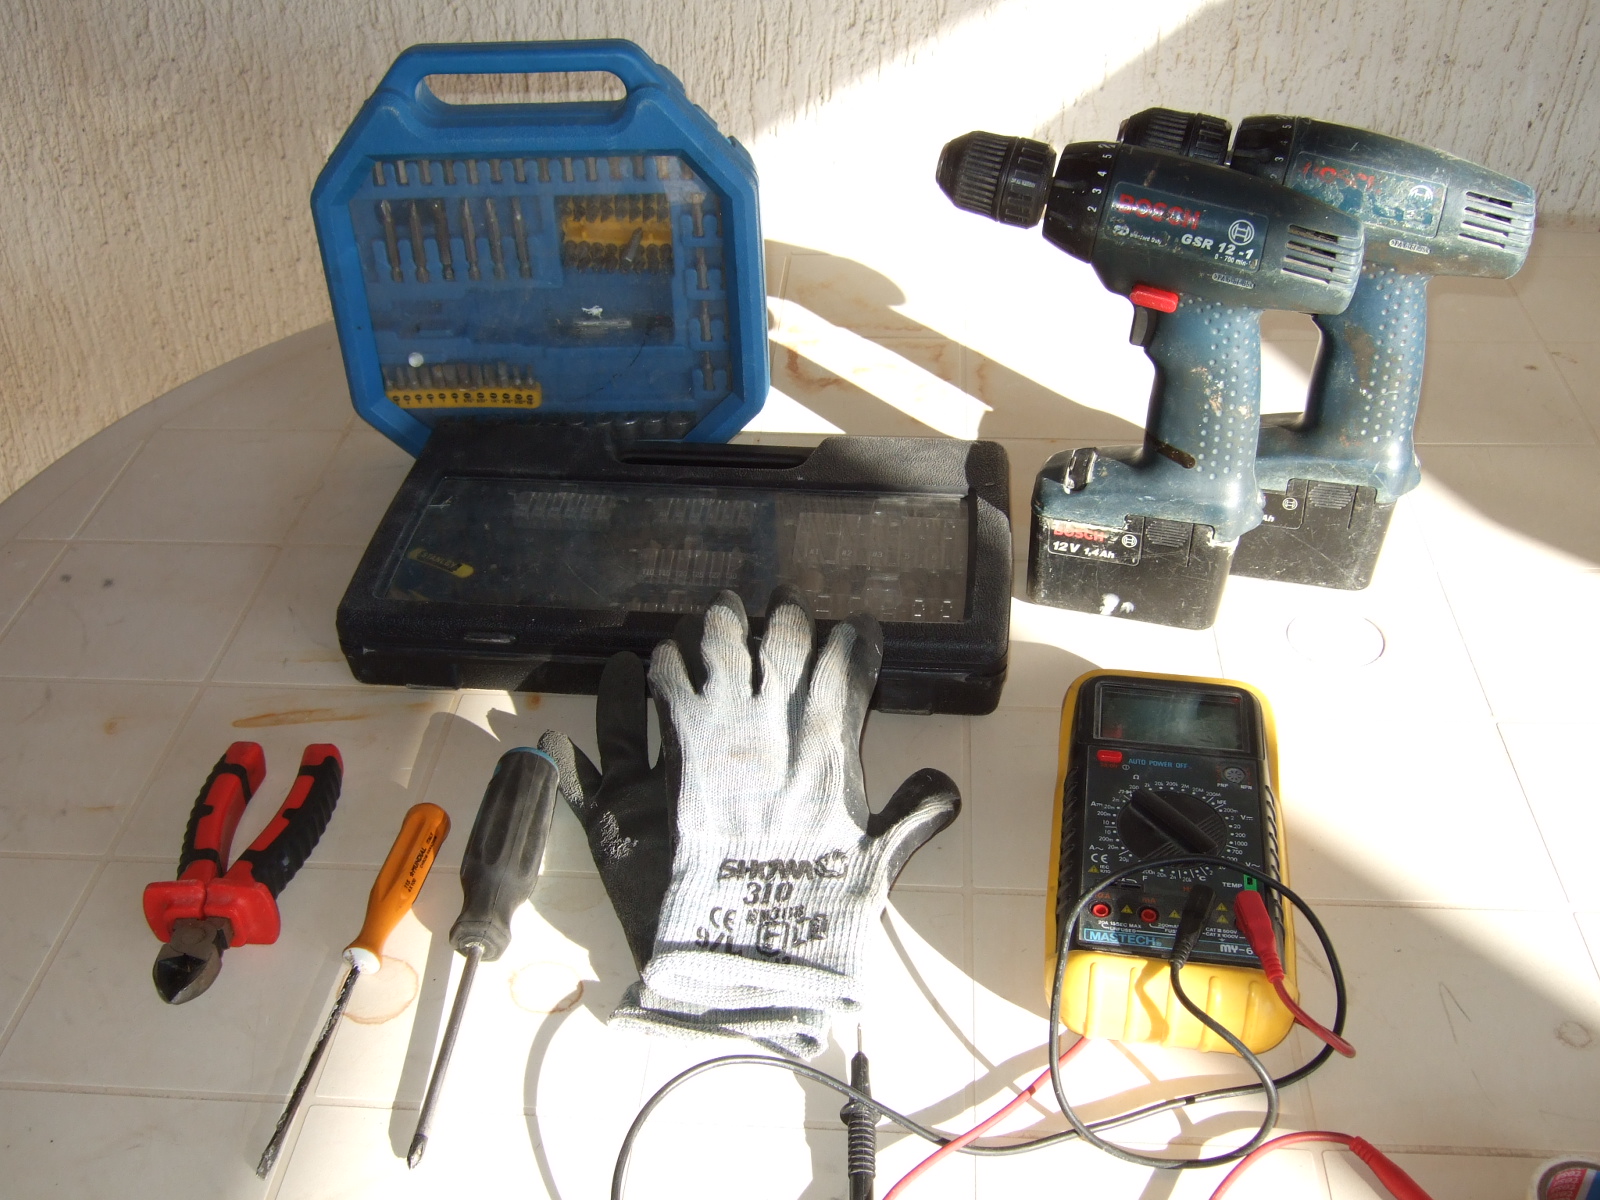
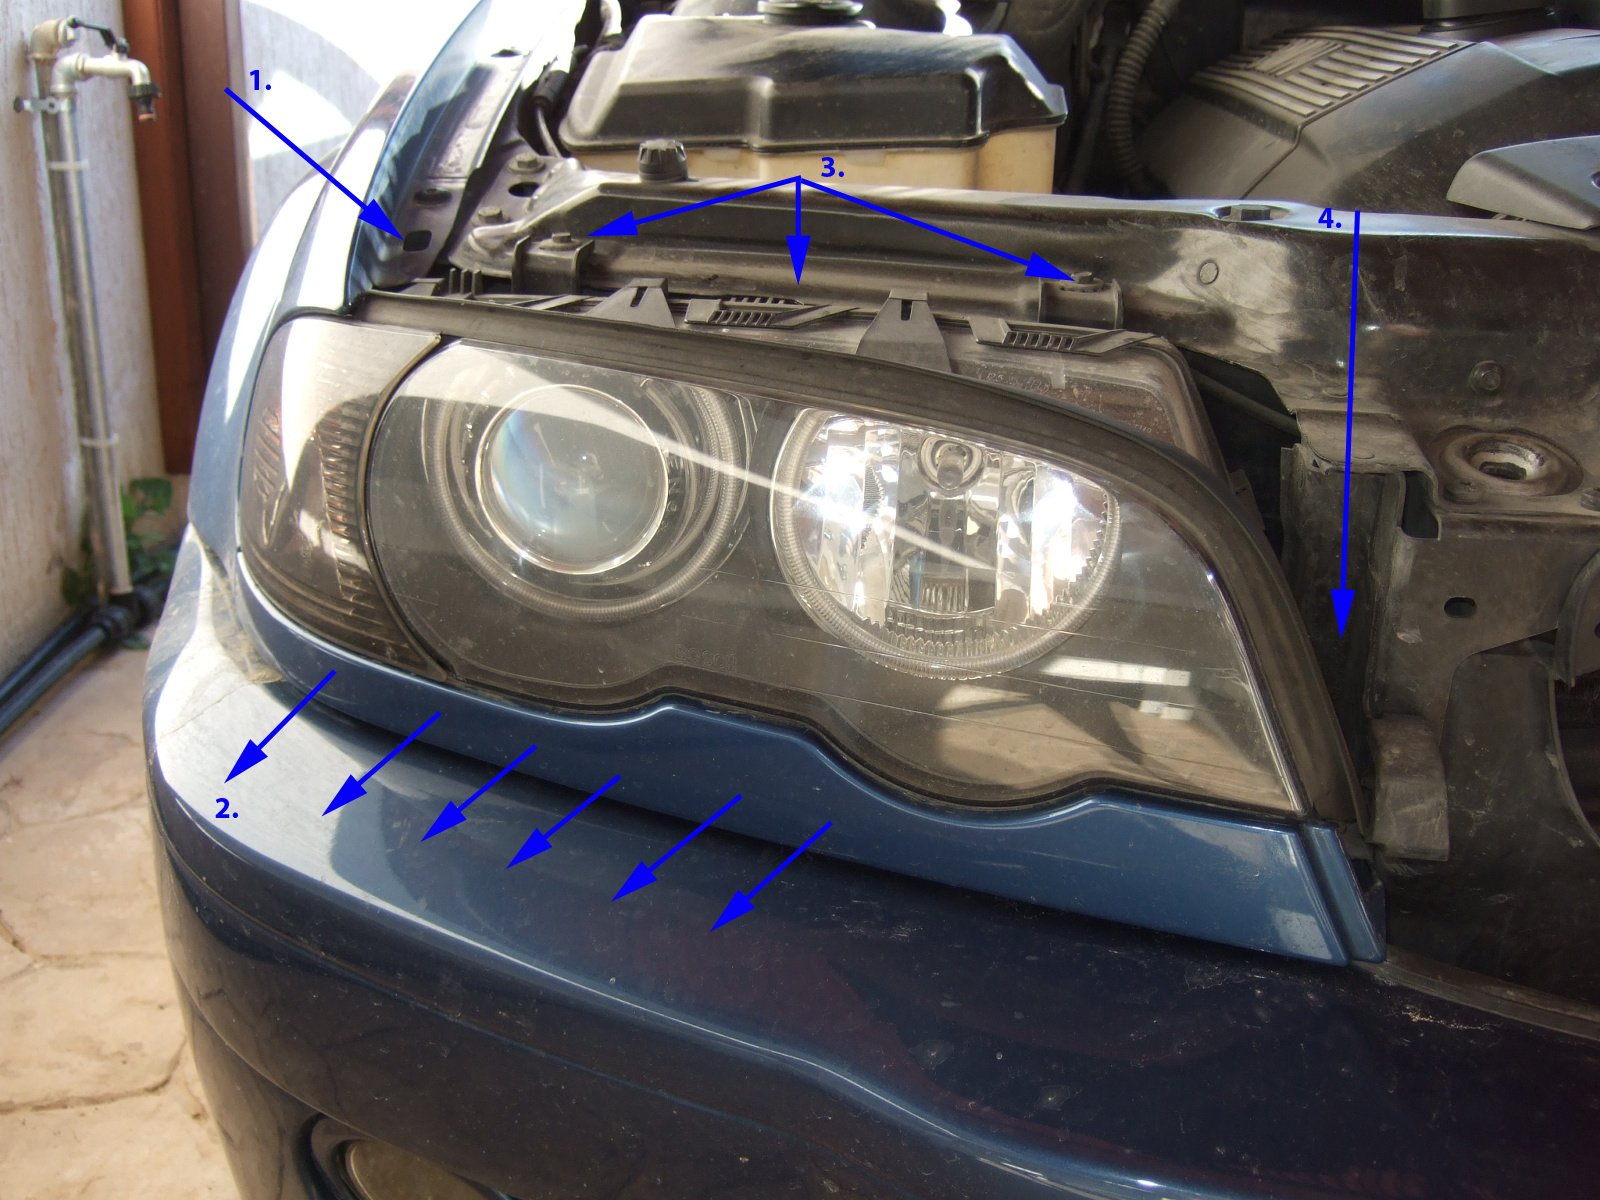
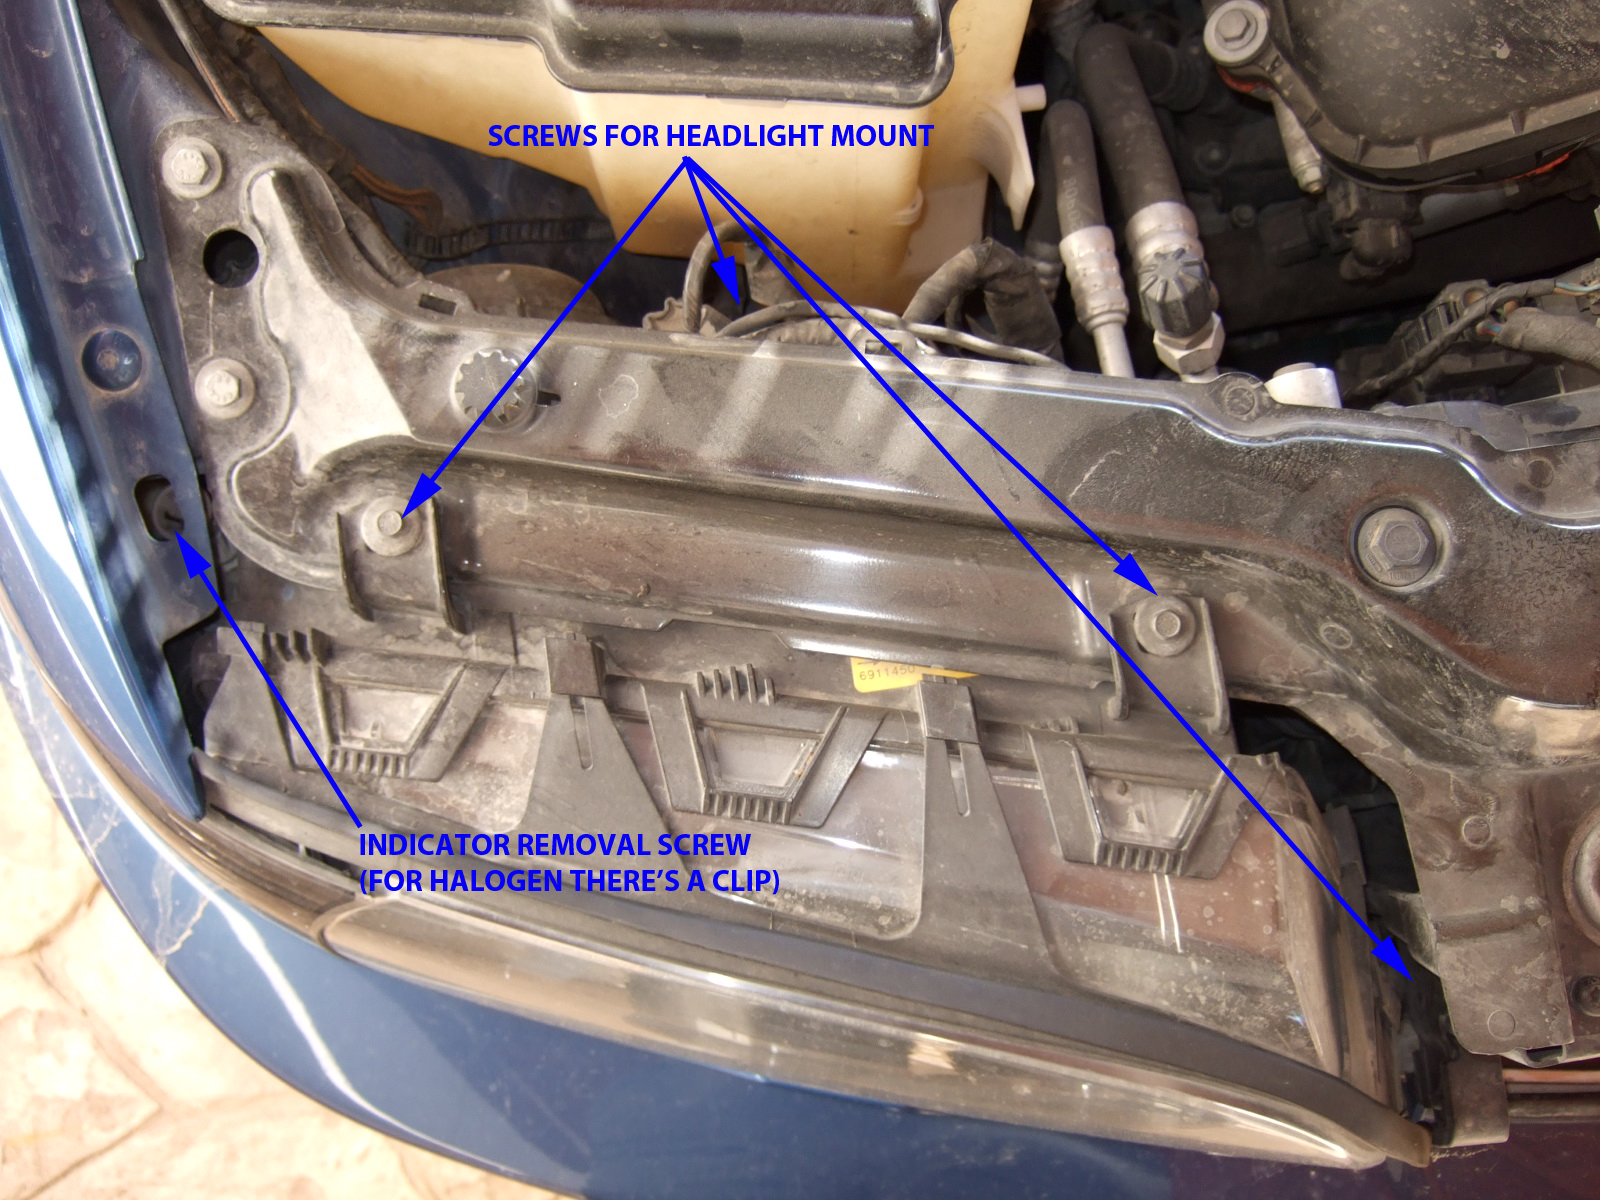
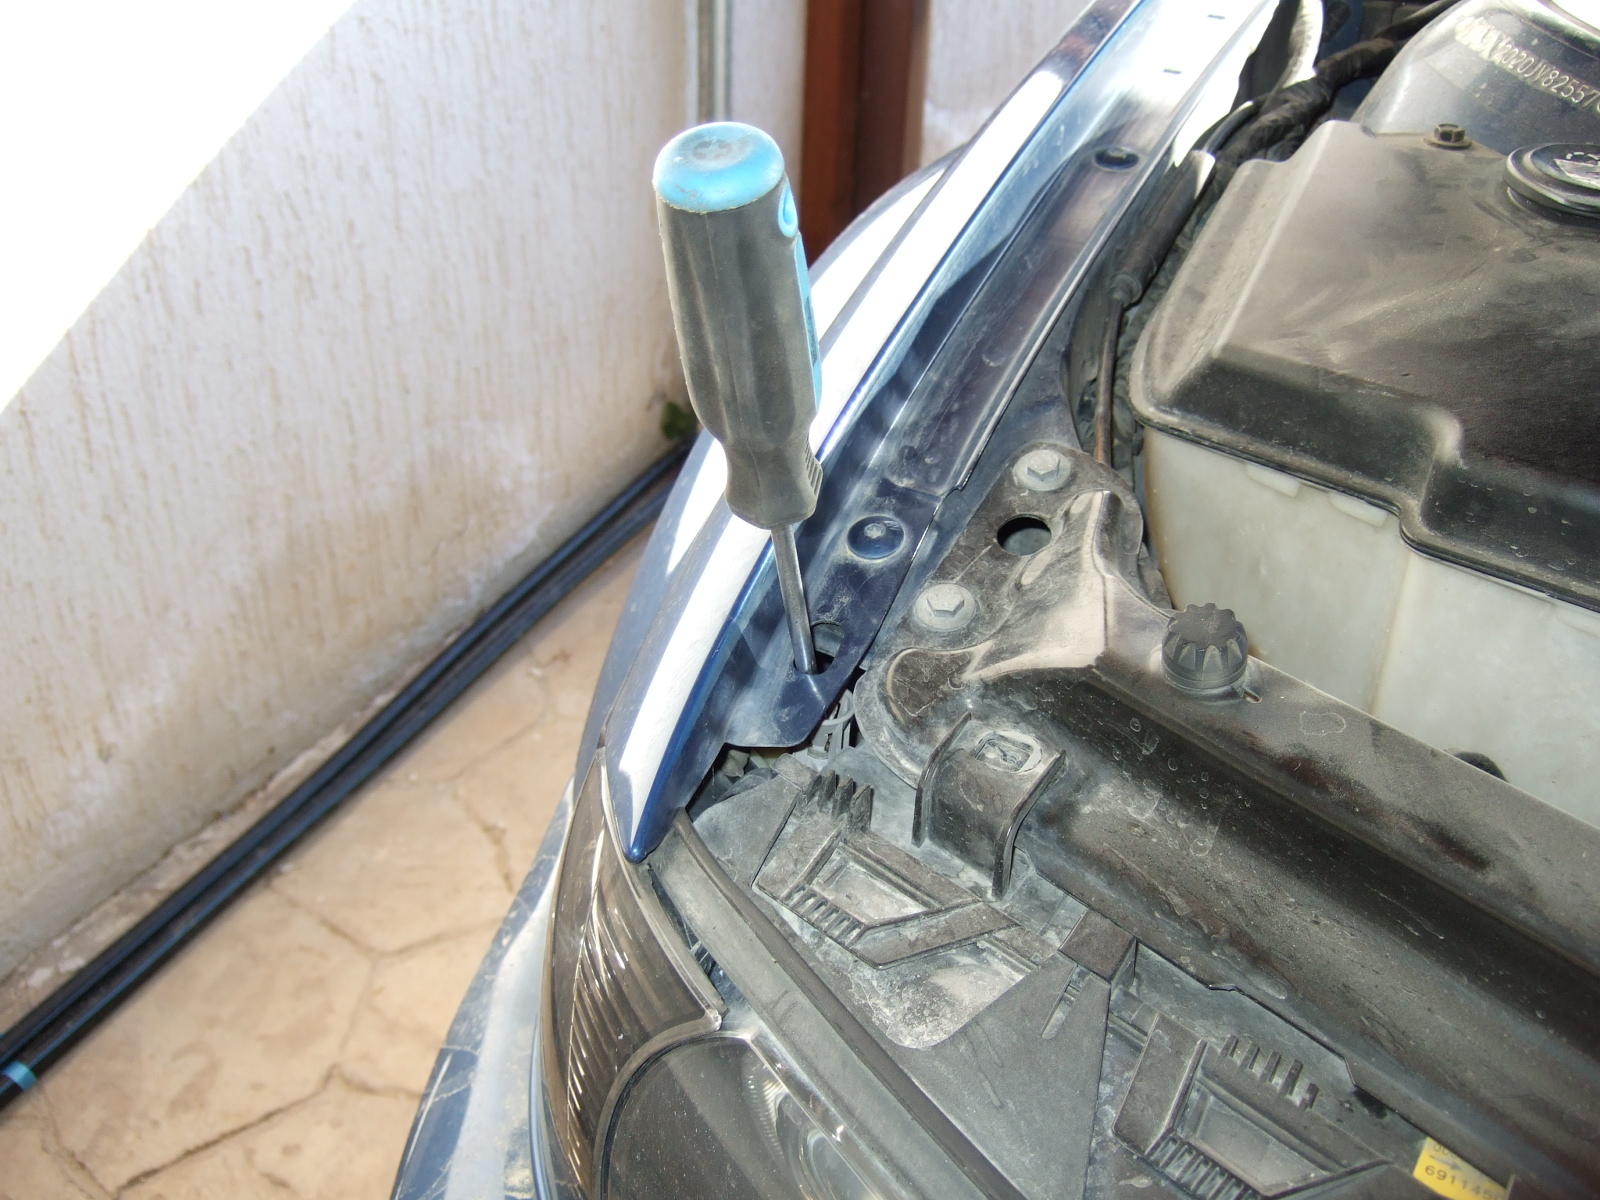
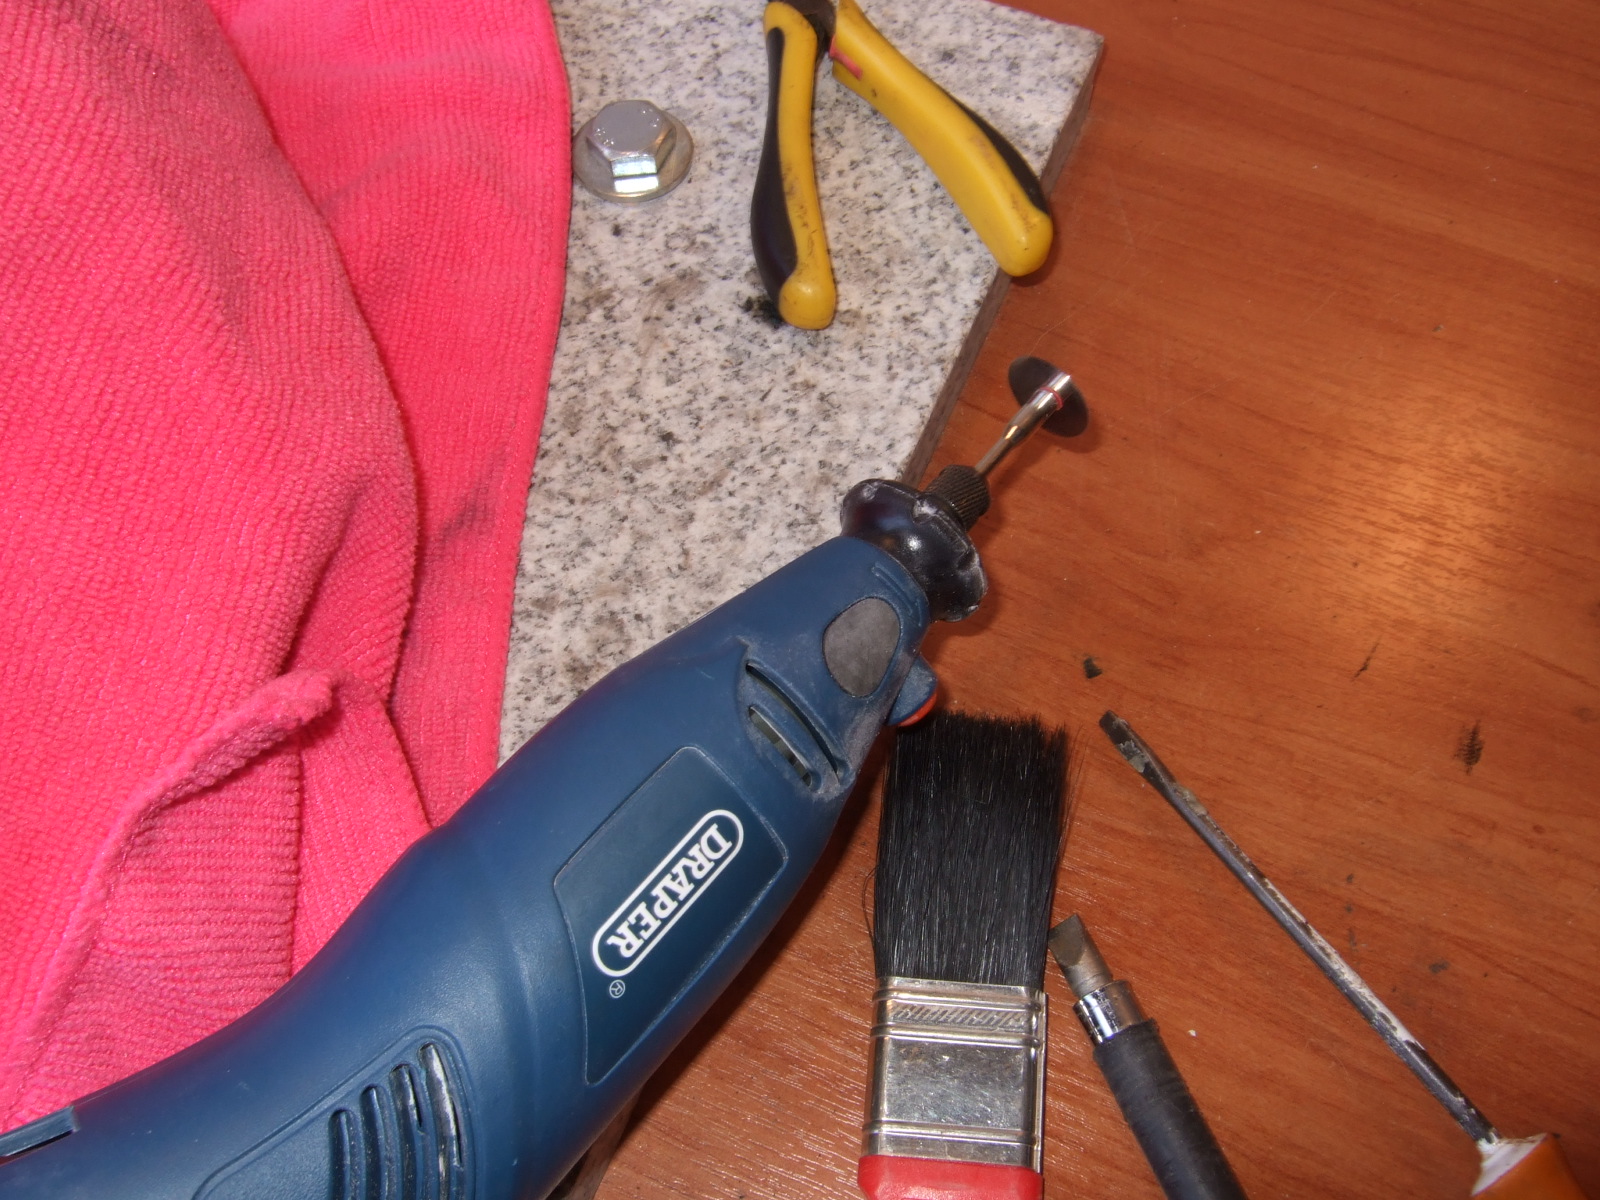
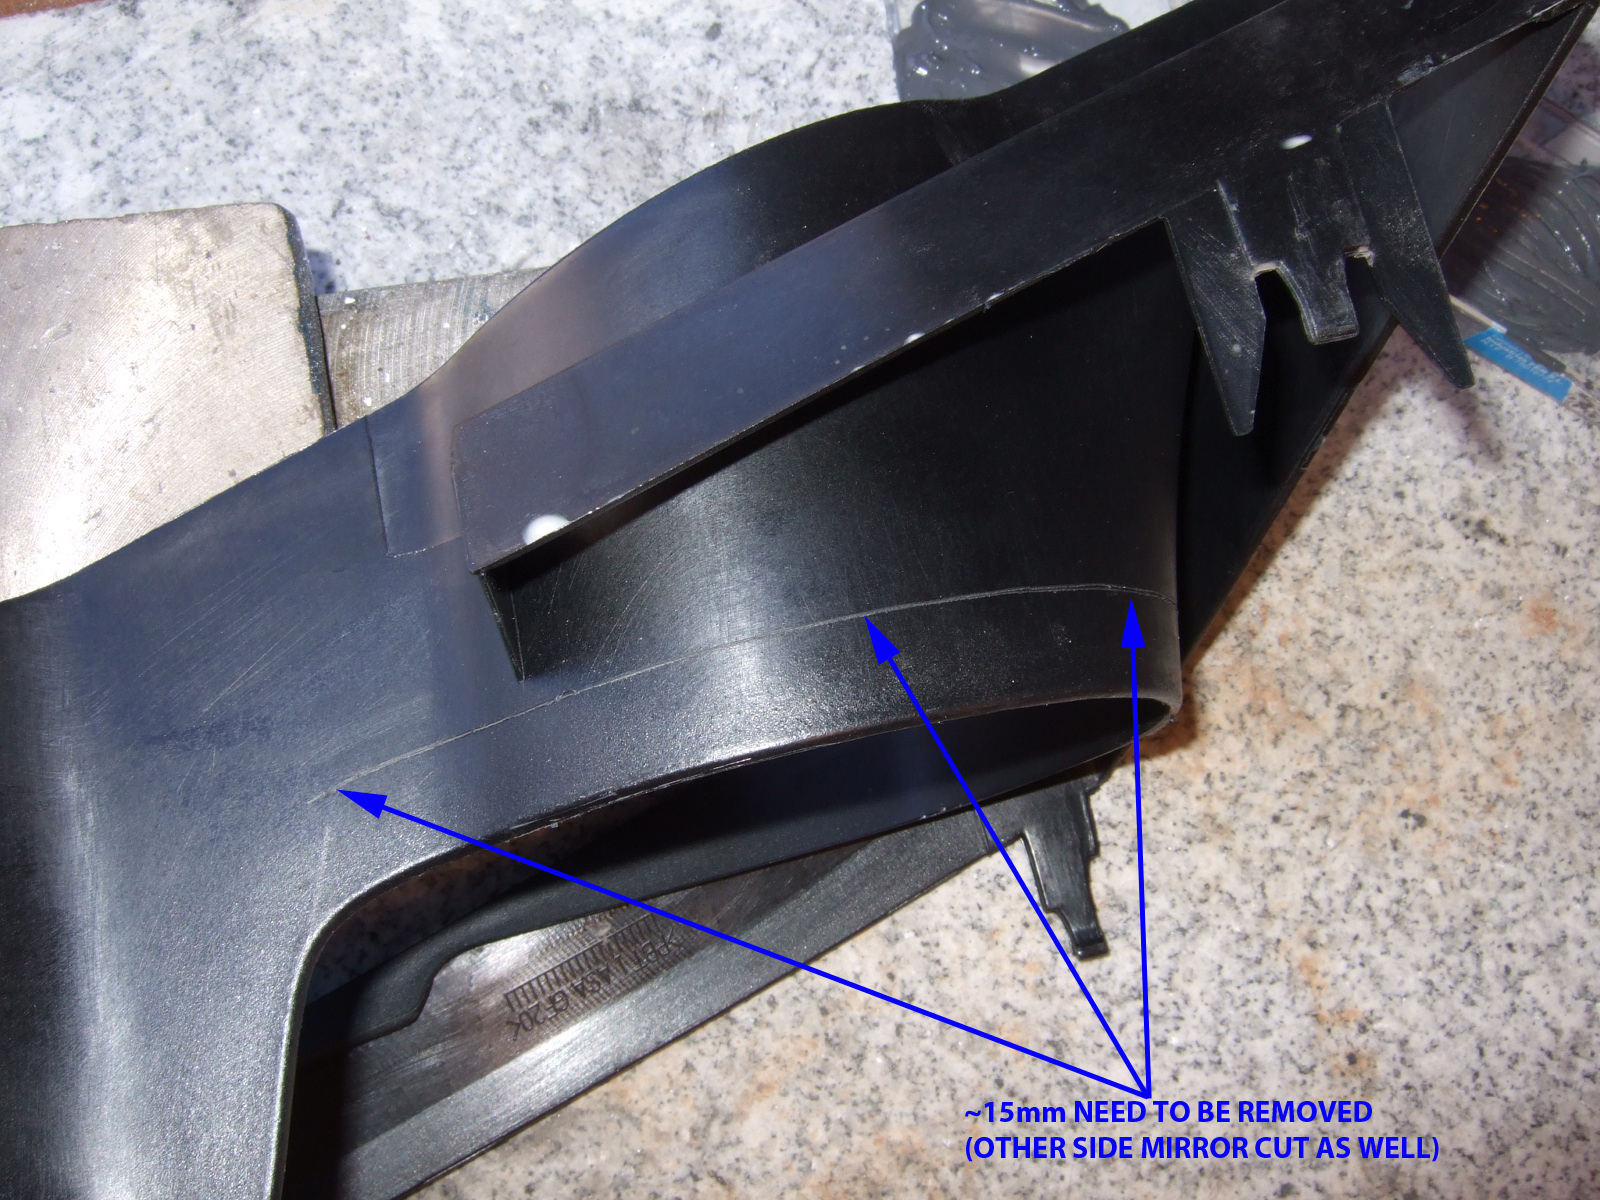
Phase 1: Using a dremel with sanding unit on, I roughened both inner shroud surface and adapter ring surface. This was done to ensure proper adhesion of epoxy glue. Sanded surfaces: Glue to be used. I really like using this glue as it is very strong, ideal for such work, takes time to harden allowing minor adjustments. Once it settles, it's as hard as metal. Epoxy all over the place, but we don't care as it will not be visible at all. To accelerate settling process, I chose to let the shrouds "bake" for 1 day next to my house heater element. I didn't over heat them, I just let them to get warm to the touch. Phase 2: Disassembly Process Tools needed: Before surgery: 1. Remove indicator by loosening screw (1.) 2. Remove lower headlight trim by pulling towards you (2.) 3. Remove 8mm bolts (3. and 4.). One is behind headlight and another one is to the righ side of it. (Other side is mirrored and not shown)
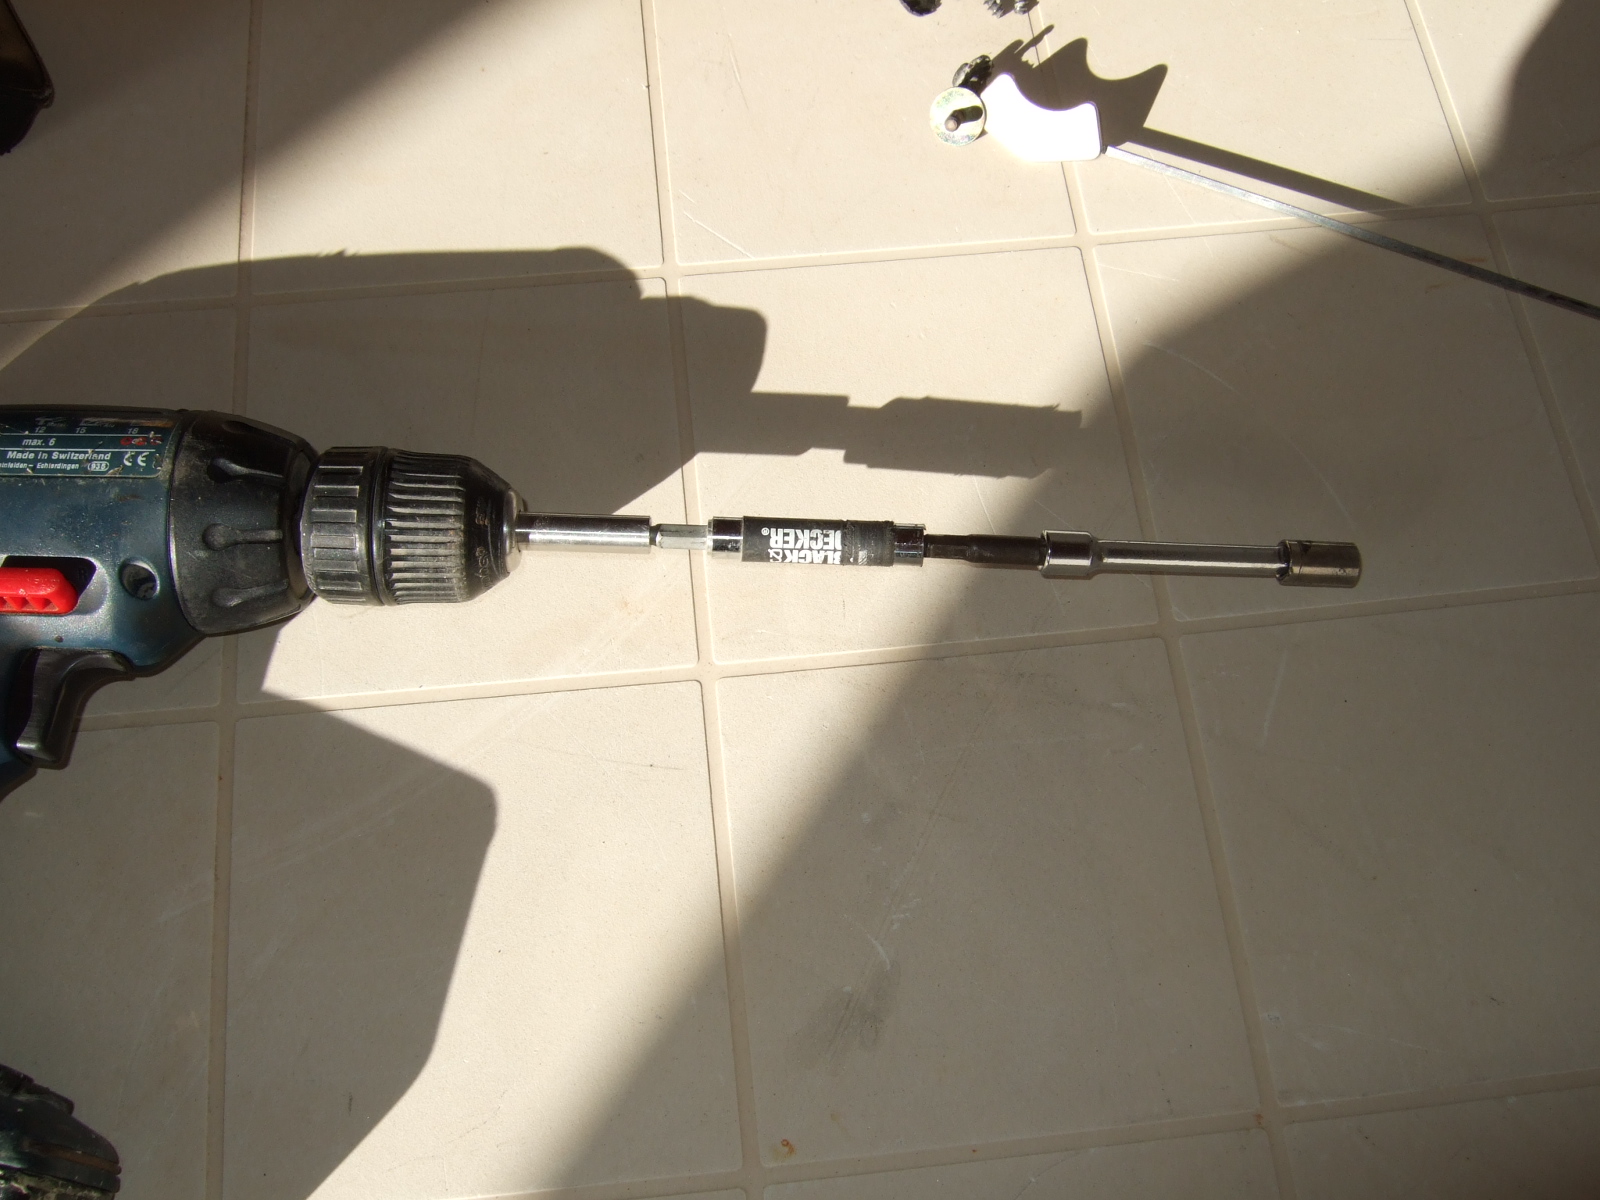
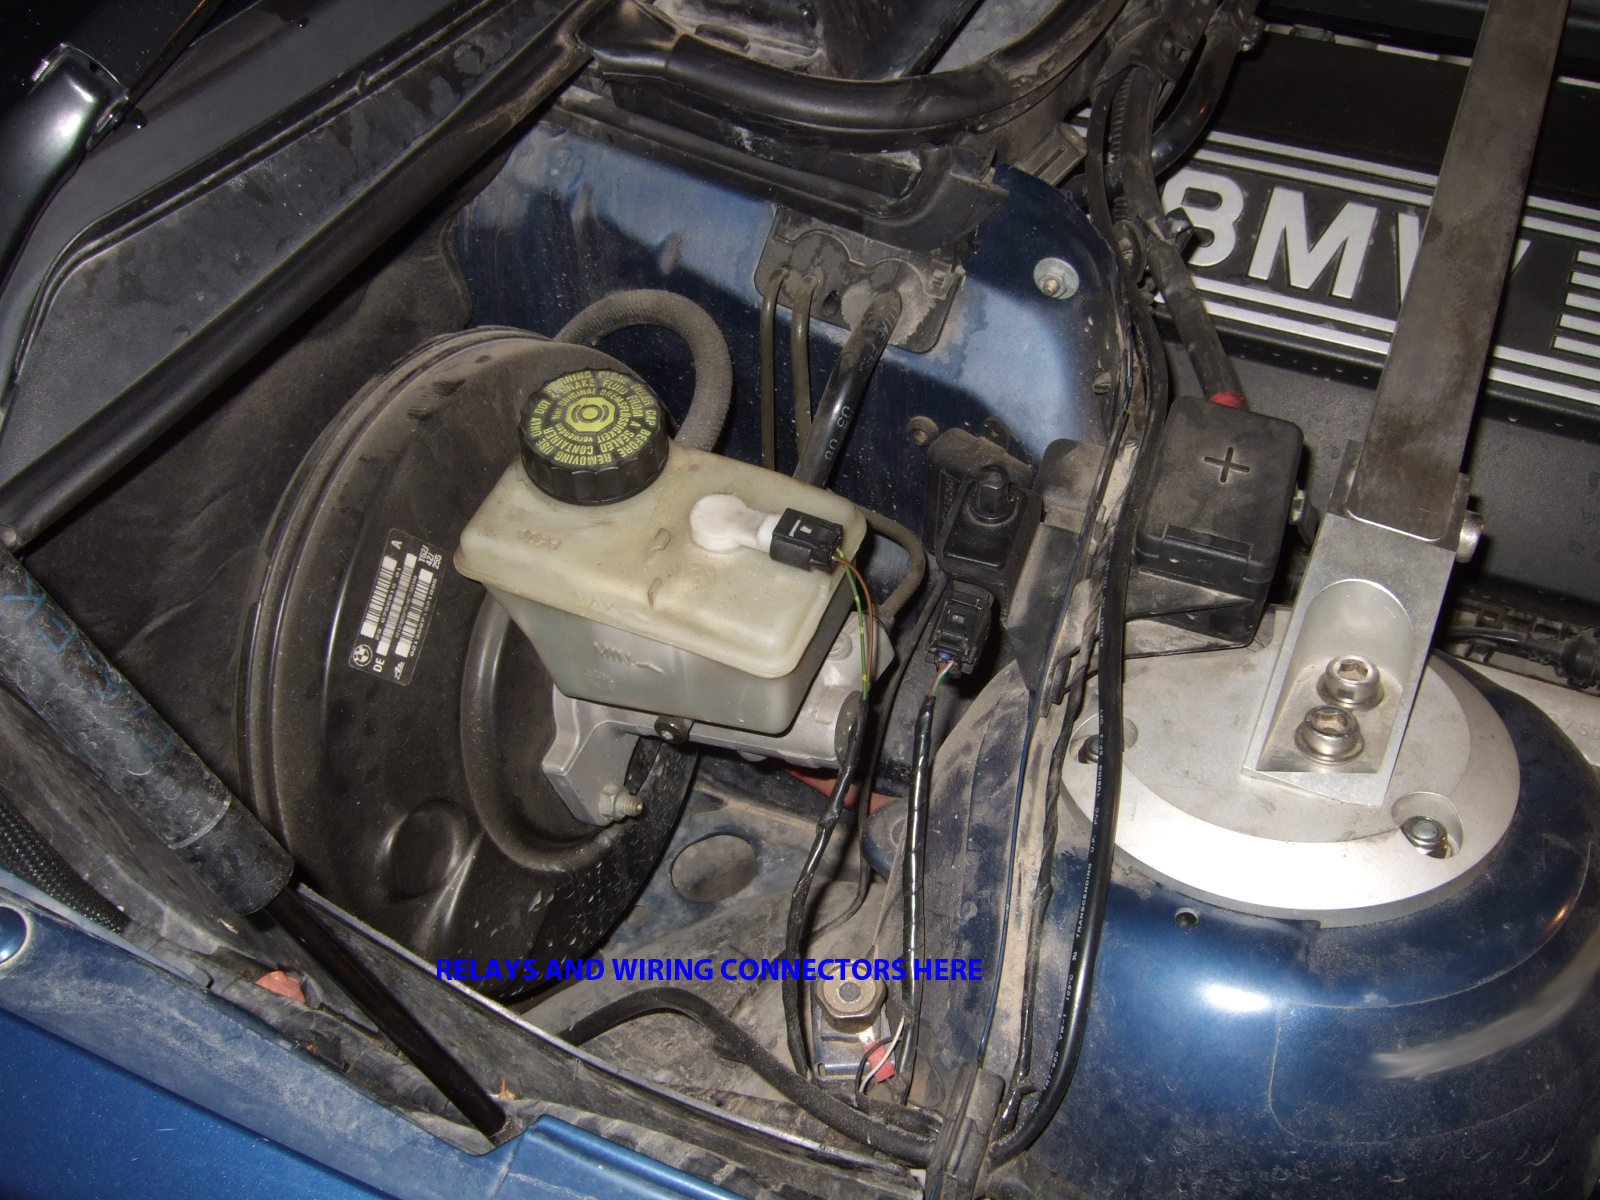
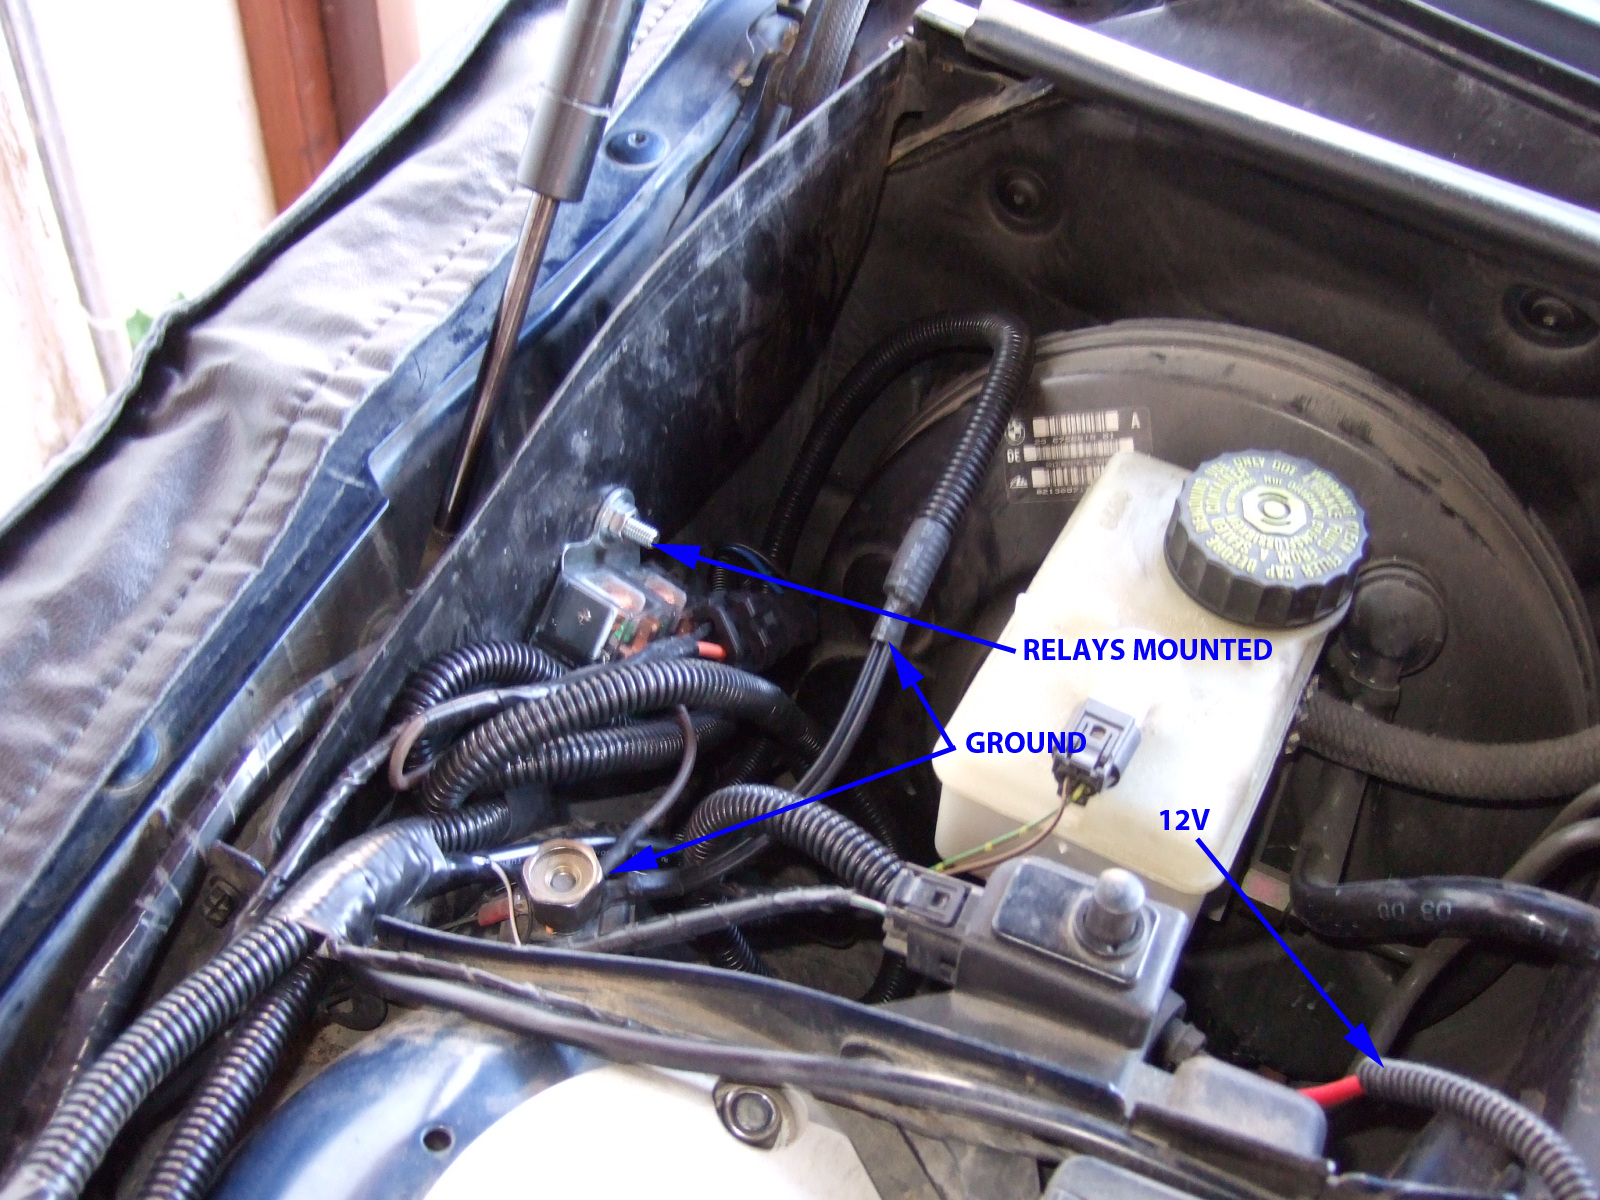
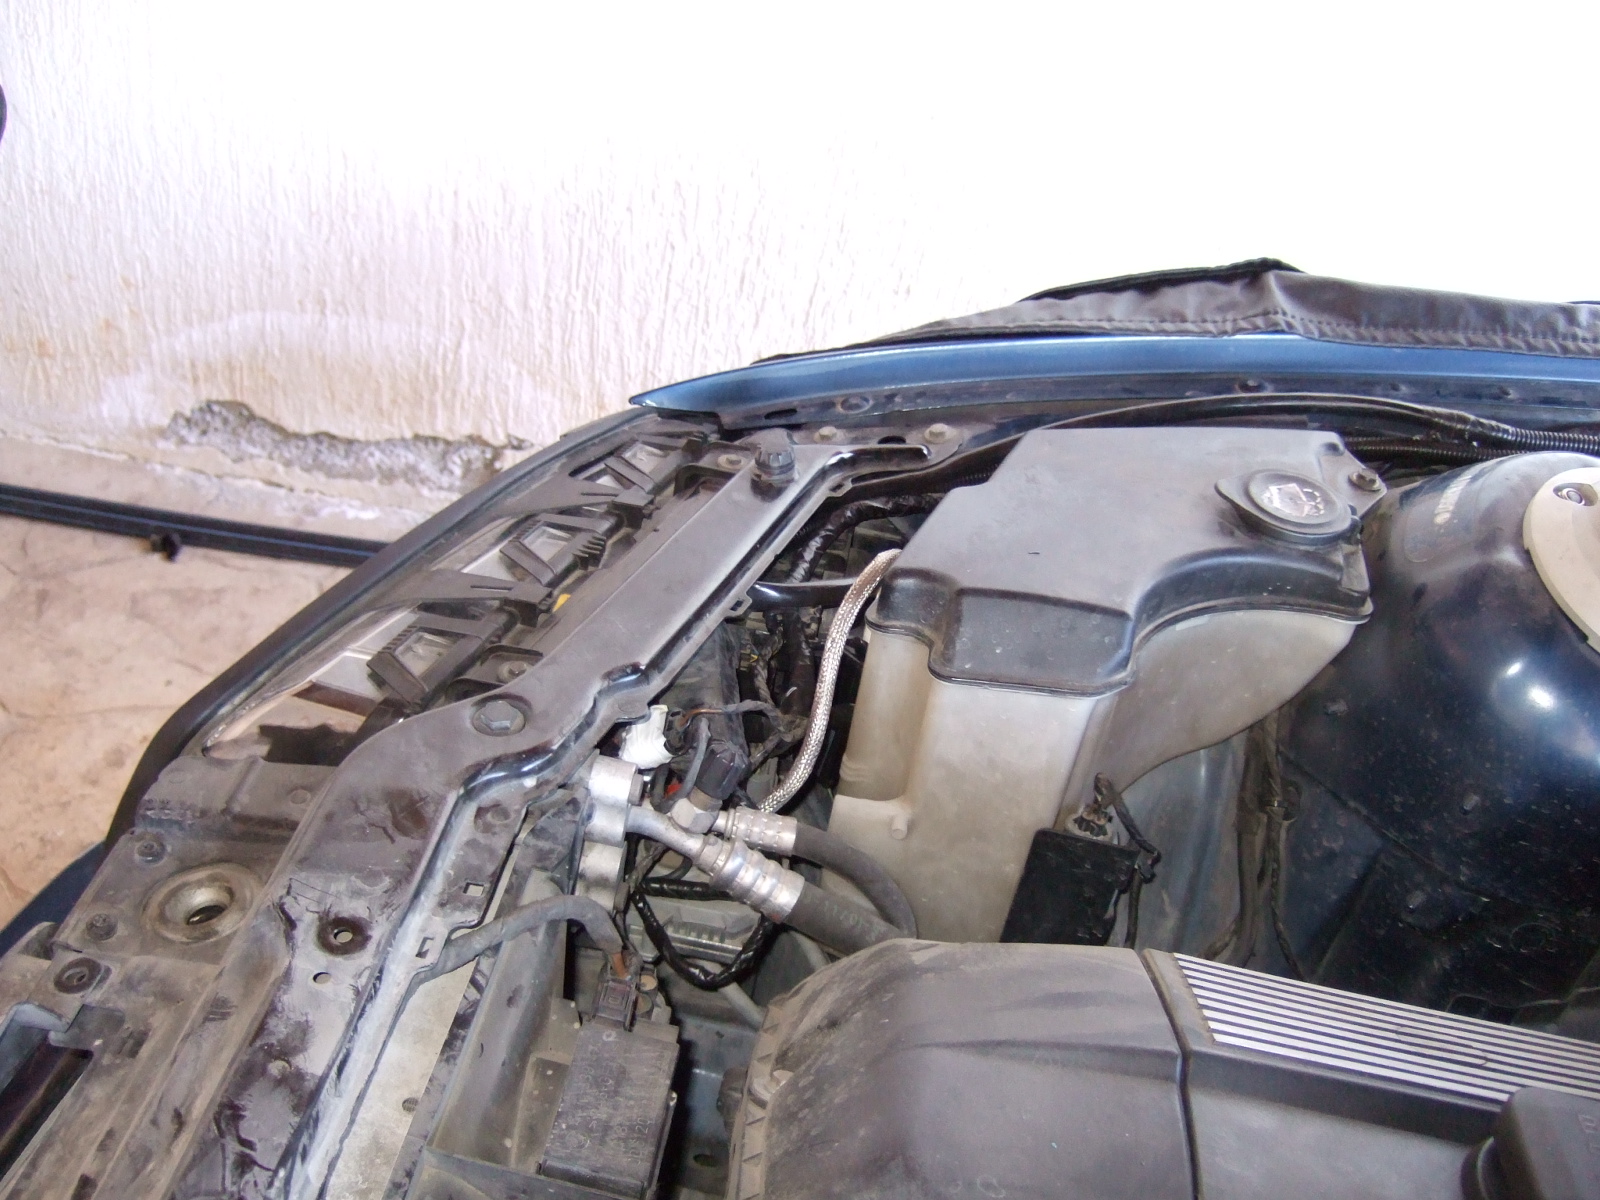
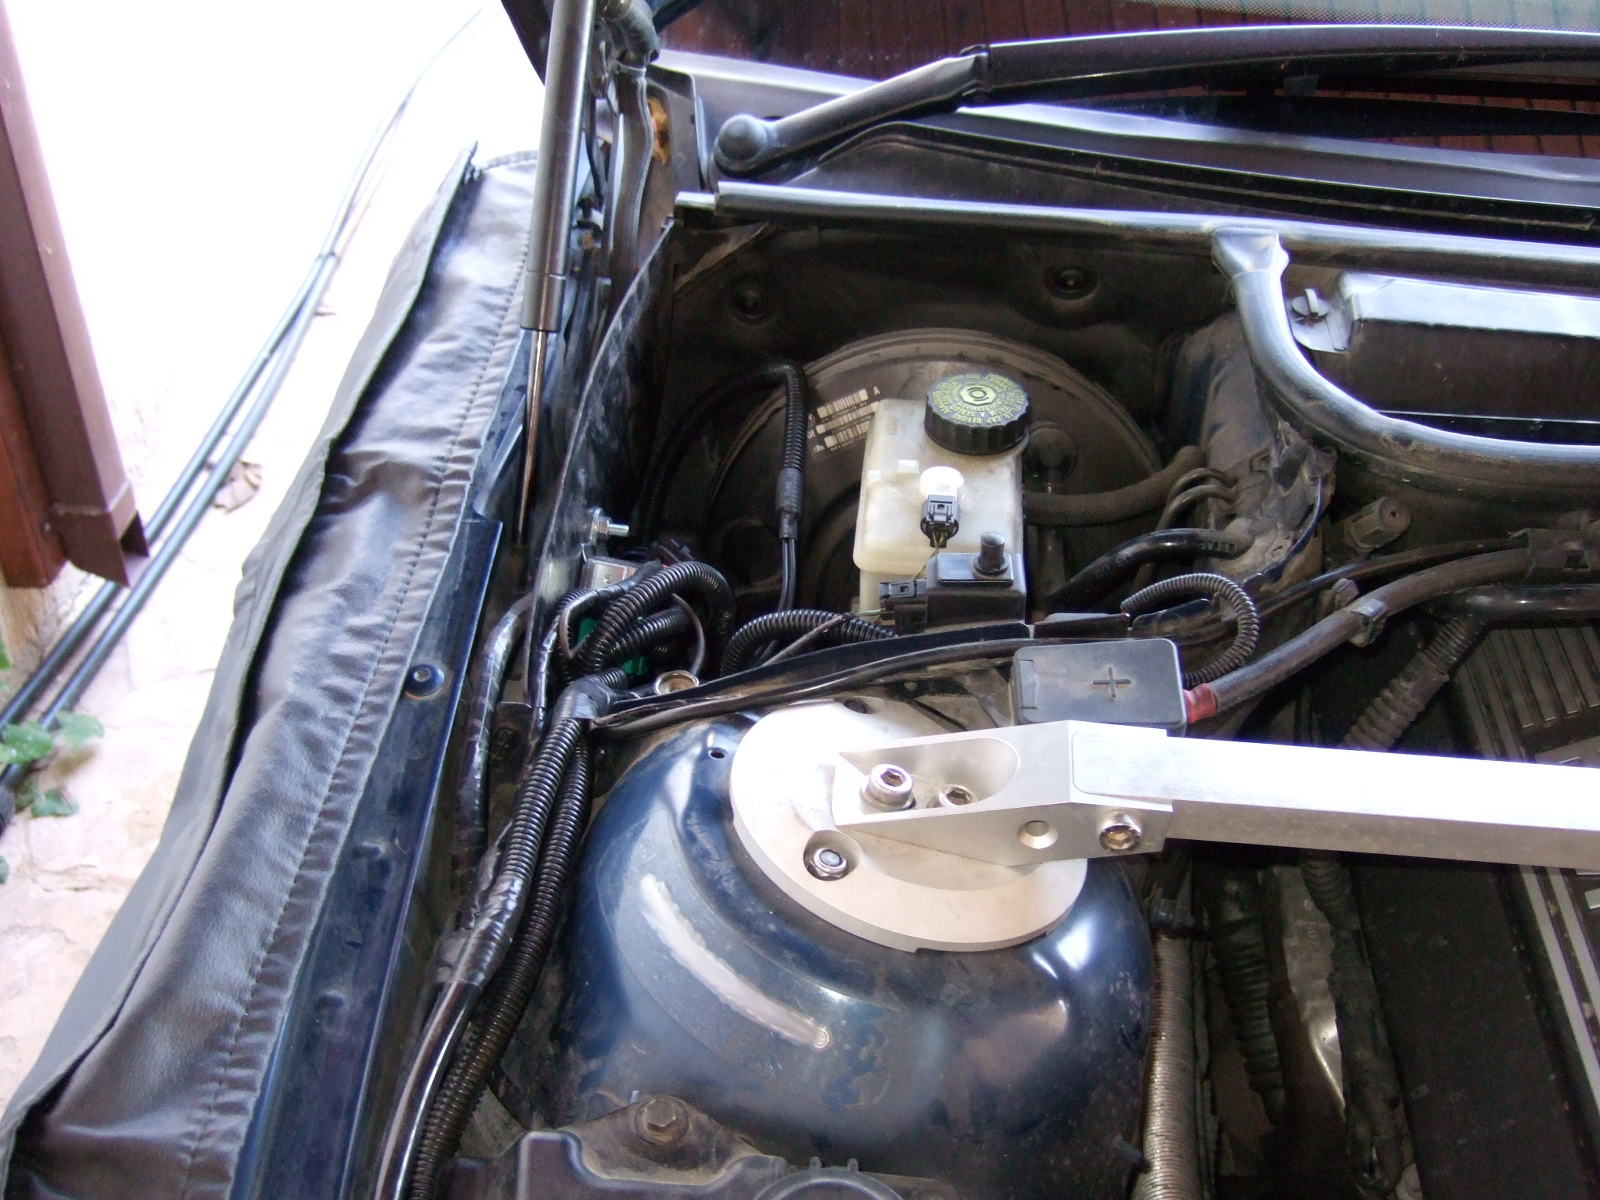
My brake booster aka drug bin cover, underneath of which the relays and connections will be done at a later stage. Hard disk magnet is good at catching screws that accidentally fell at random spot in the engine bay. Extensions on my electric screwdriver to reach headlight bolts.
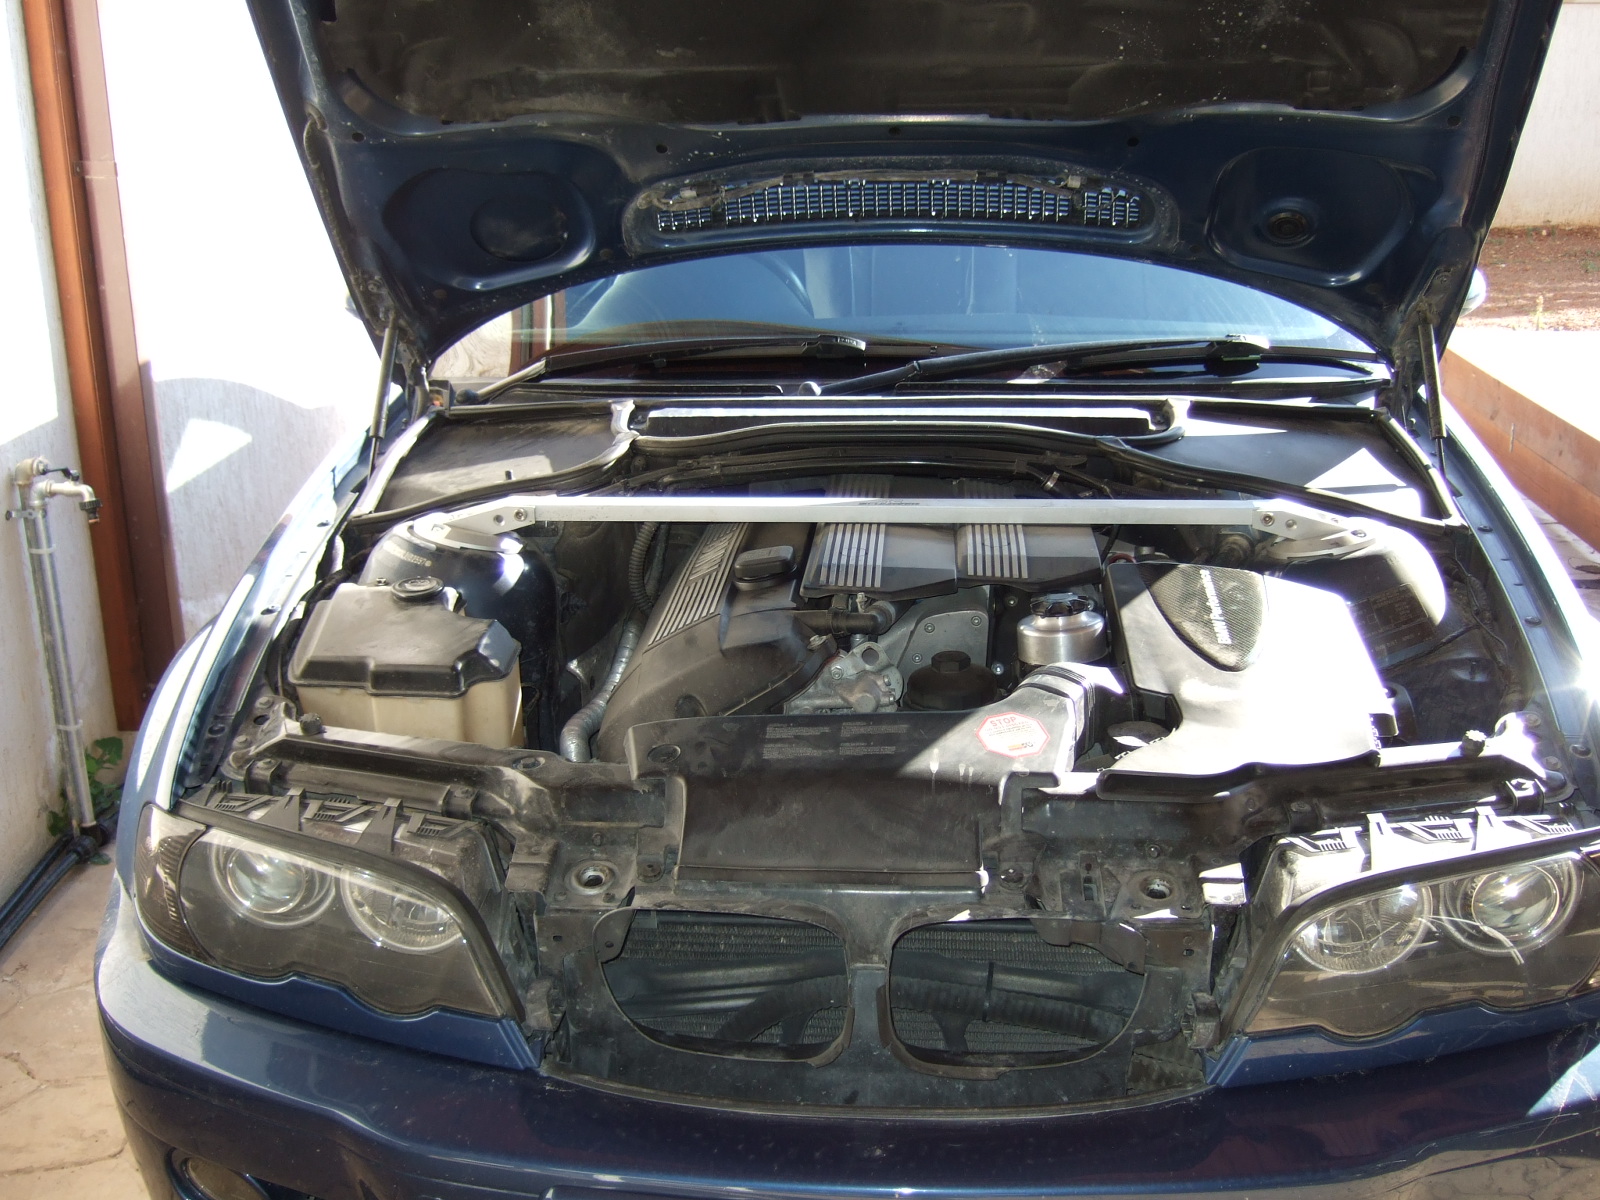
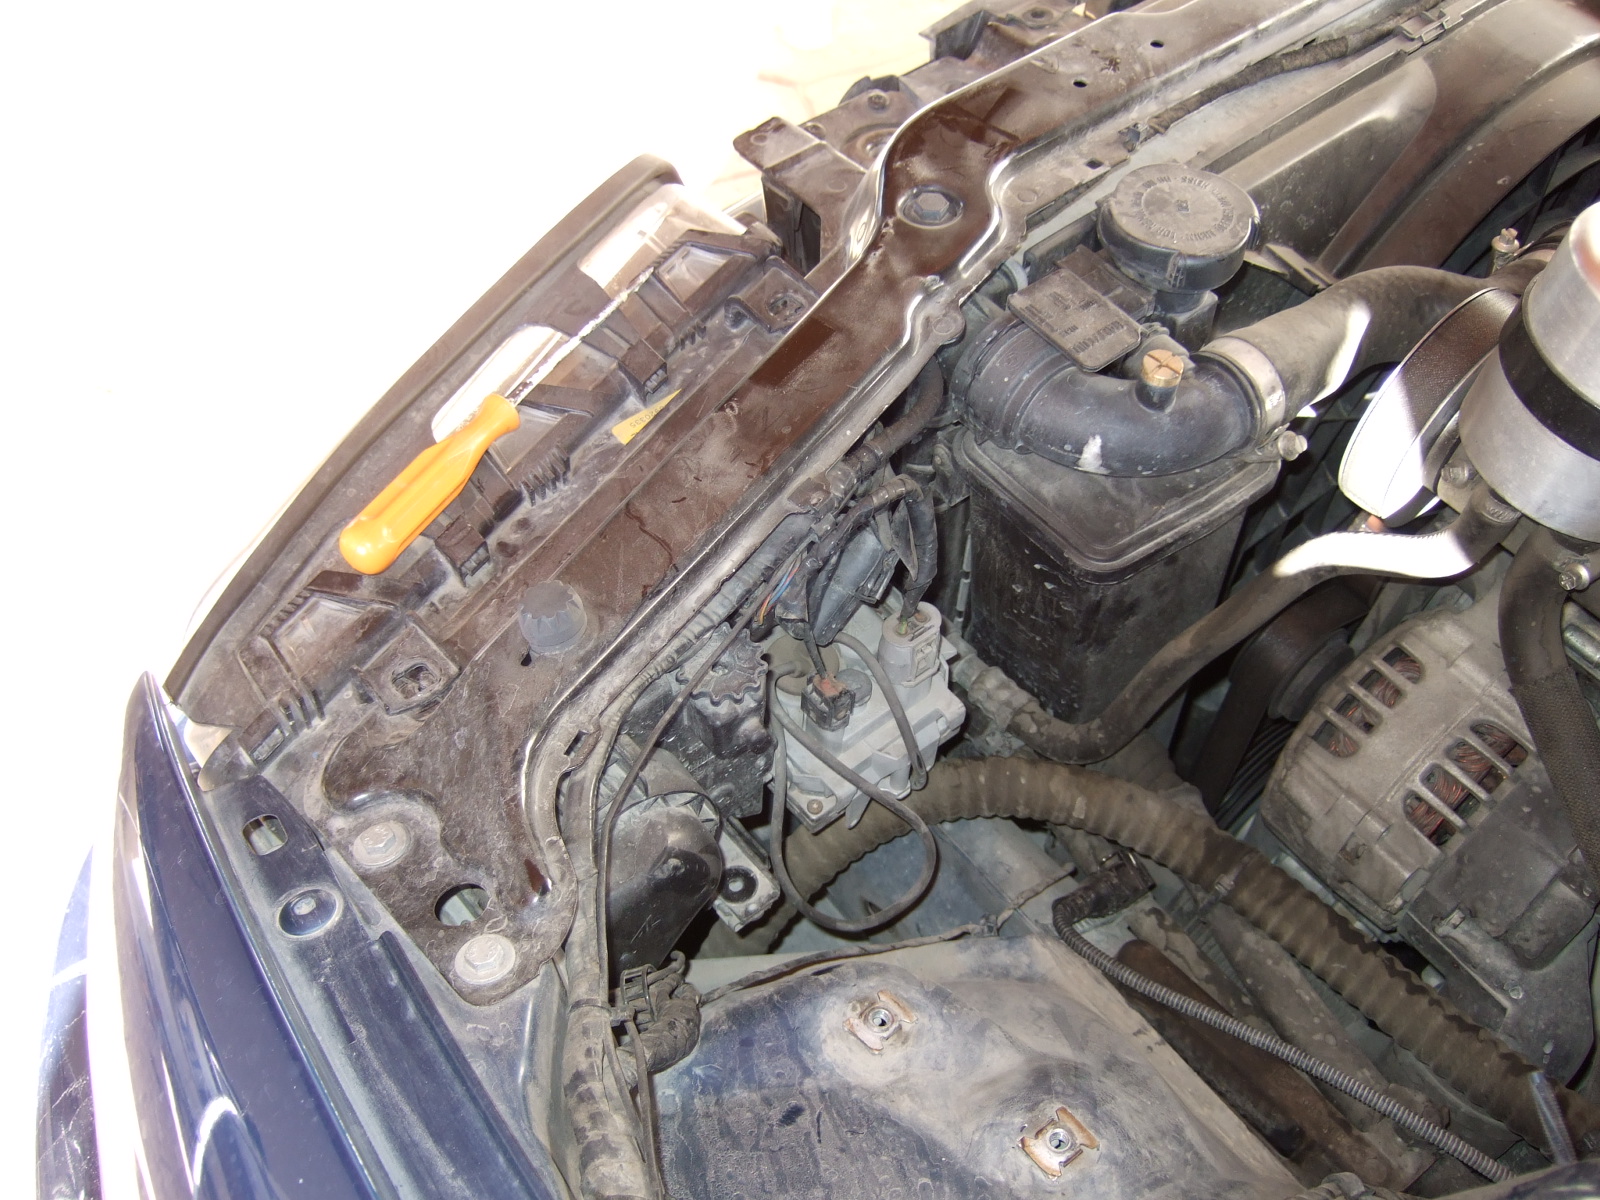
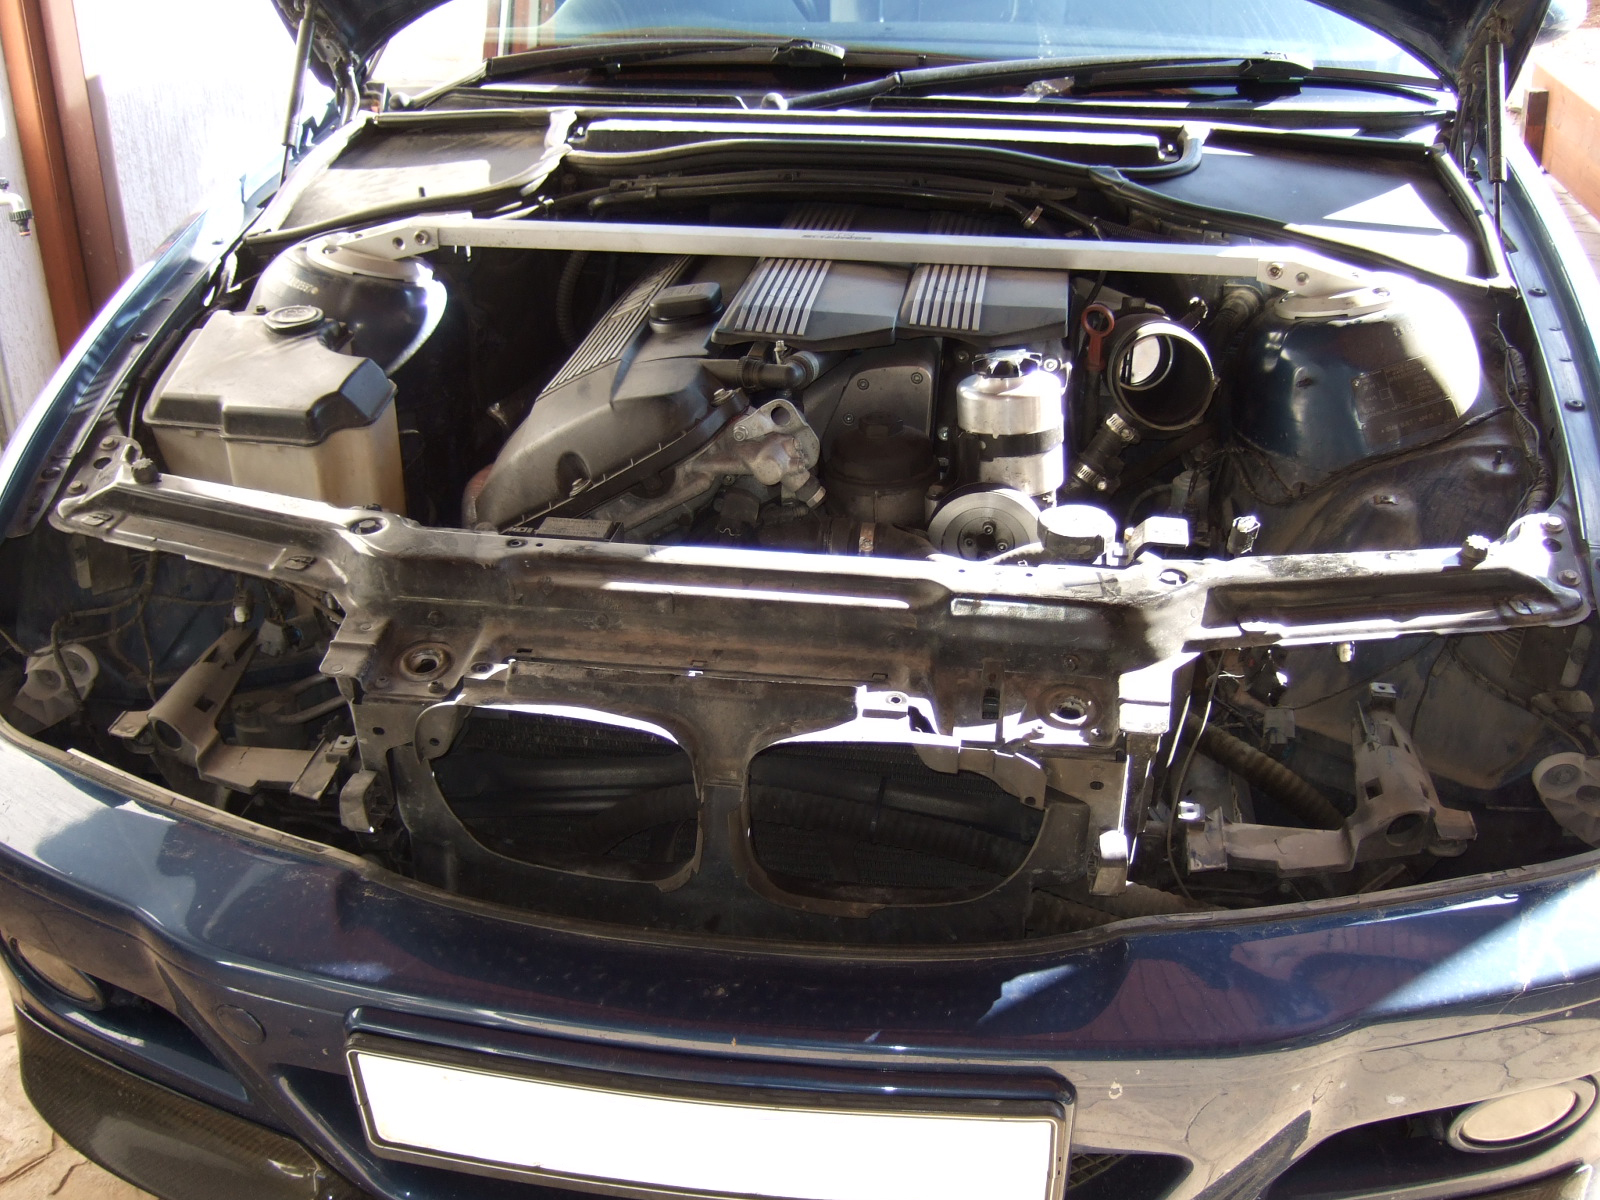
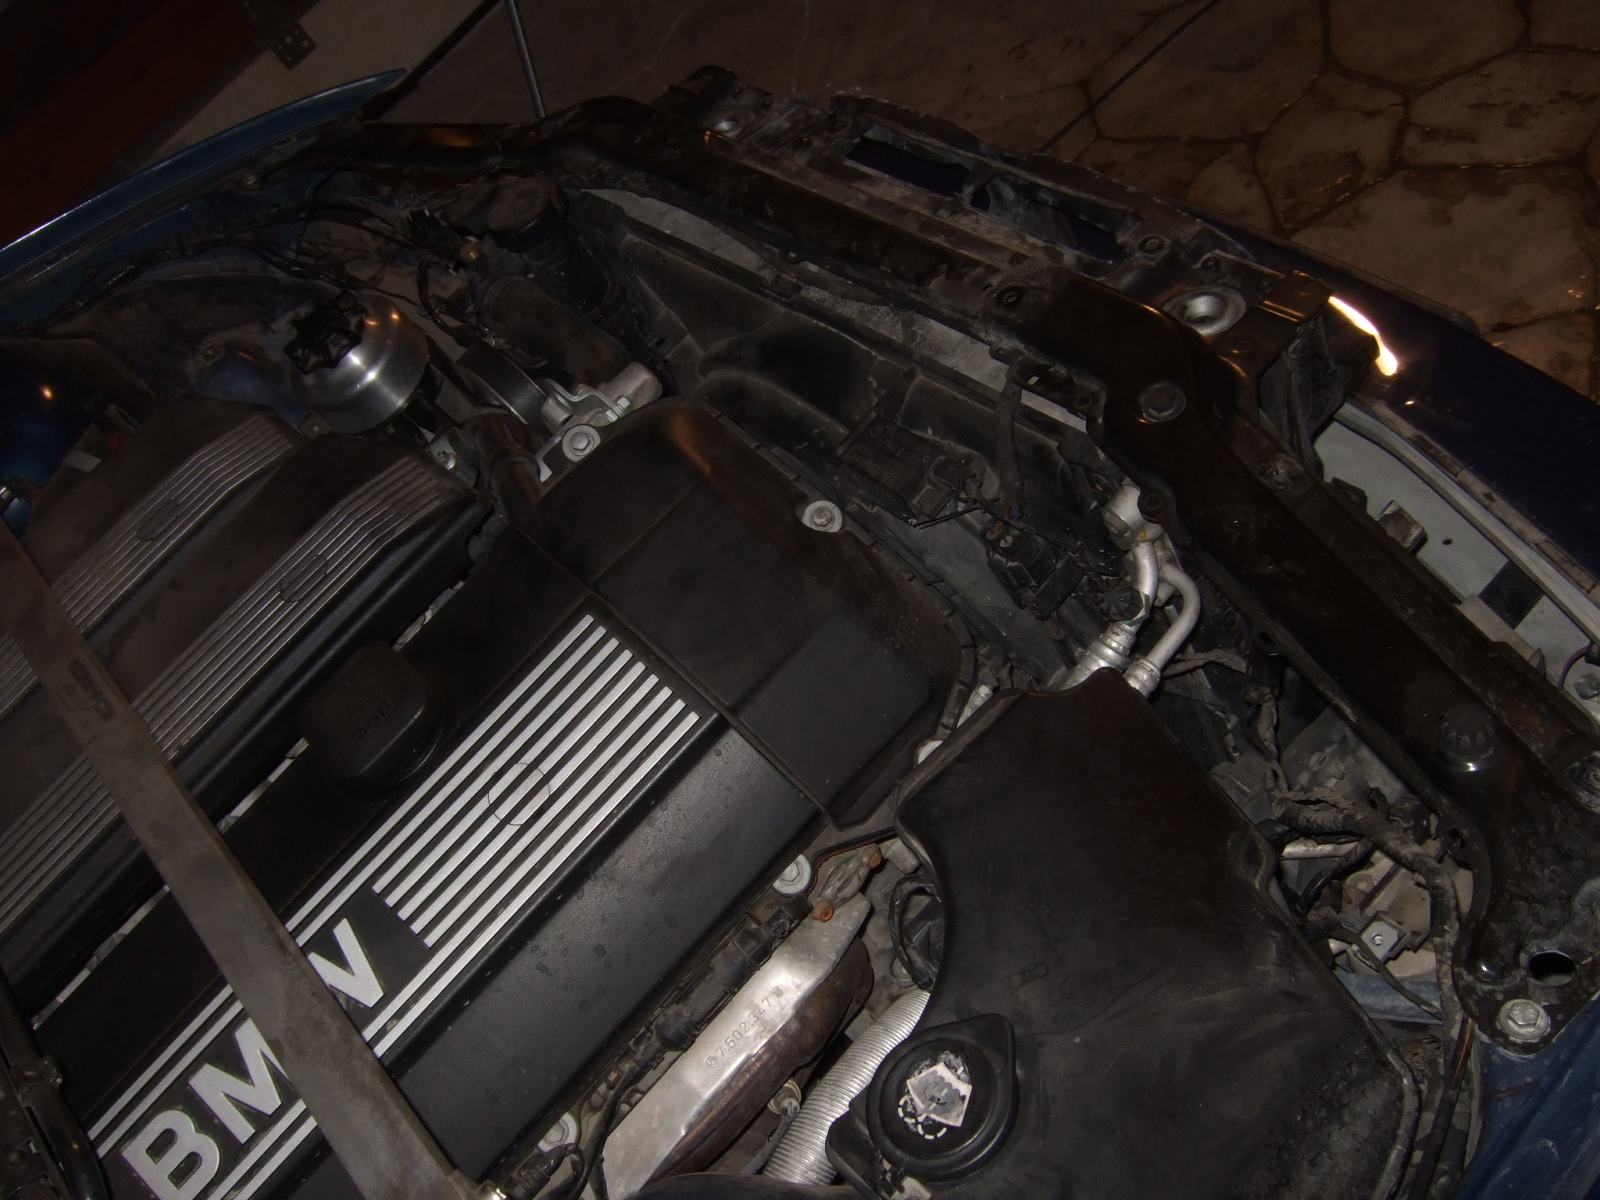
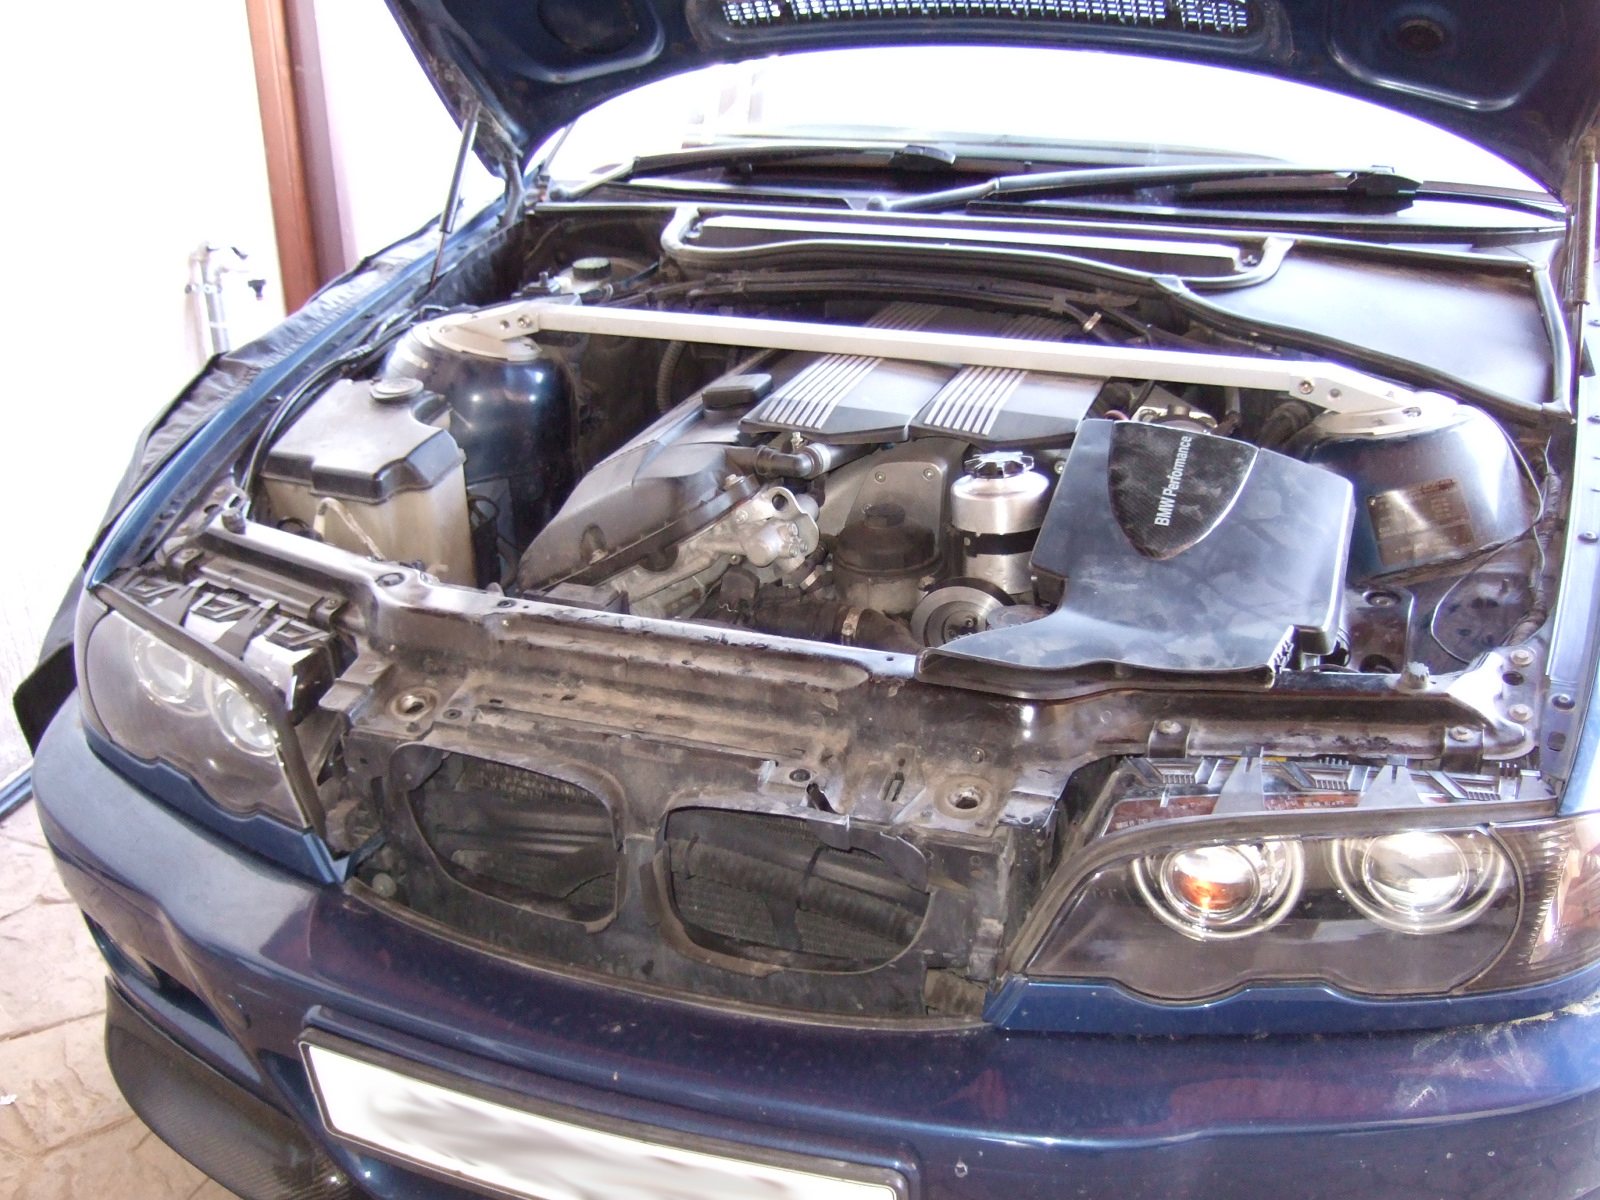
Airbox has to come out as well to give space. Before removing the headlights, don't forget to unplug everything, else you will be looking at buying new plugs from dealer.
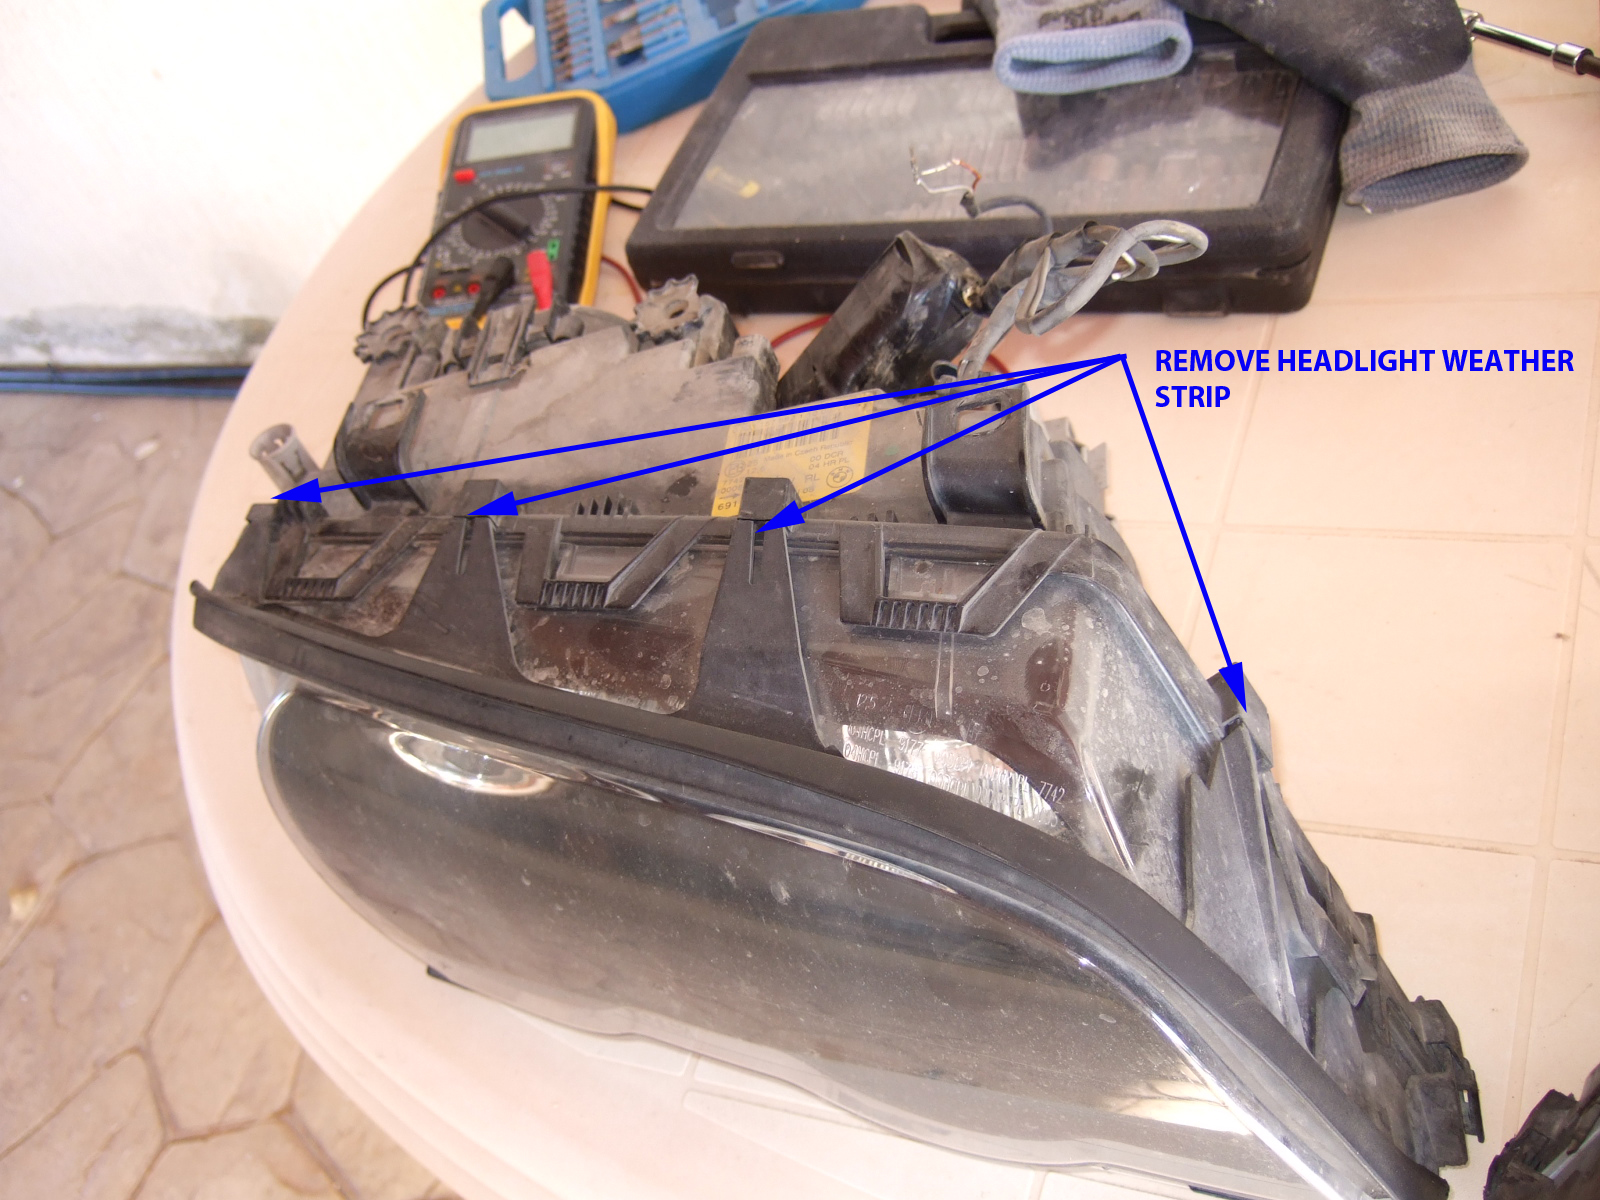
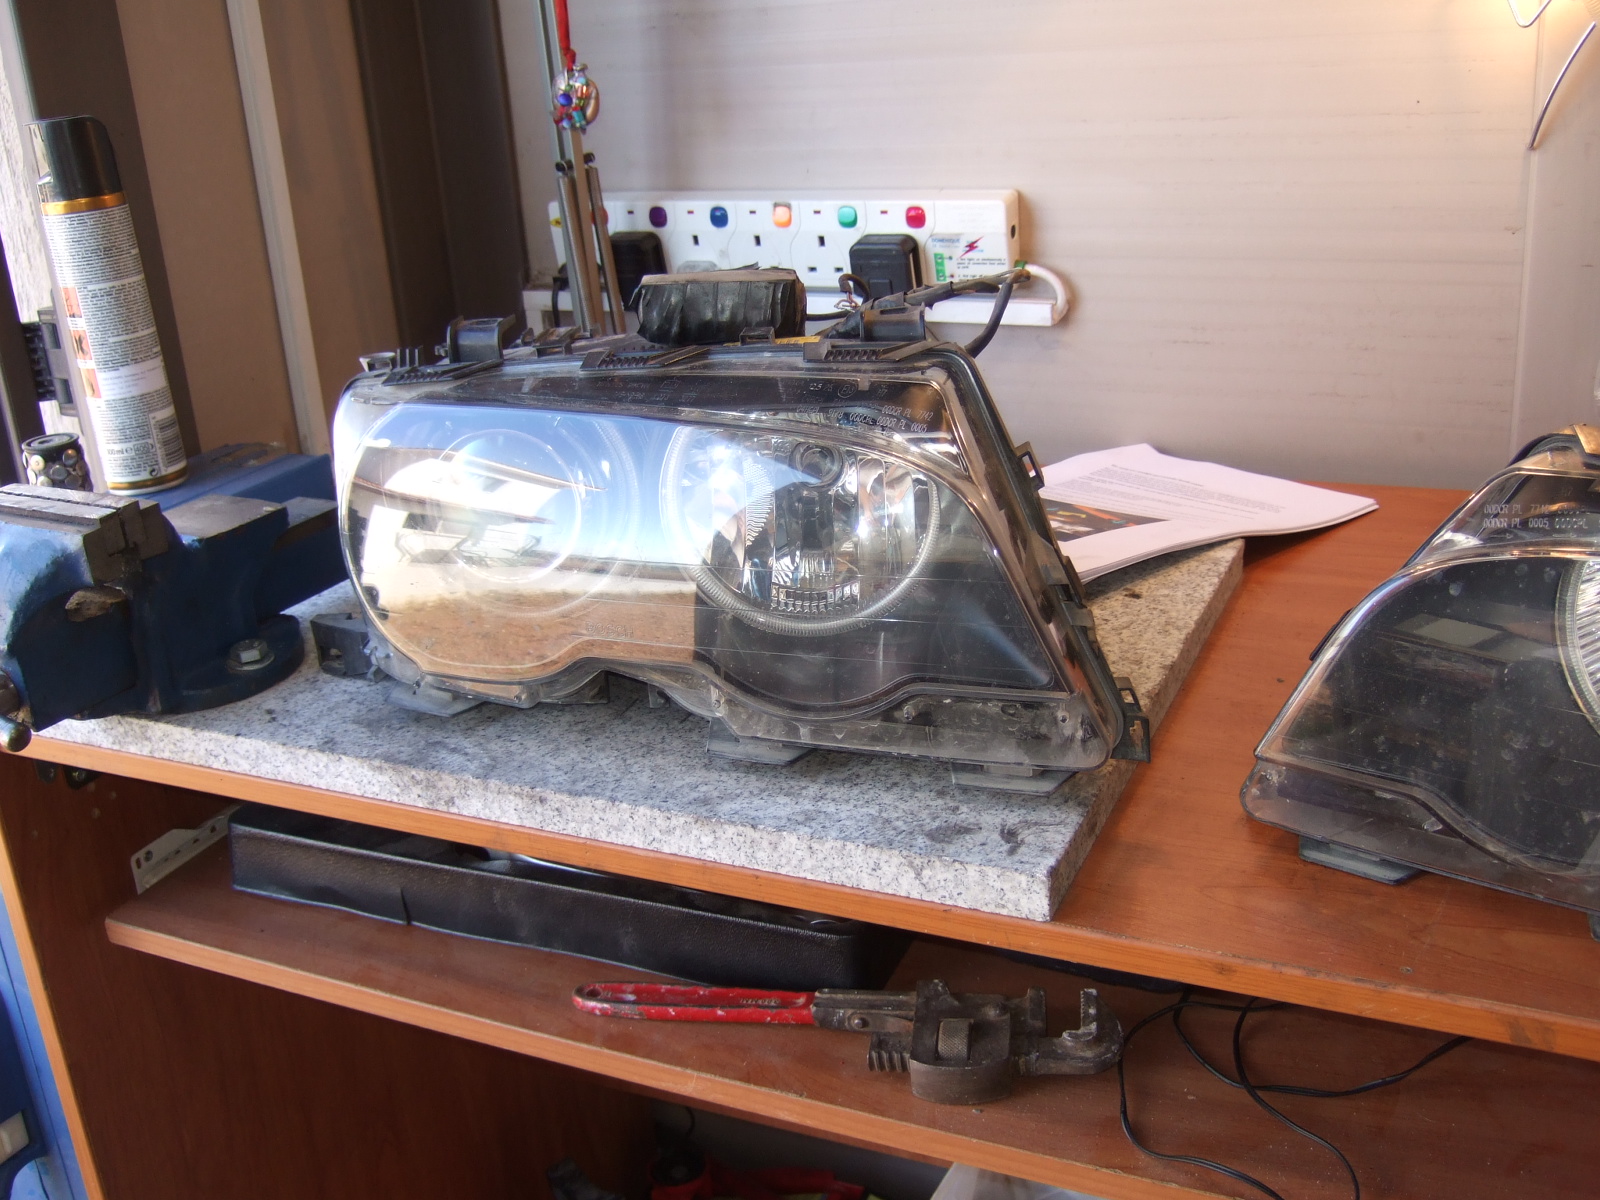
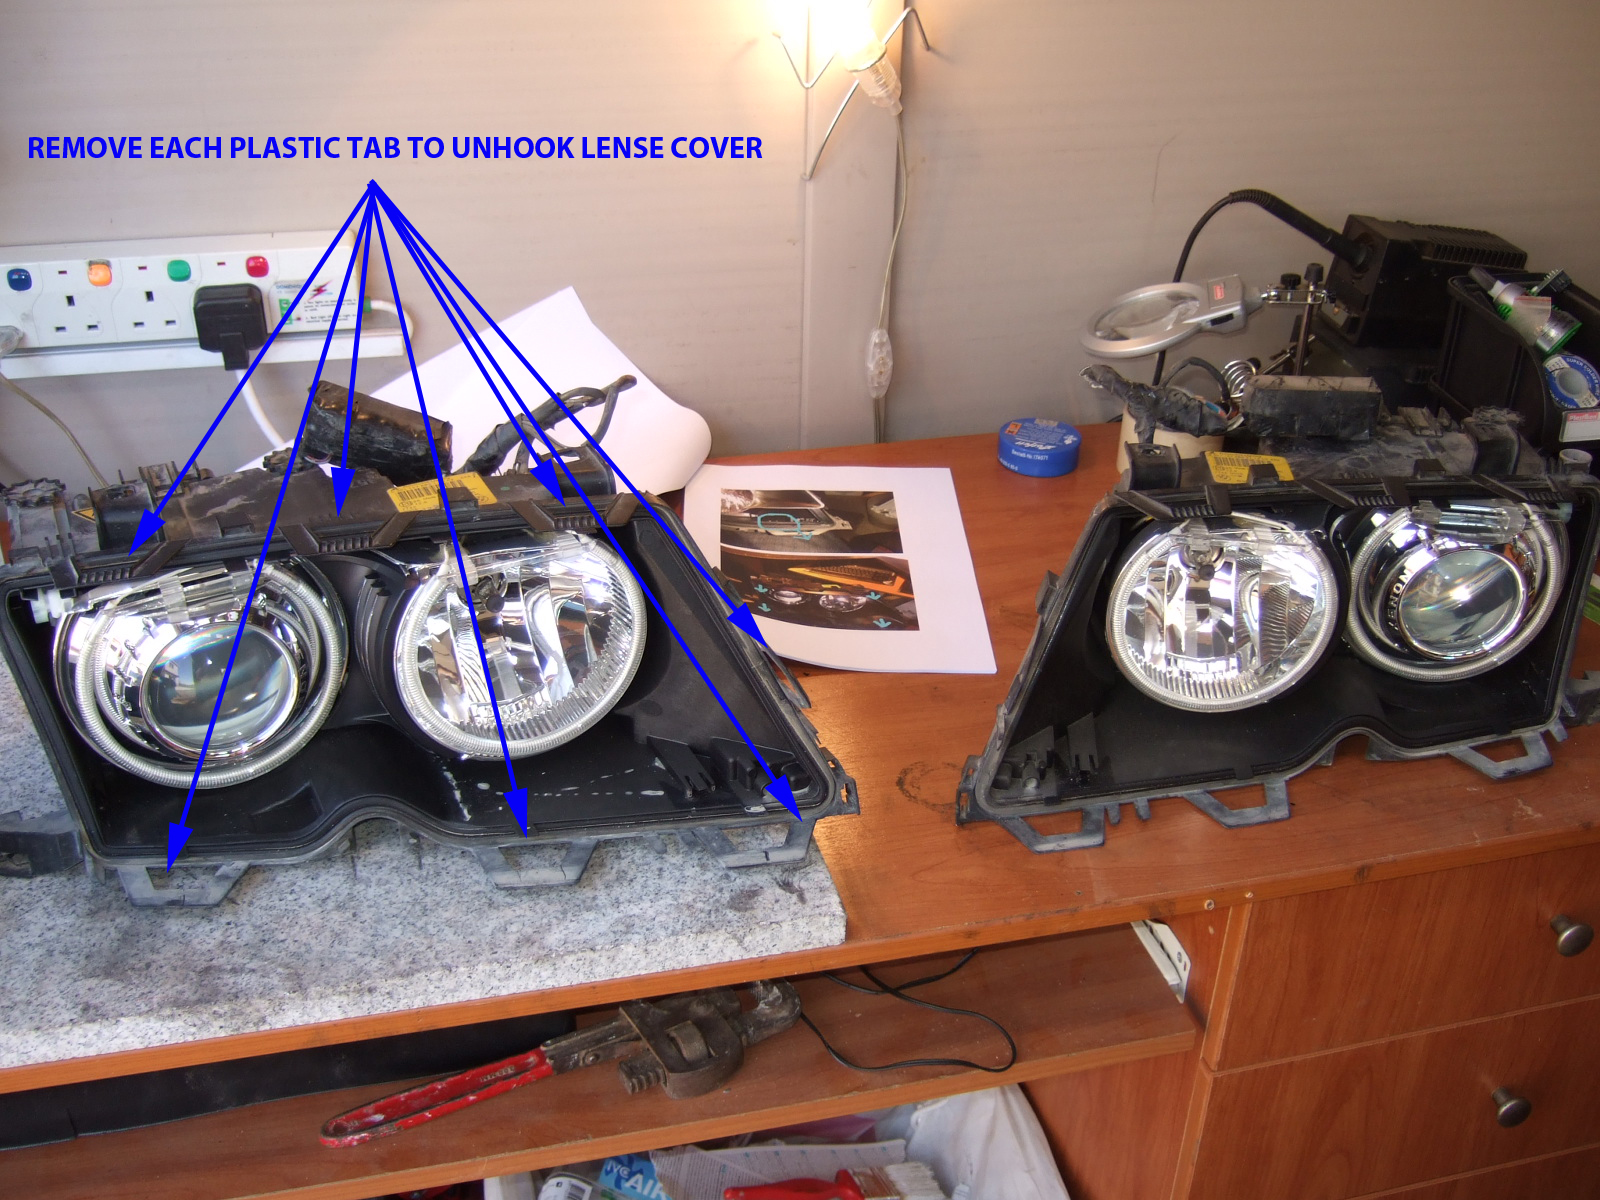
My car in "blind mode" Last view before disassembly process begins The basic: Take the rubber weather strip out from the 4 prongs. If it's rotten, time for a new one from dealer. www.realoem.com for part numbers. And onto my work bench: Remove the headlight cover by lifting the 3 plastic tabs on the top, working your way around it. The pre-facelift cover is not glued and should pop out once all prongs are released from tension.
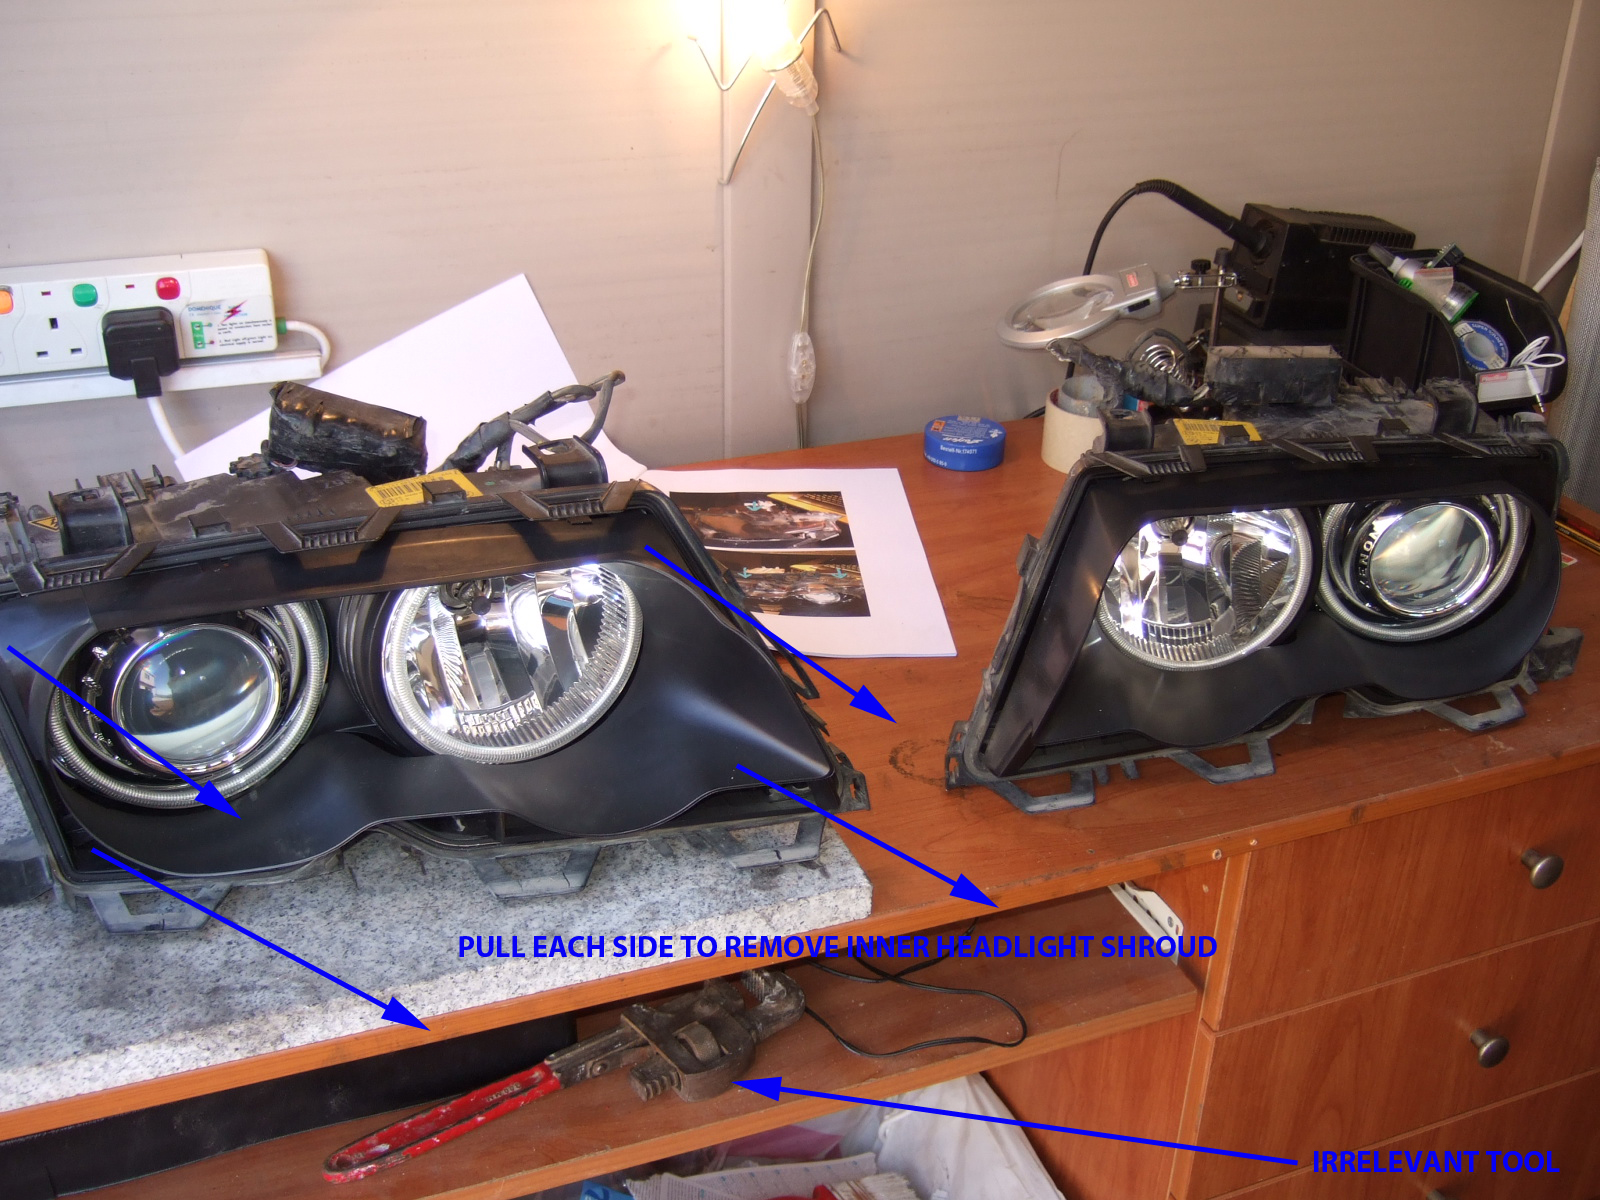
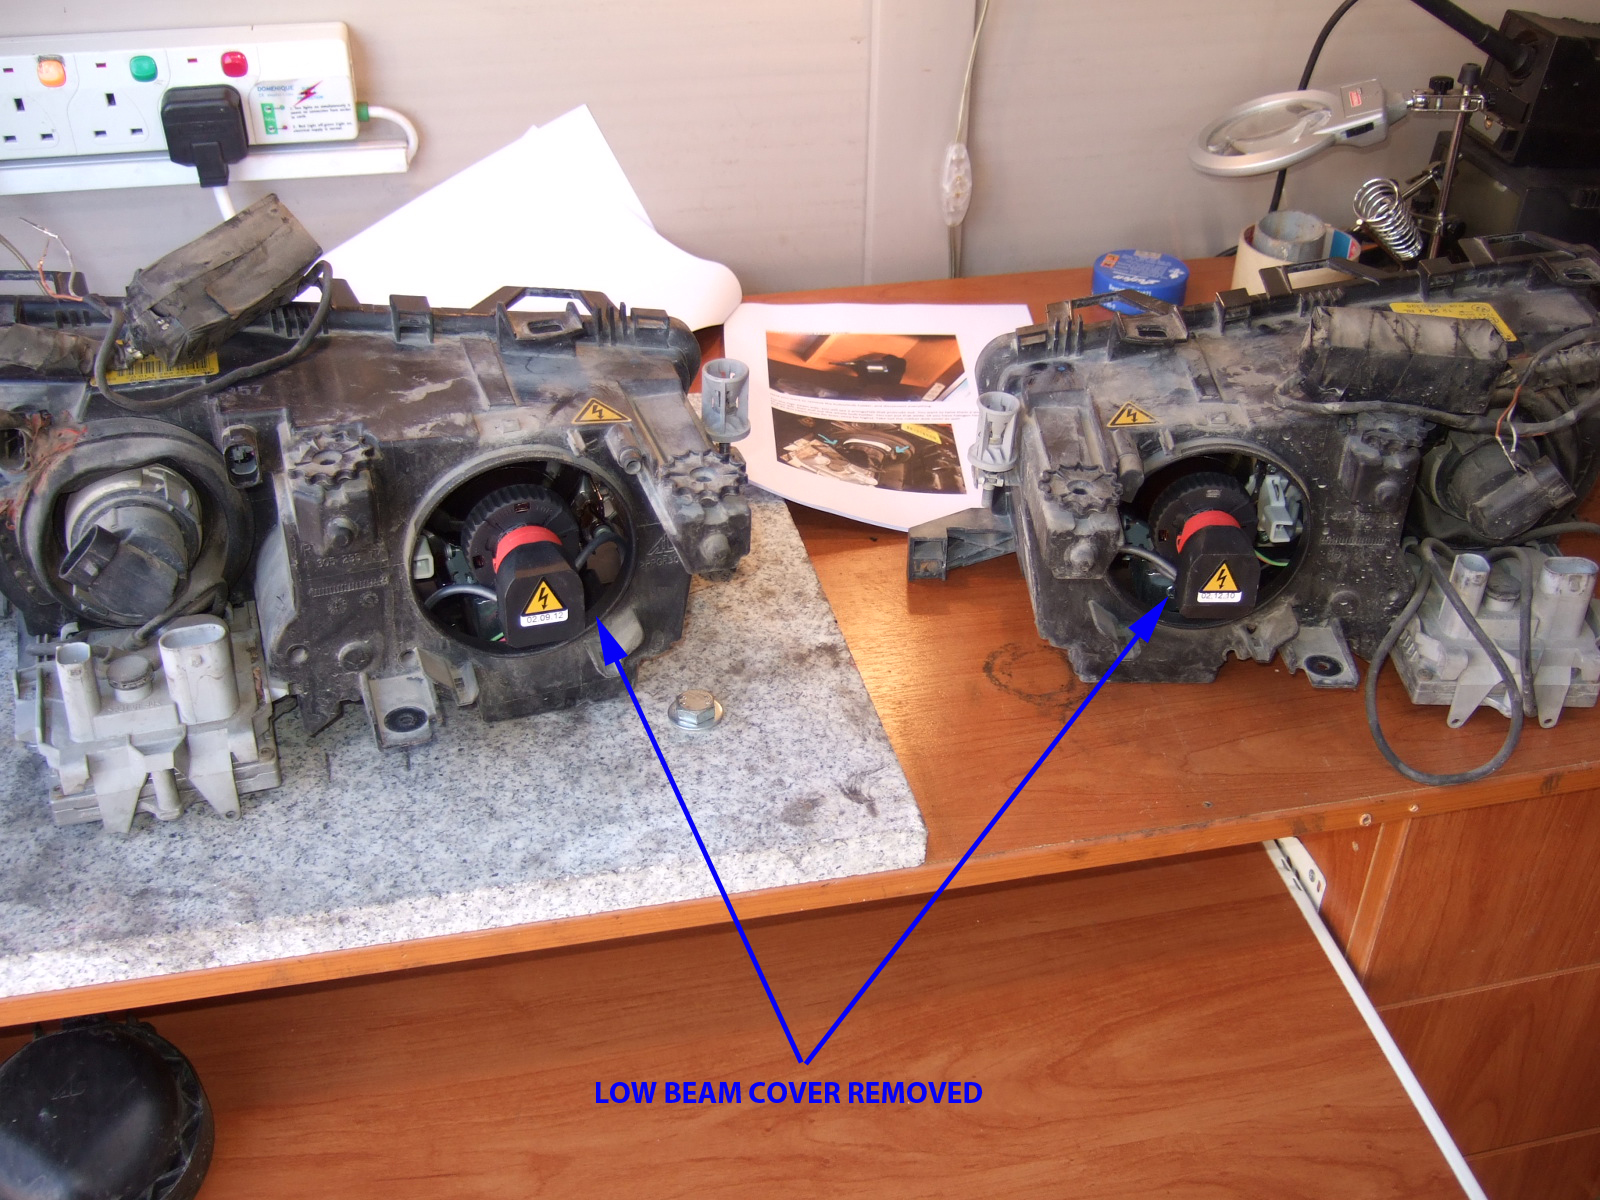
Also remove the inner headlight shroud by pulling outwards you from the 4 corners. Since we only have 2 hands, you can make one side each time. Remove low beam covers and set aside.
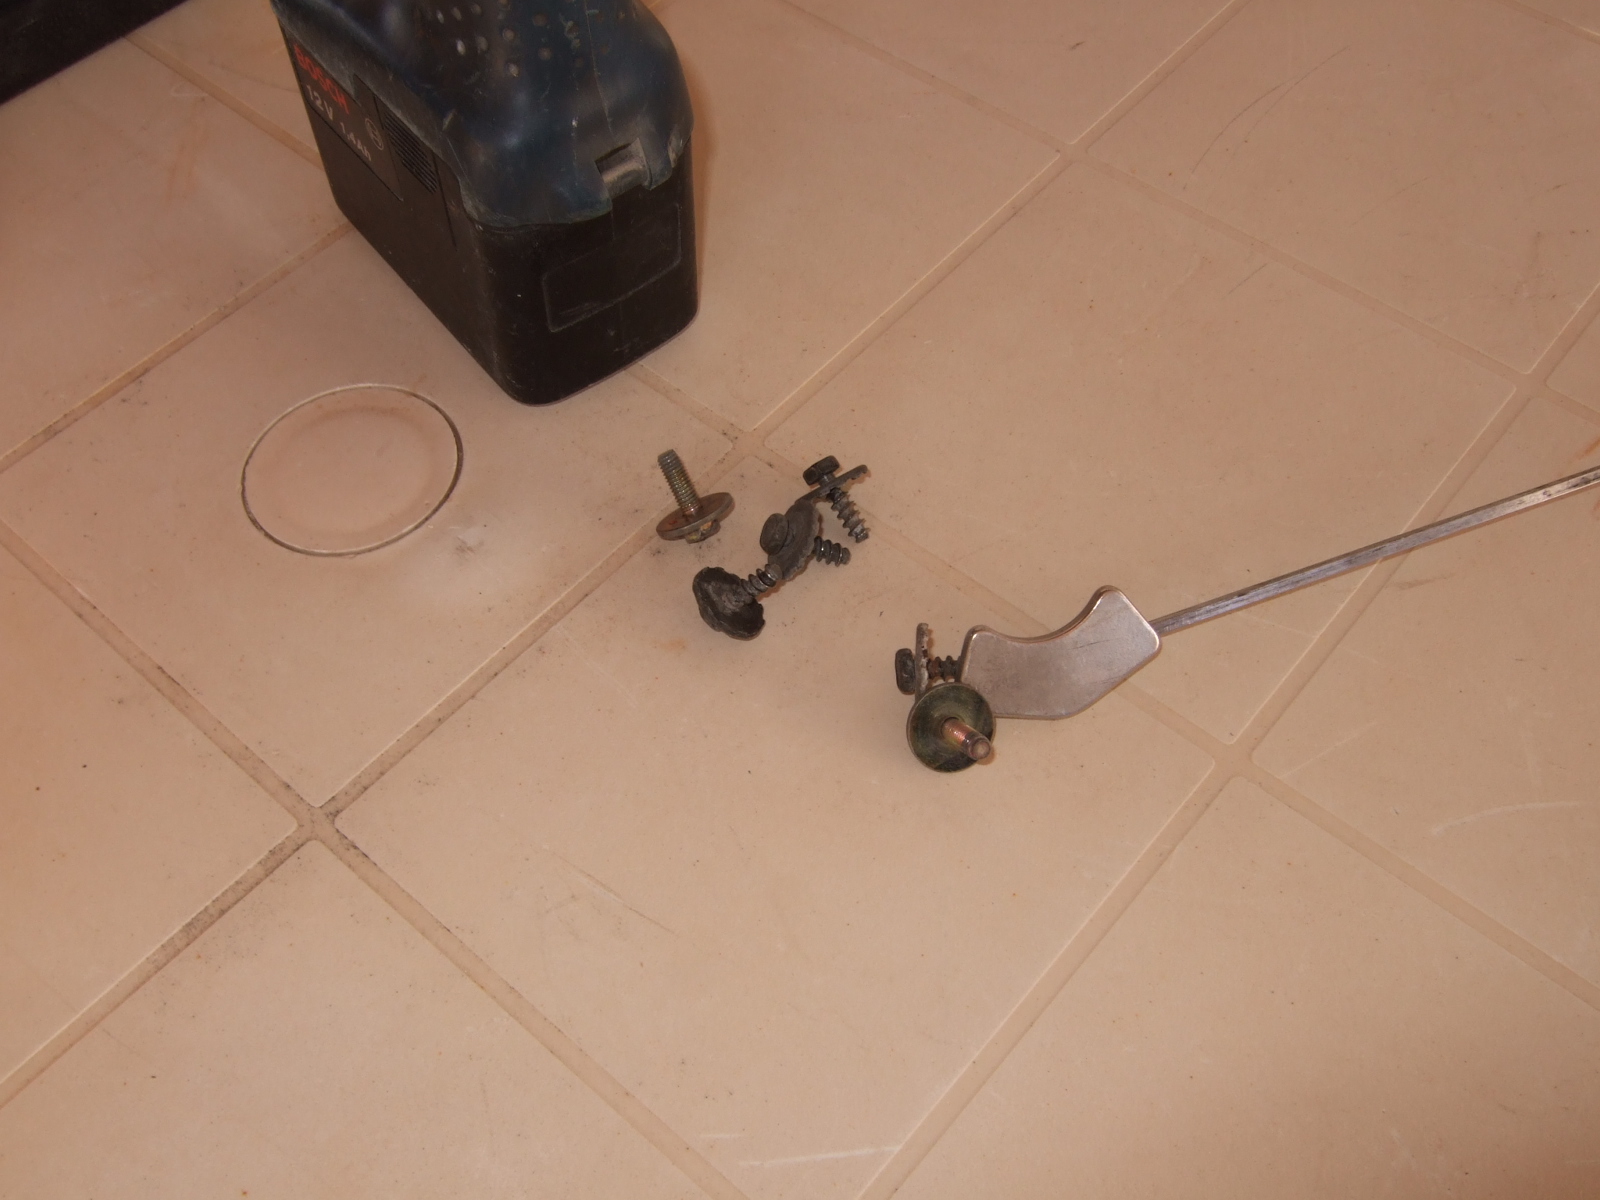
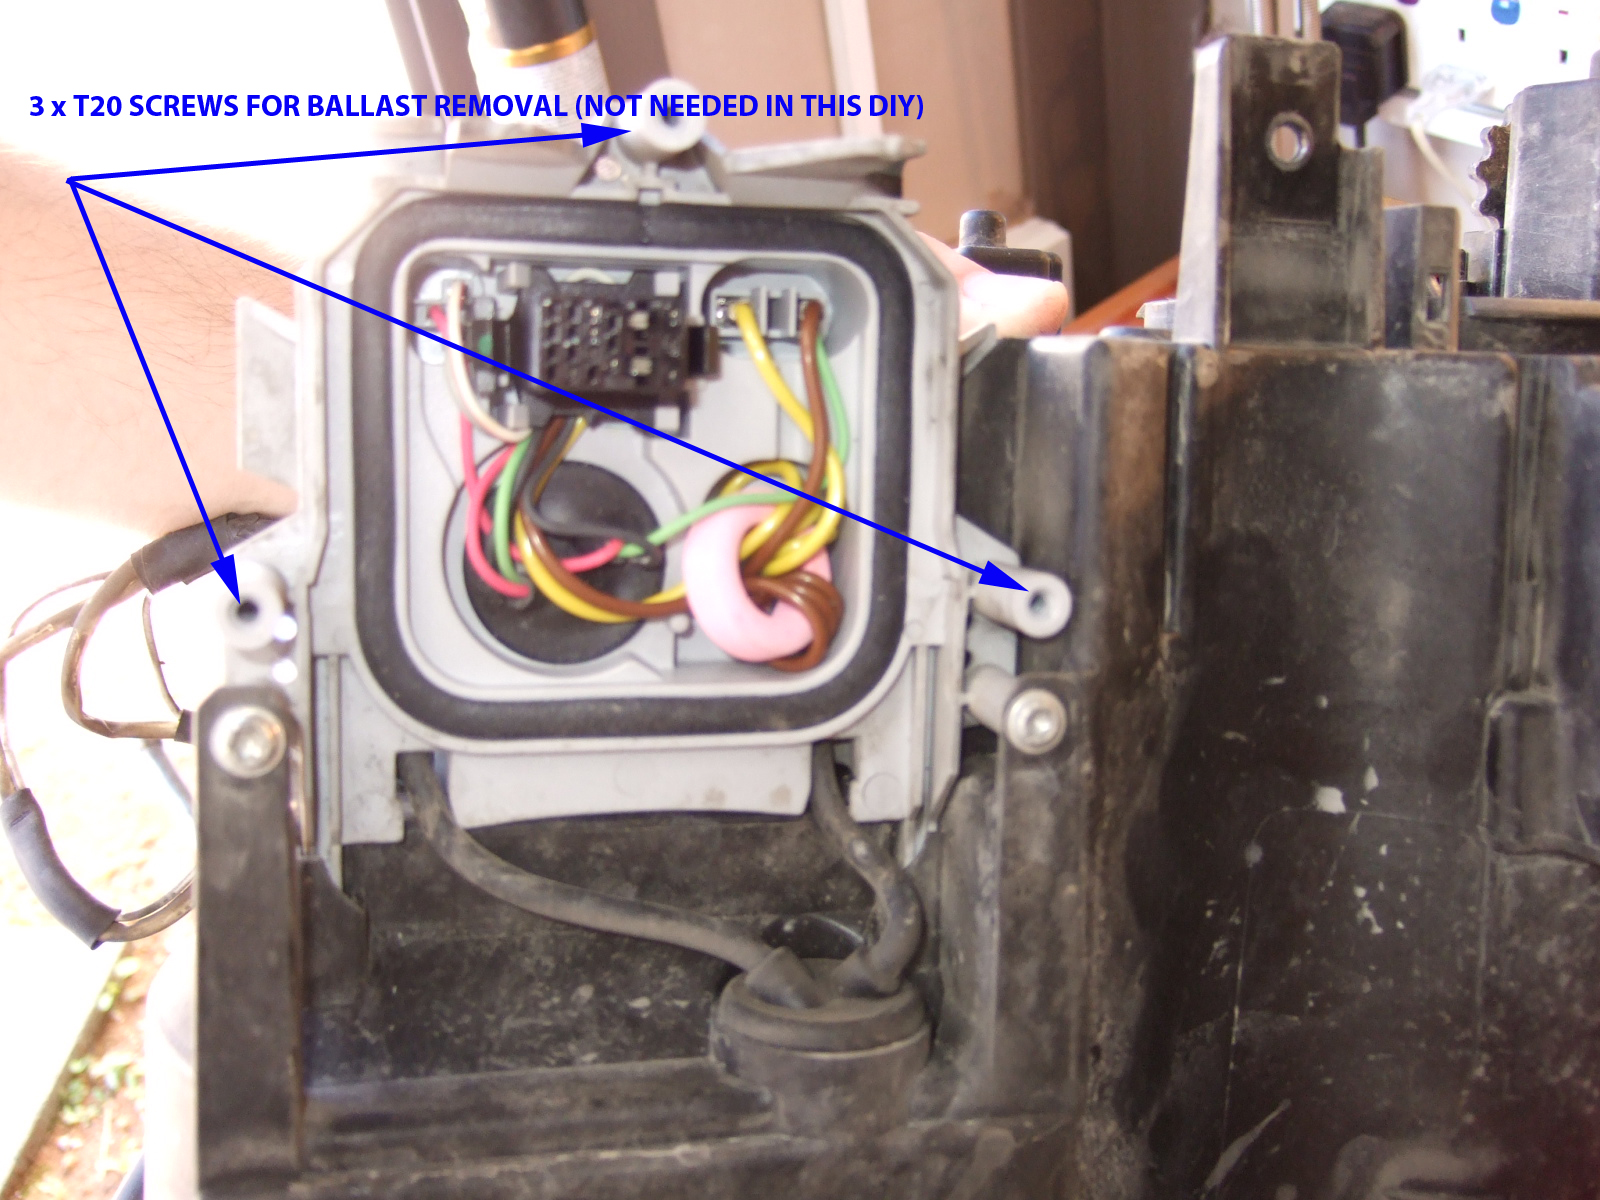
Although not necessary, in order to remove the ballast, you'll need to remove the 3x T20 screws that hold it in place:
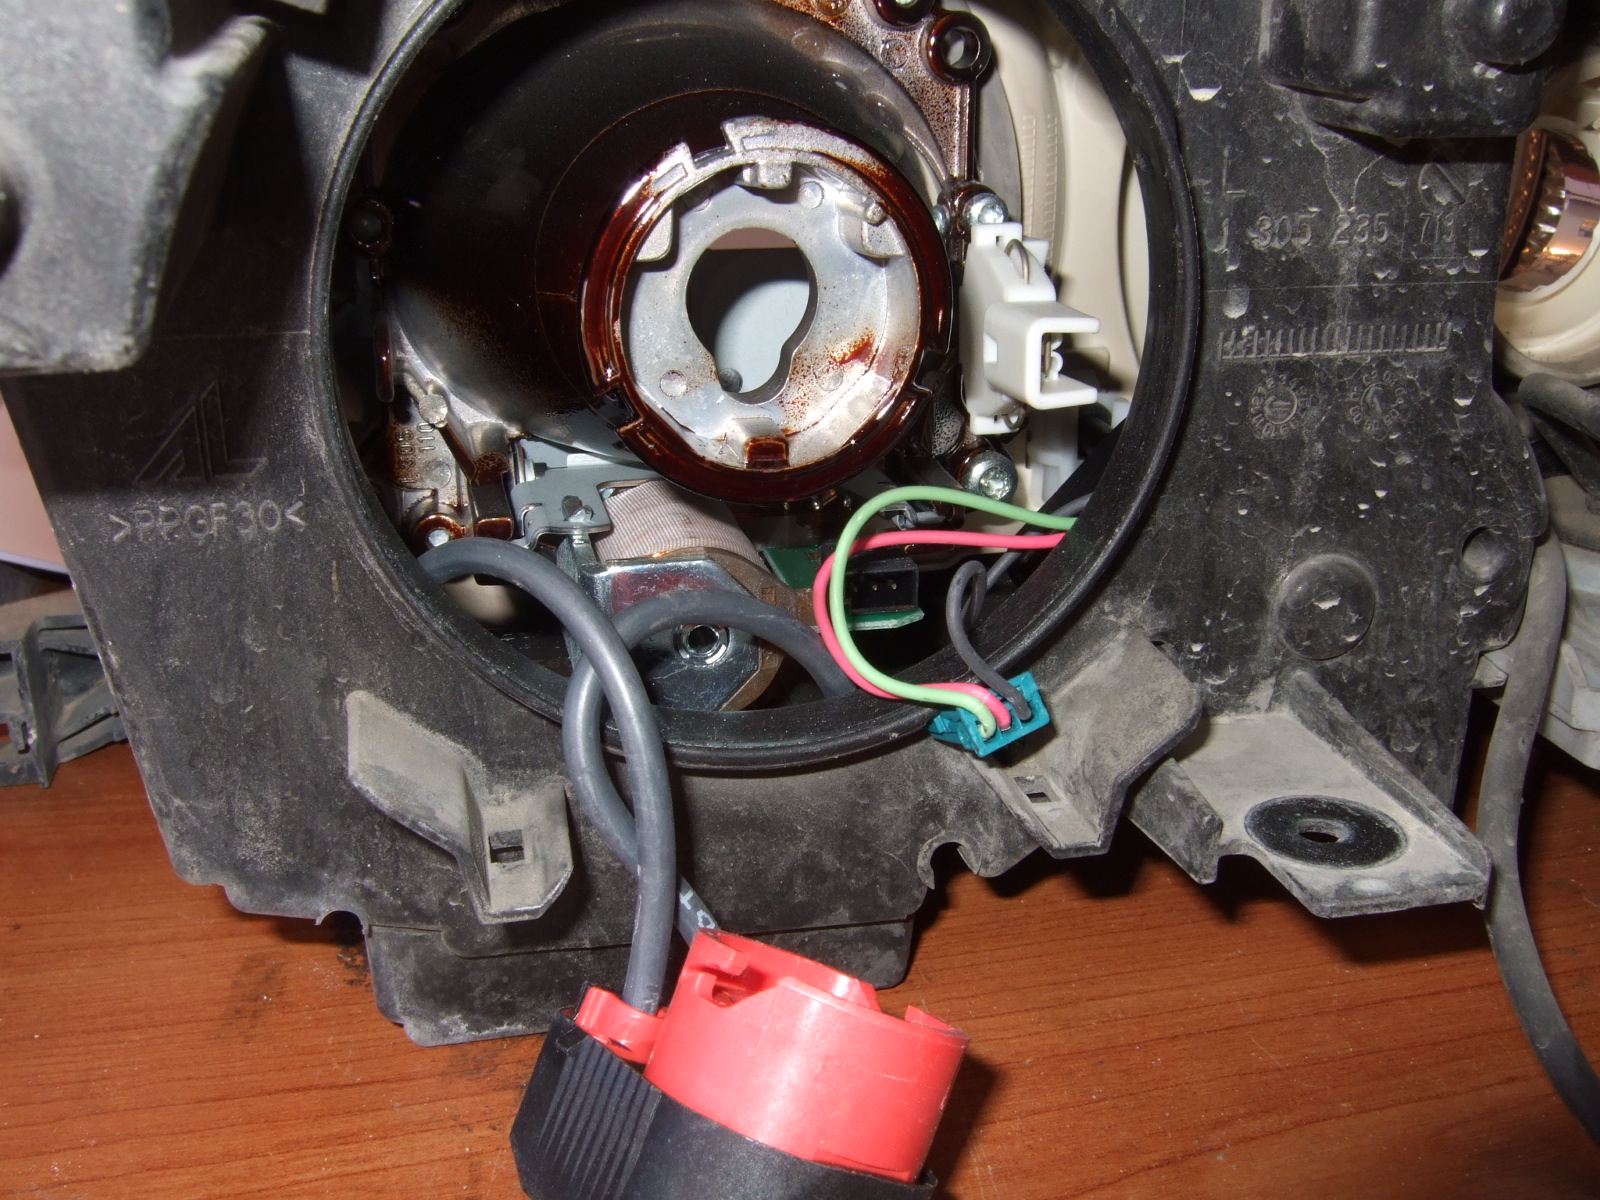
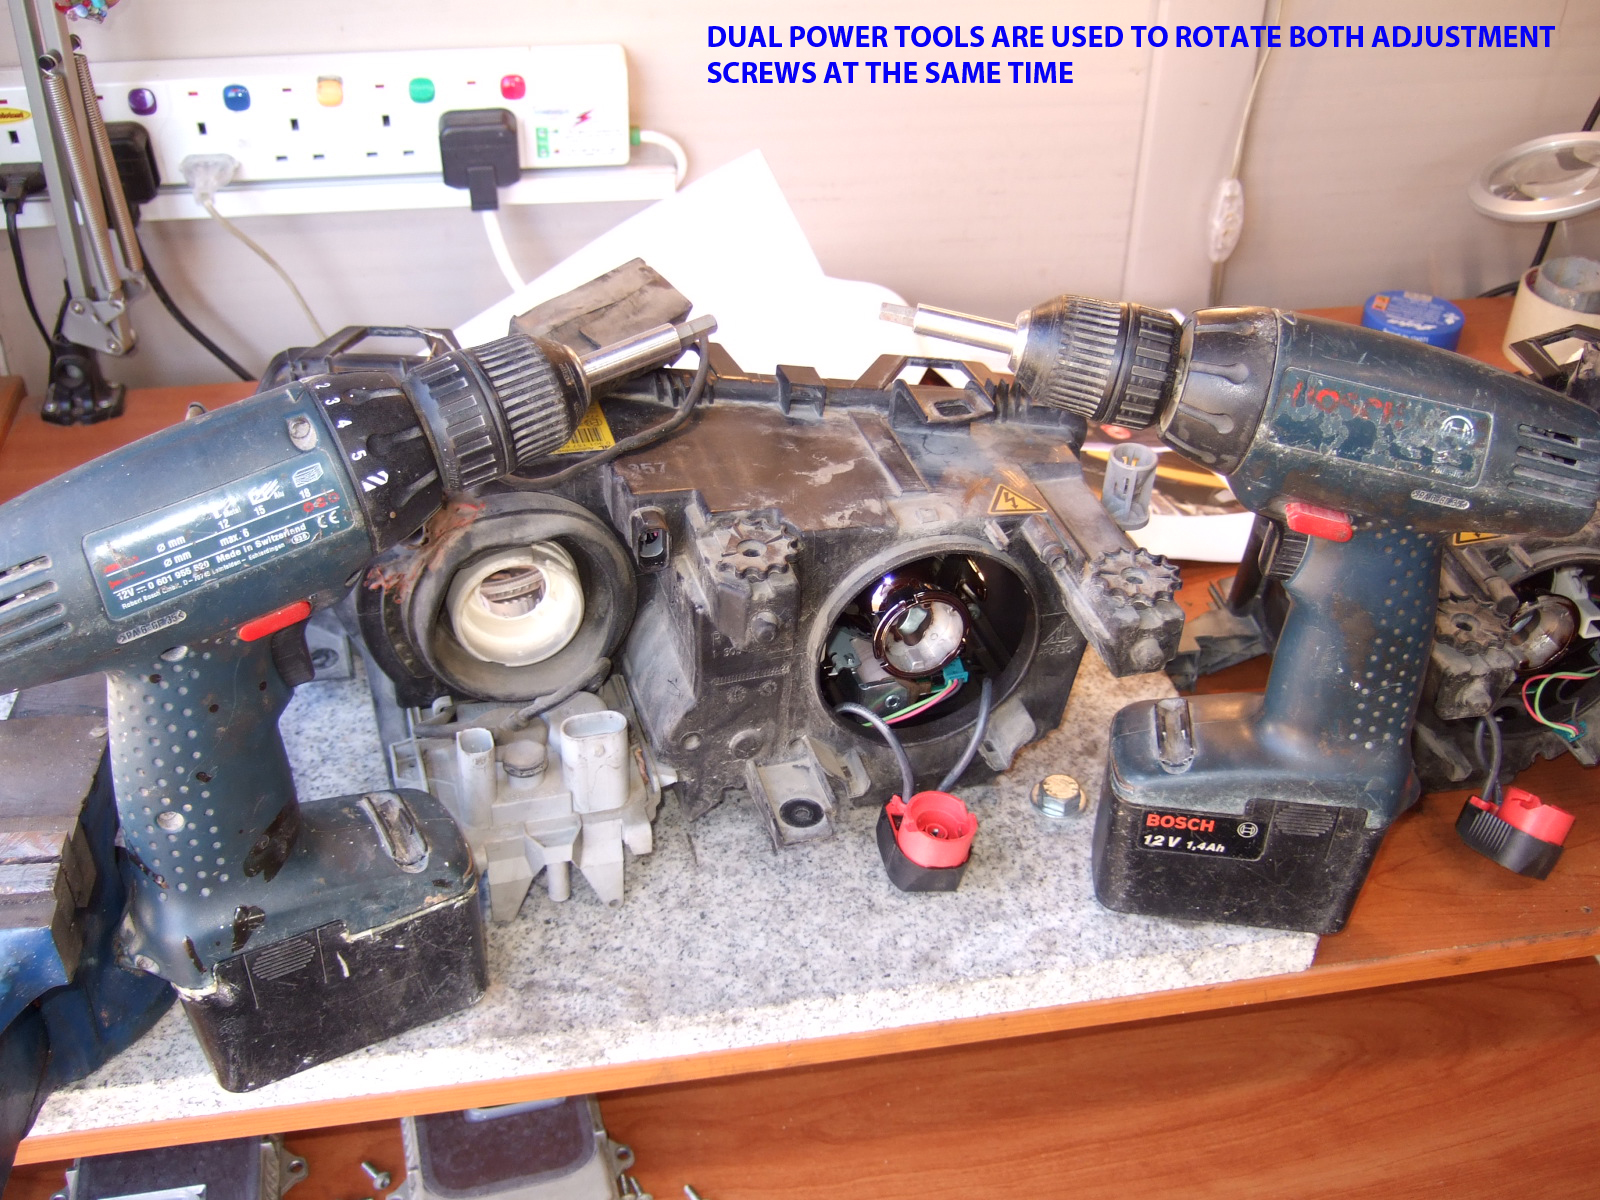
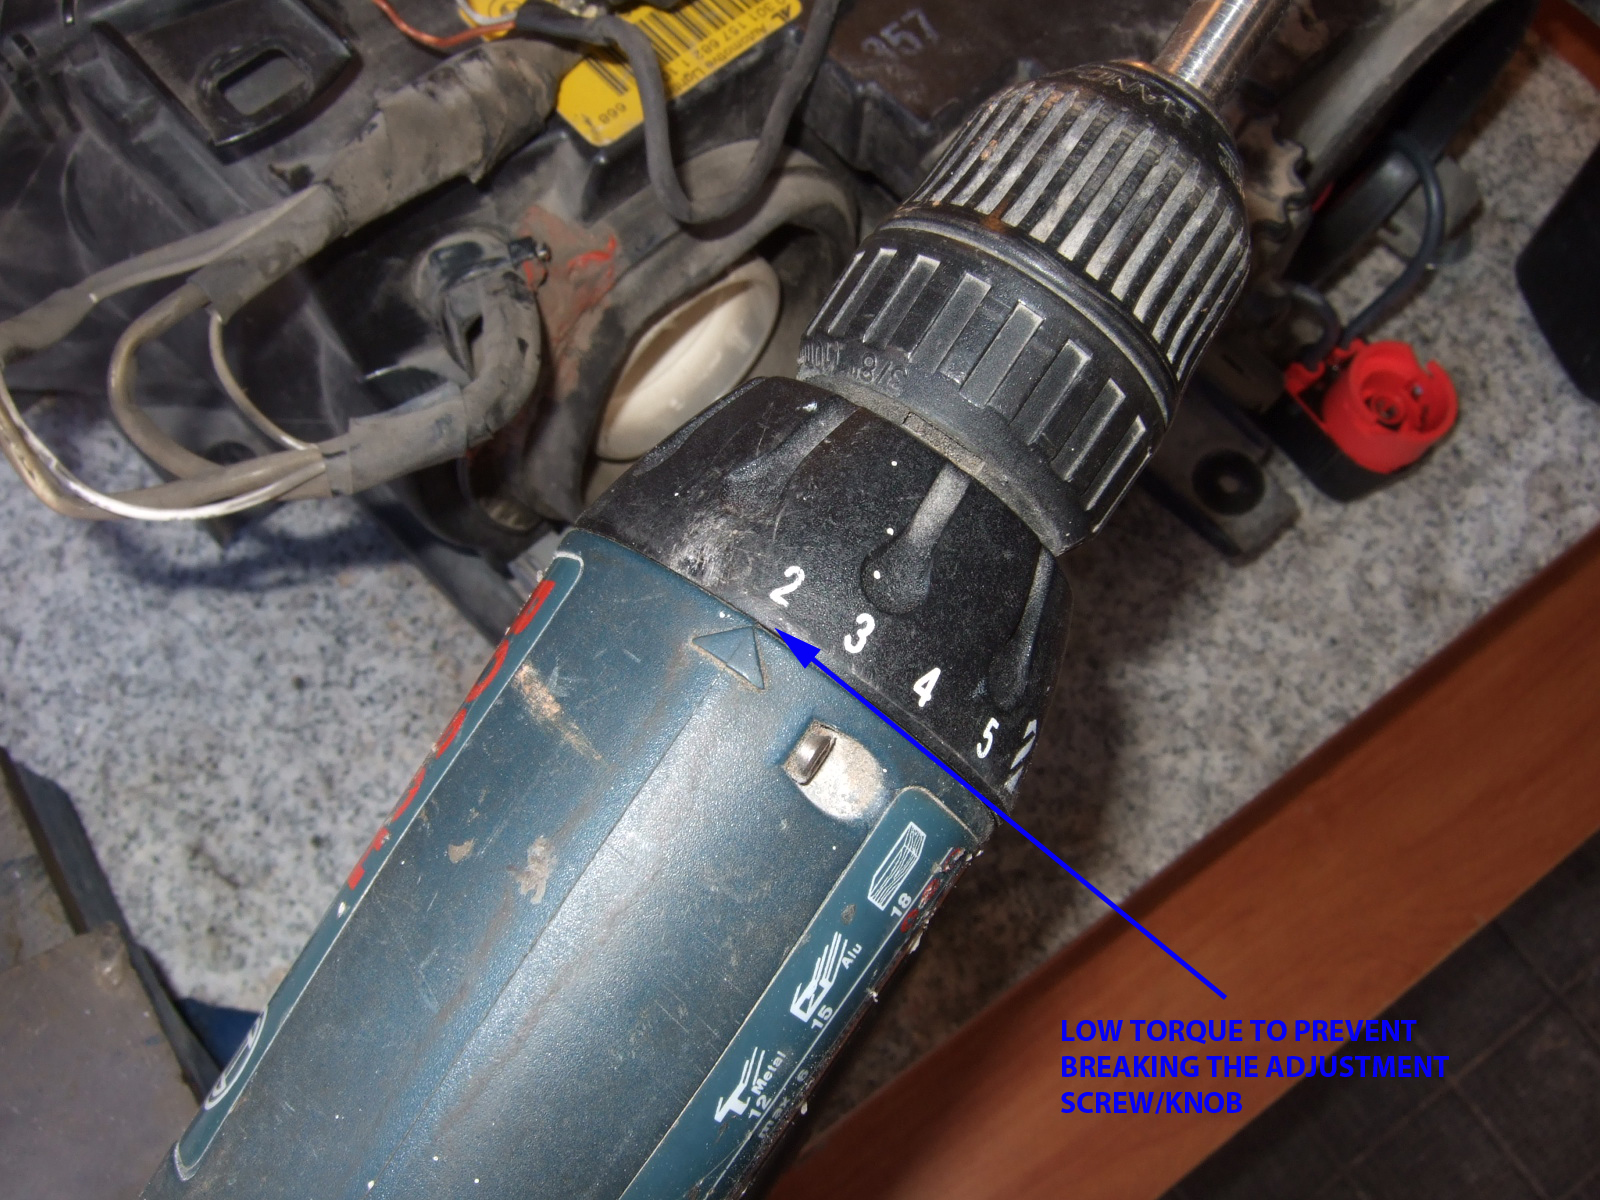
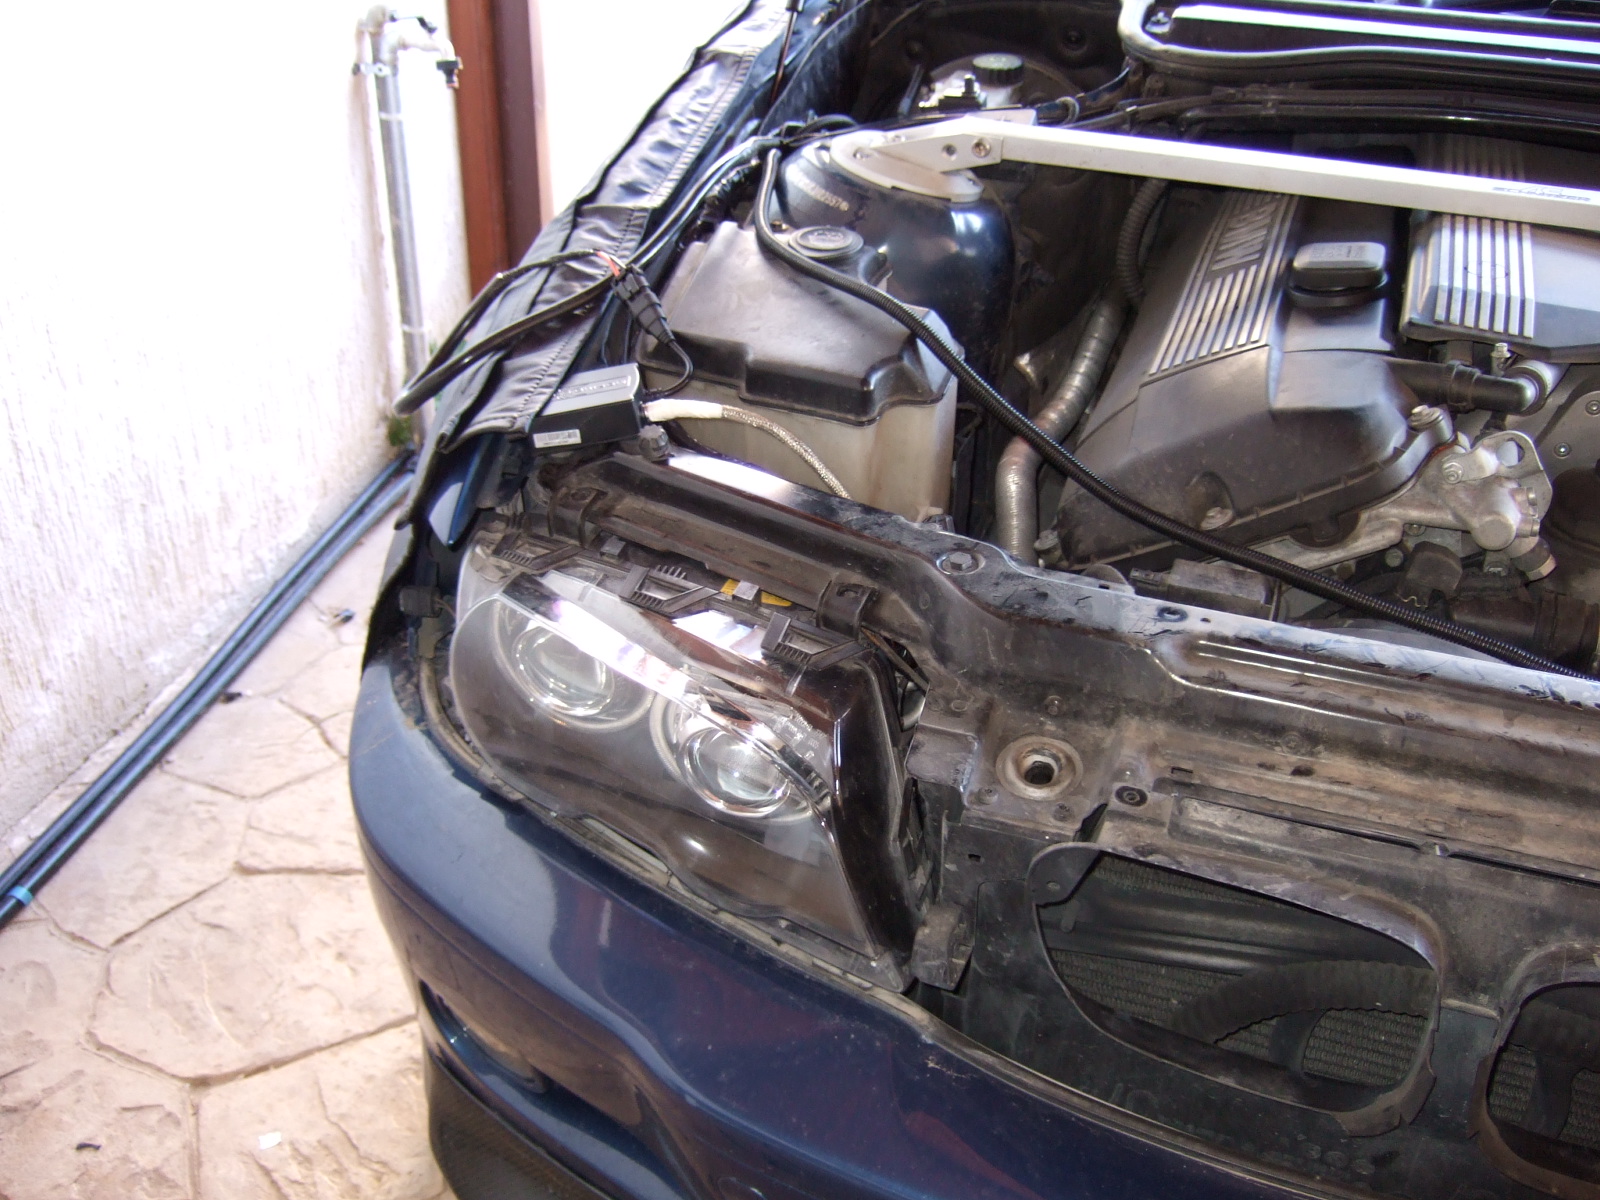
Back to the headlight now, D2S plug (twist to remove), D2S holder (twist to remove) and bulb removed and set aside. To remove the high-beam halogen bulb, just twist and remove the corresponding bulb holder plastic prongs. If you can't manage this then it's just better to put back everything in place and forget this mod. Two power drills are used to rotate clockwise both headlight adjustment knobs until you hear the guides inside reach the end. A characteristic pop noise will be heard. I set the torque to low so that in case an obstacle was found during this process, the drill would just stop and damage would be prevented. After finishing the two adjustment knobs, the hardest part of the process is to remove the leveling arm from the headlight lense assembly. Before that, we unplug the little 3-wire connector as seen below. Then we need to pry the arm off and pull the lenses at the same time. It can be done by pushing down or up. Just be careful not to break the white plastic.
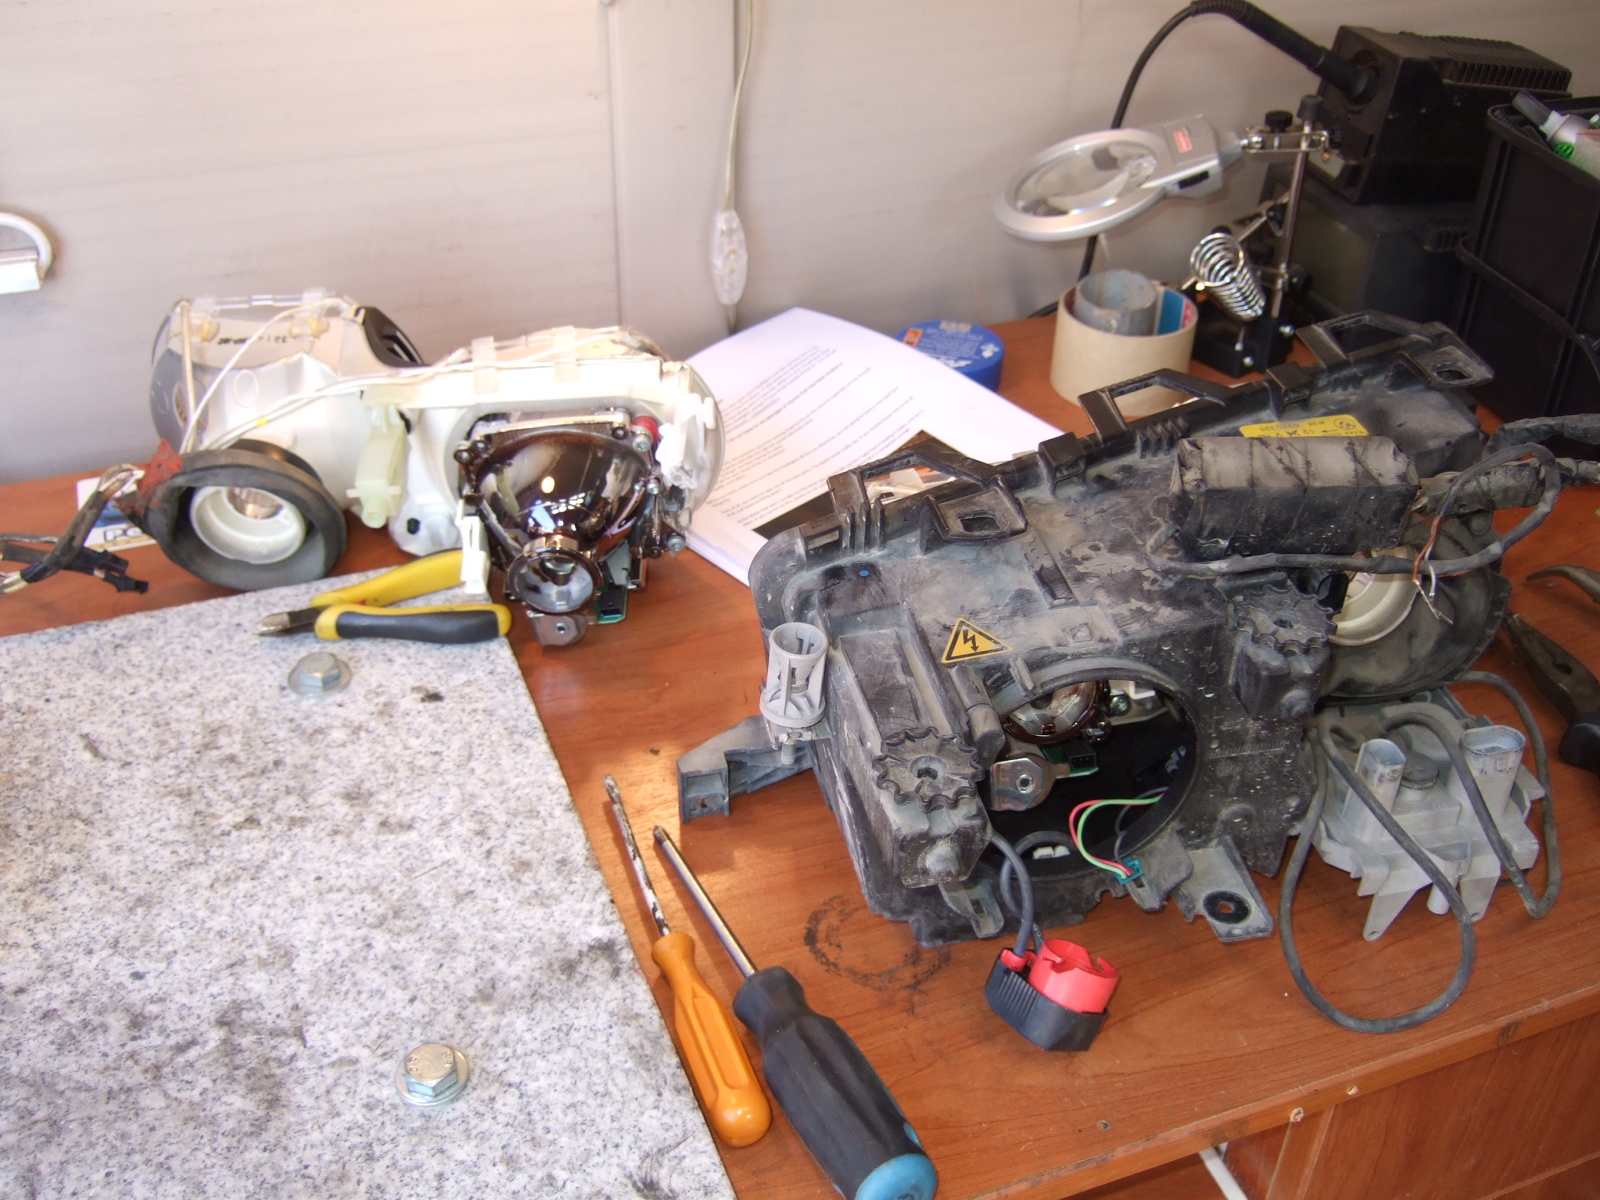
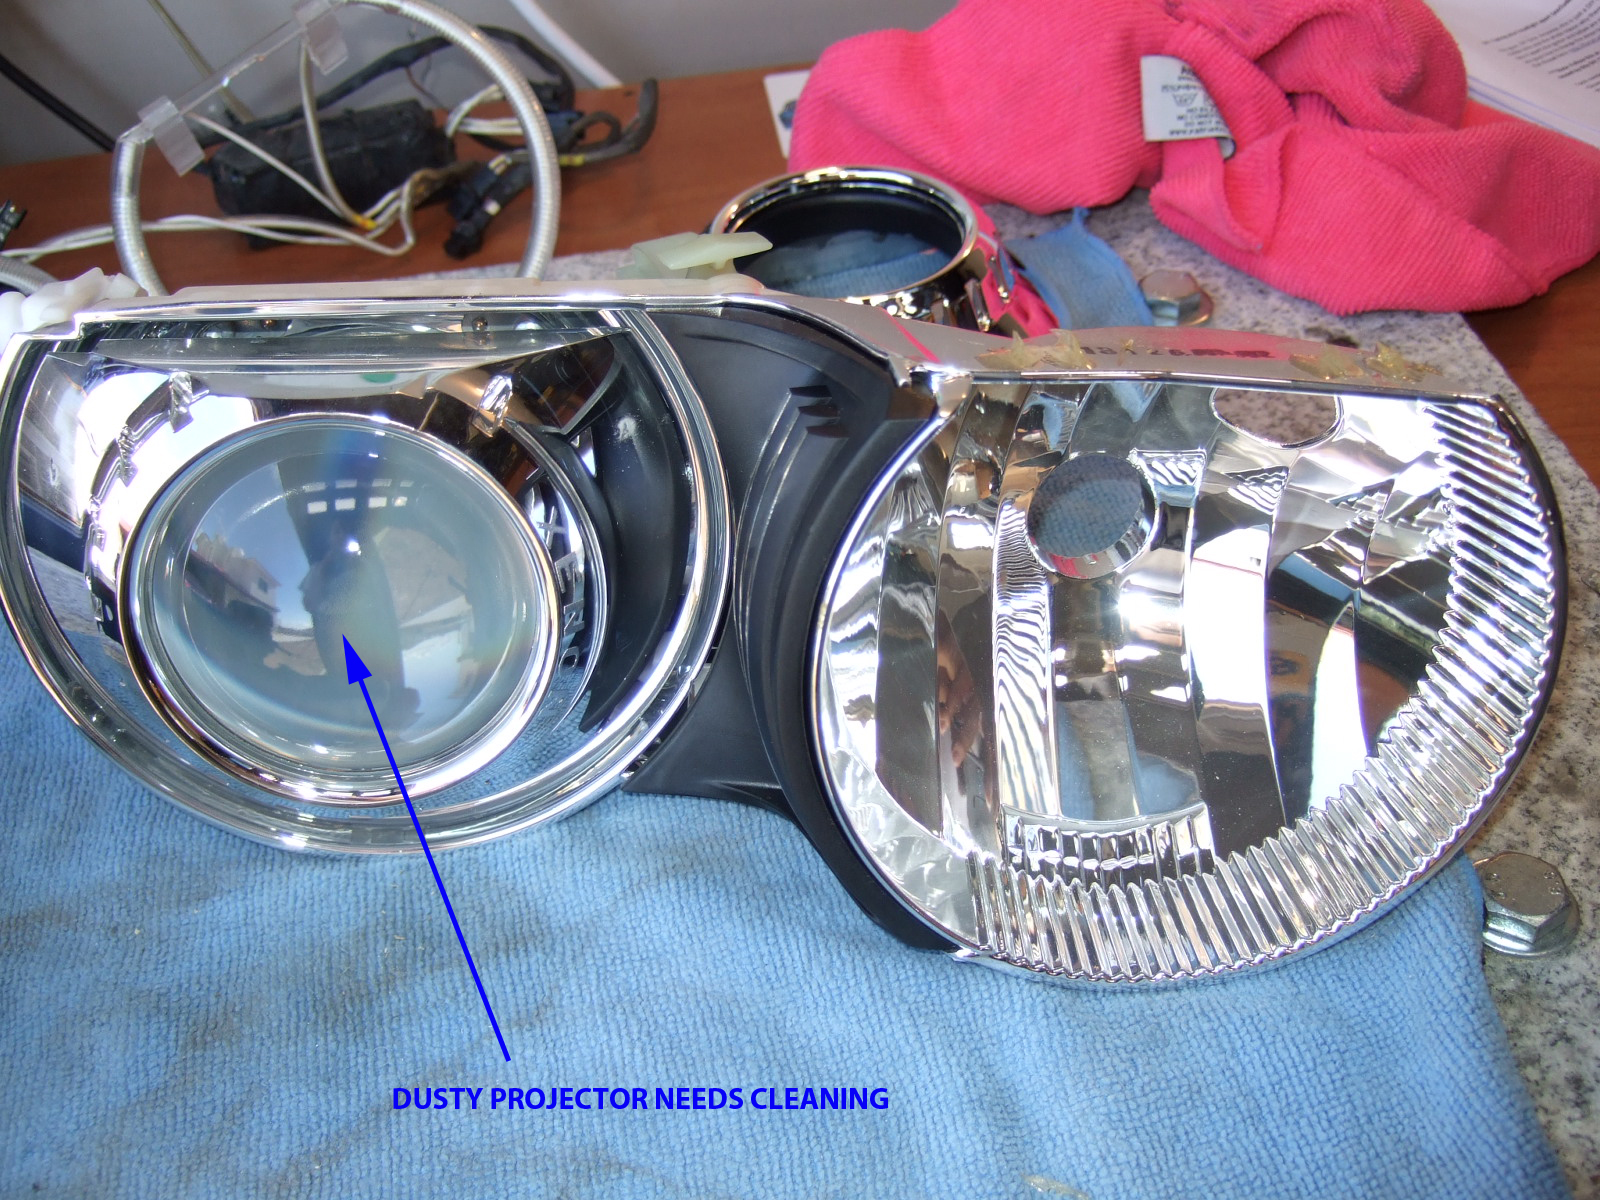
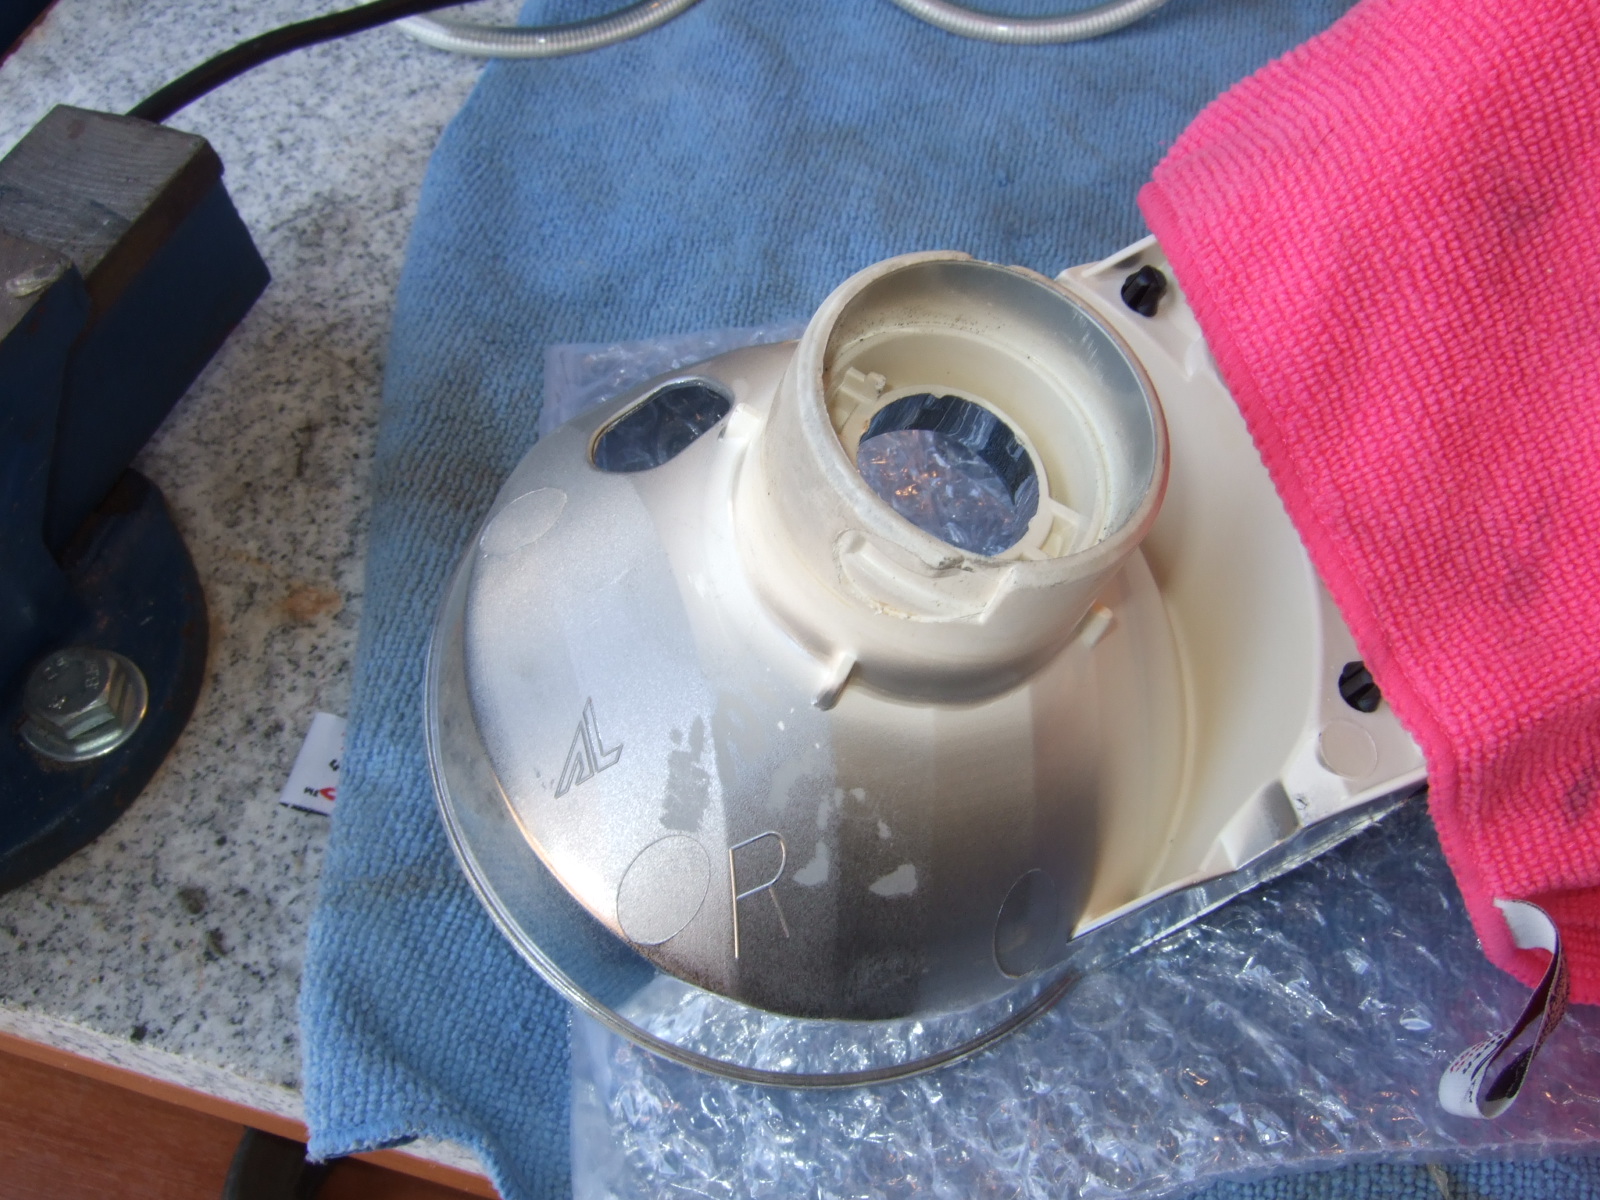
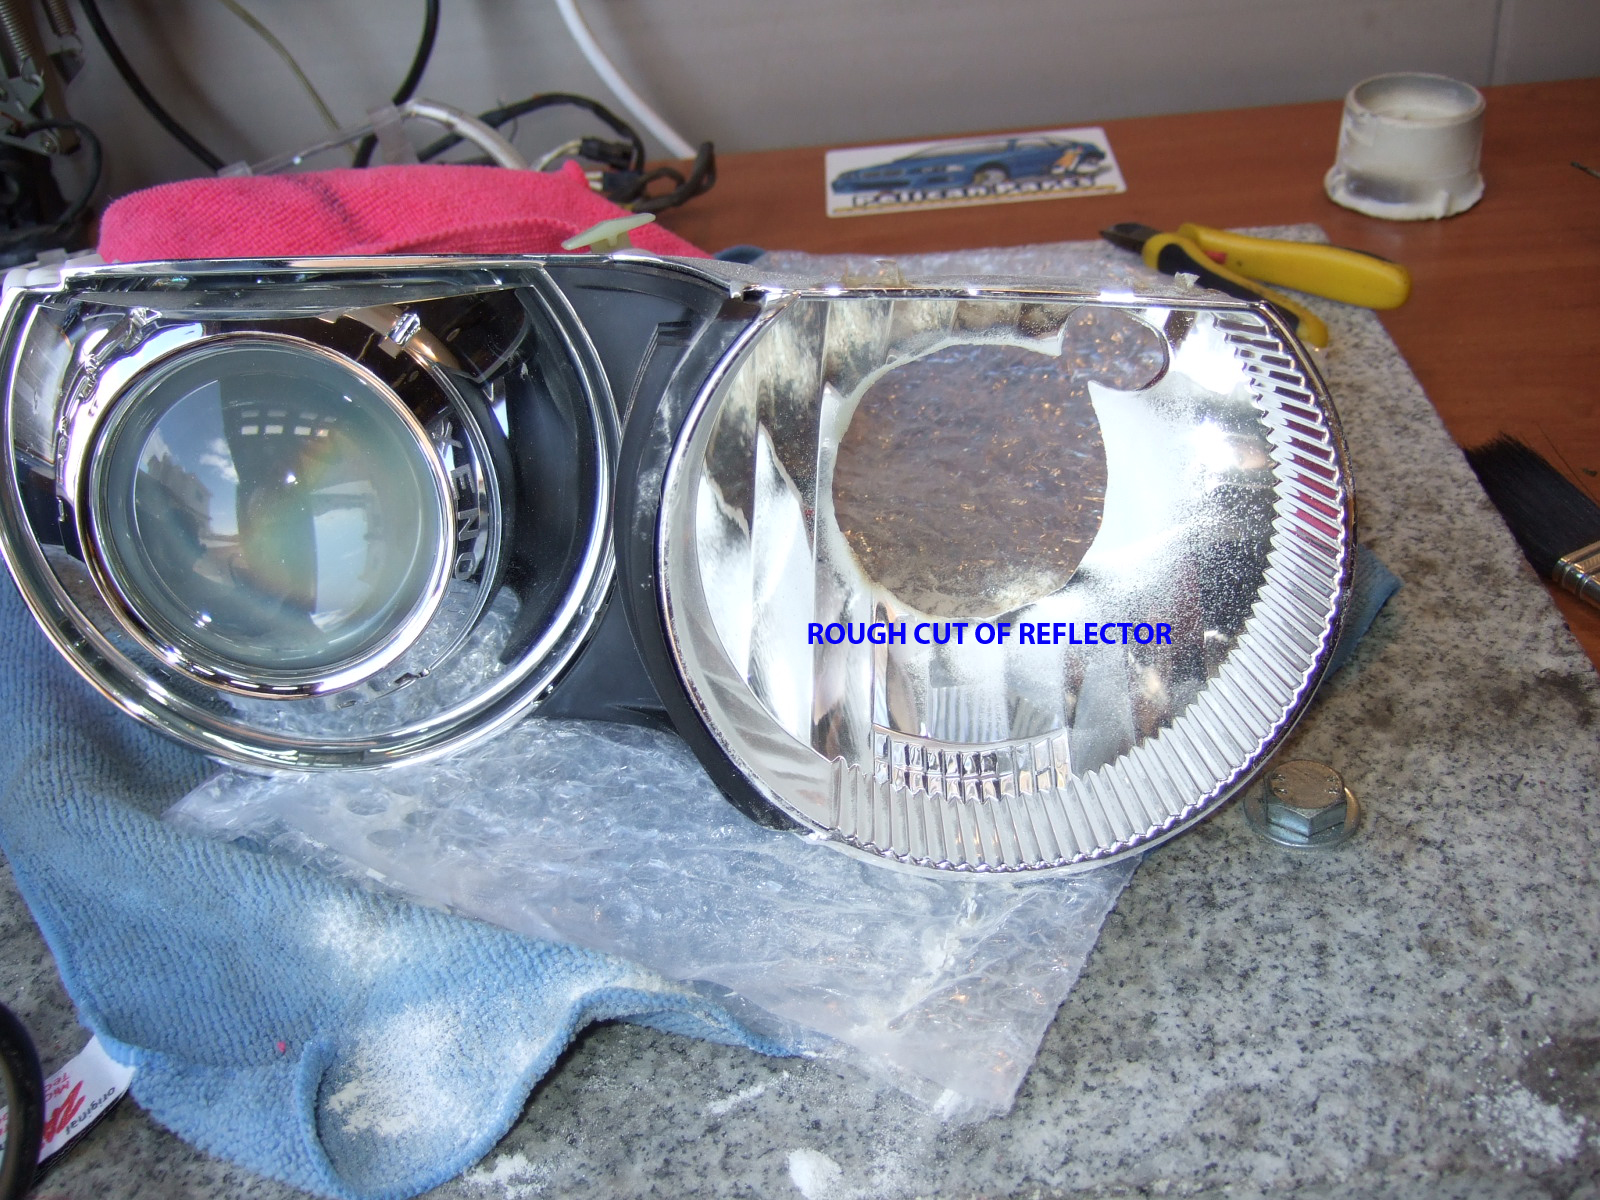
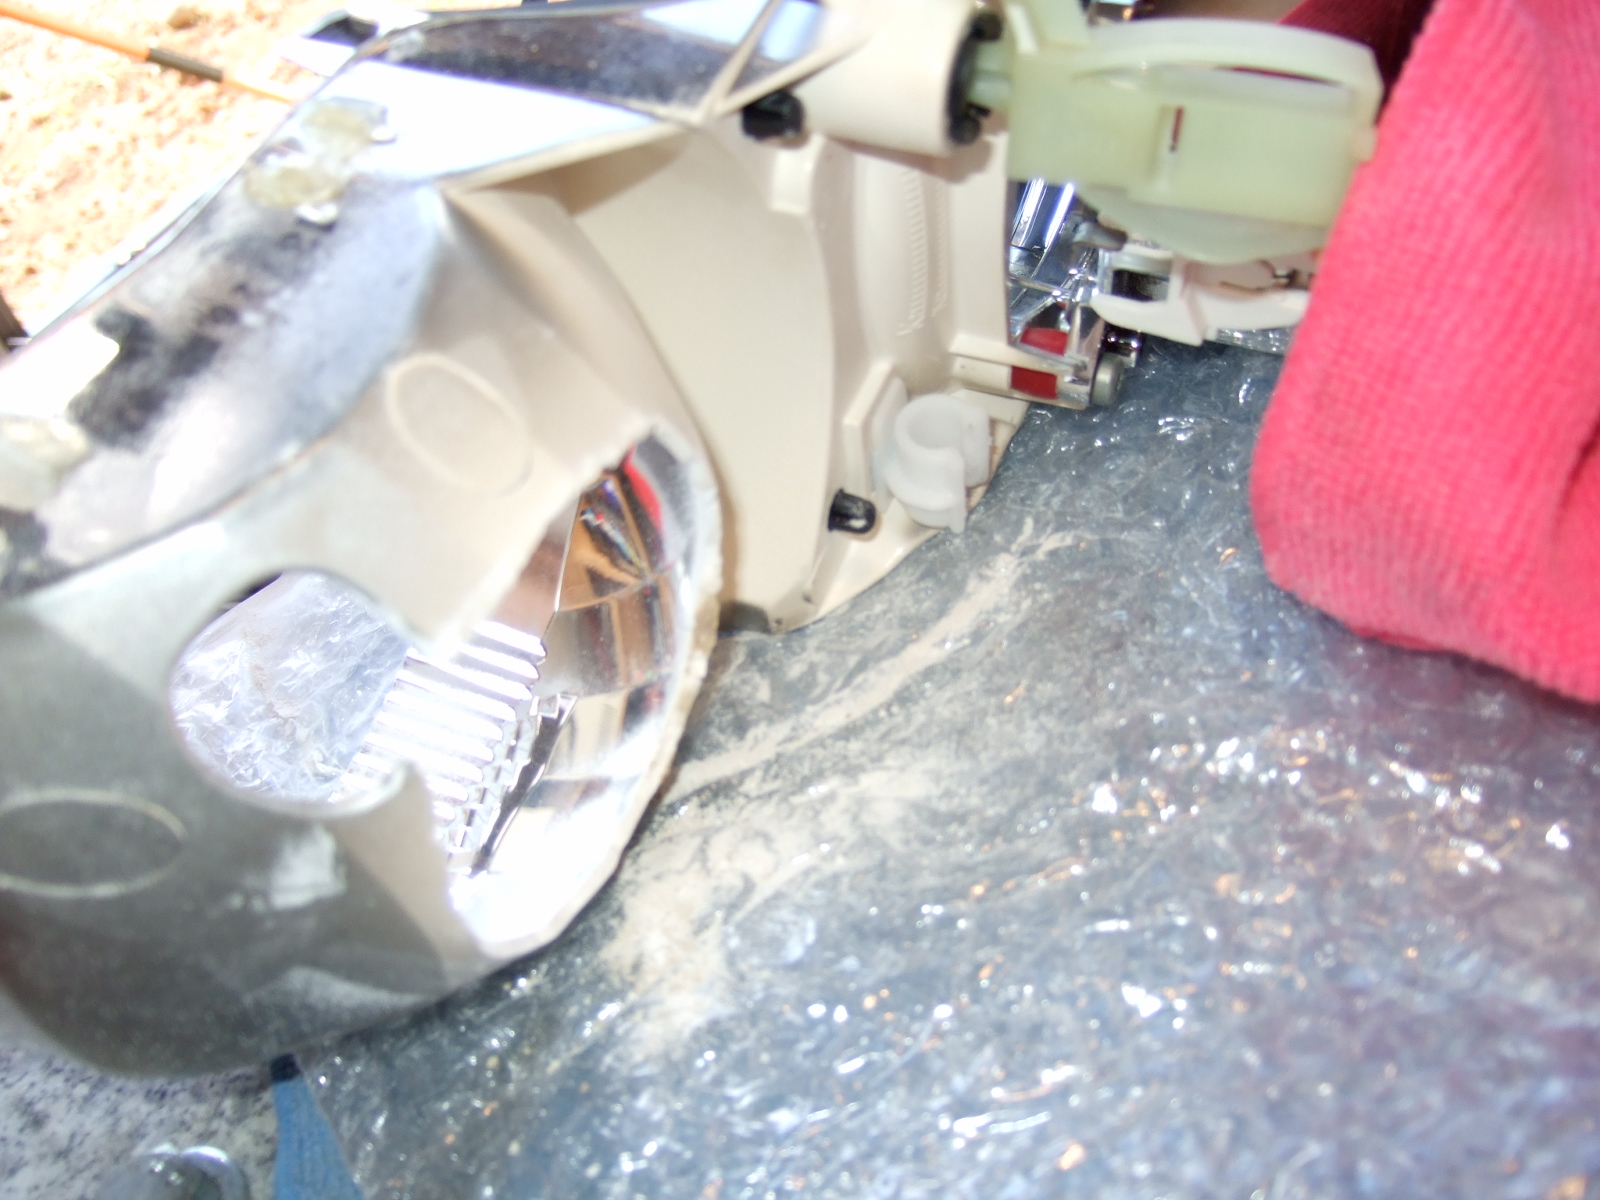
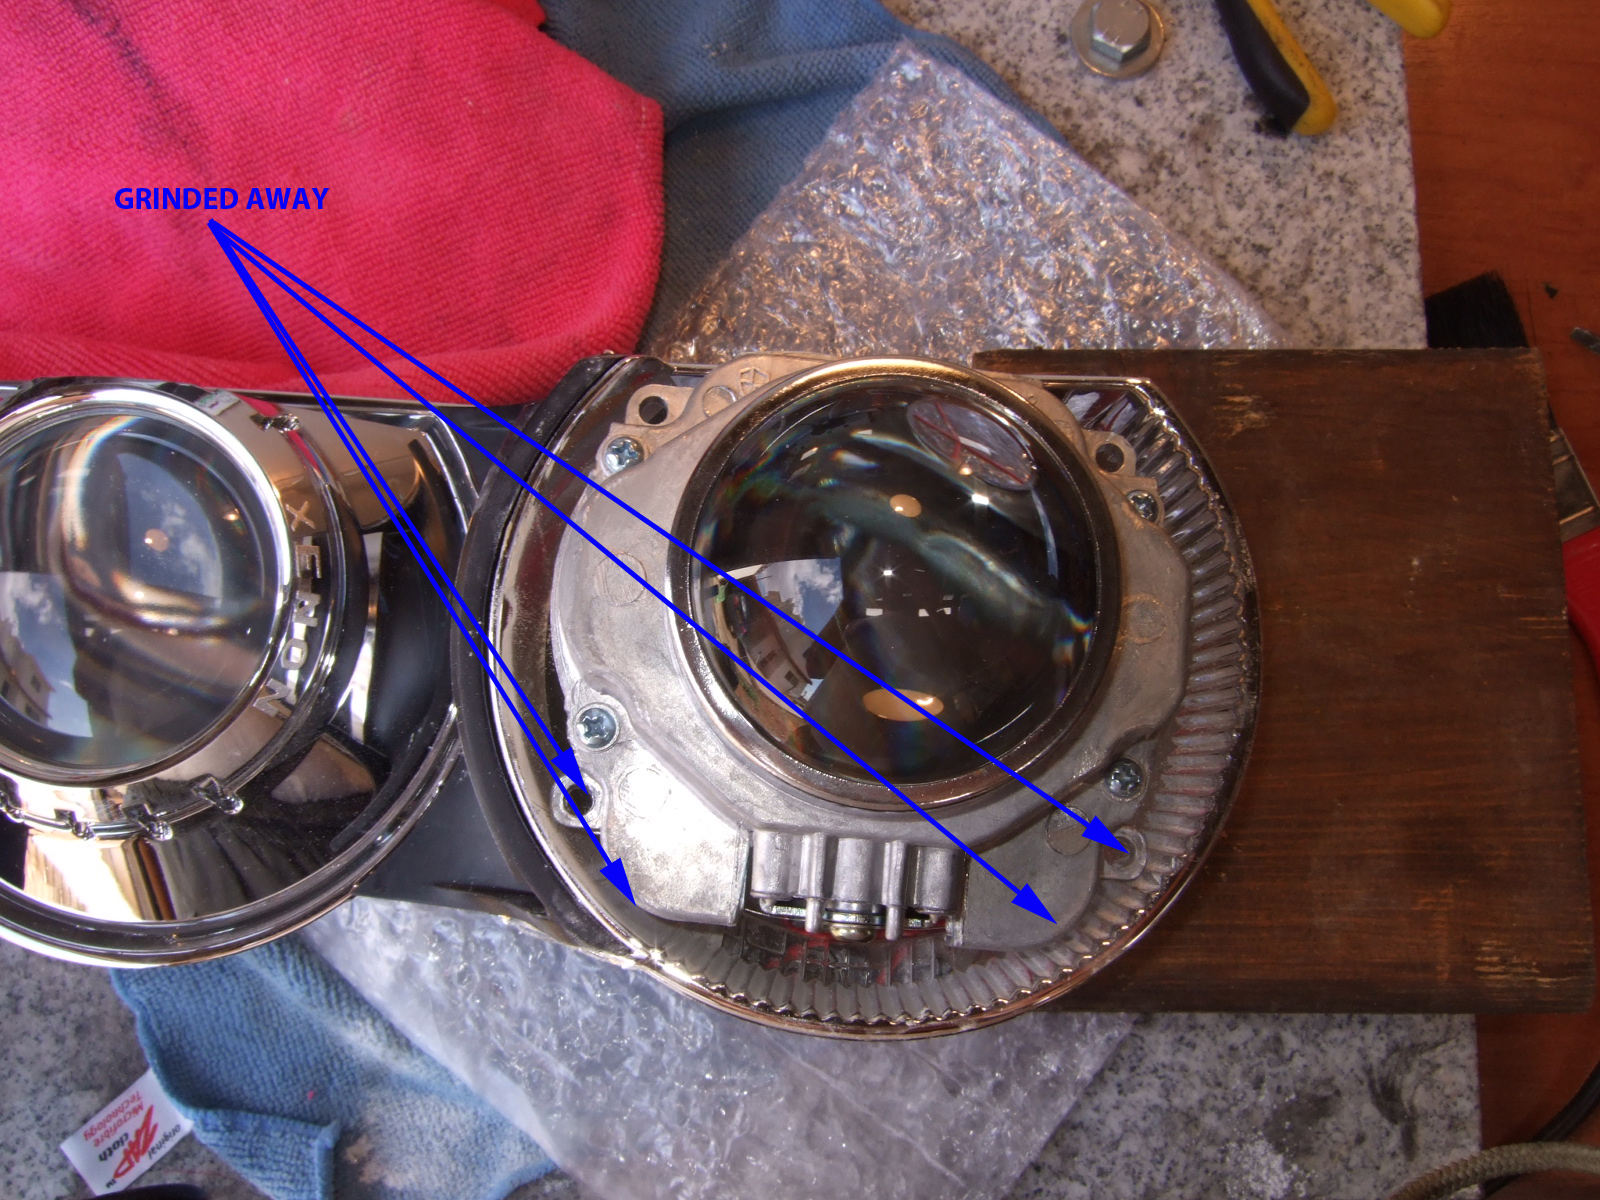
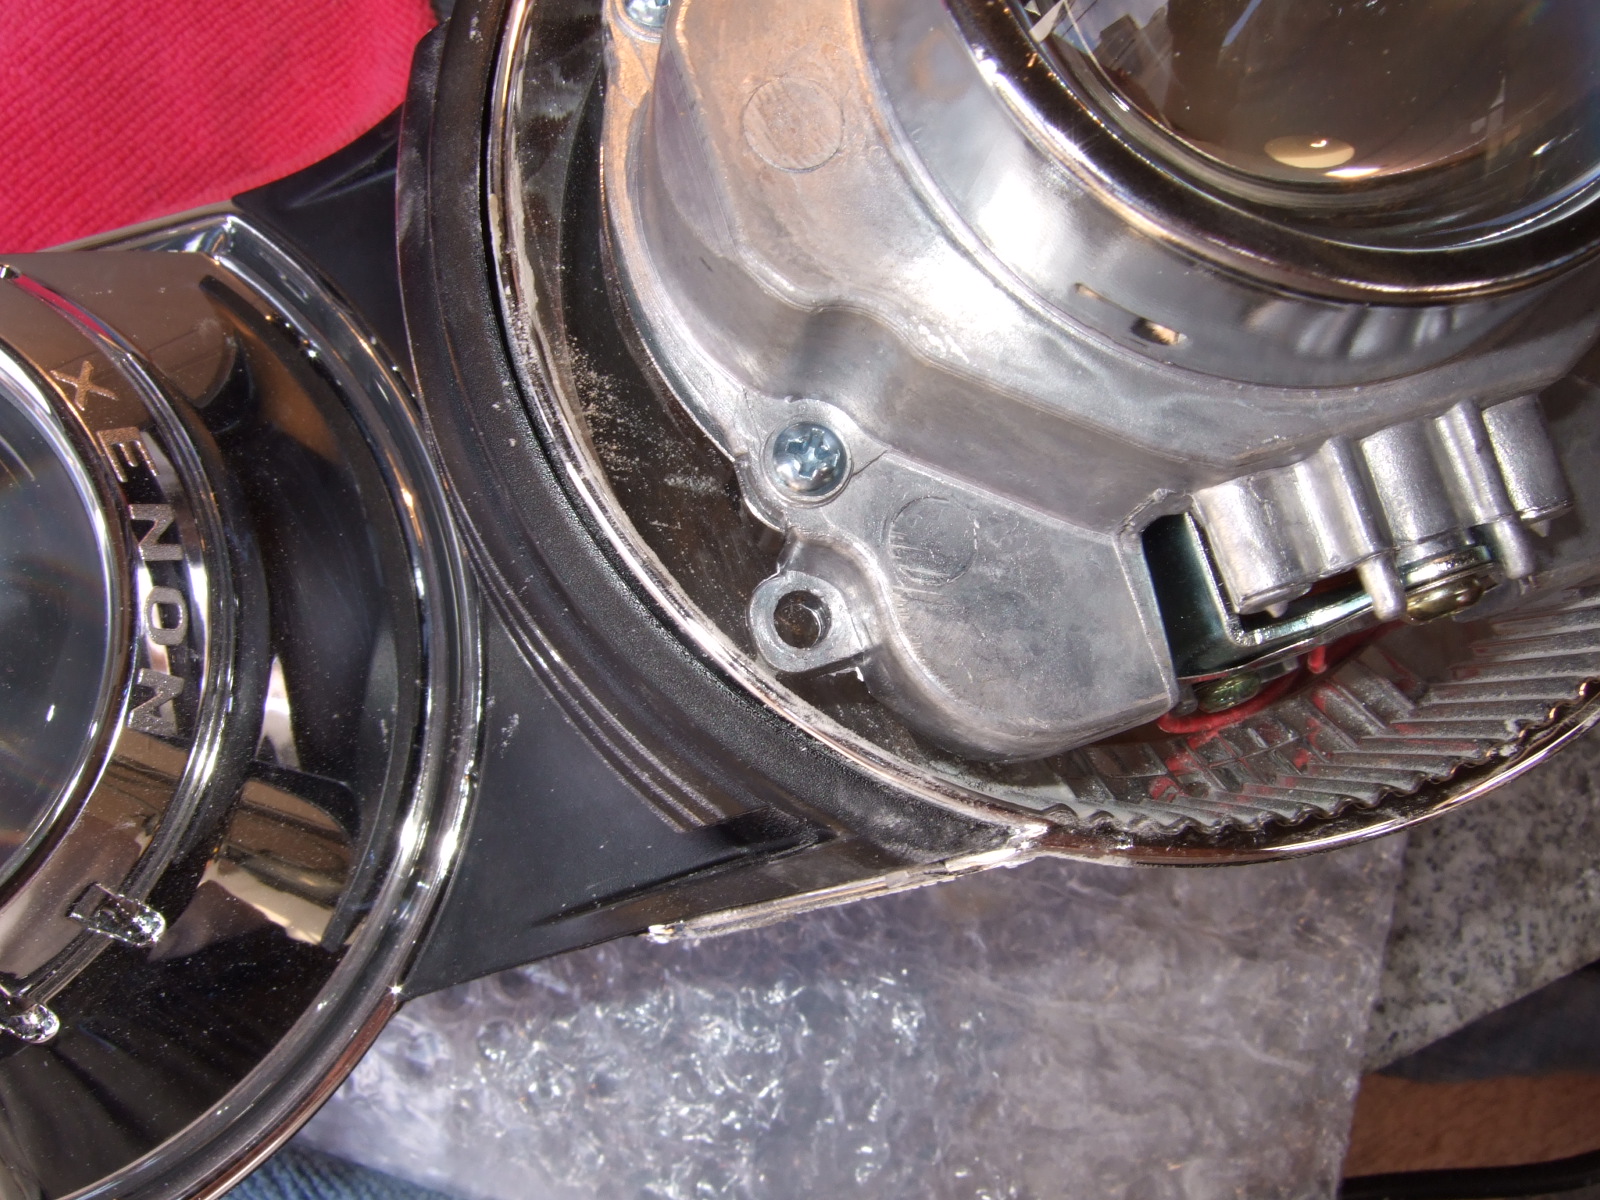
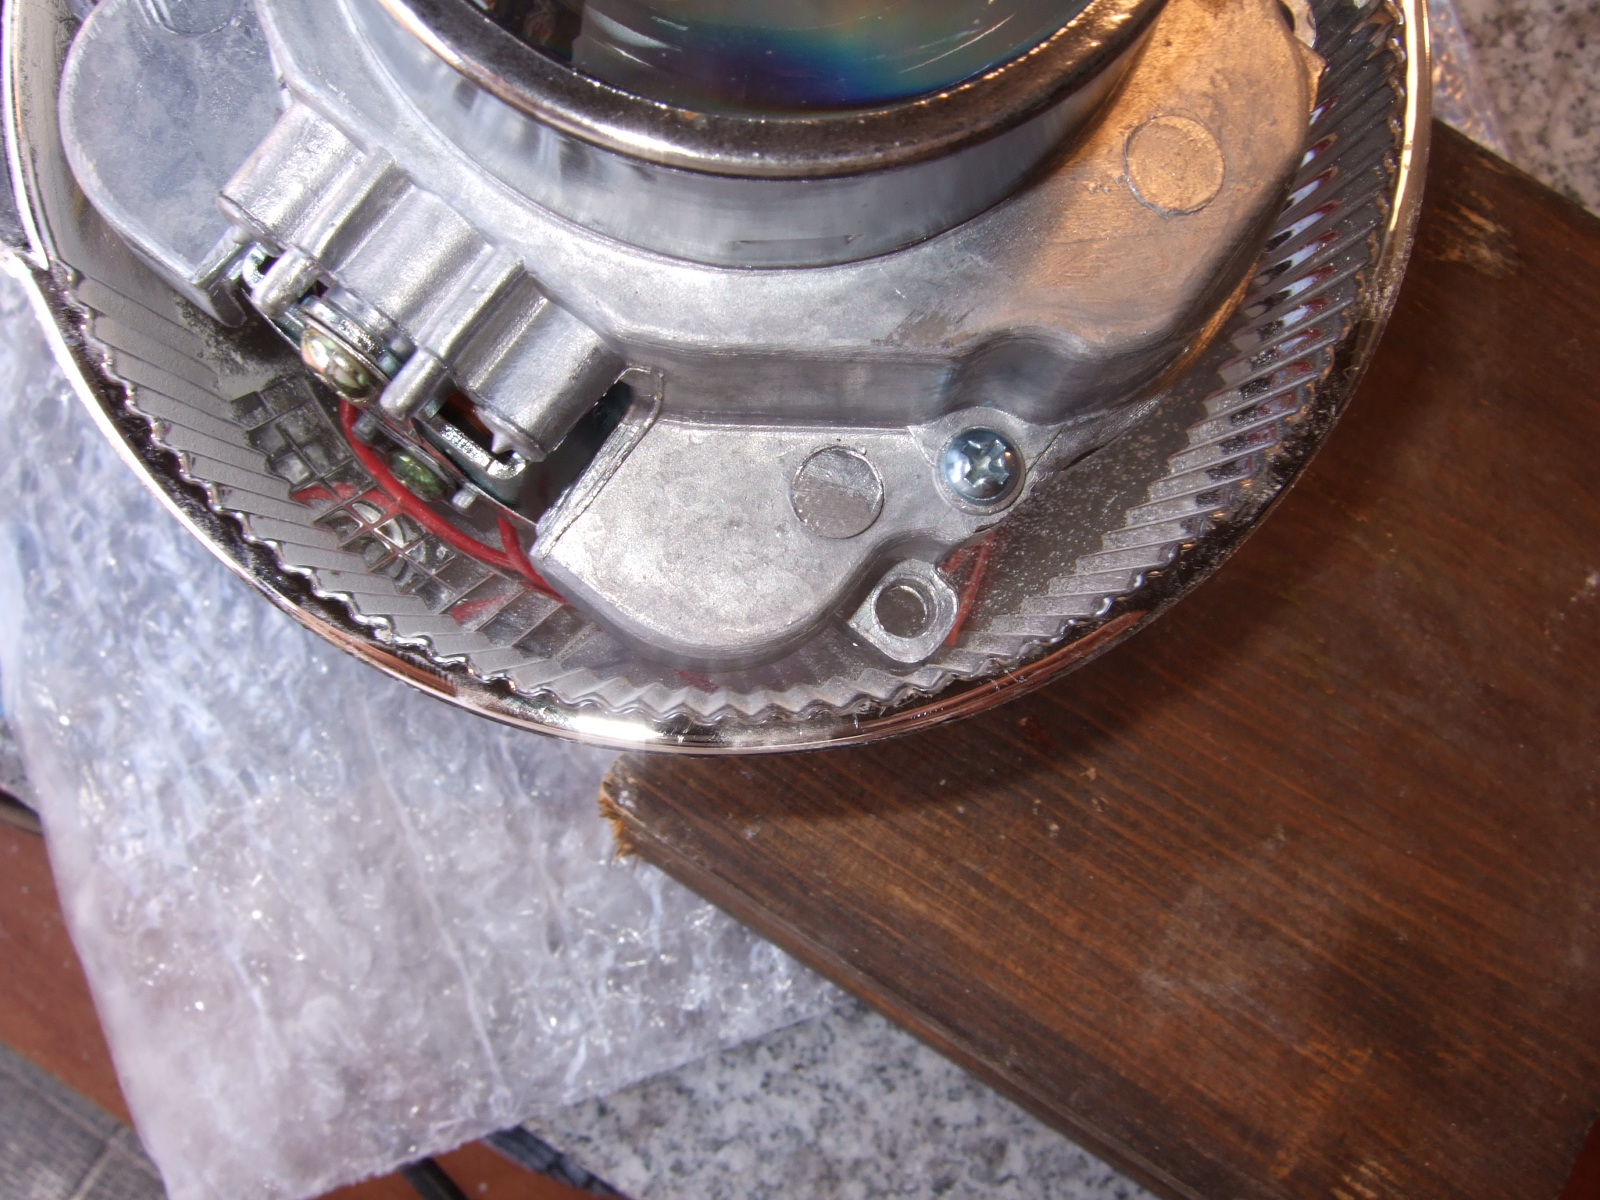
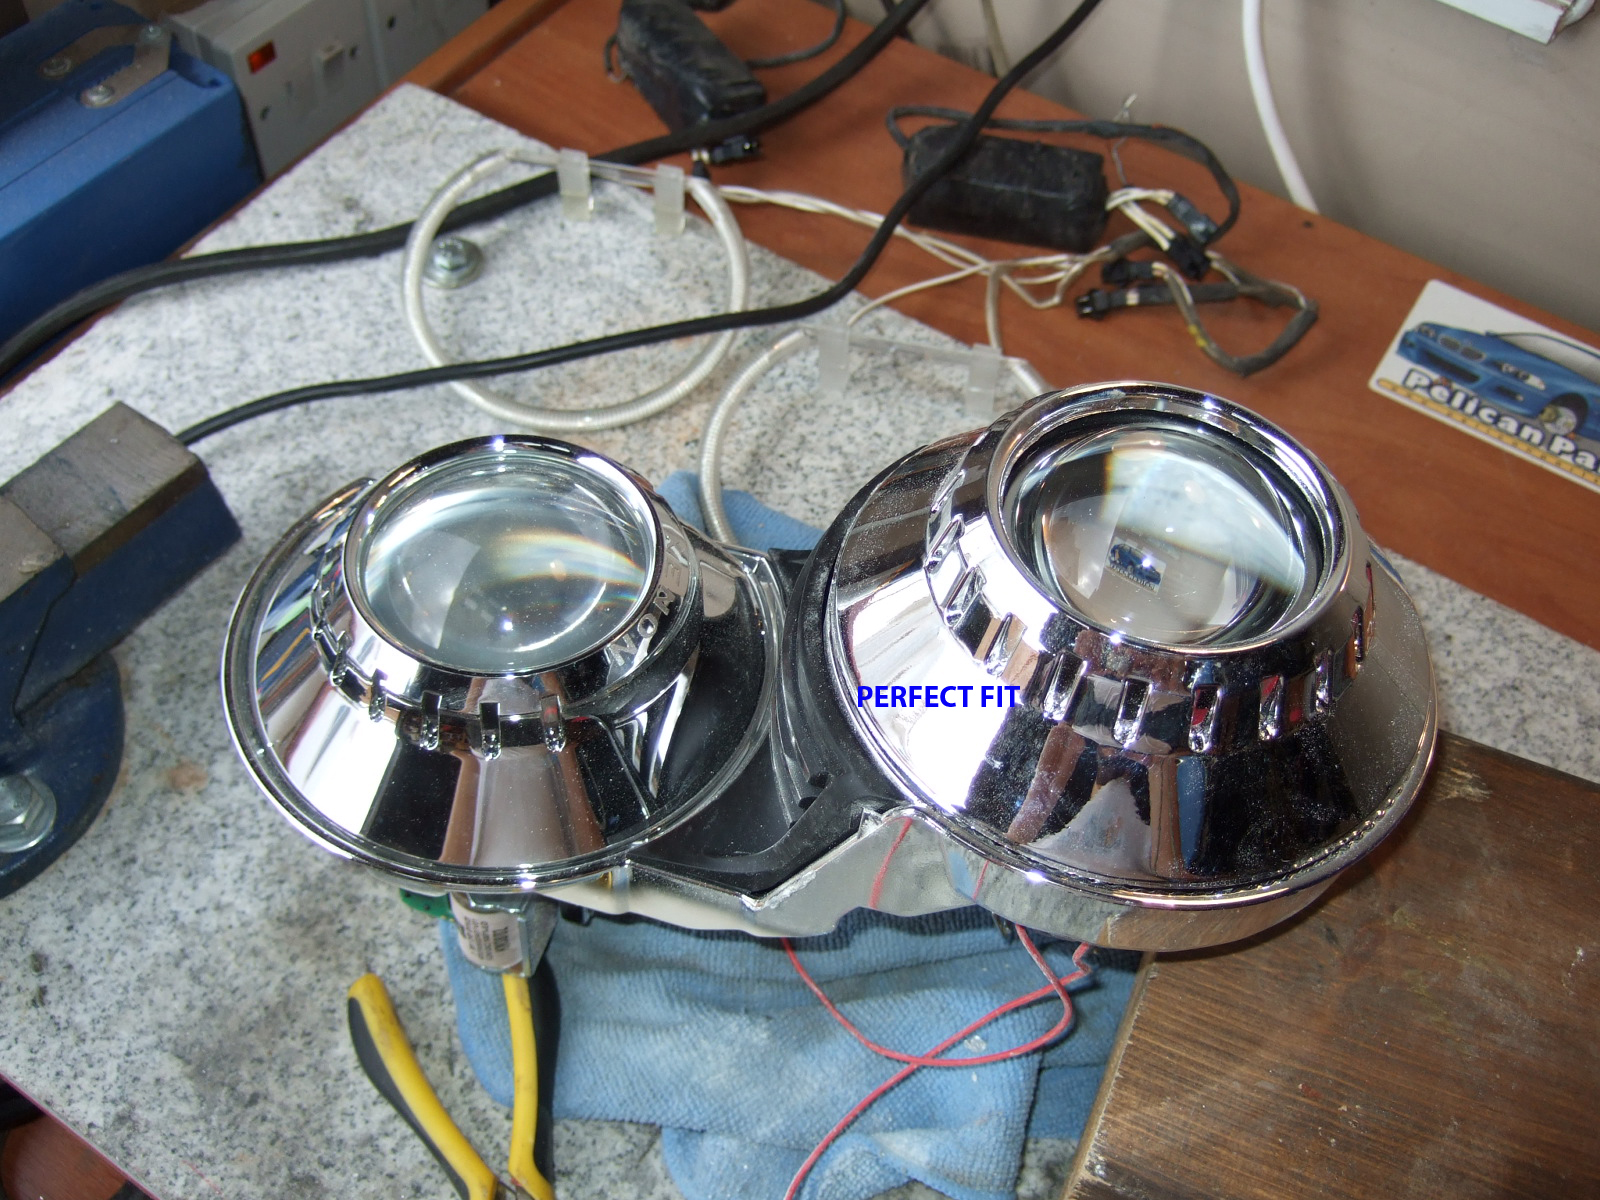
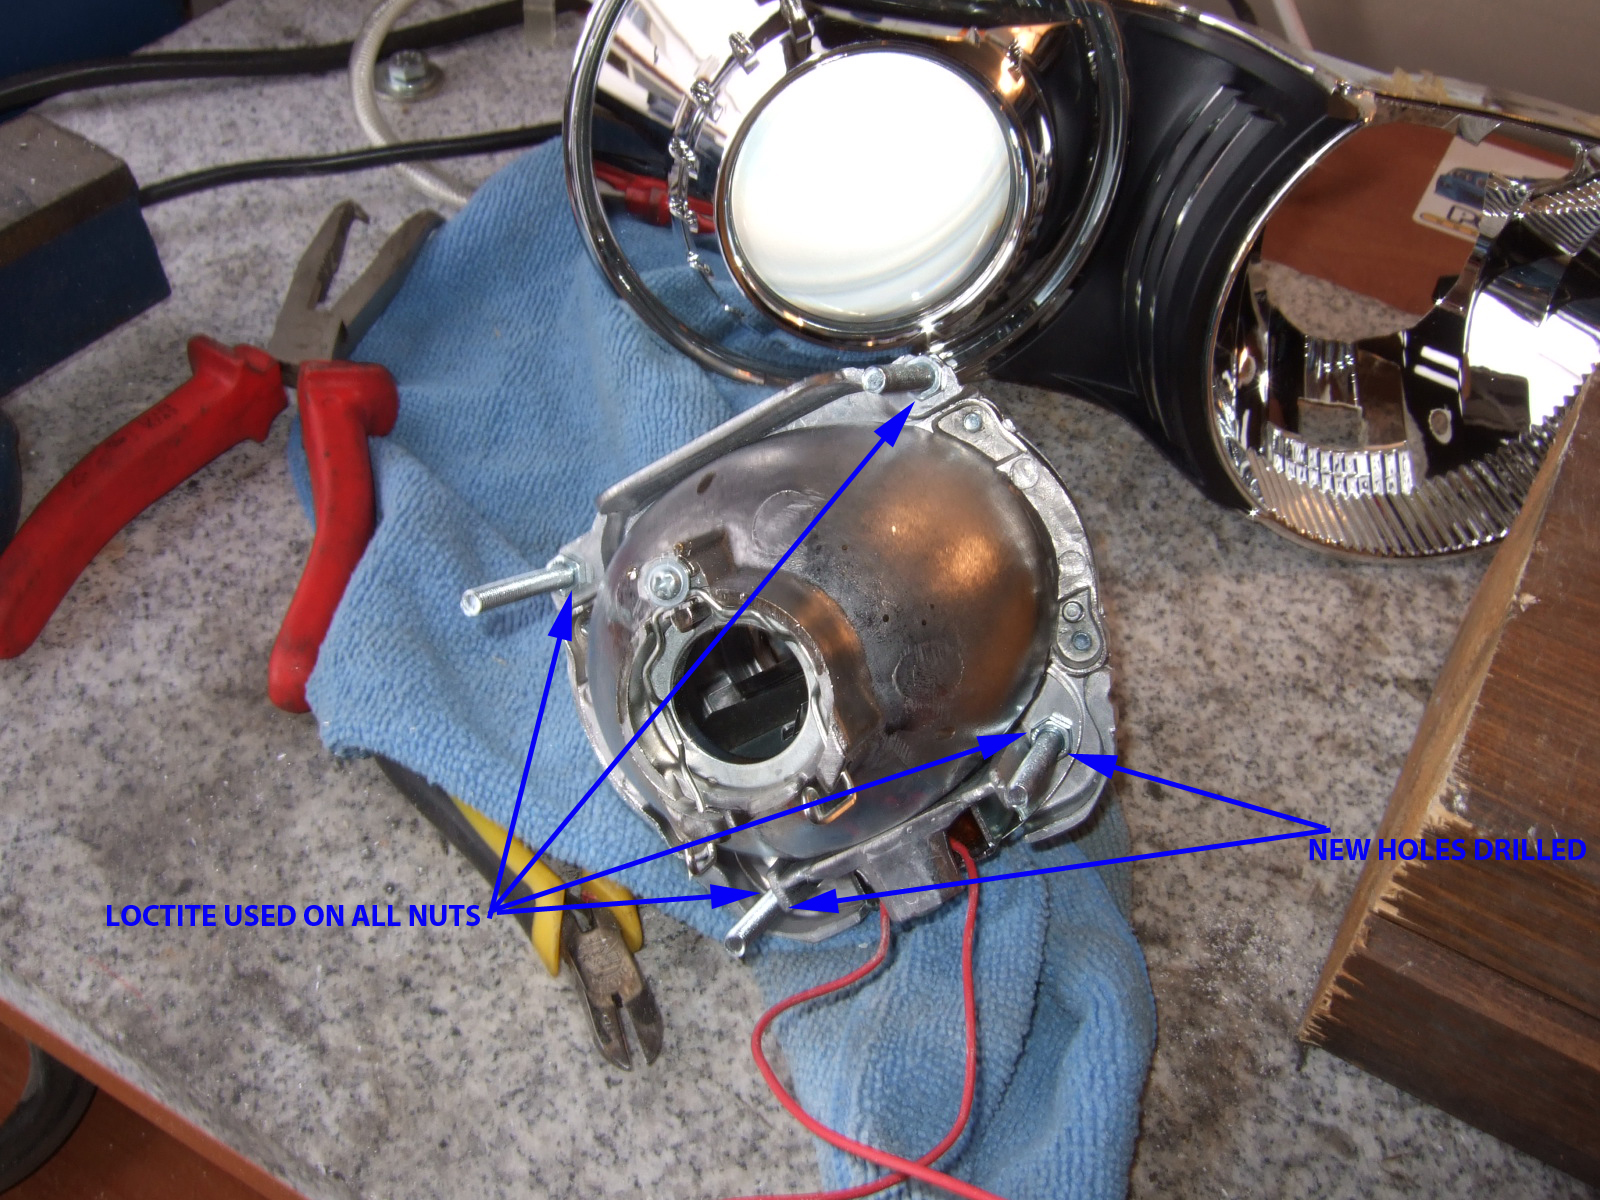
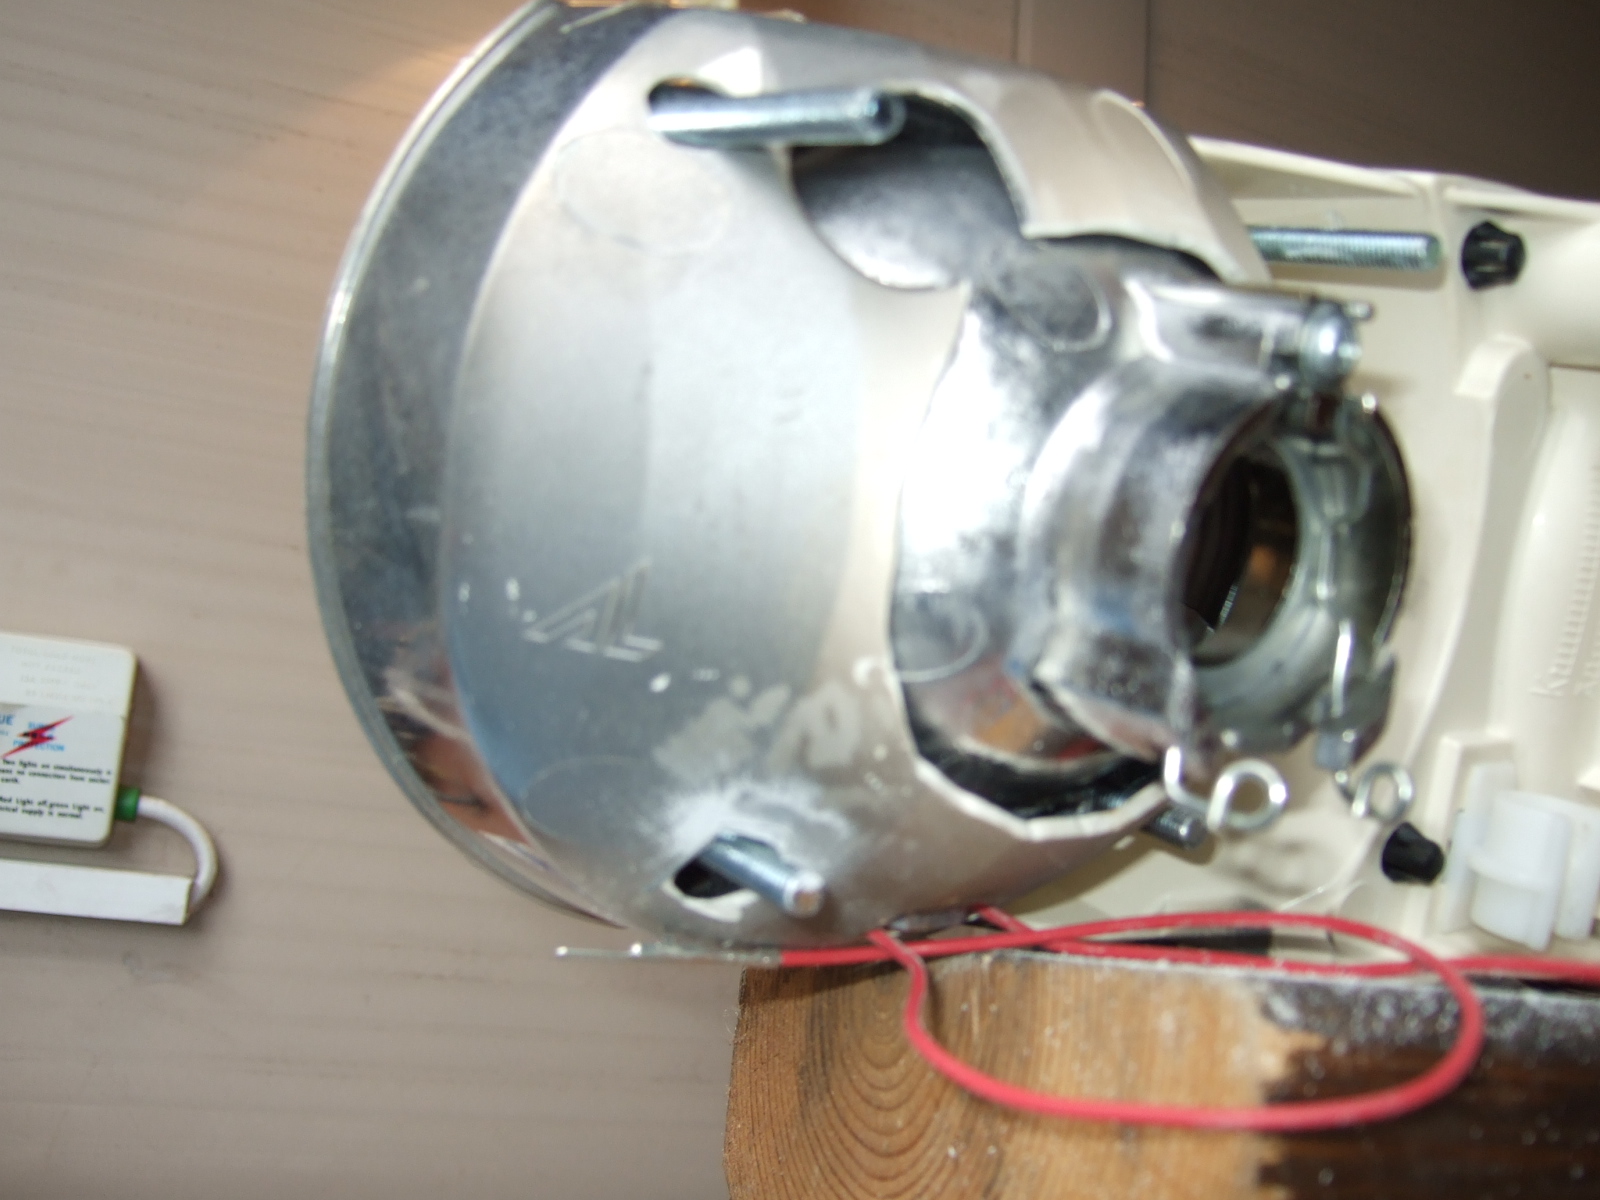
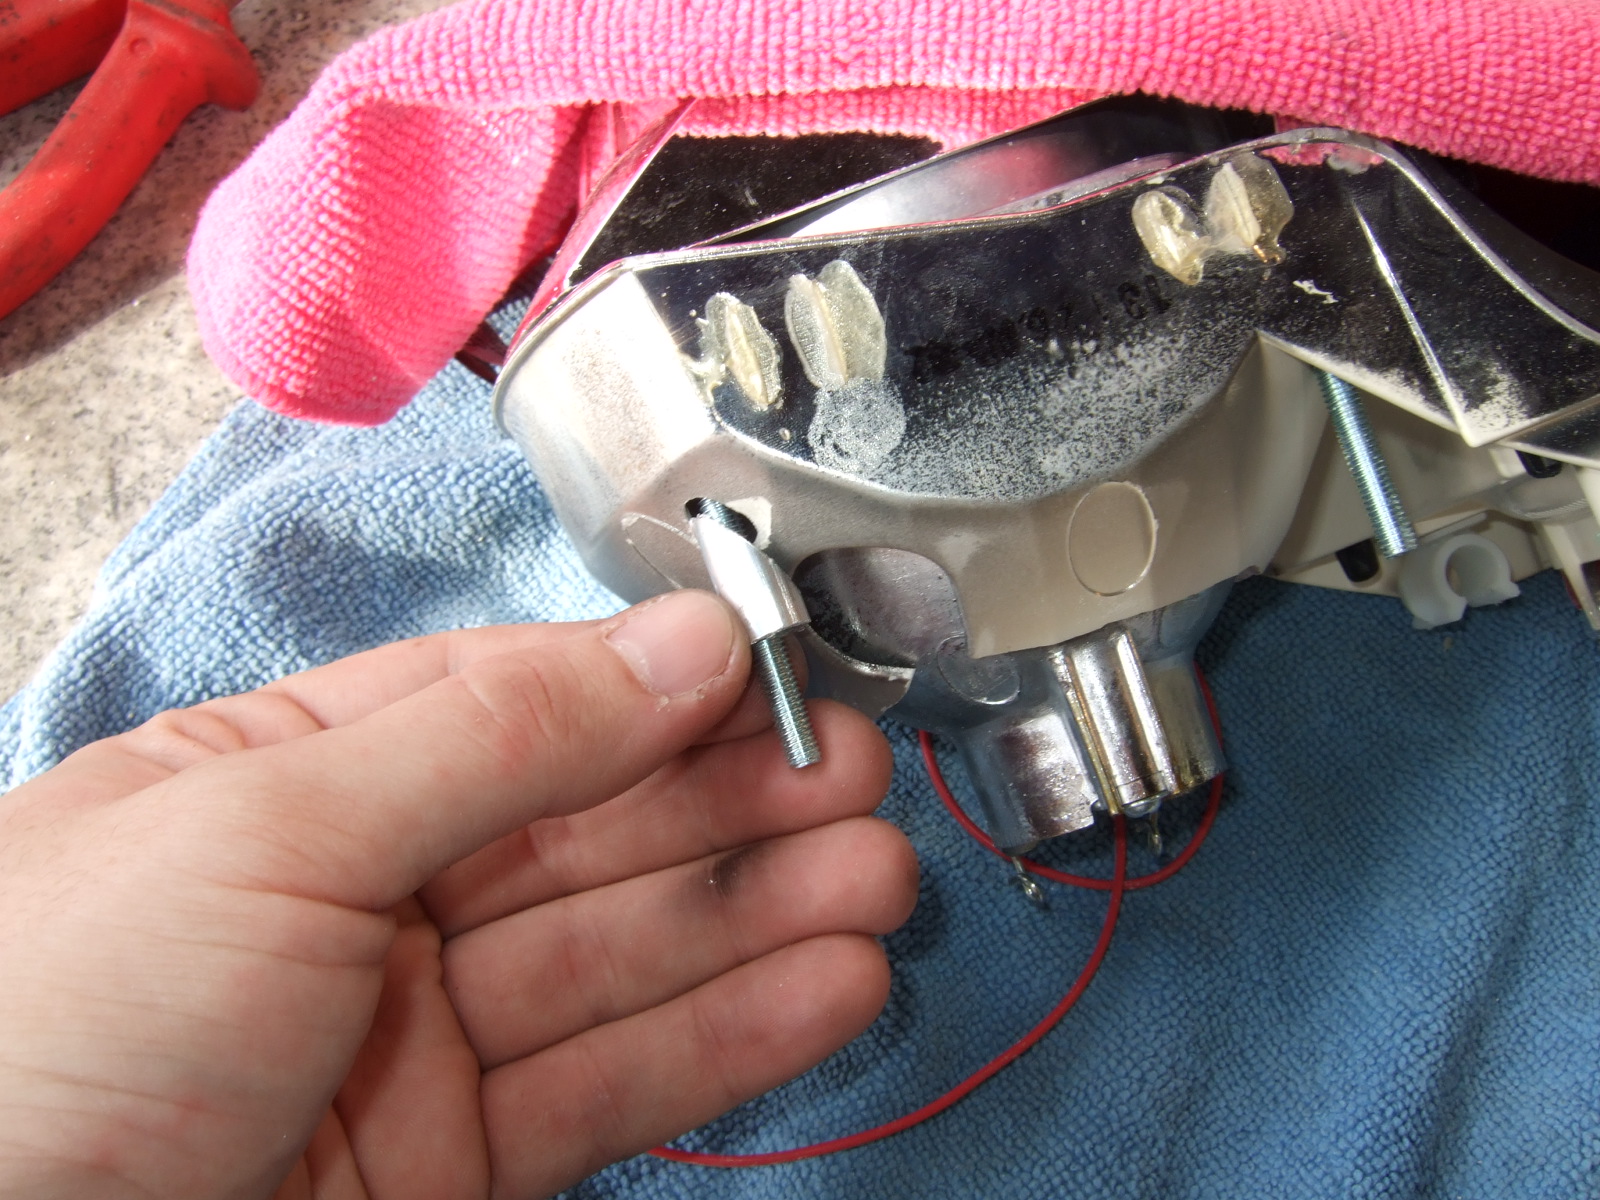
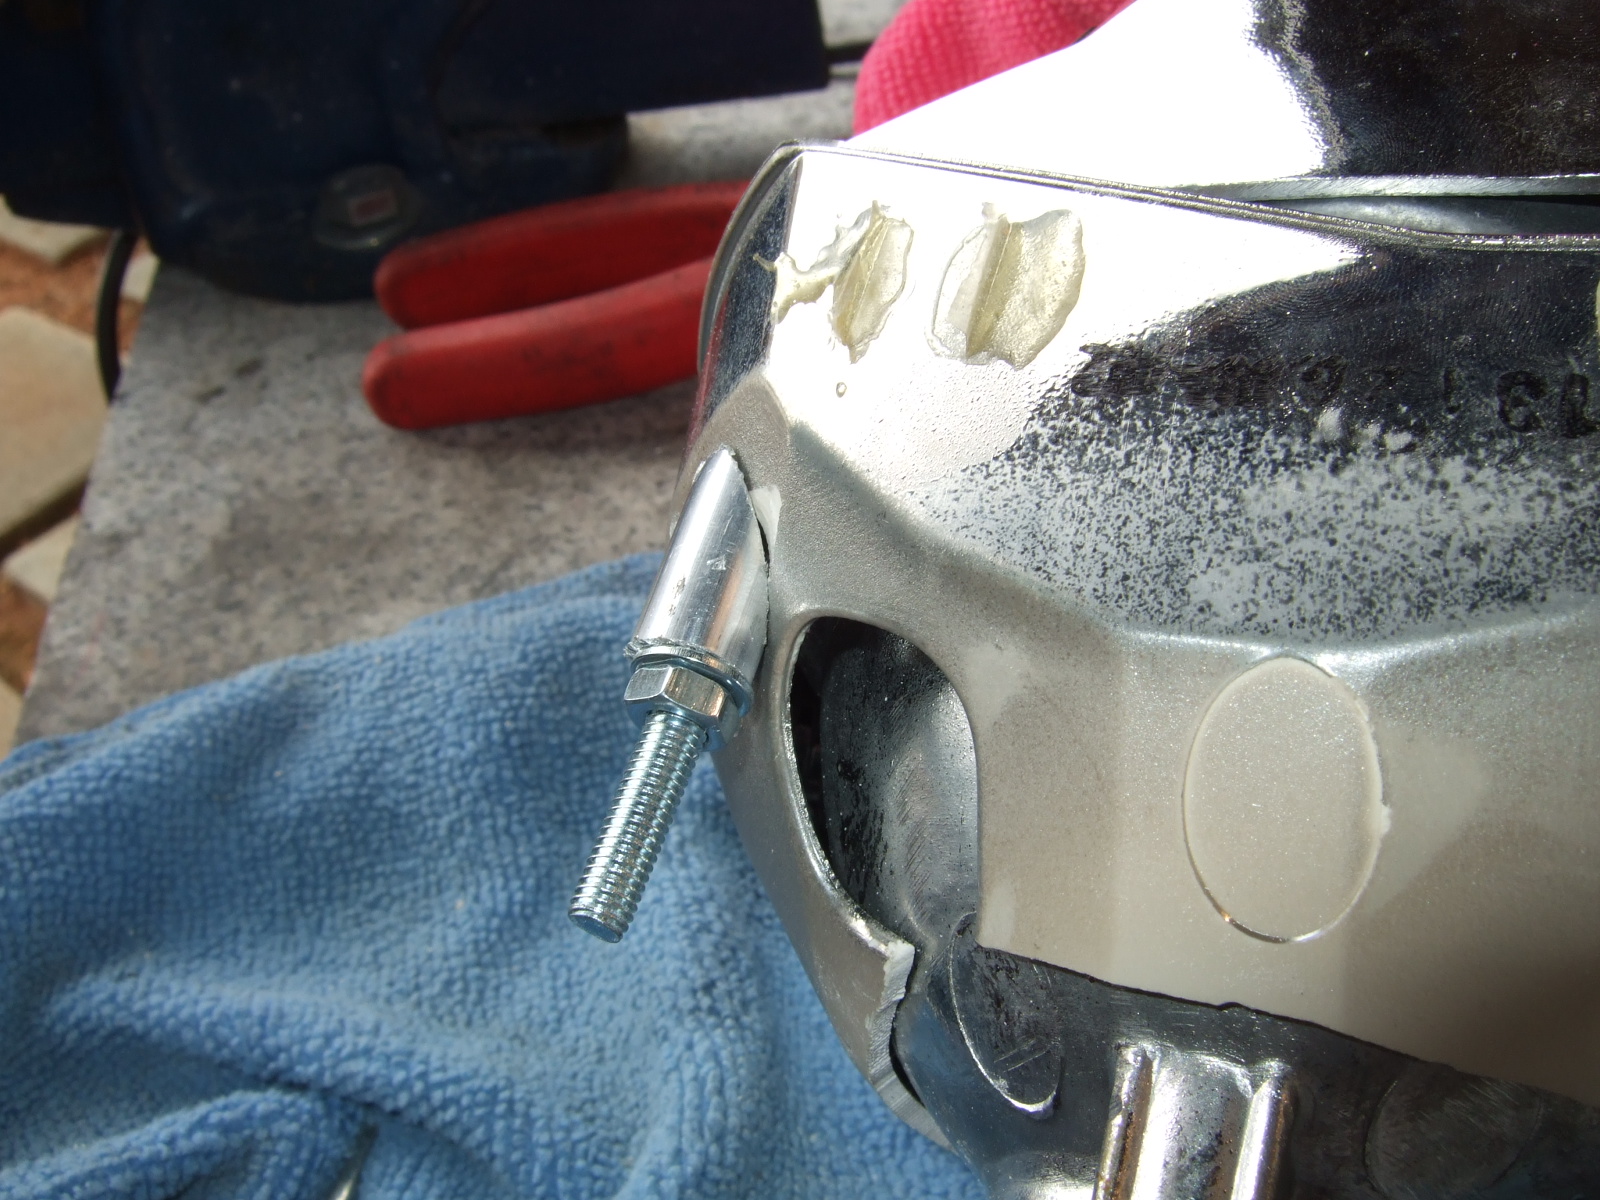
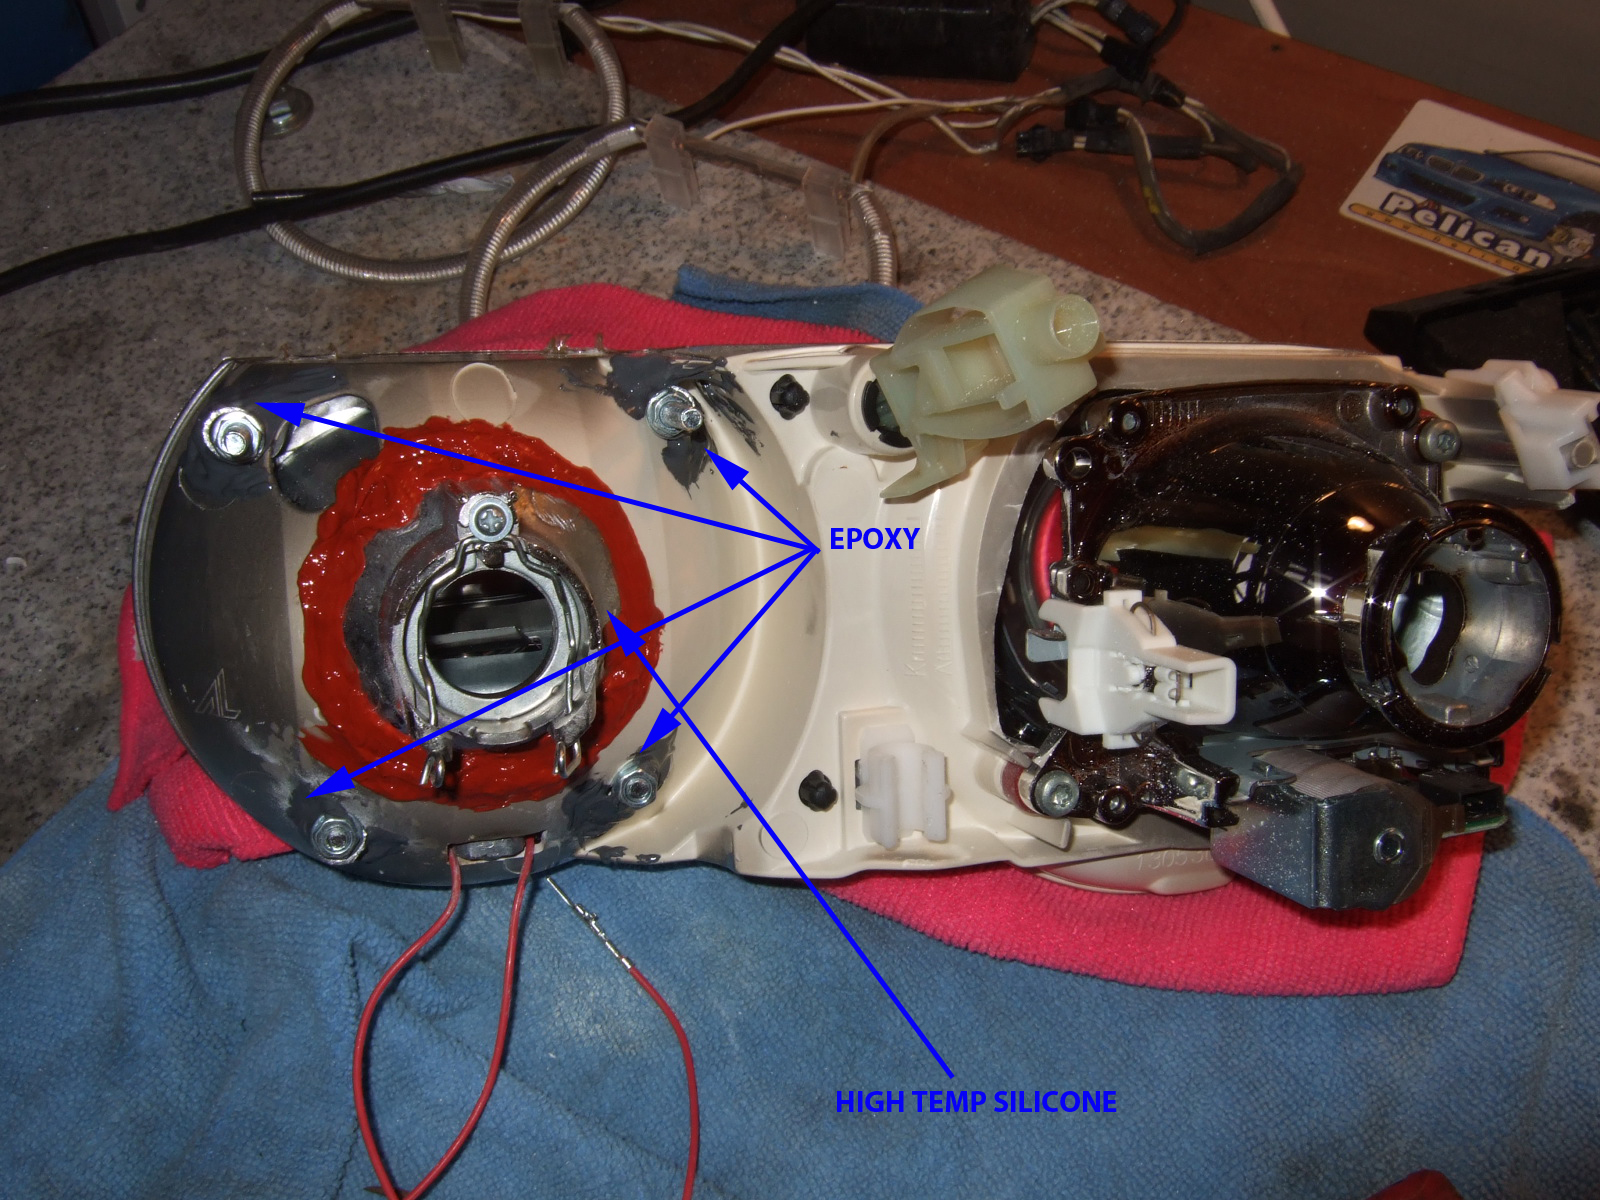
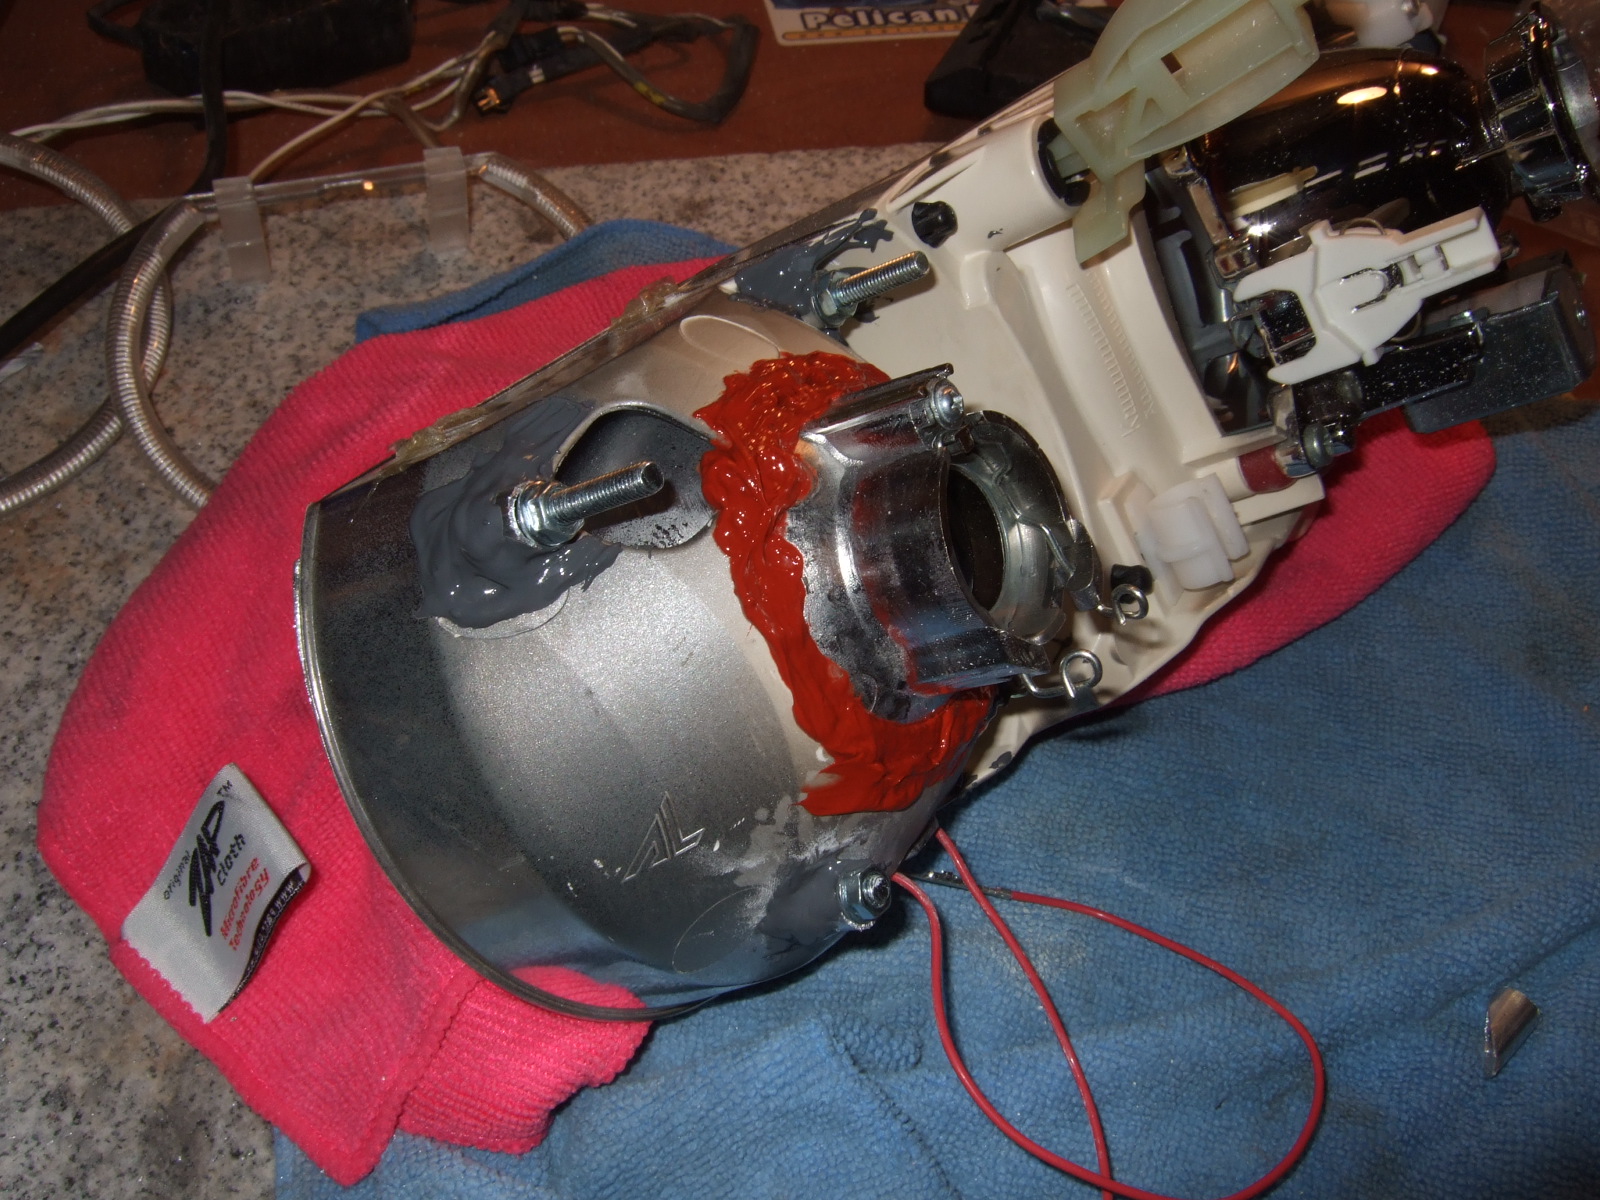
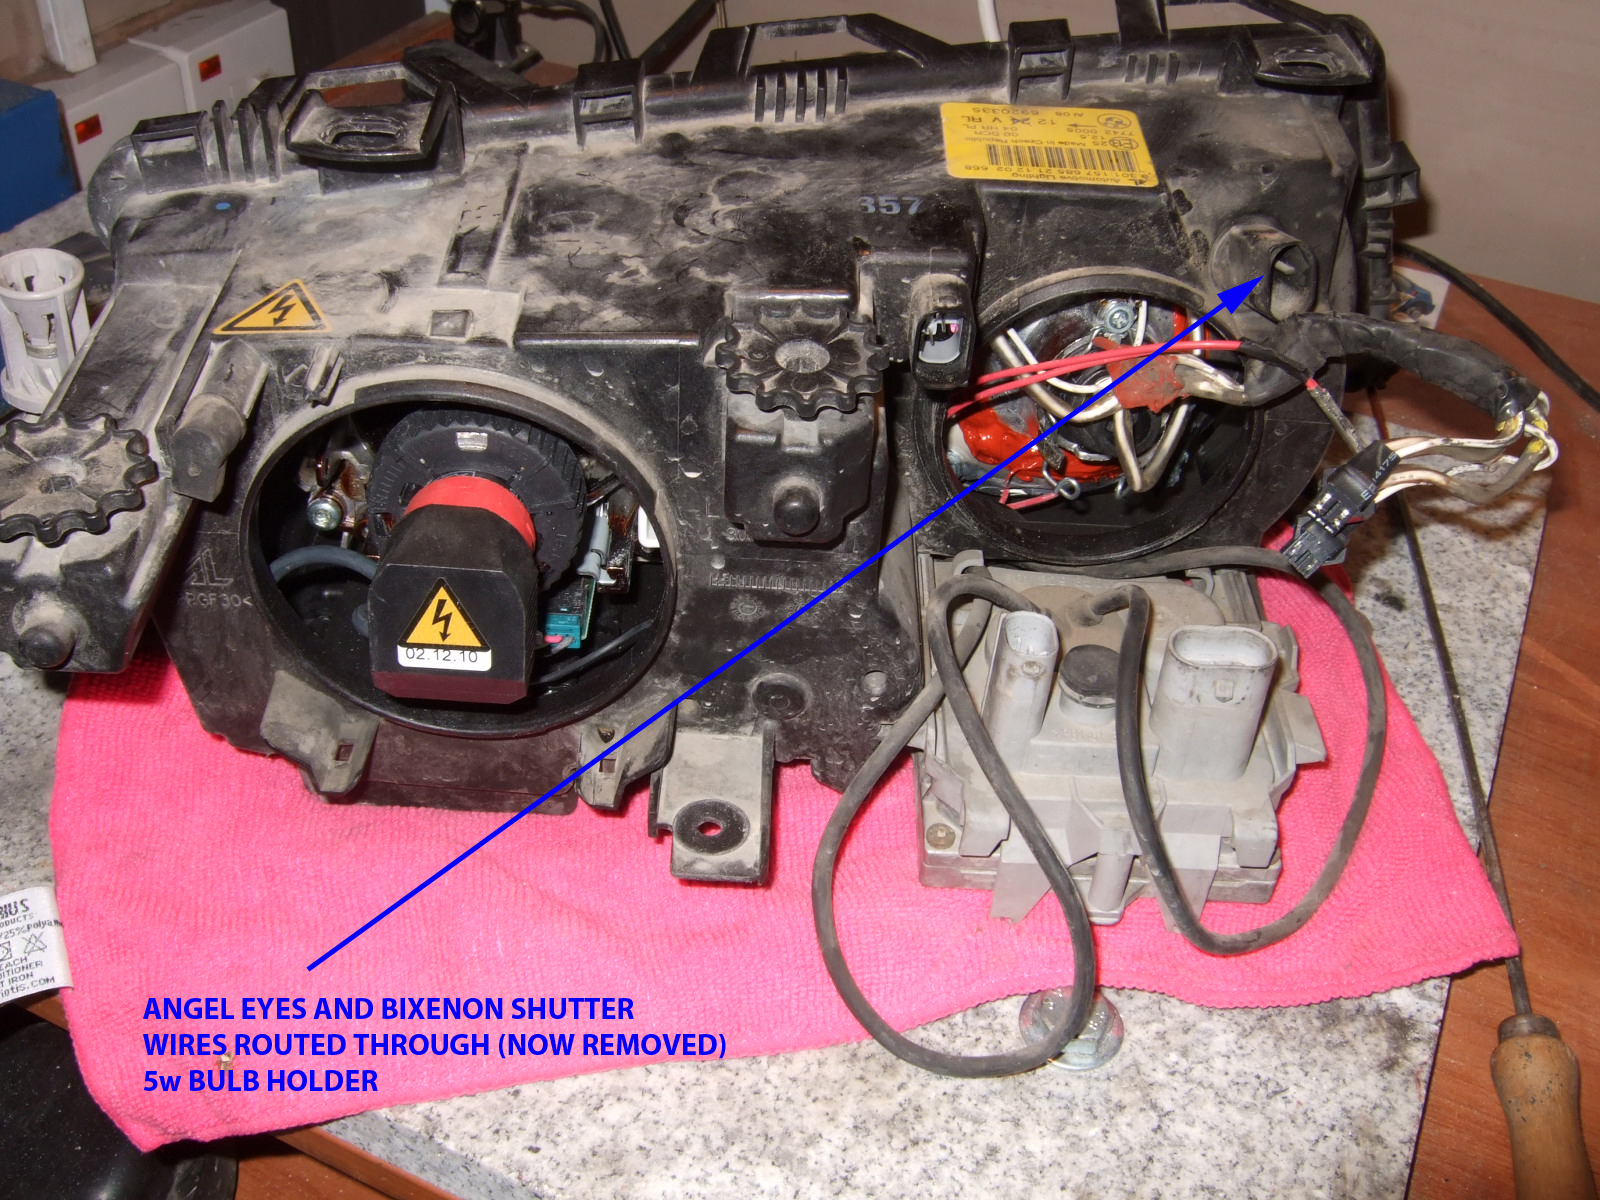
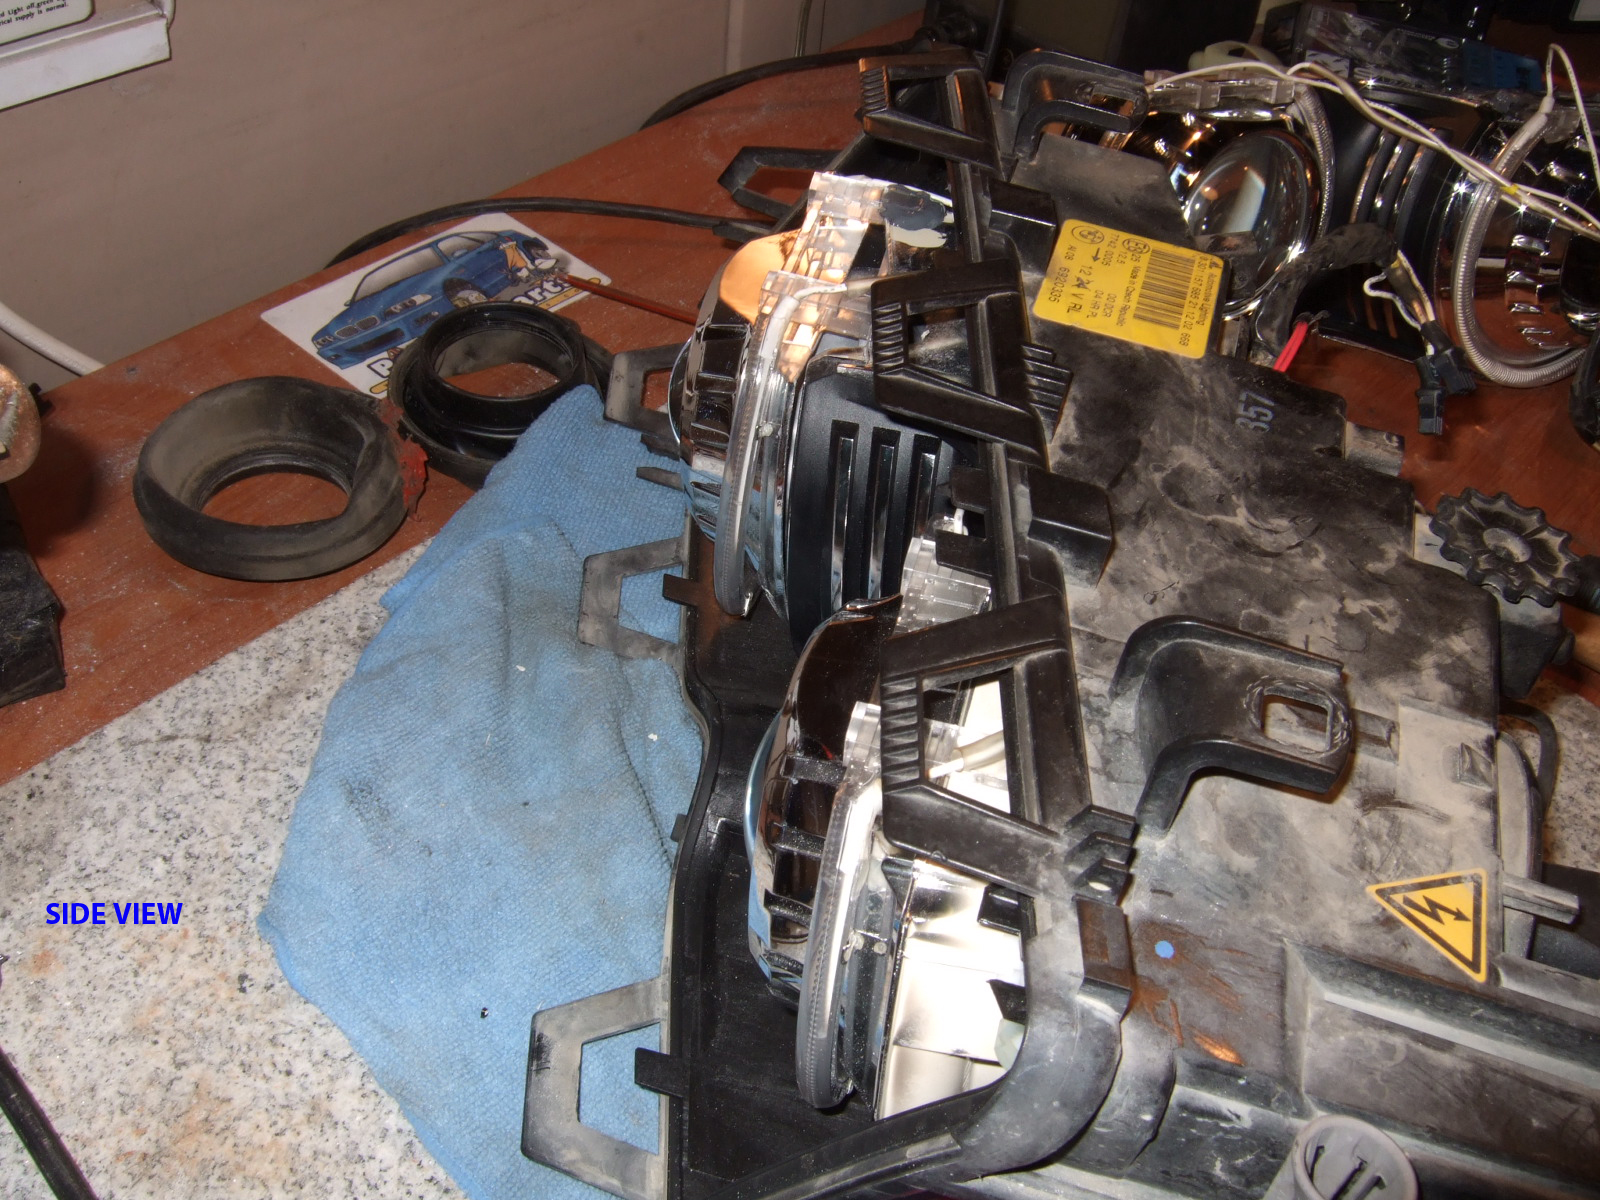
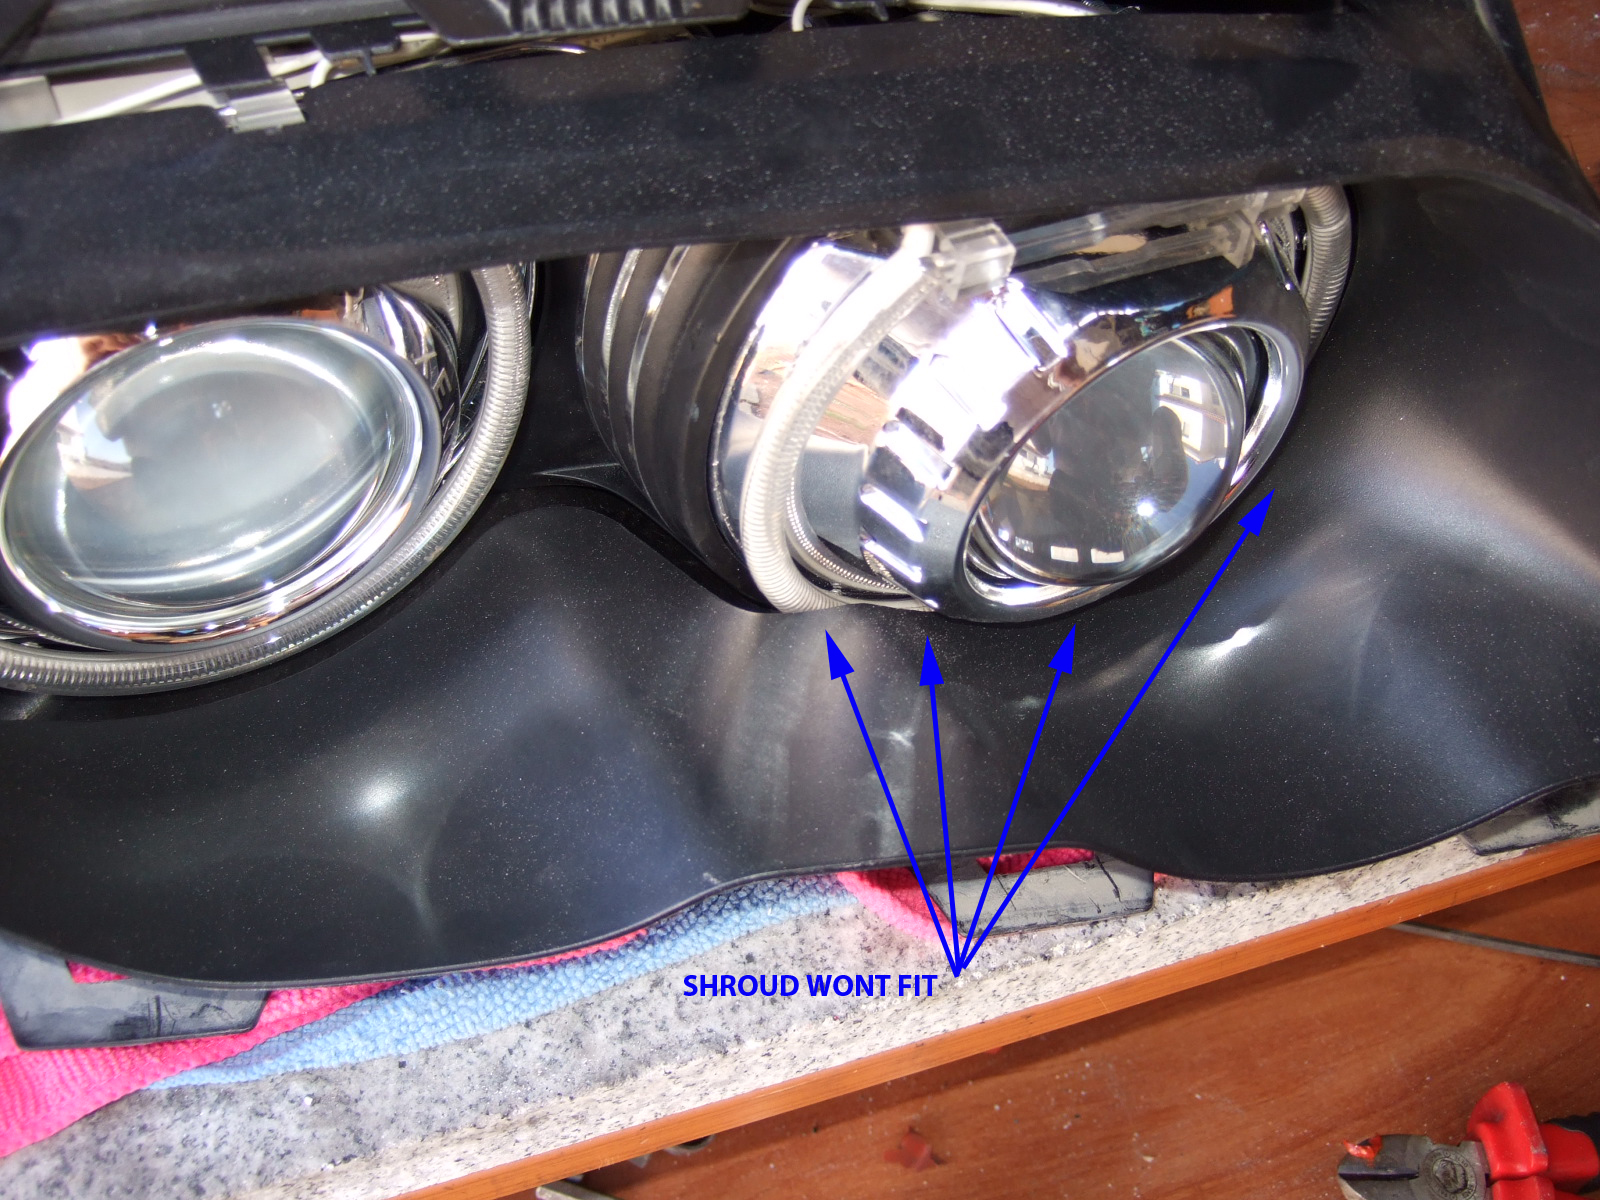
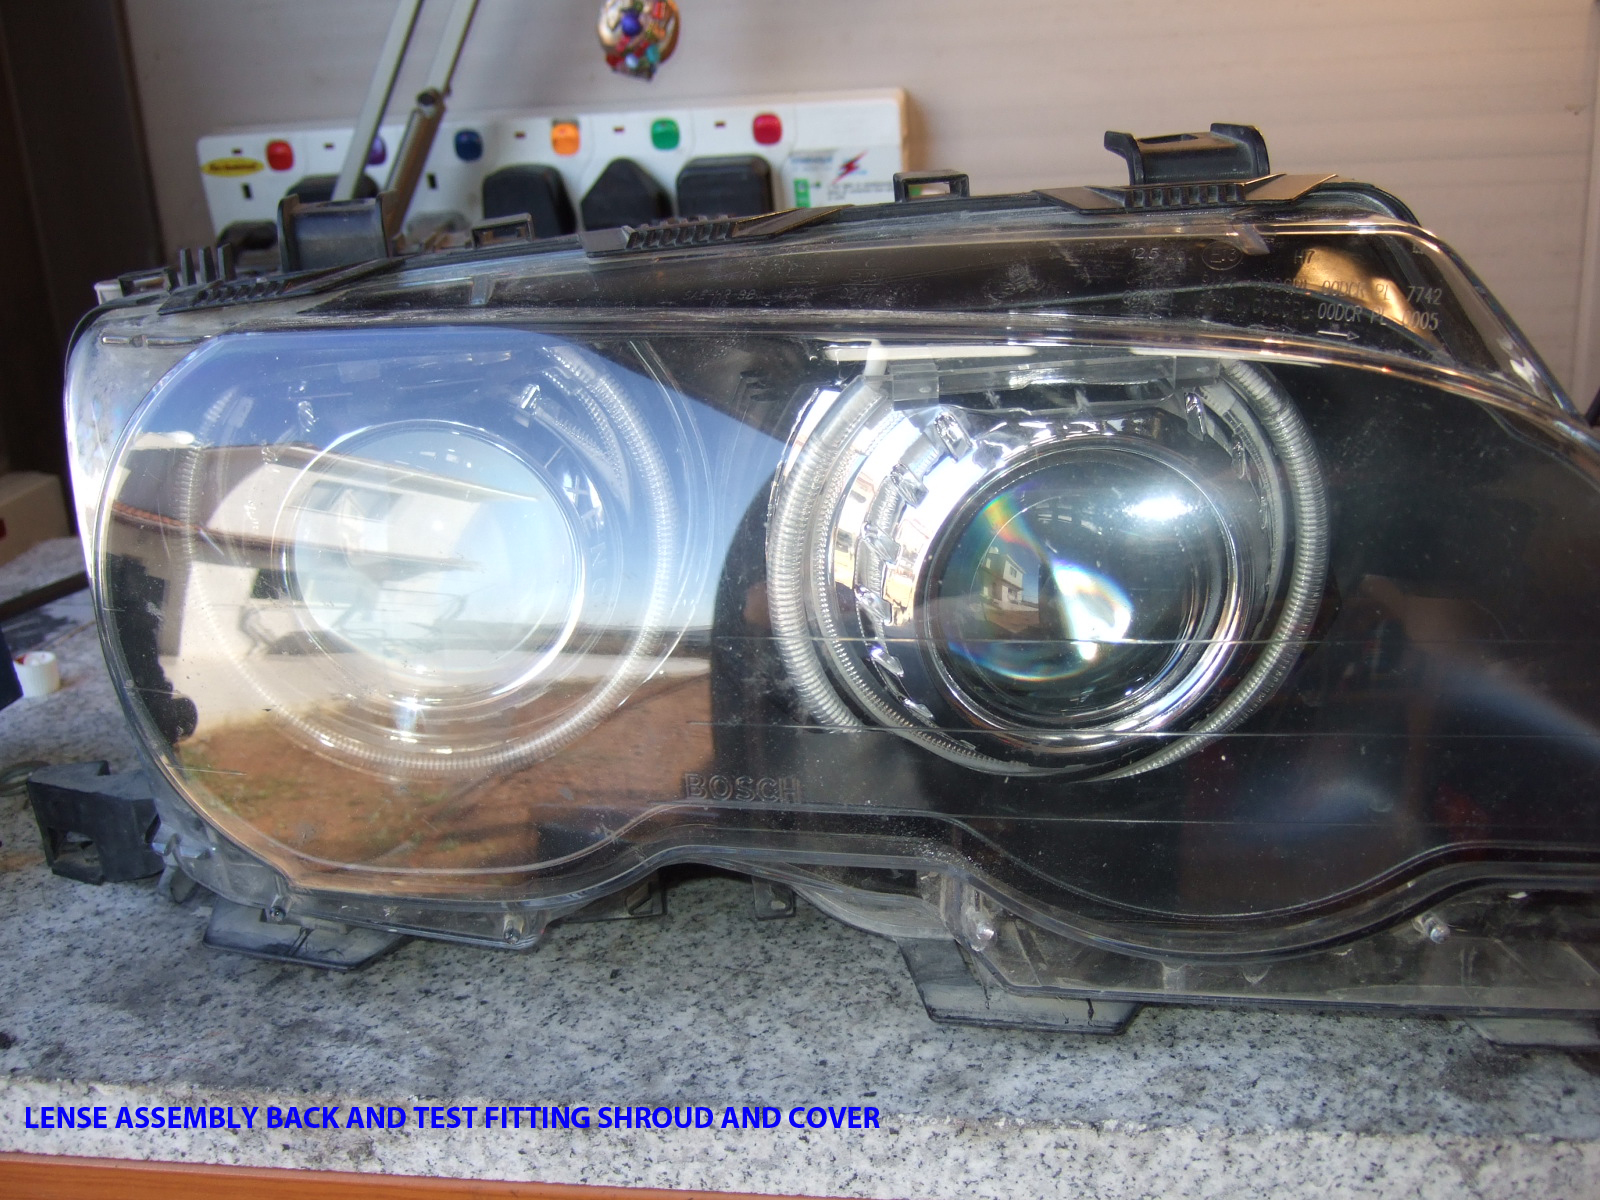
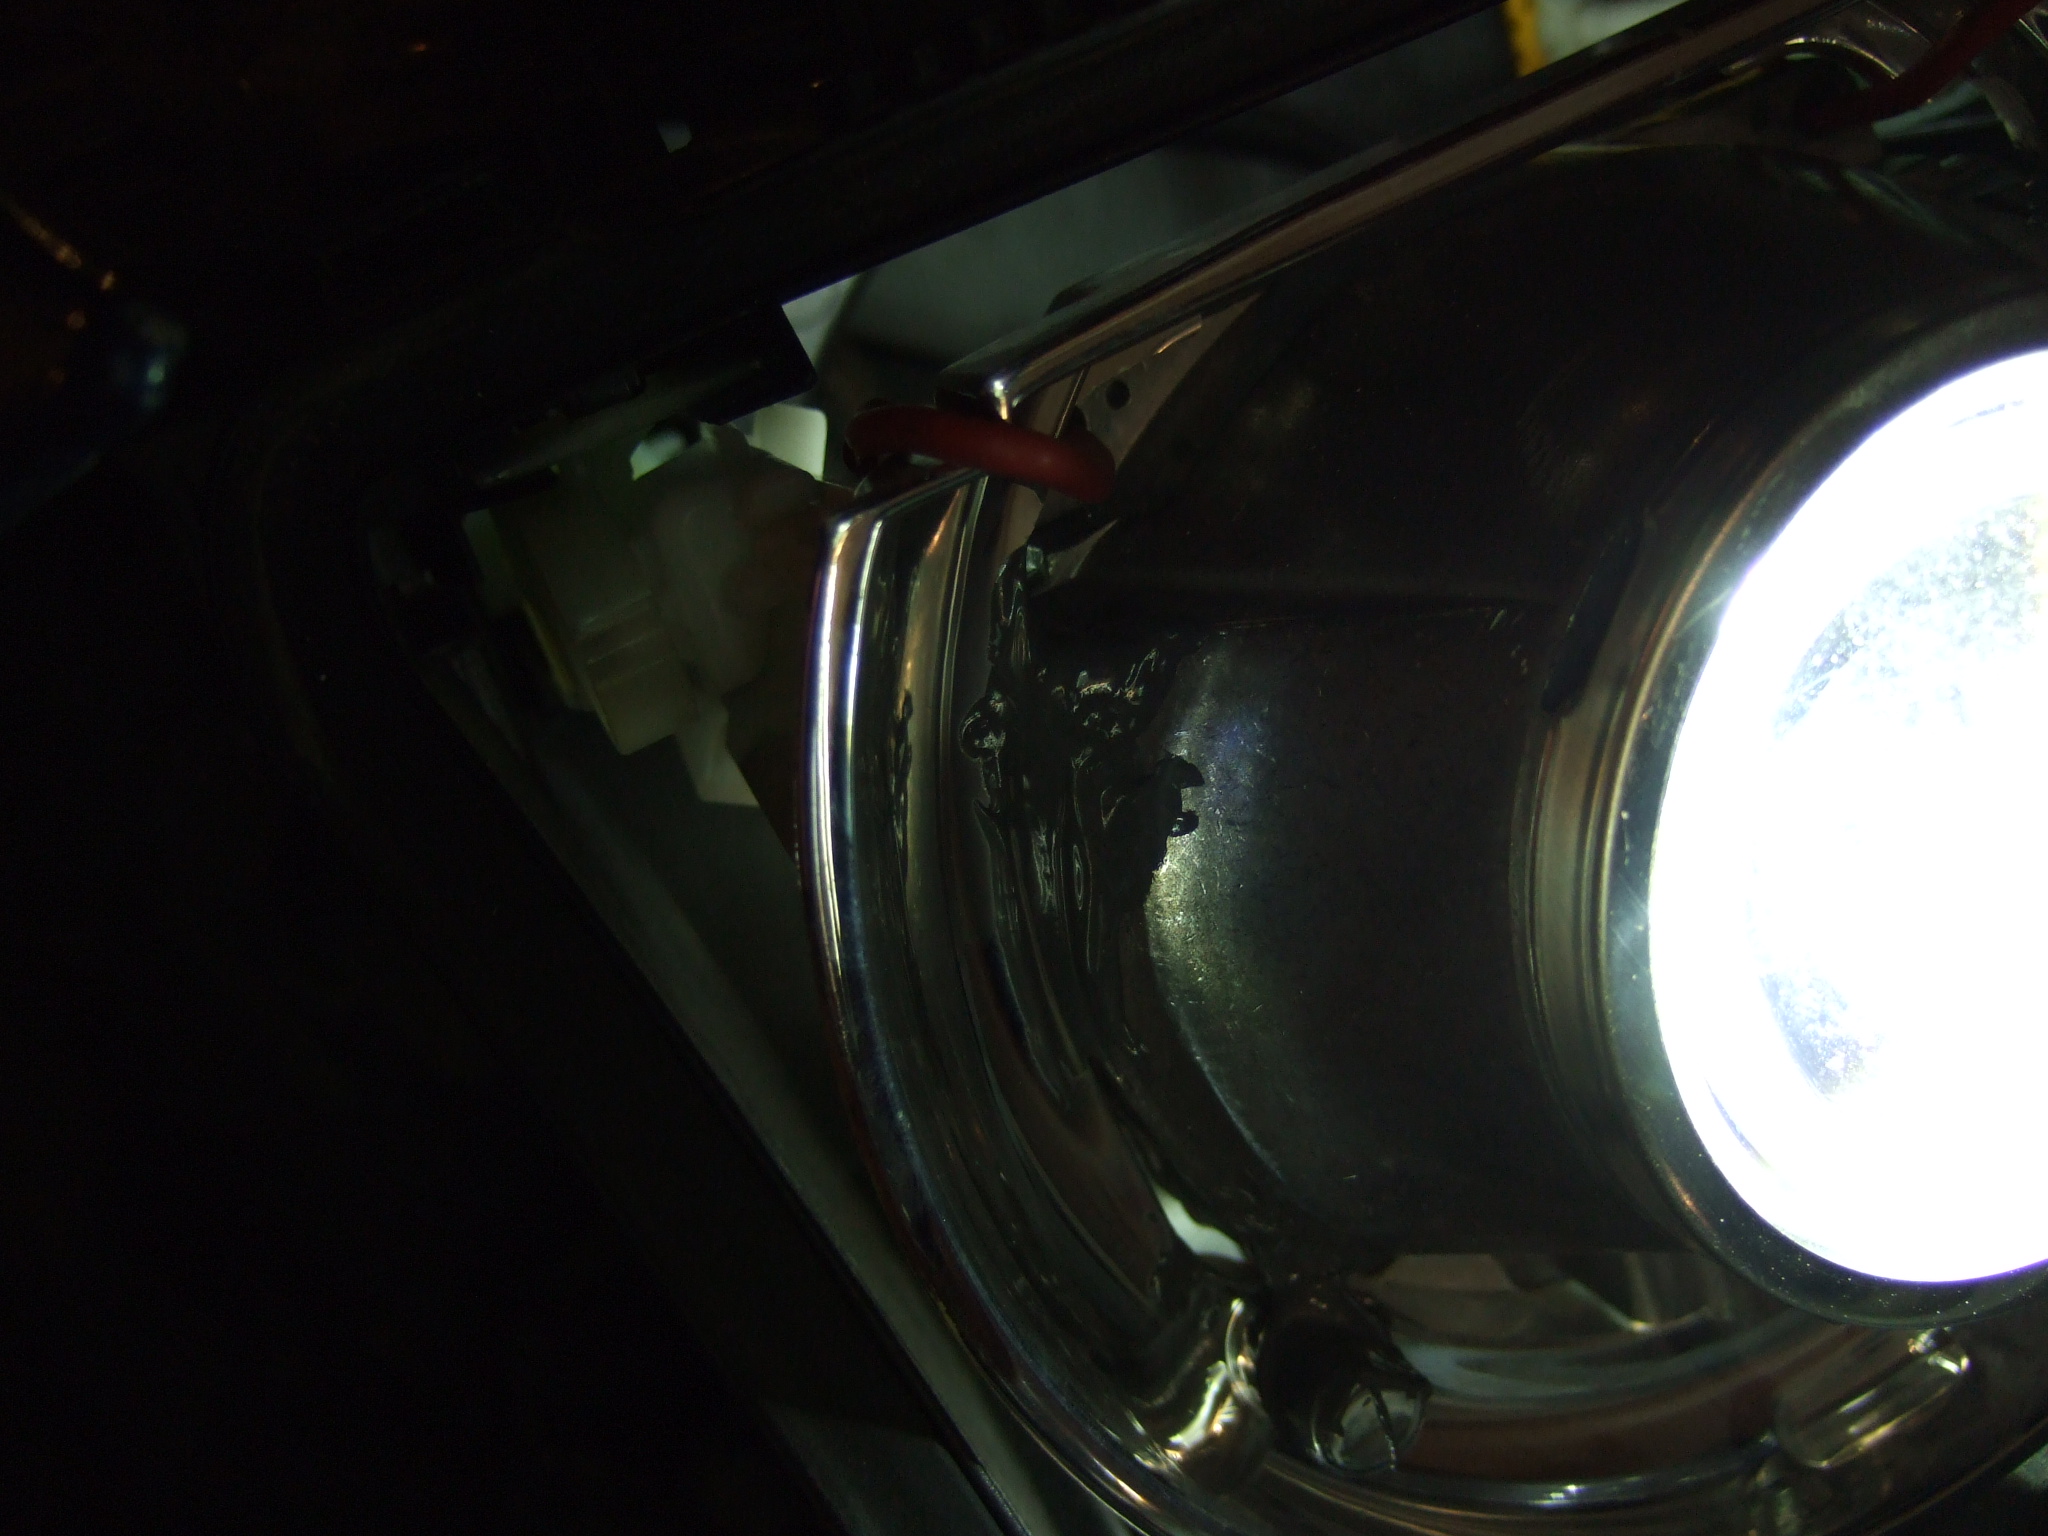
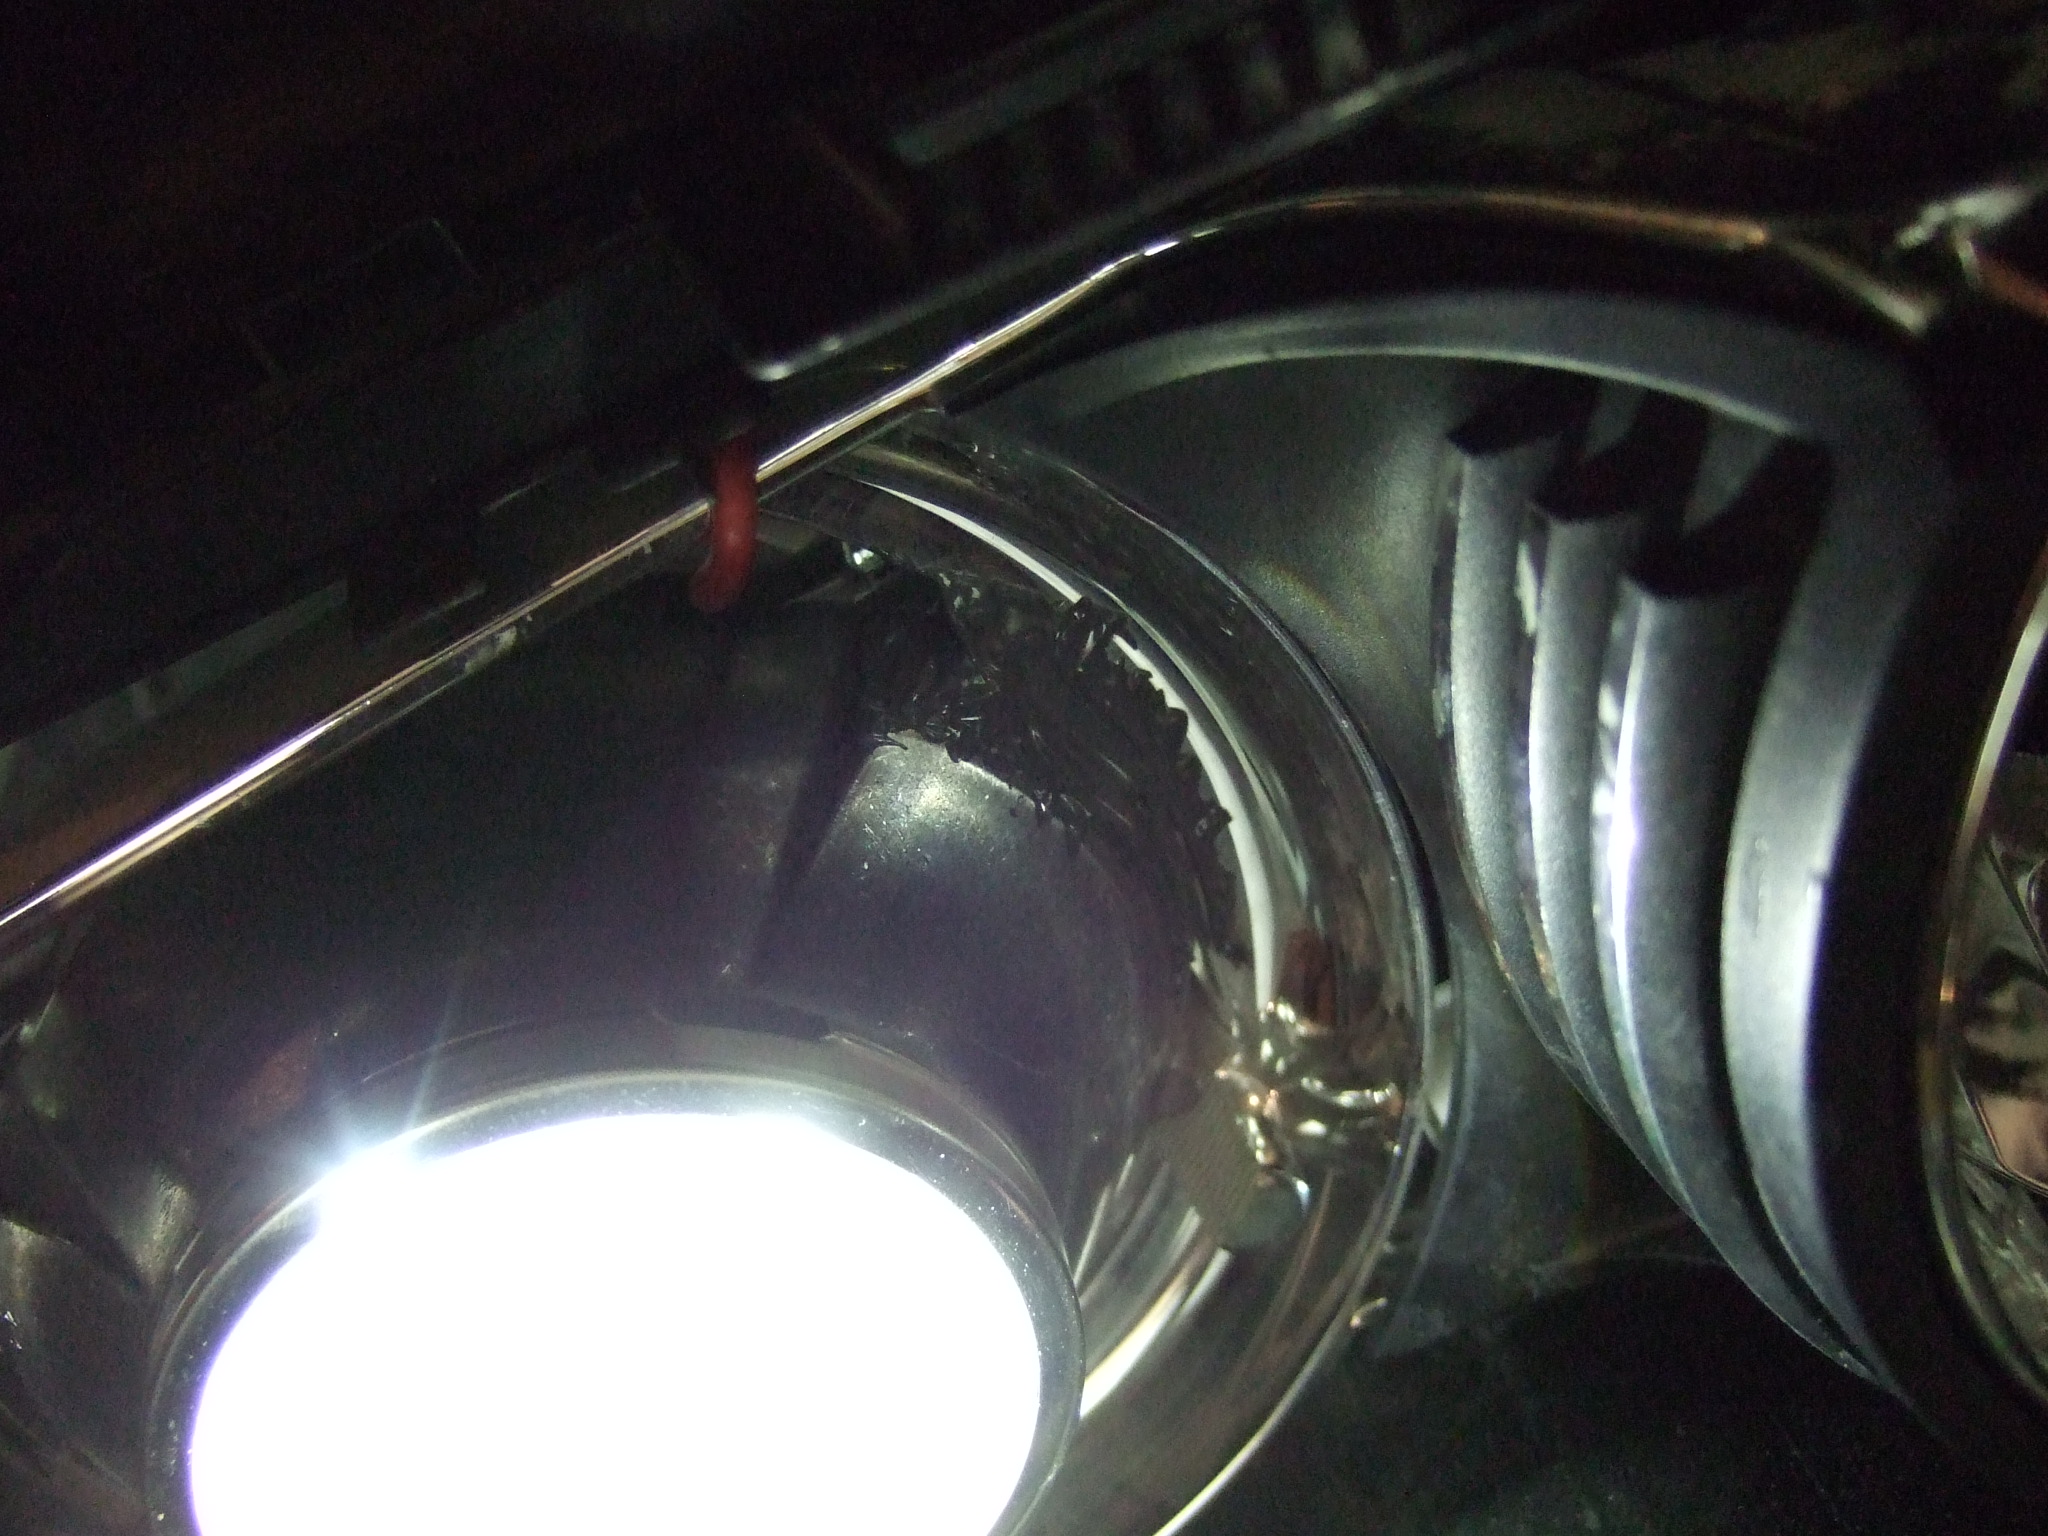
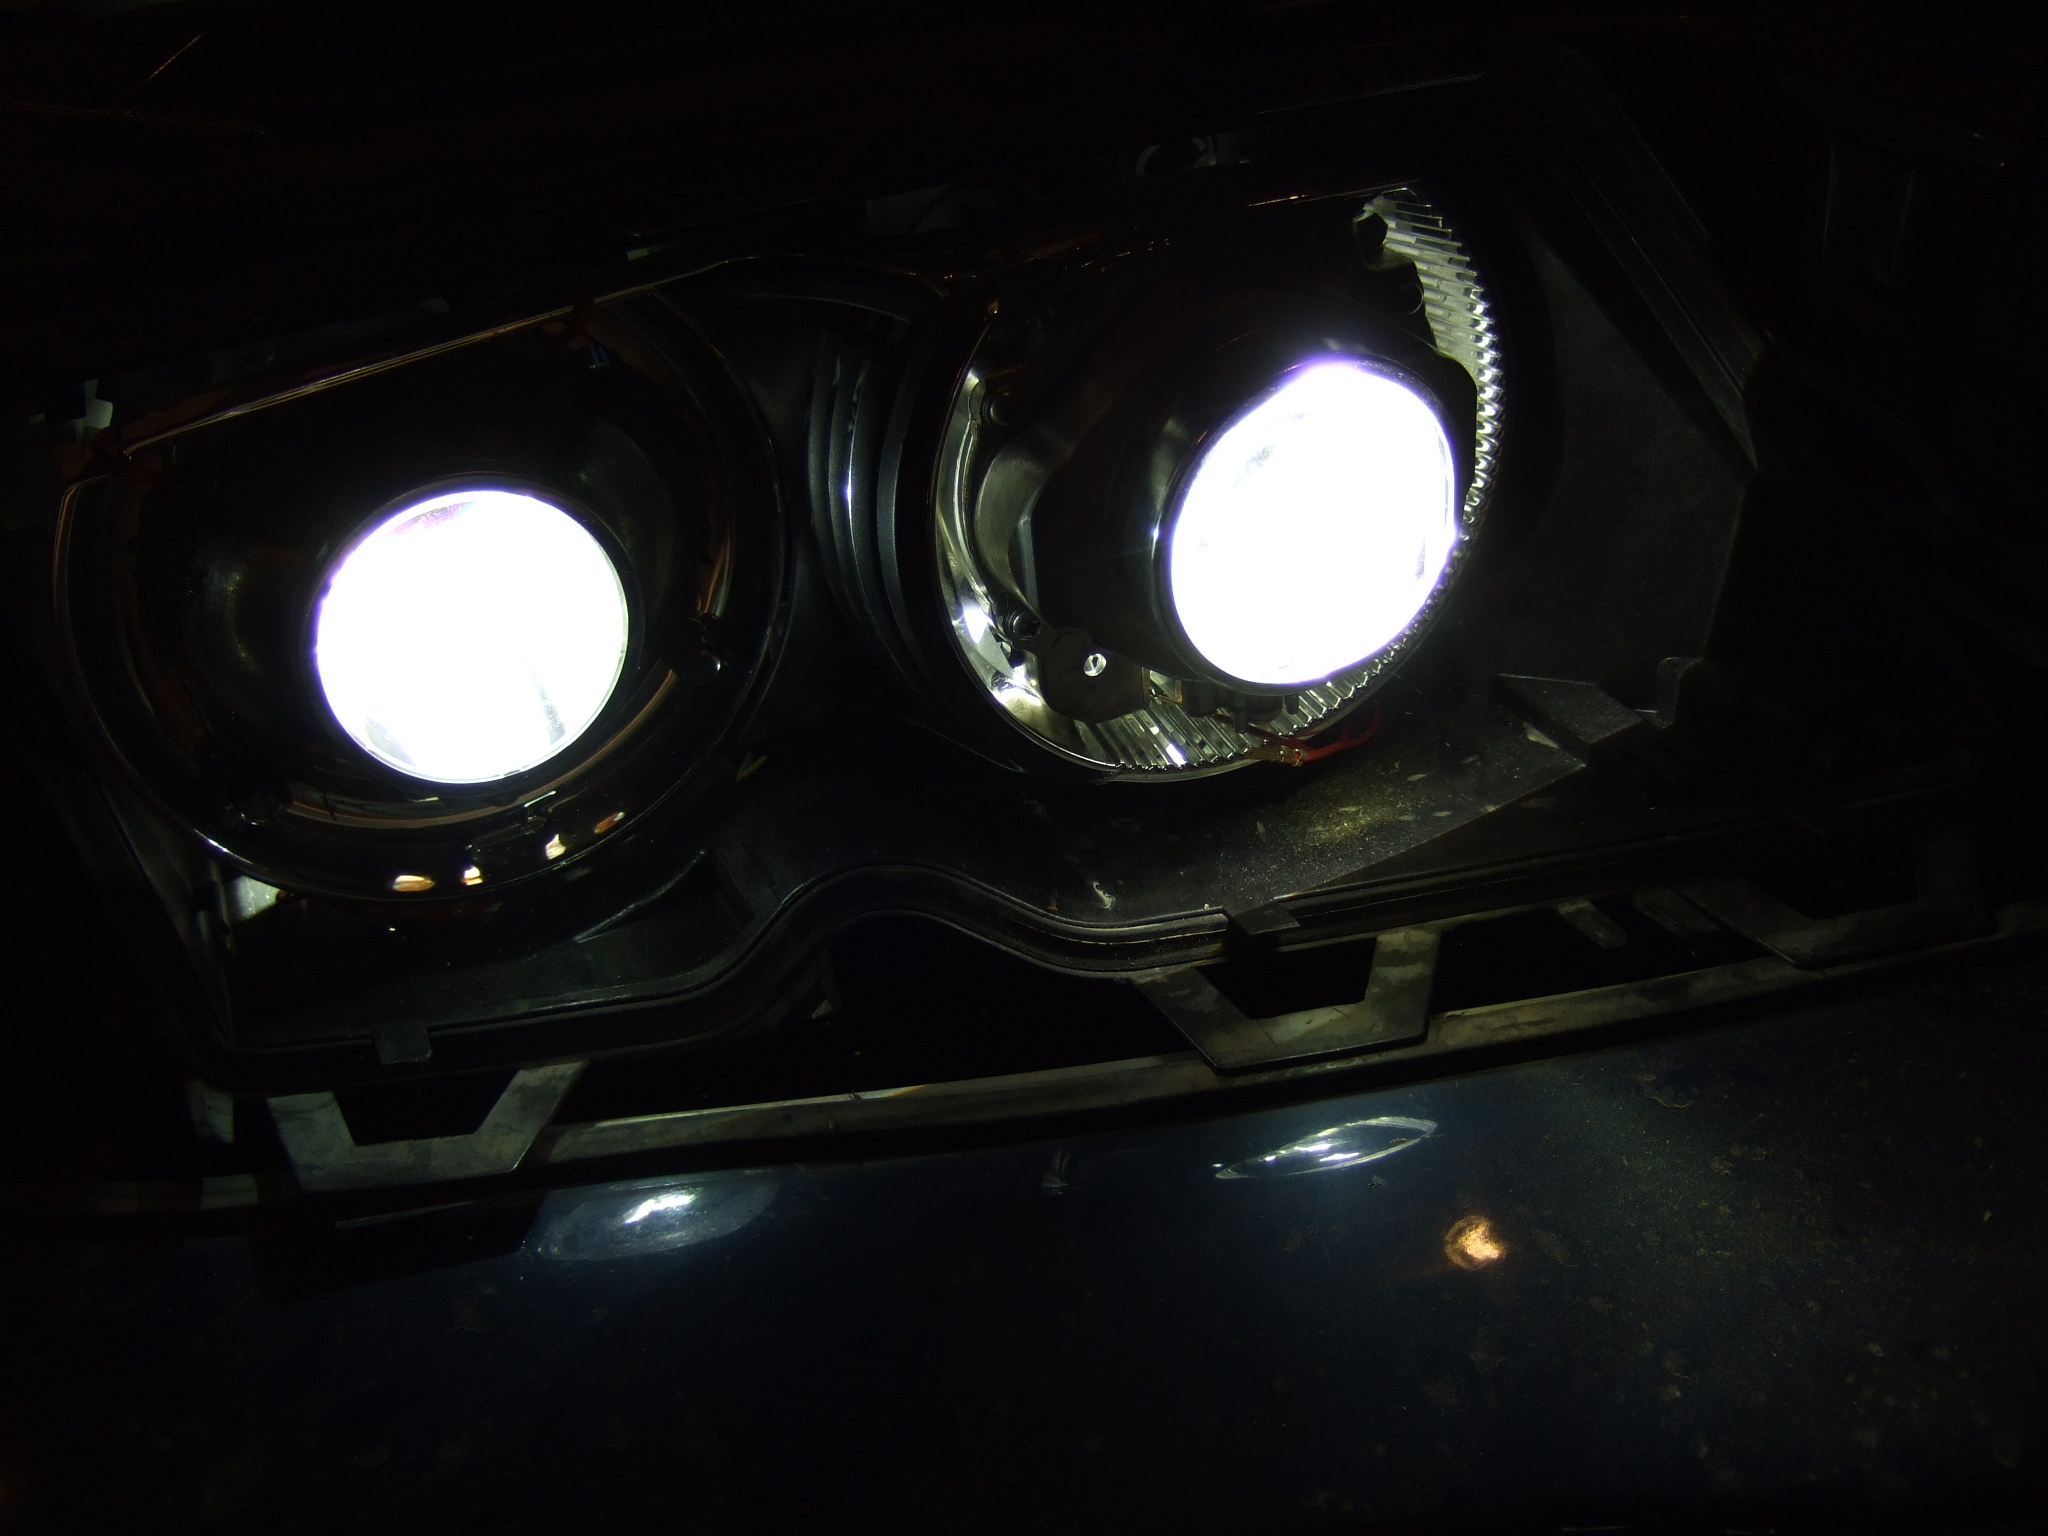
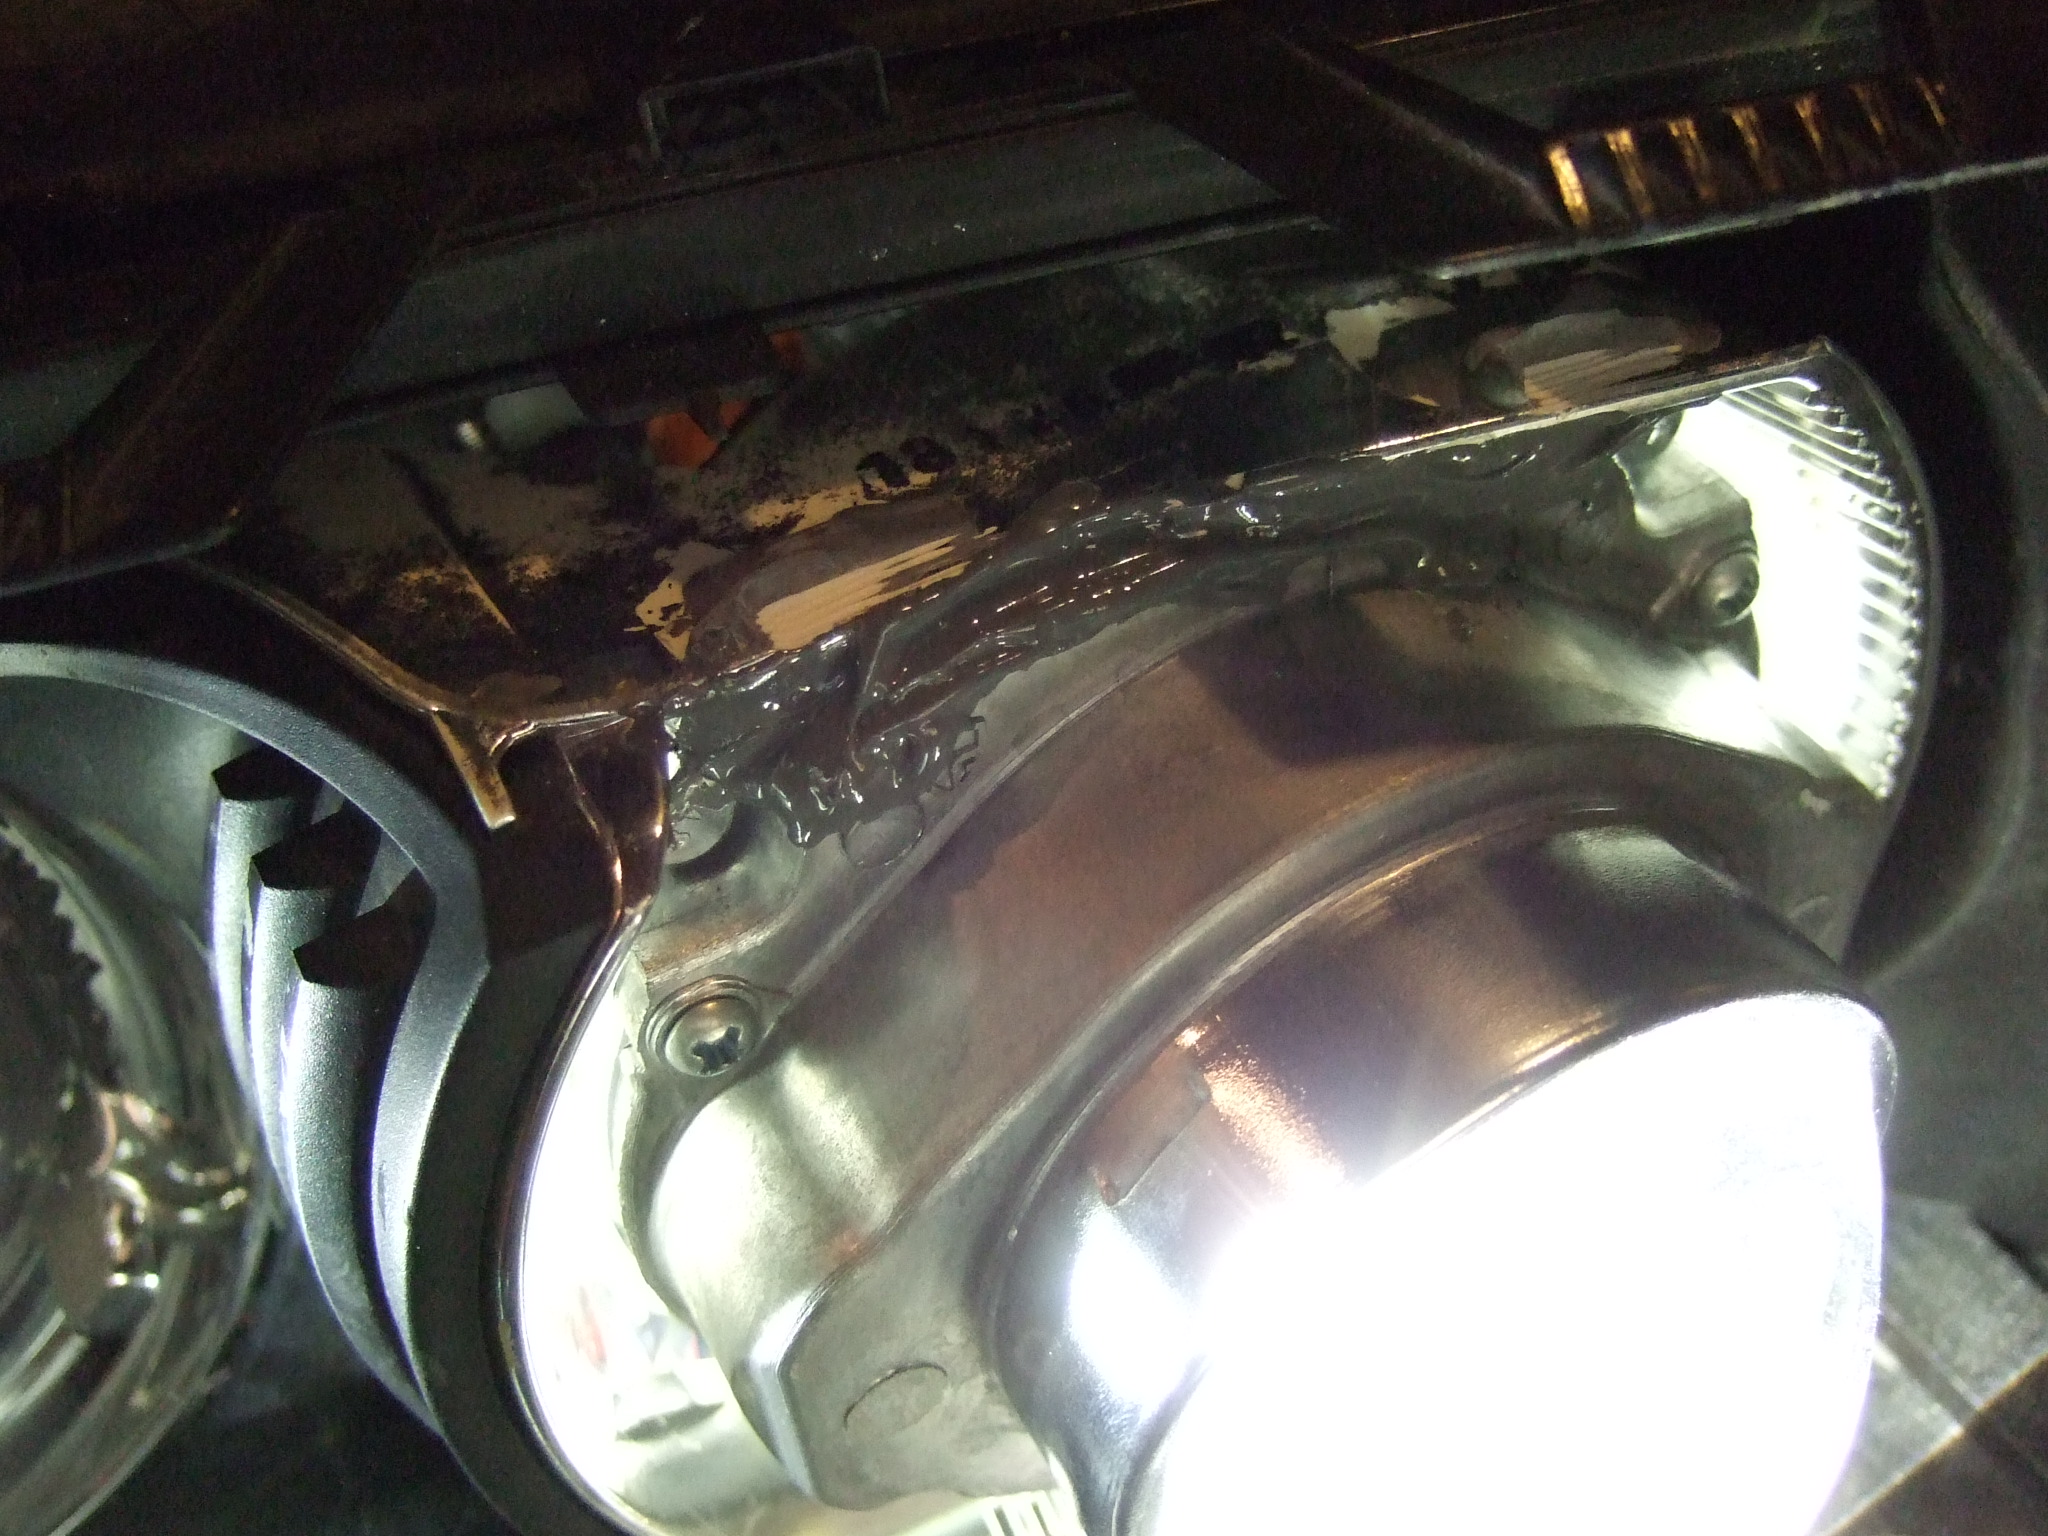
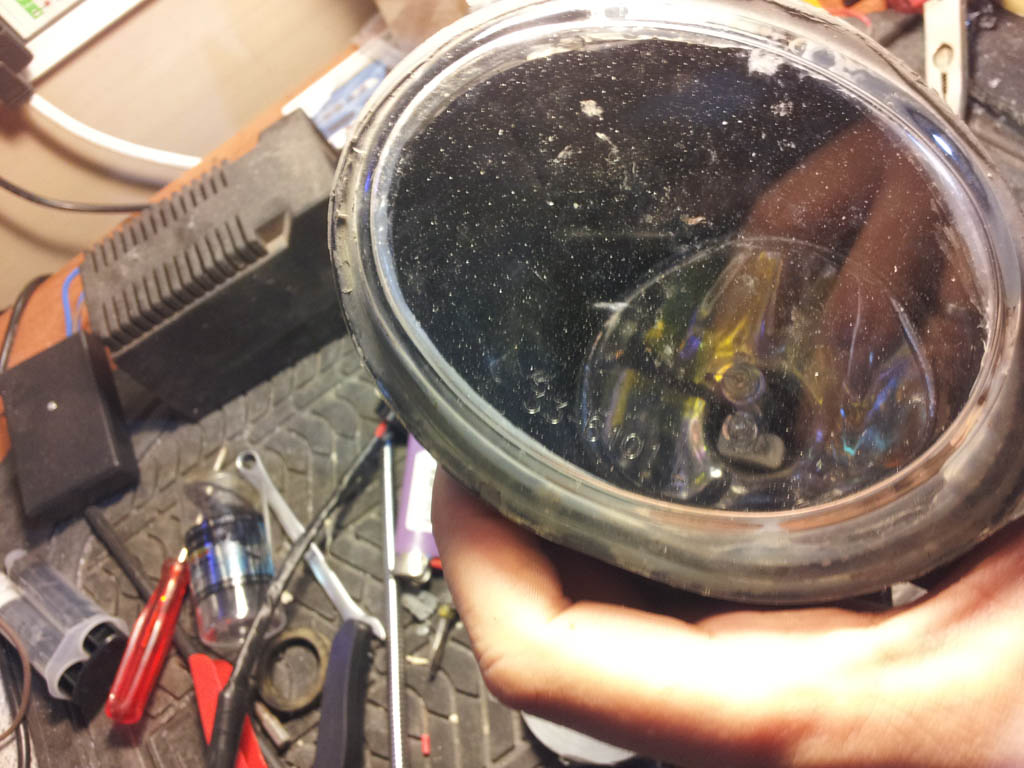
After a lot of anger, fear to break things, the headlights finally came apart: Front view. Surprise, the OEM projector had a layer of dust on it. I let it like that since cleaning would be the last step before re-assembly Took out the angel eyes Now it's the moment of bravery. Look (for the last time) the high-beam reflector that you are about to cut. Put the protective gear (gloves, eye mask, breather) and start dremeling around the holder DONE! If you regreted doing this mod, now you will need money to go back. The FXR Projector is an all aluminum construction, which is good. However, the lower parts need to be grinded to allow it to drop within the halogen housing enough in order to fit the shrouds in front. I drilled new lower holes after grinding. Small cut out was done right at the bi-xenon mechanism to allow wires to come out and to push the projector further back in place. After a lot of trial and error to get the projector grinded correctly, it finally sit in place. I used the E46 shrouds as guides to sit it flush with the halogen housing. Drilled 4 holes to allow bolts to pass through. 4 stainless steel bolts with nuts secured on the projector and loctite used. We don't want them coming loose, else a complete disassembly will be required to fix this. This aluminum tube was used to make some adapters, to allow the nuts to sit flush on the high beam outer housing. Self explanatory from the pics below: Epoxy used on 4 sides to secure everything together as well as high-temp silicone for the middle section. Silicone allows for some elasticity just in case minor adjustments are needed. European E46 have an additional 5w wedge bulb within the halogen housing, which is now not used. The existing hole is ideal to route all additional wires outside of the headlight housing. In my case, angel eyes and bi-xenon wires. Refitting angel eyes back and pray that they will still work after all this fiddling. To put back the inner headlights: 1. Bring both parts as close as possible. Fish the wires out of the hole 2. Align the 2 upper leveling guides with the adjustment knob screws on the housing. Turn the knobs a bit until they catch the guides. 3. Now push the lower middle section of the inner headlight assembly until it pops back in the leveling arm (the one it troubled us before). Use the power tools to rotate both knobs counterclockwise to pull the lenses back now. Verify movement and proceed. 4. Clean everything and blow some compressed air to take away any dust from the lenses 5. Re-install D2S bulbs, holders and covers, to reveal a nasty surprise: the high-beam rubber cover is too big for the D2S bulb. 6. Silicone used to seal gaps and holes, D2S bulbs (now 4) secured in place Test fitting the front headlight trims to find out that they don't fit as well now.
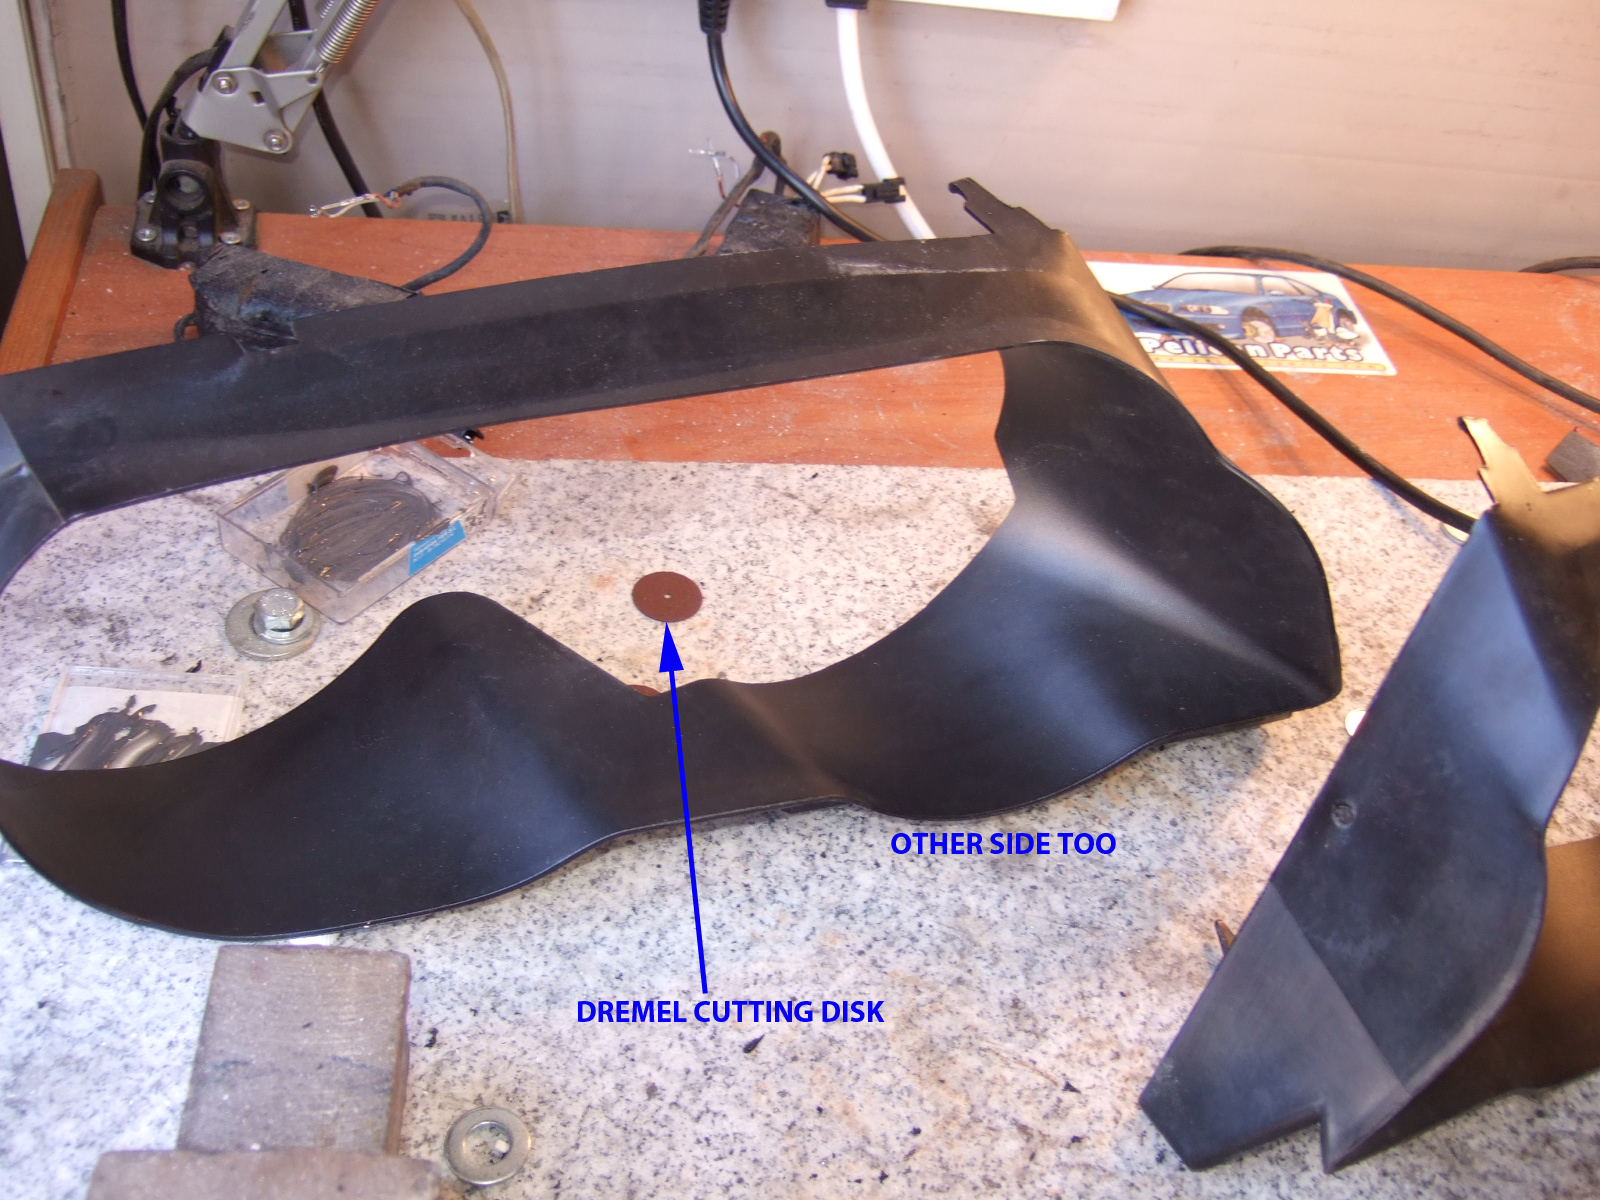
Marking the trim for cutting.
Proud to see that I managed a perfect cut. Headlight trim should fit in place now. Clean everything and re-install, paying attention to ensure that the headlight cover is dust-free and clipped all around. Sit back and admire your work, to find out that you have another headlight to do. (Trick: do both in parallel)
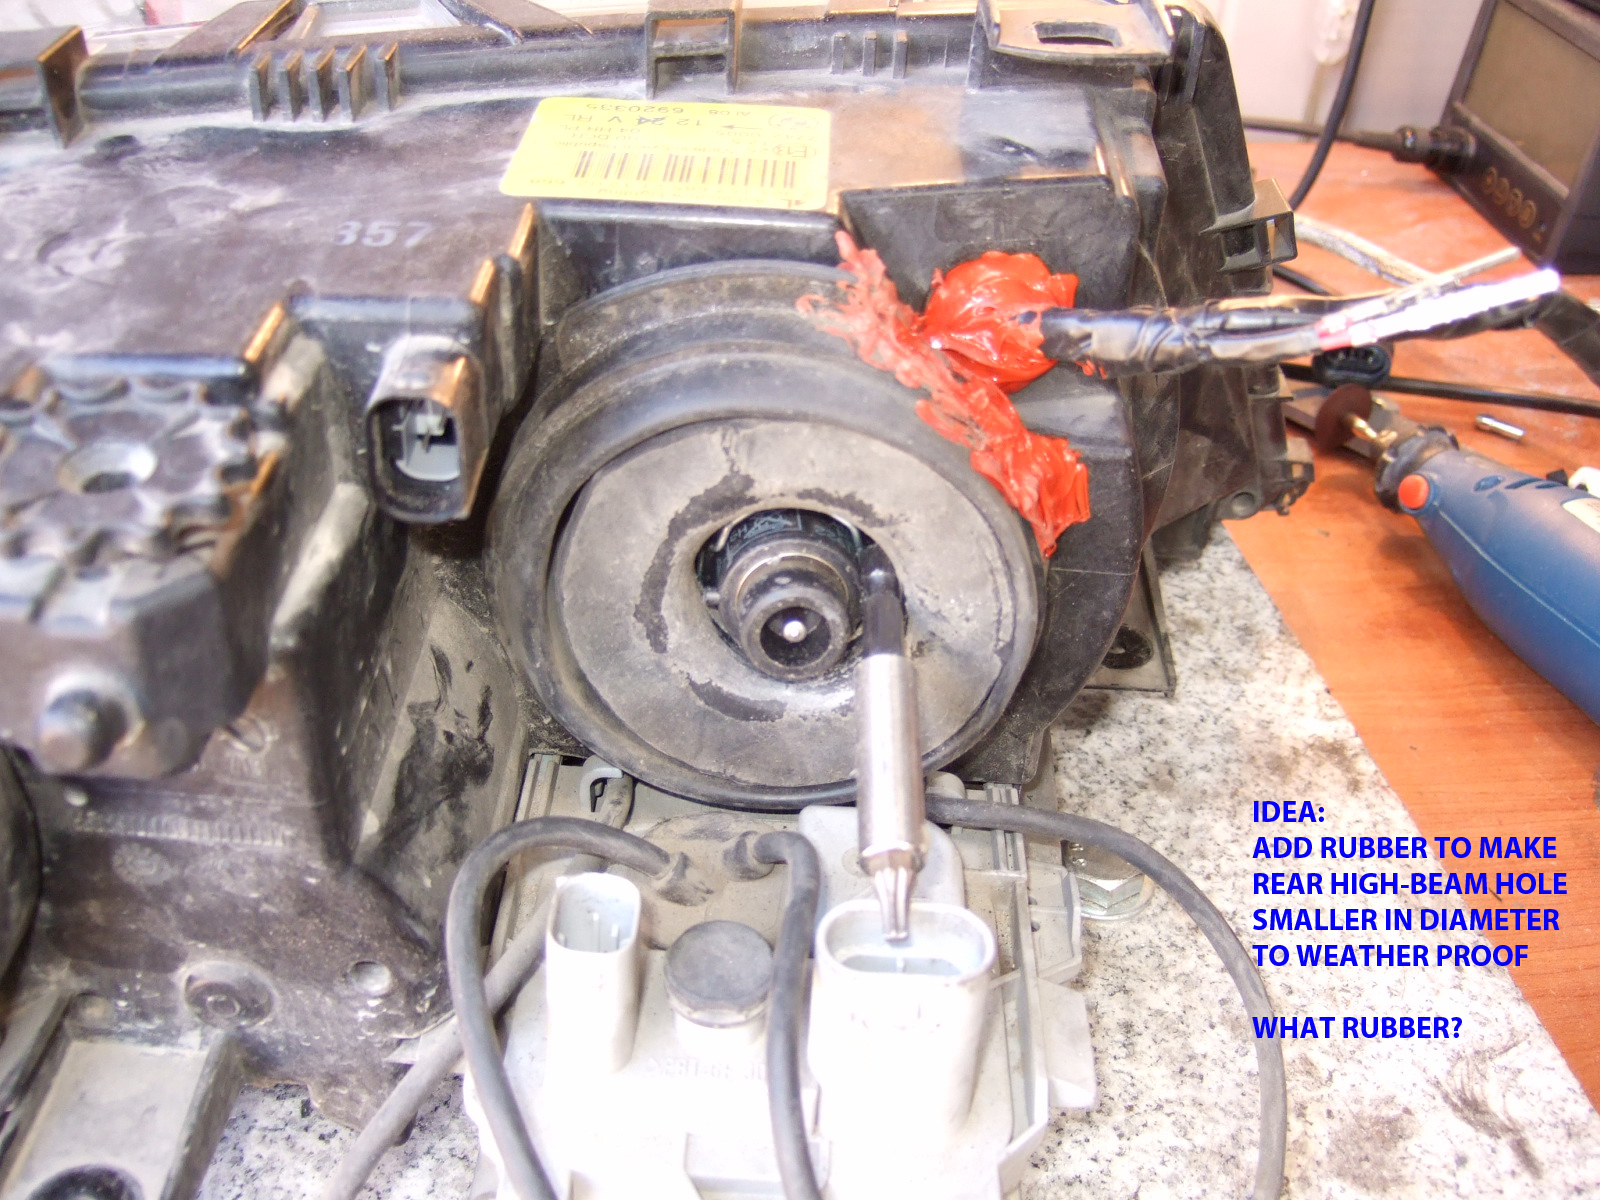
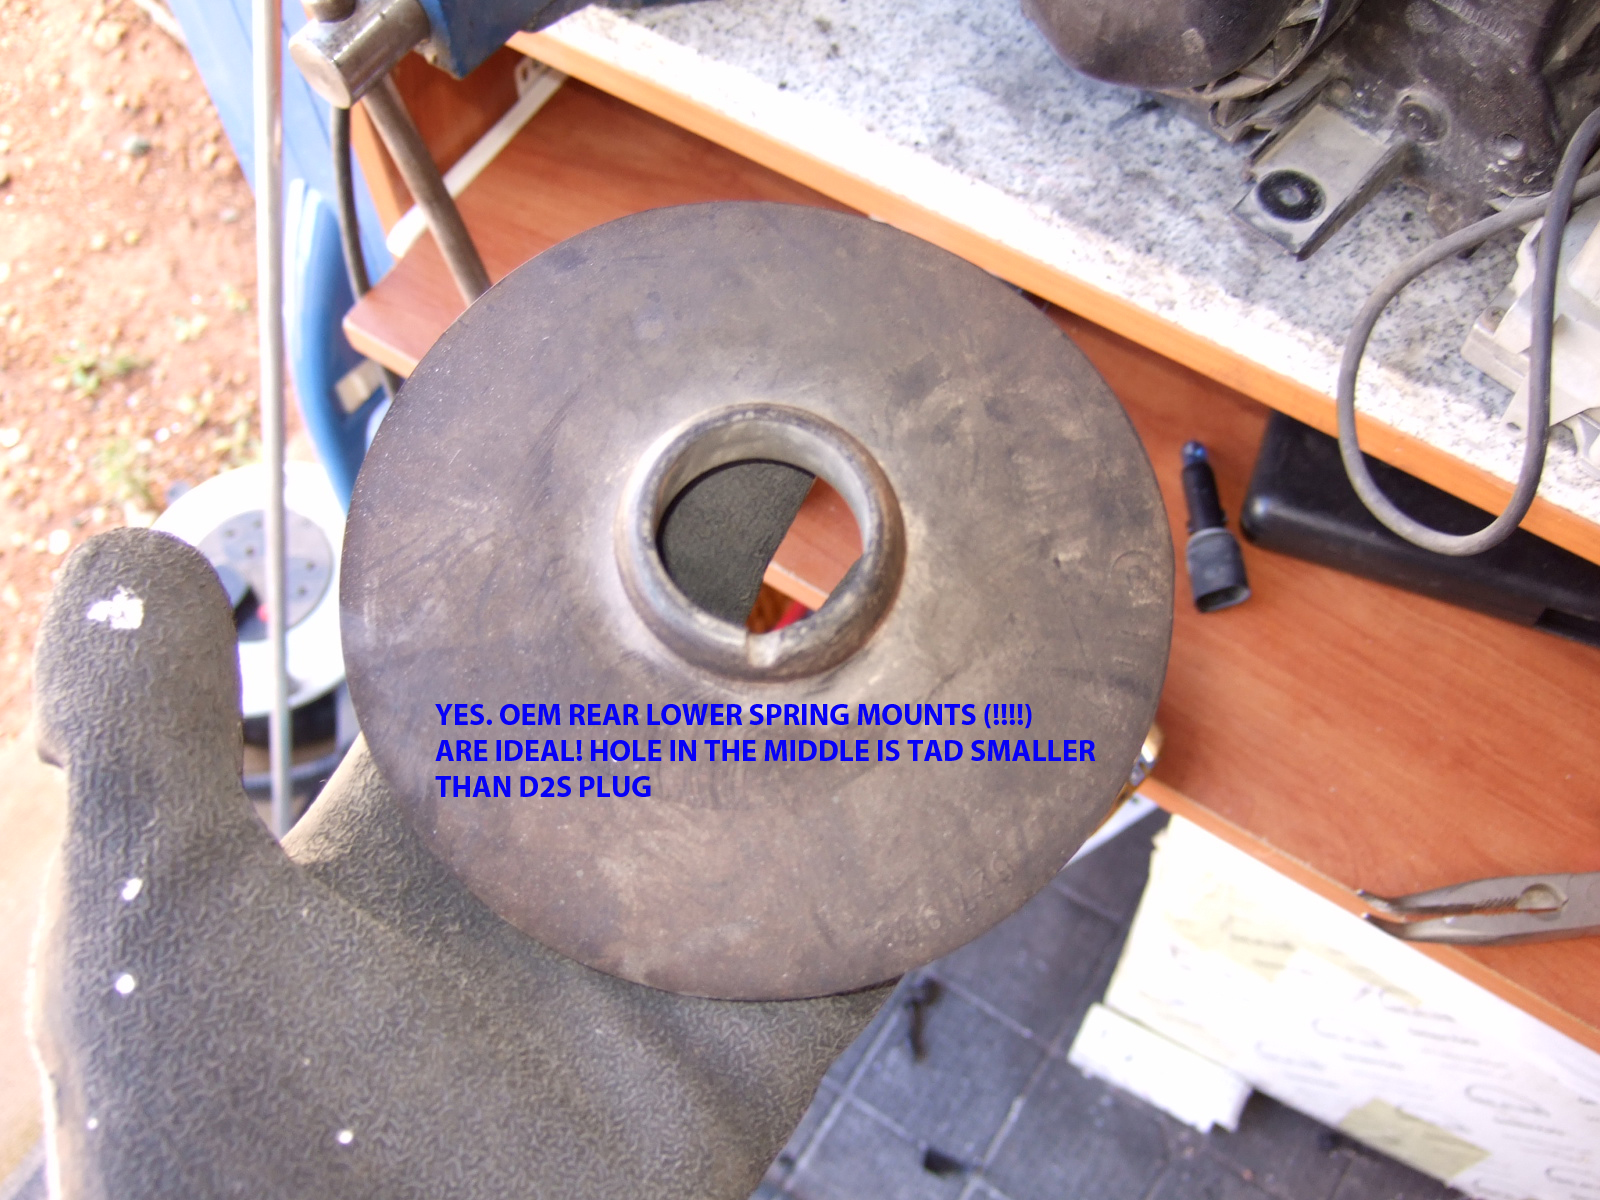
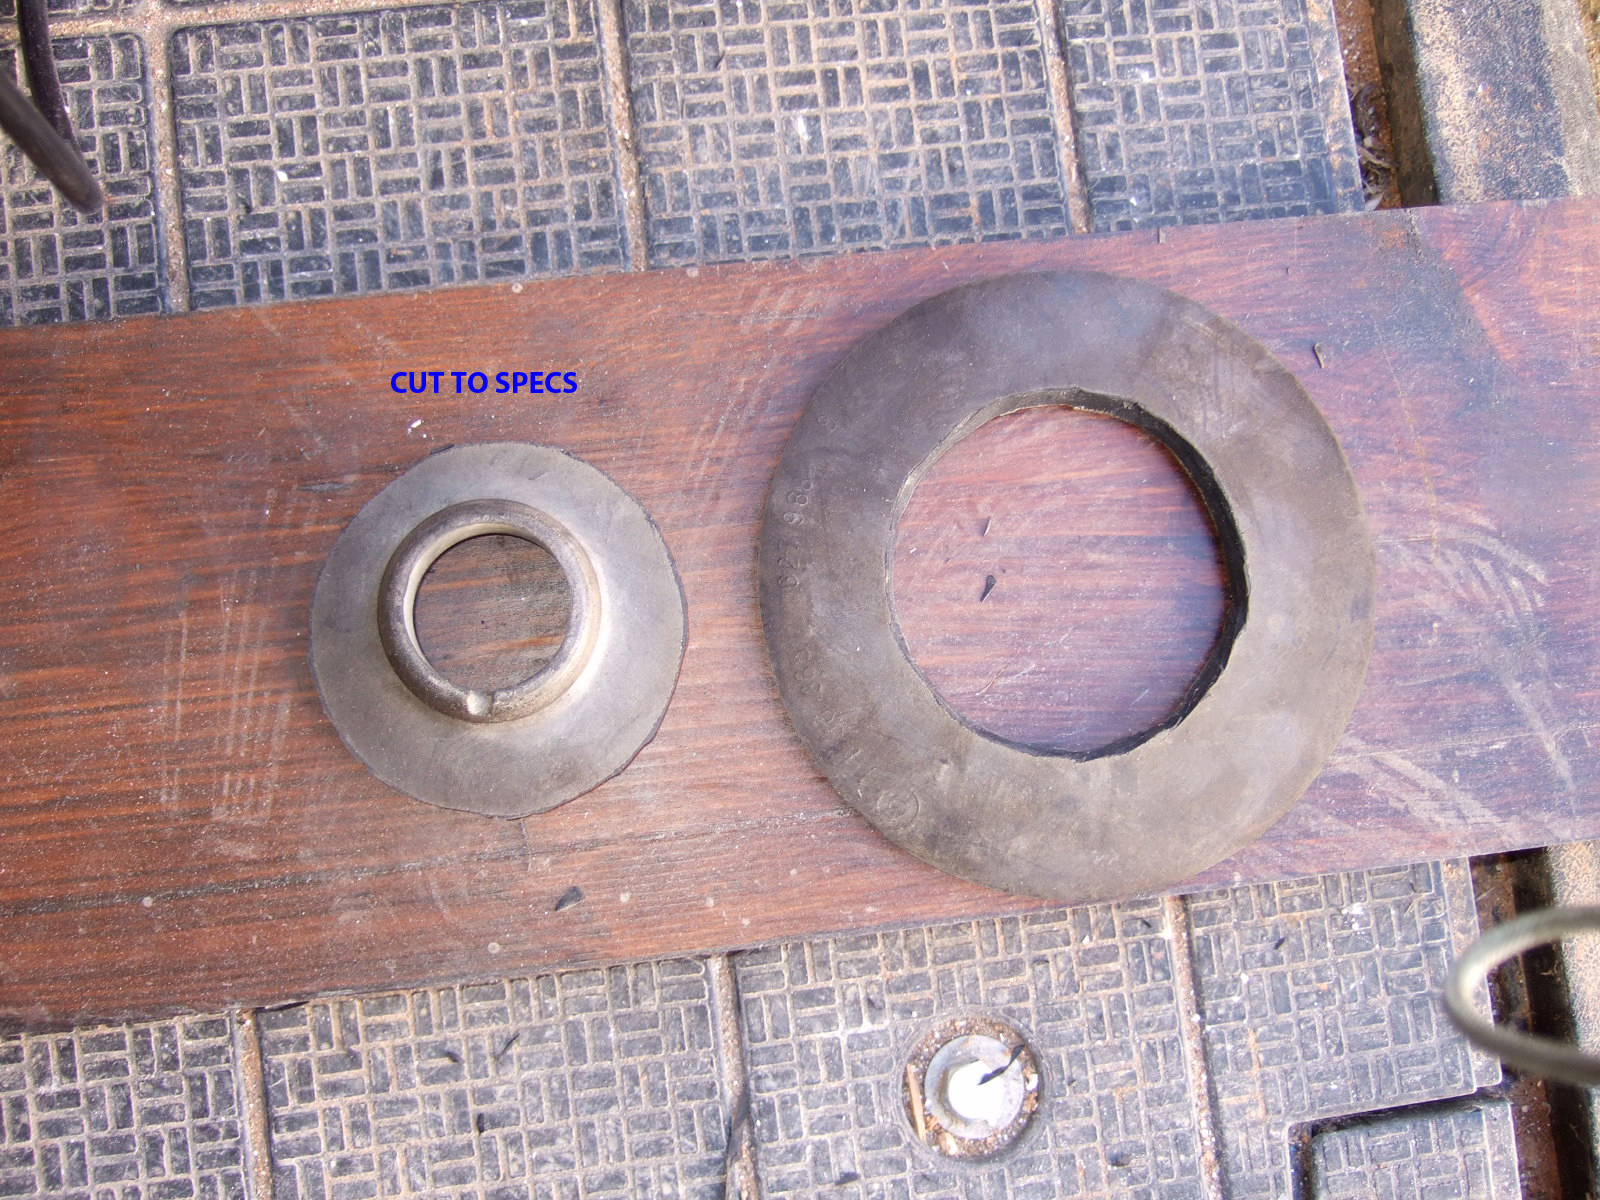
Back side now, to solve the gap problem on the rubber cover, I made the adaptor seen below. Now, what did I use to make that? When I did a full suspension install, I got these spring pads as well which I never installed. Amazingly the hole in the middle is perfect for the bulb and bulb plug! Only need to reduce the outer diameter to fit inside the existing rubber cover
Cutting takes place with a knife that the sales person at pelican parts accidentally left in my brakes order :)
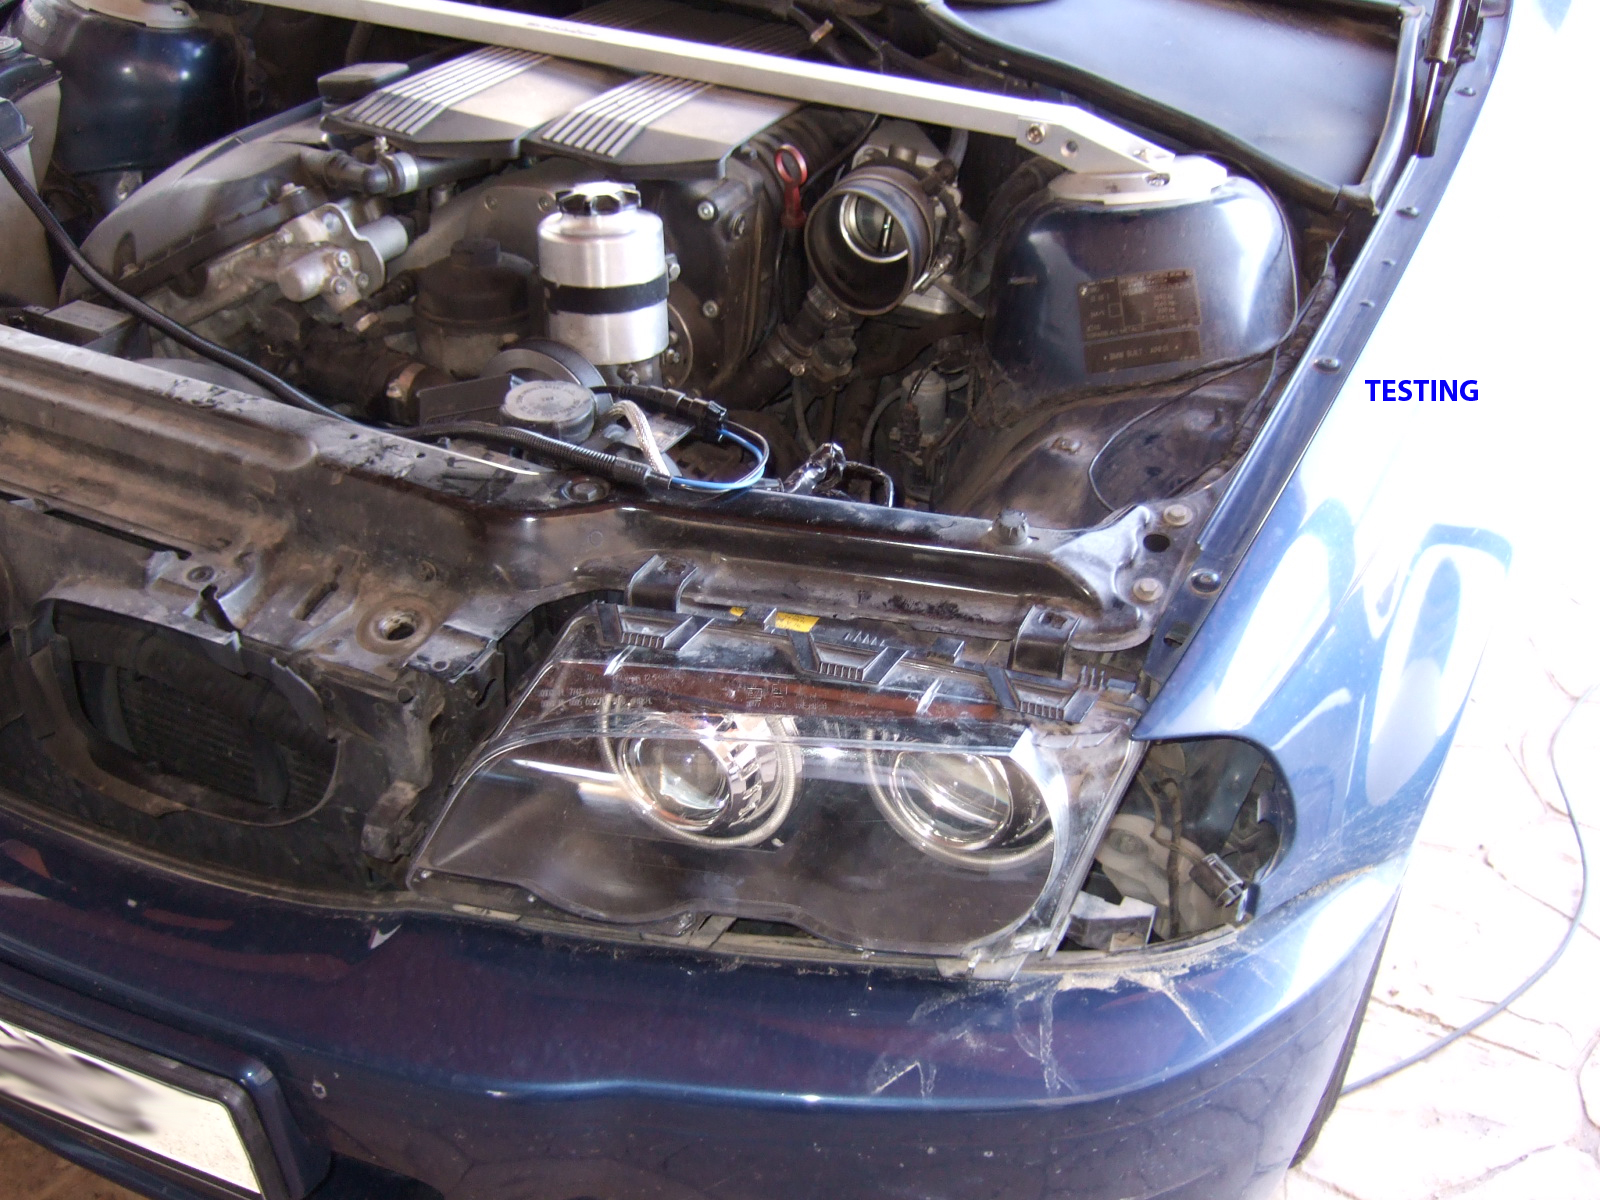
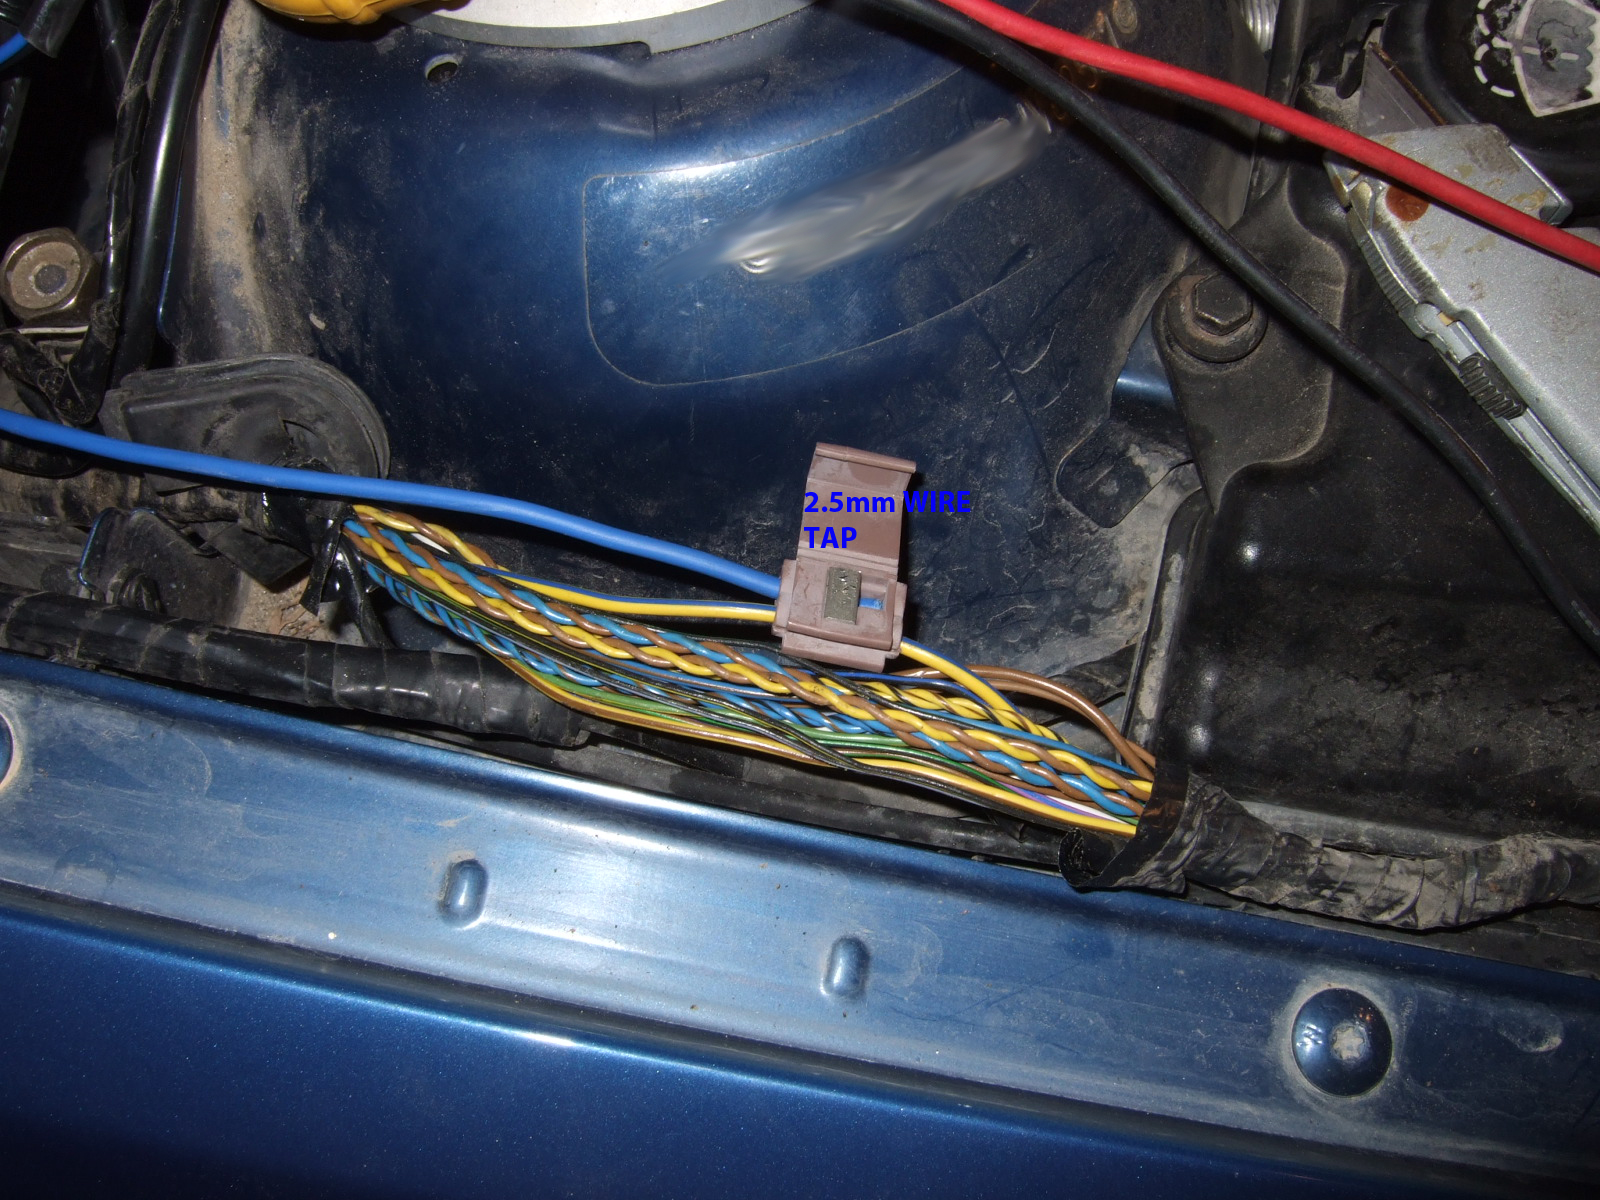
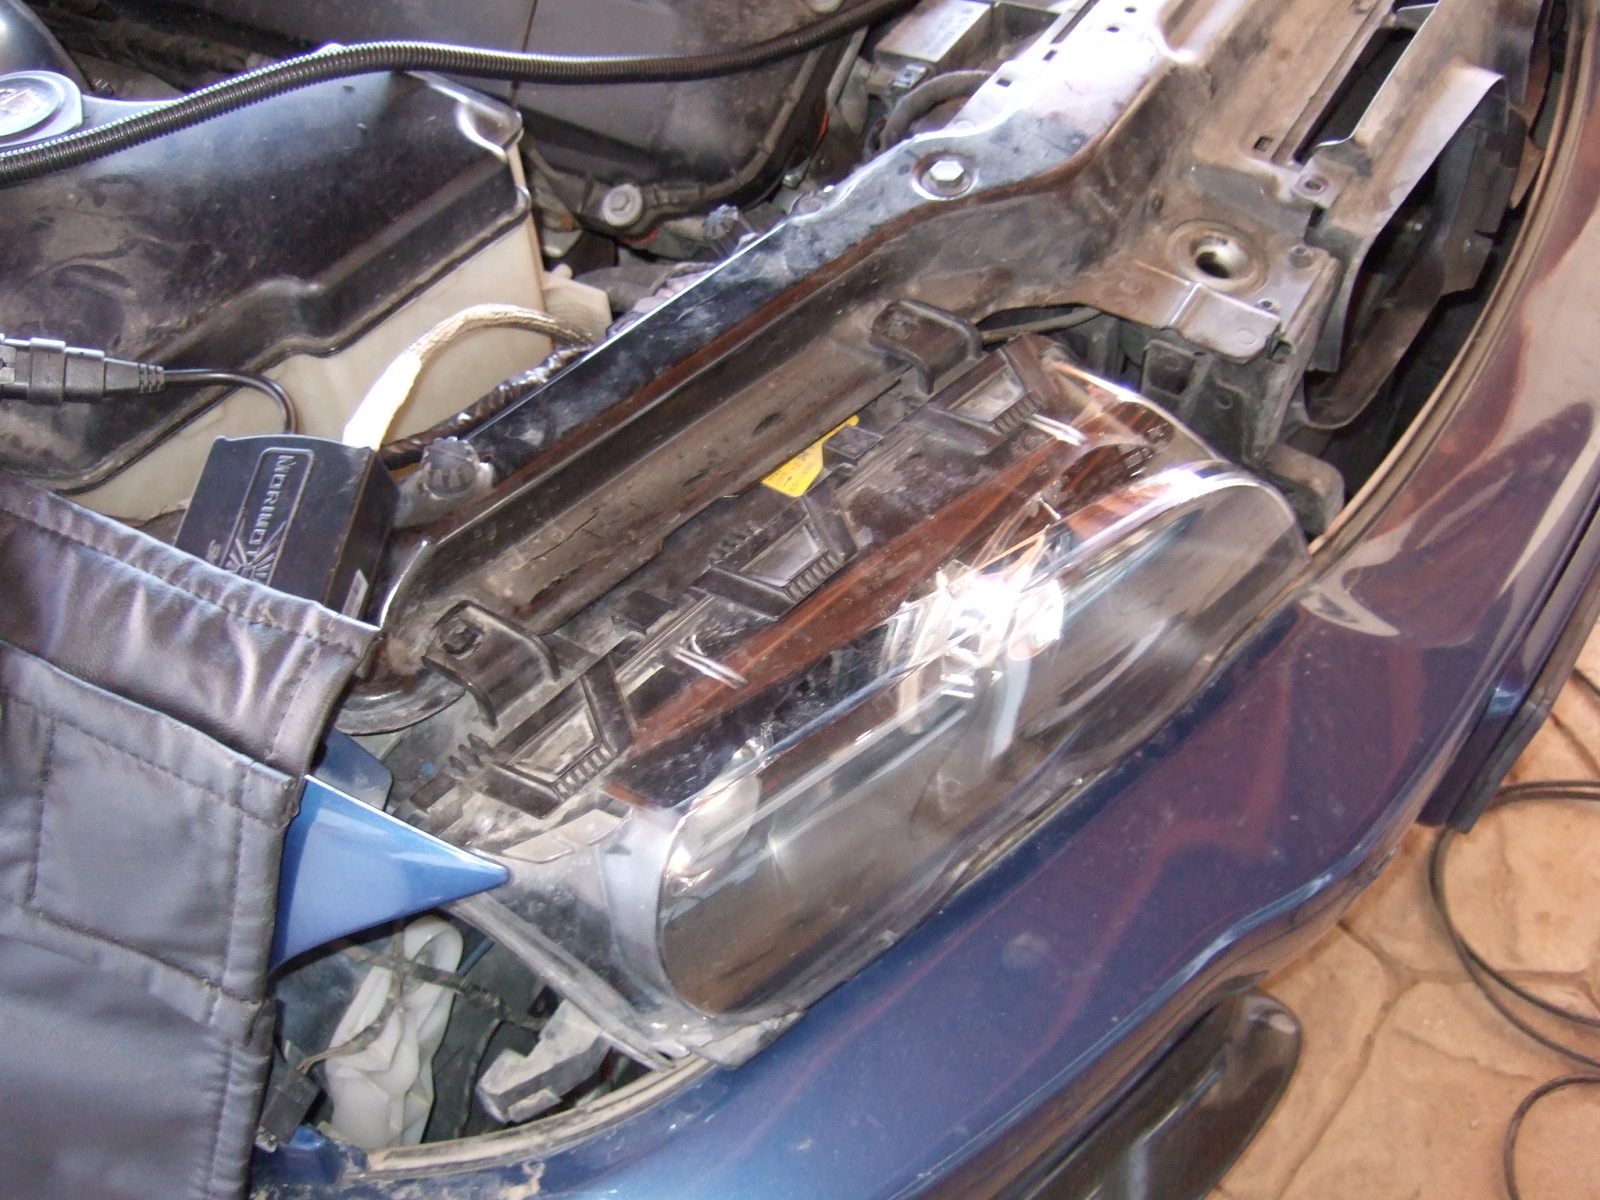
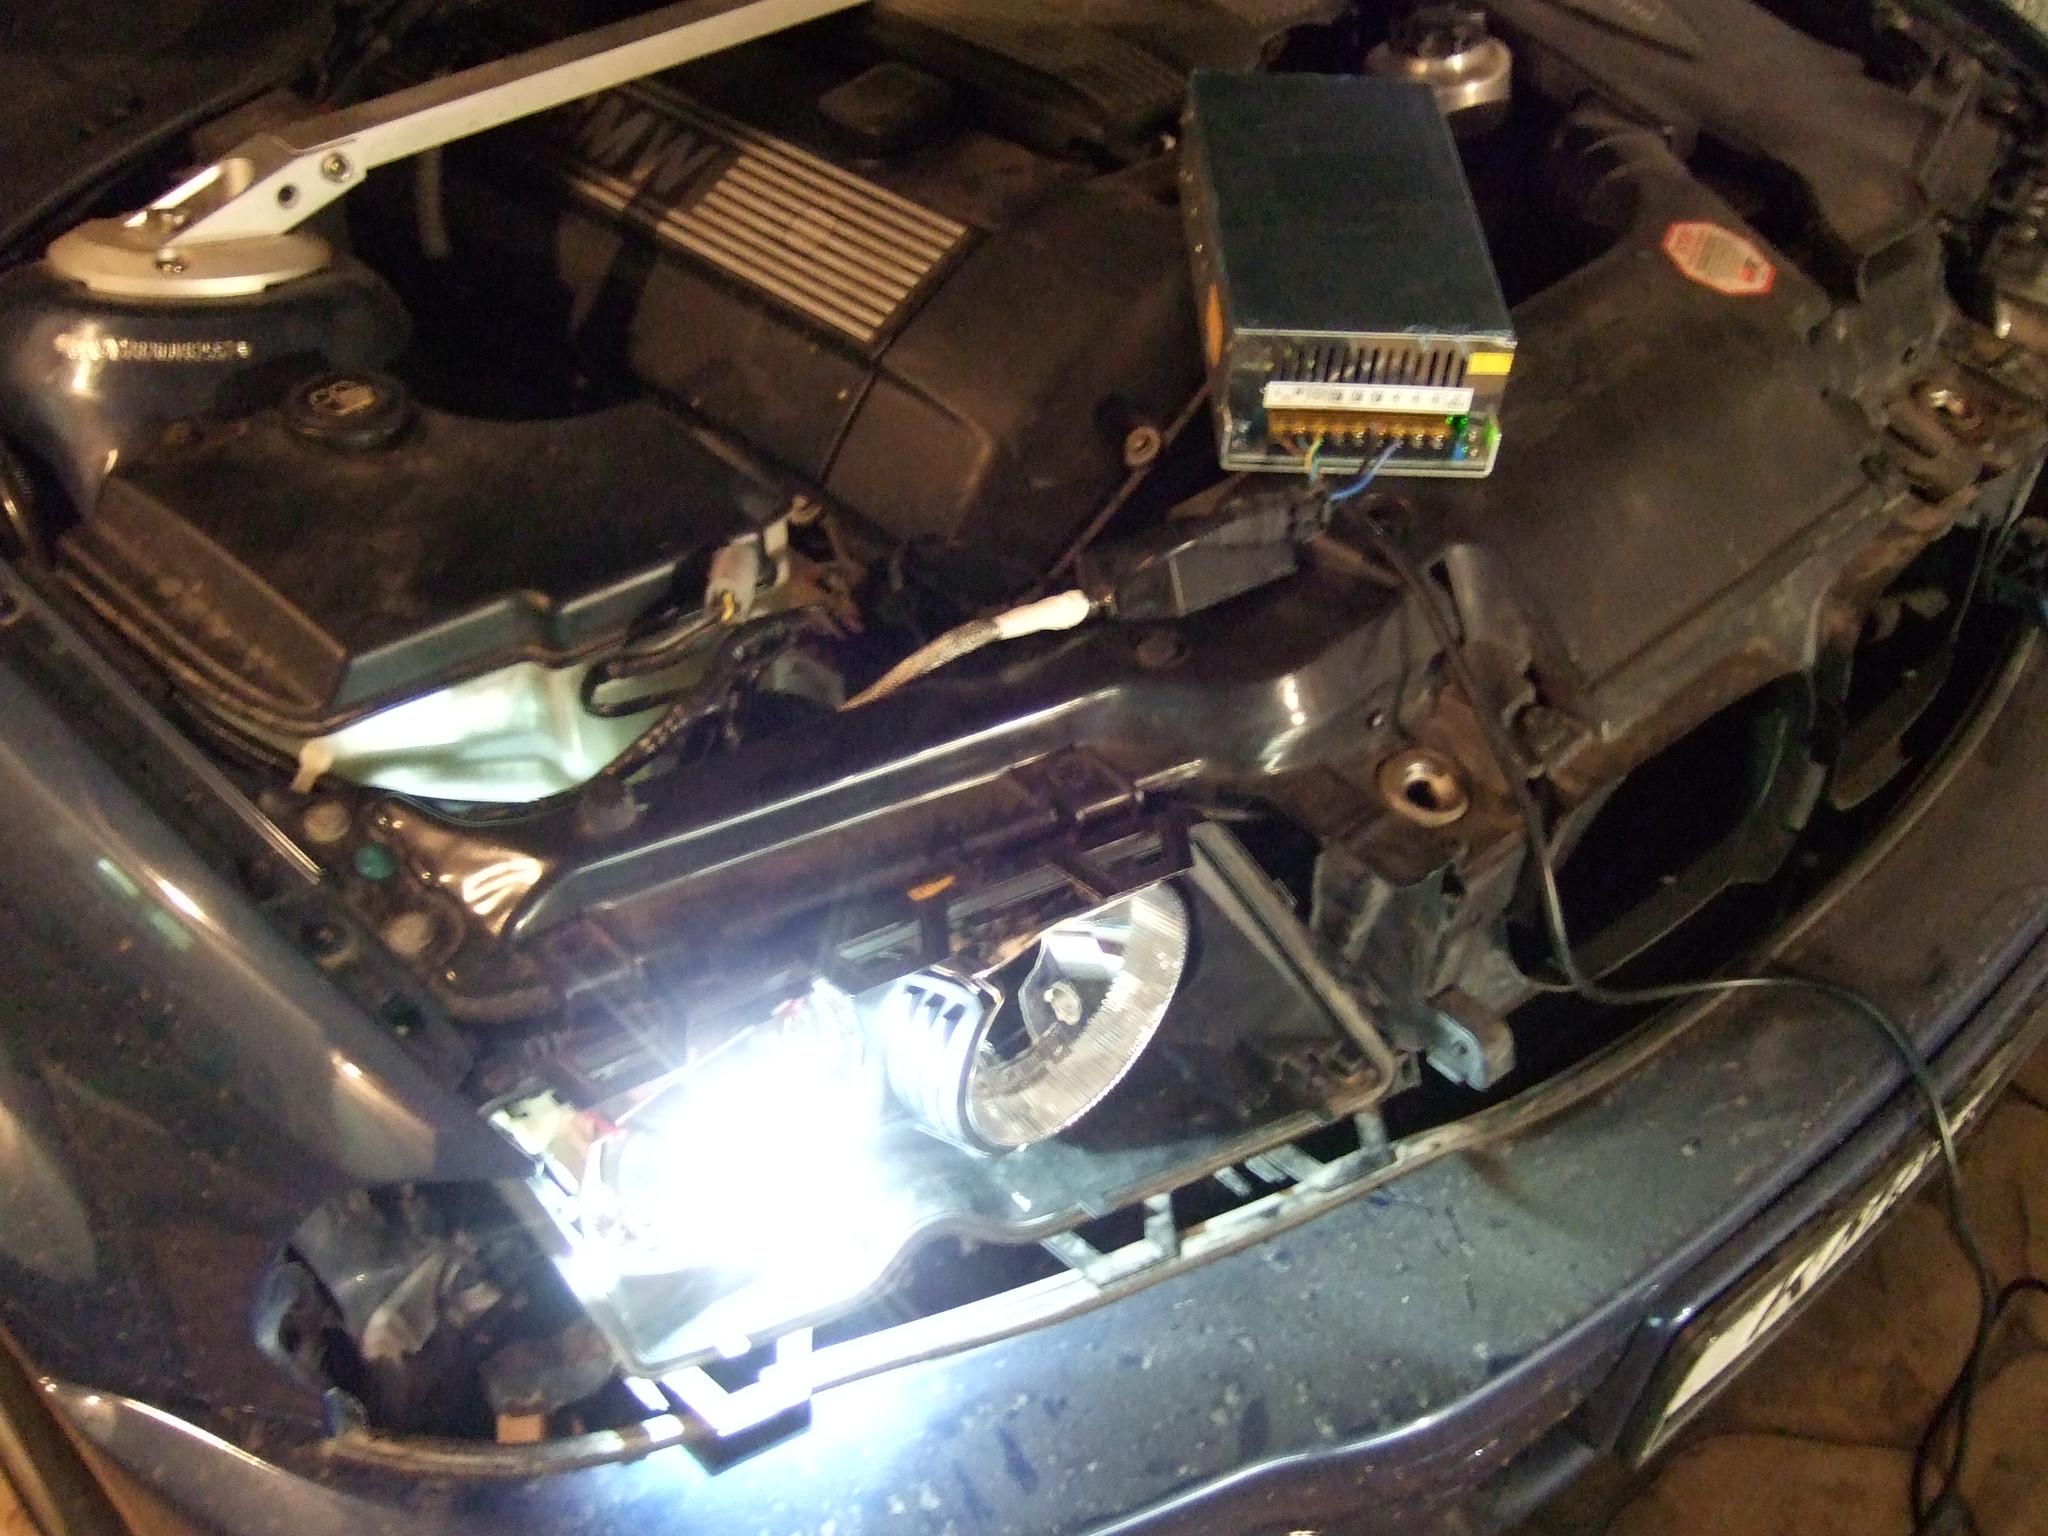
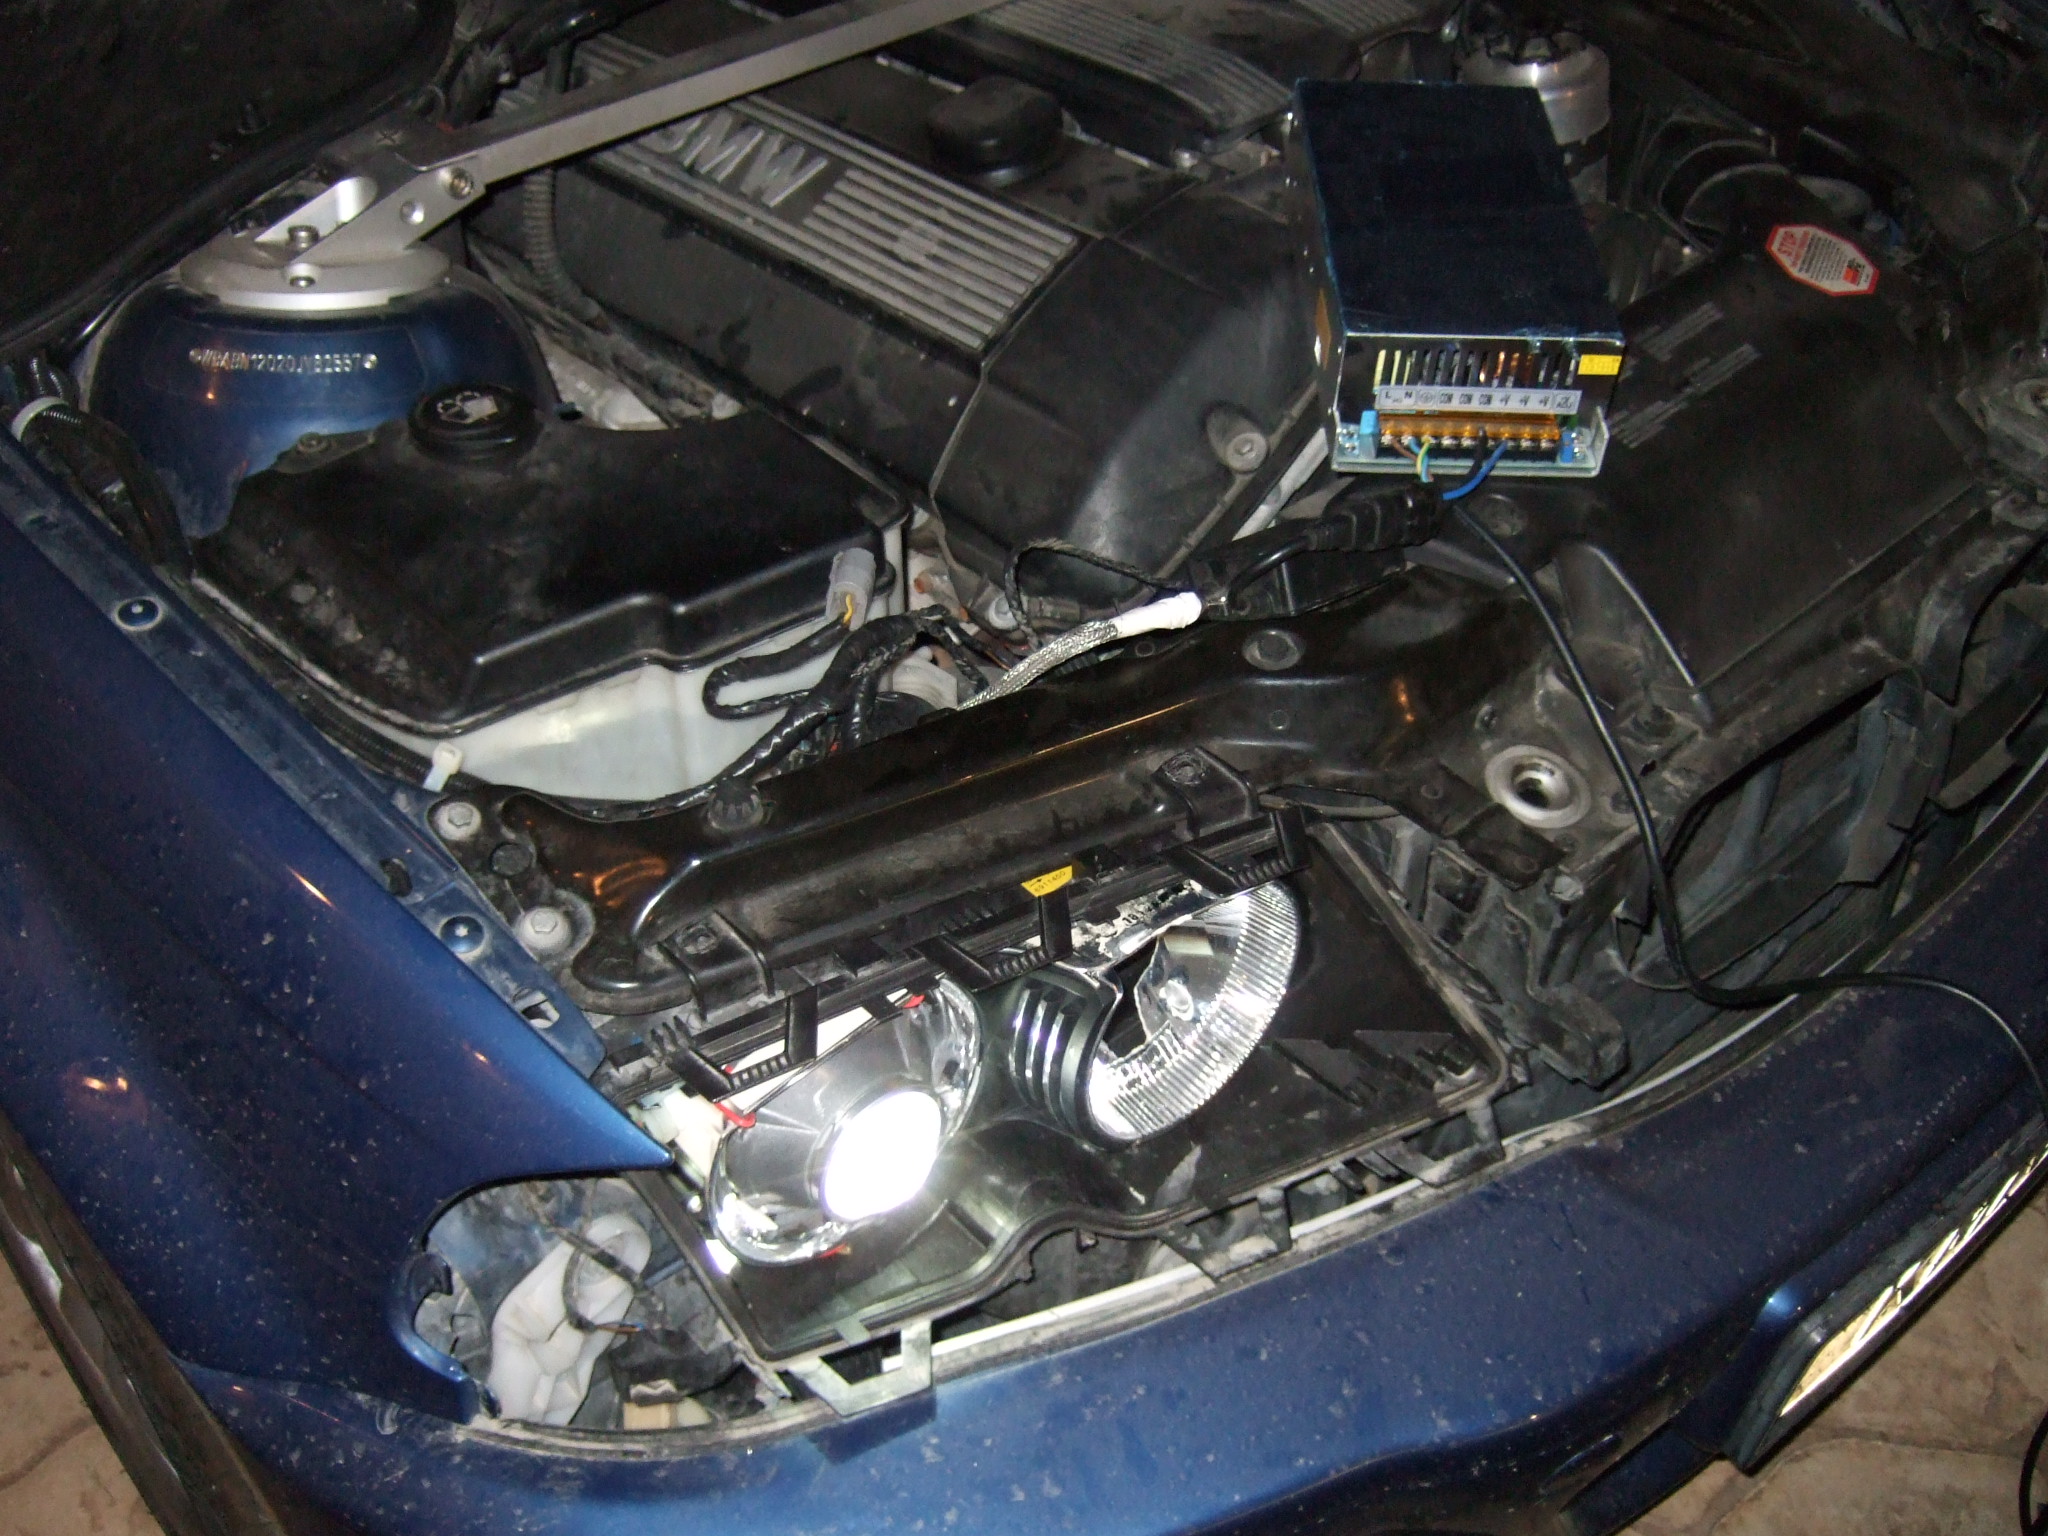
Use high-temp silicone everywhere. Once installed, nobody will see it. Also use plenty of PVC tape. The tape I removed for disassembly was cracked and was falling apart. This however left the wires inside intact. Now back to the car for the installation. Test fitting Place that wiring will be placed. Safer than near the headlights for sure! For a trigger signal to power up the additional xenon ballasts, I tapped on the Yellow-Blue wire as seen below, by removing the existing PVC tape to reveal the wires.
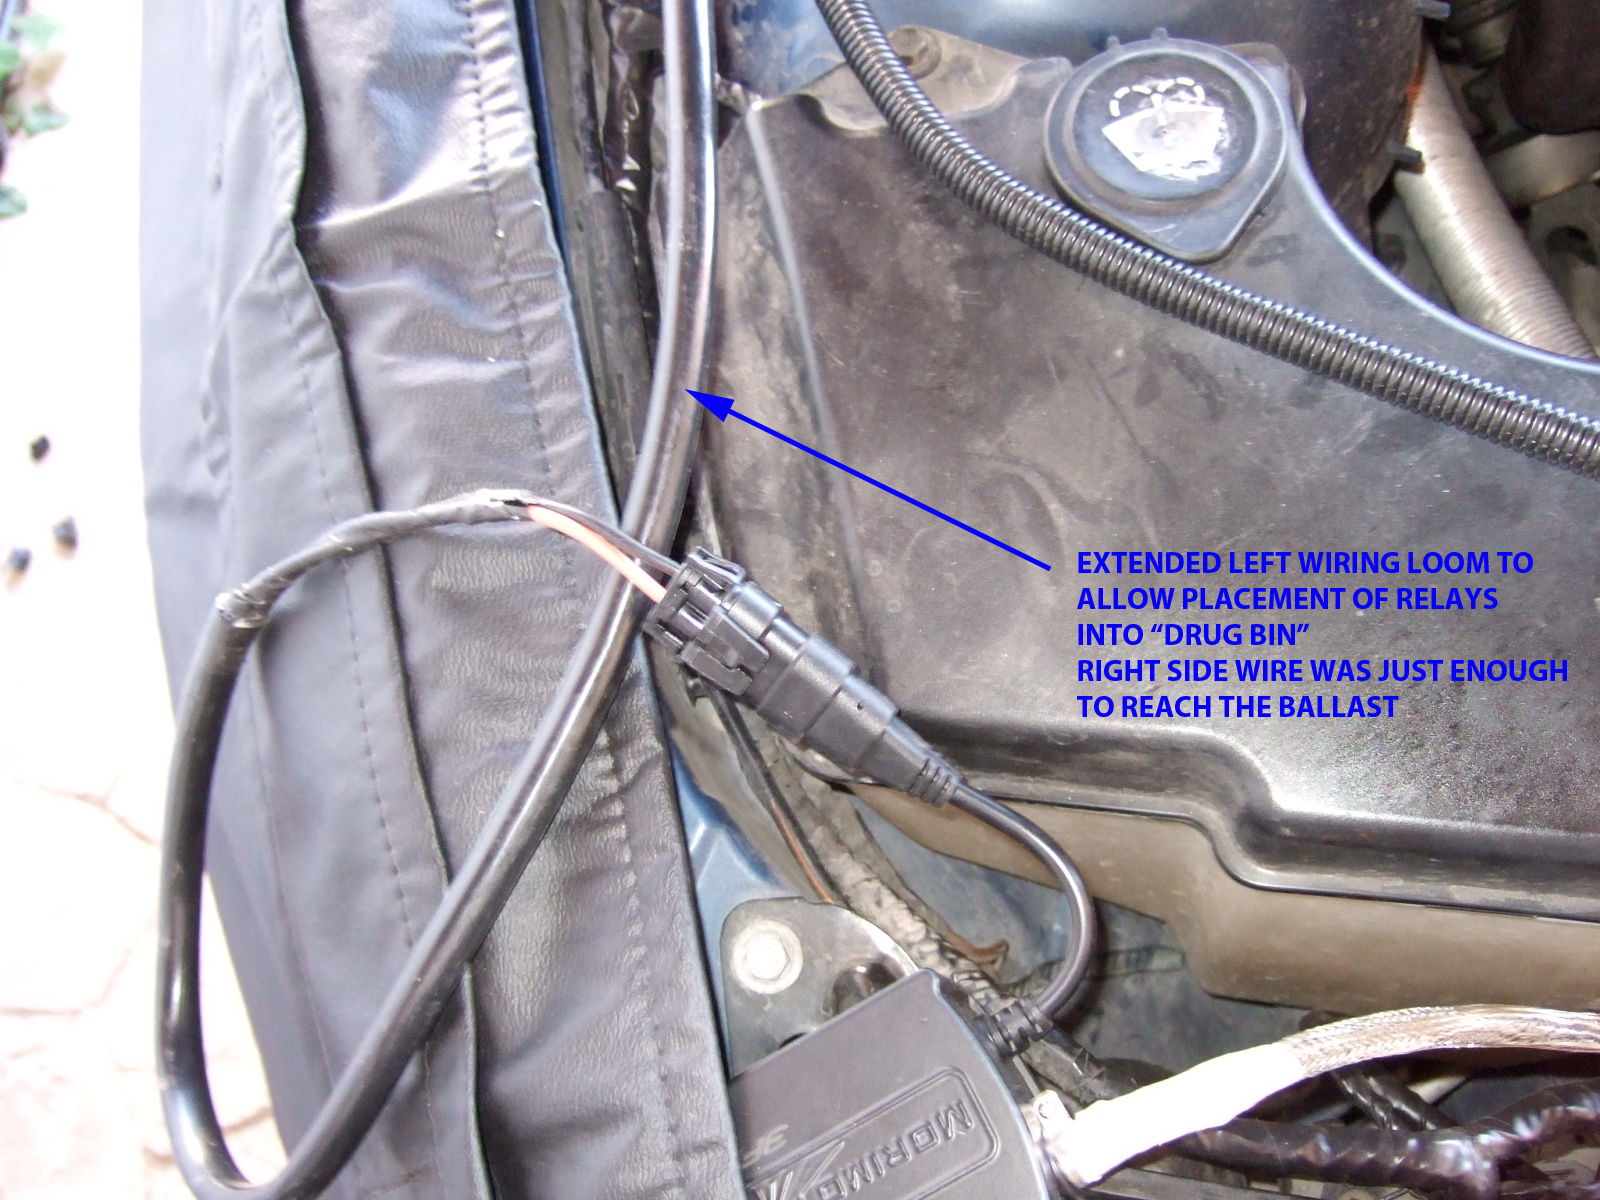
The wiring for one headlight was too short for my liking, so I extended it. I assume it was made short with the intention of mounting the relays near the headlights.
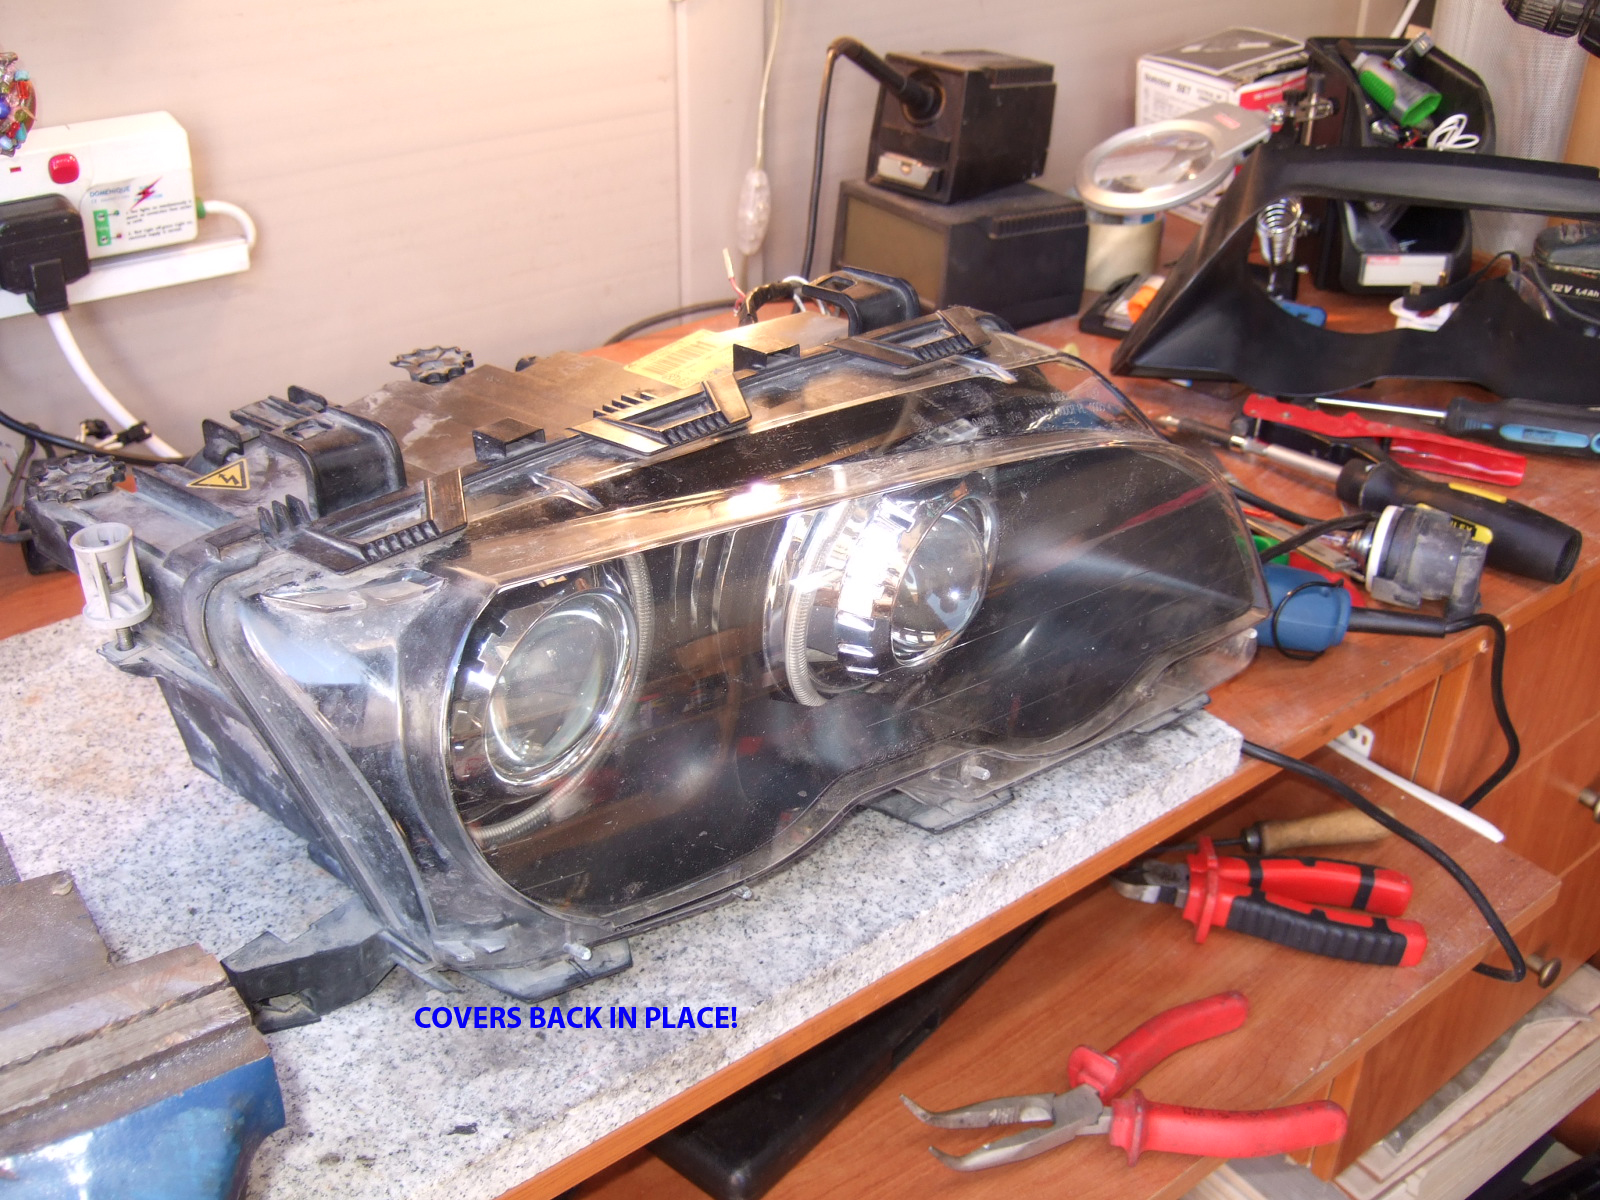
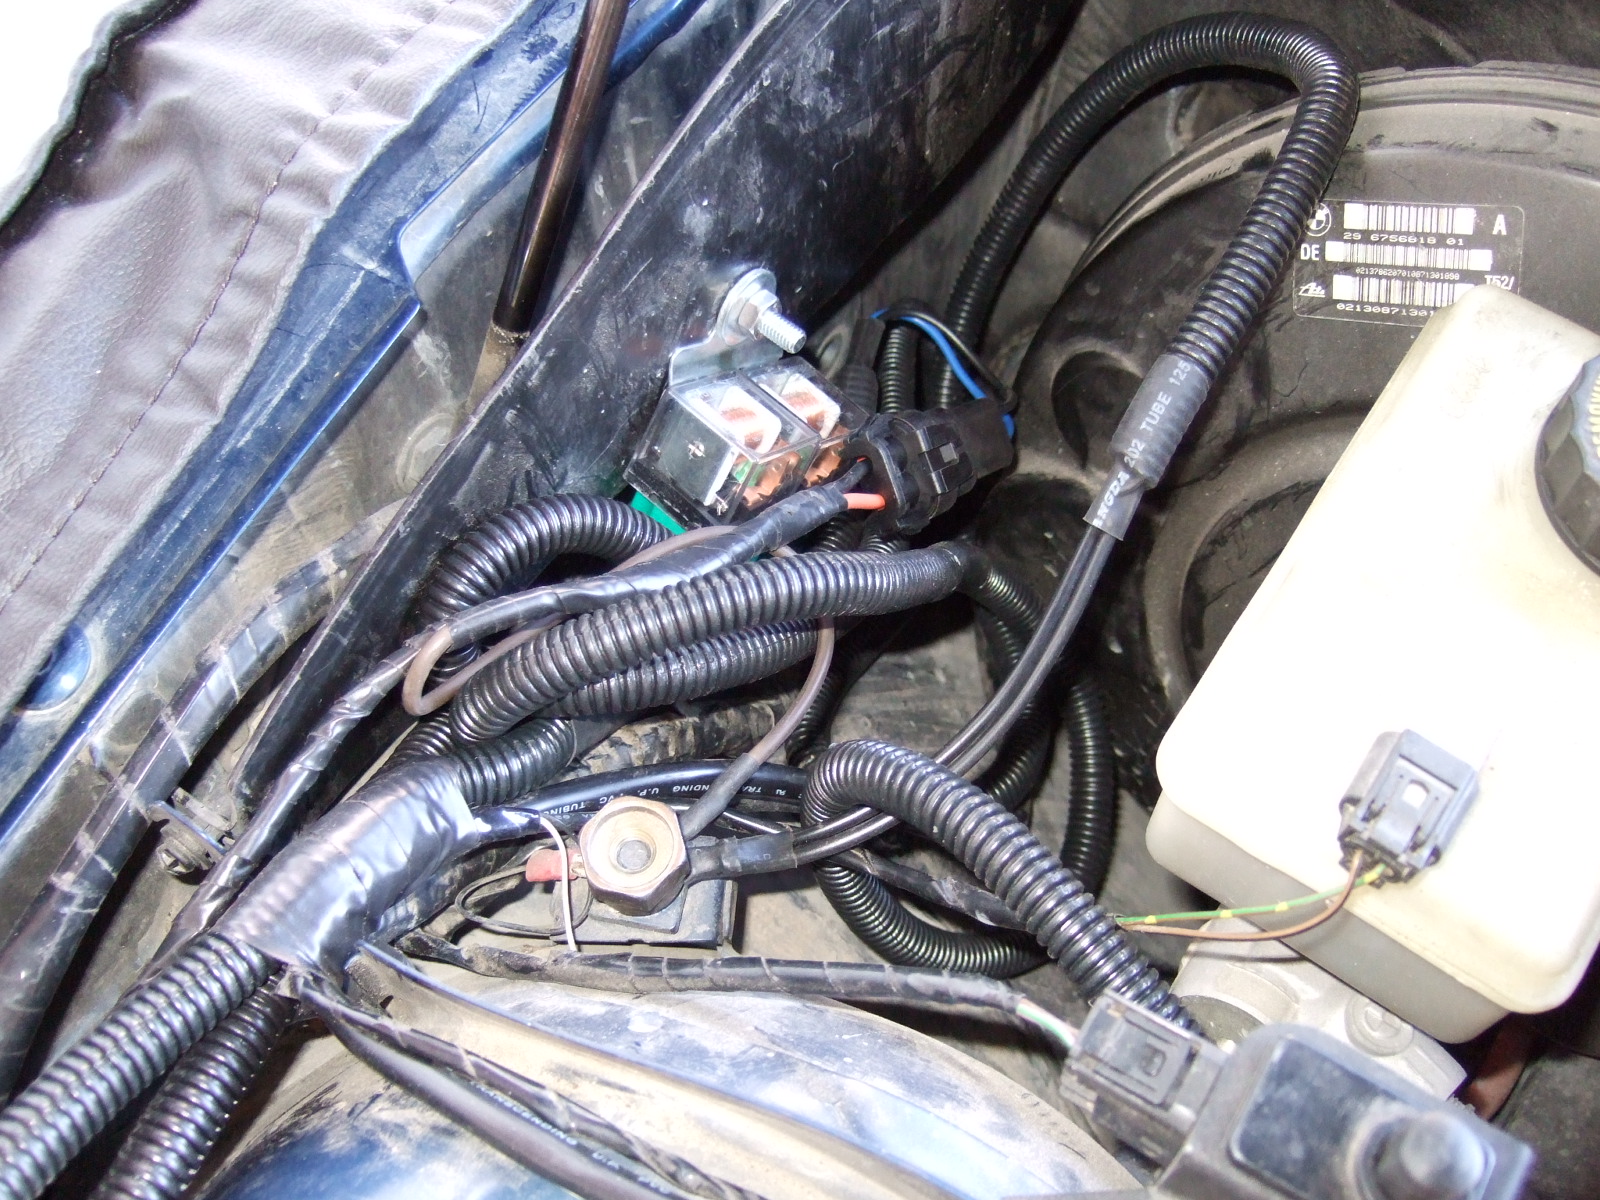
Common ground for relays, headlight signal and constant 12v source straight from battery. Since the relays were mounted on plastic, I used 1 large washer on the outer surface to distribute the force of the bolt to prevent the plastic from breaking. Connecting all plugs back Weather strip back in place along with lower headlight trim. Airbox installed as well! Indicators back Red silicone nowhere to be seen!
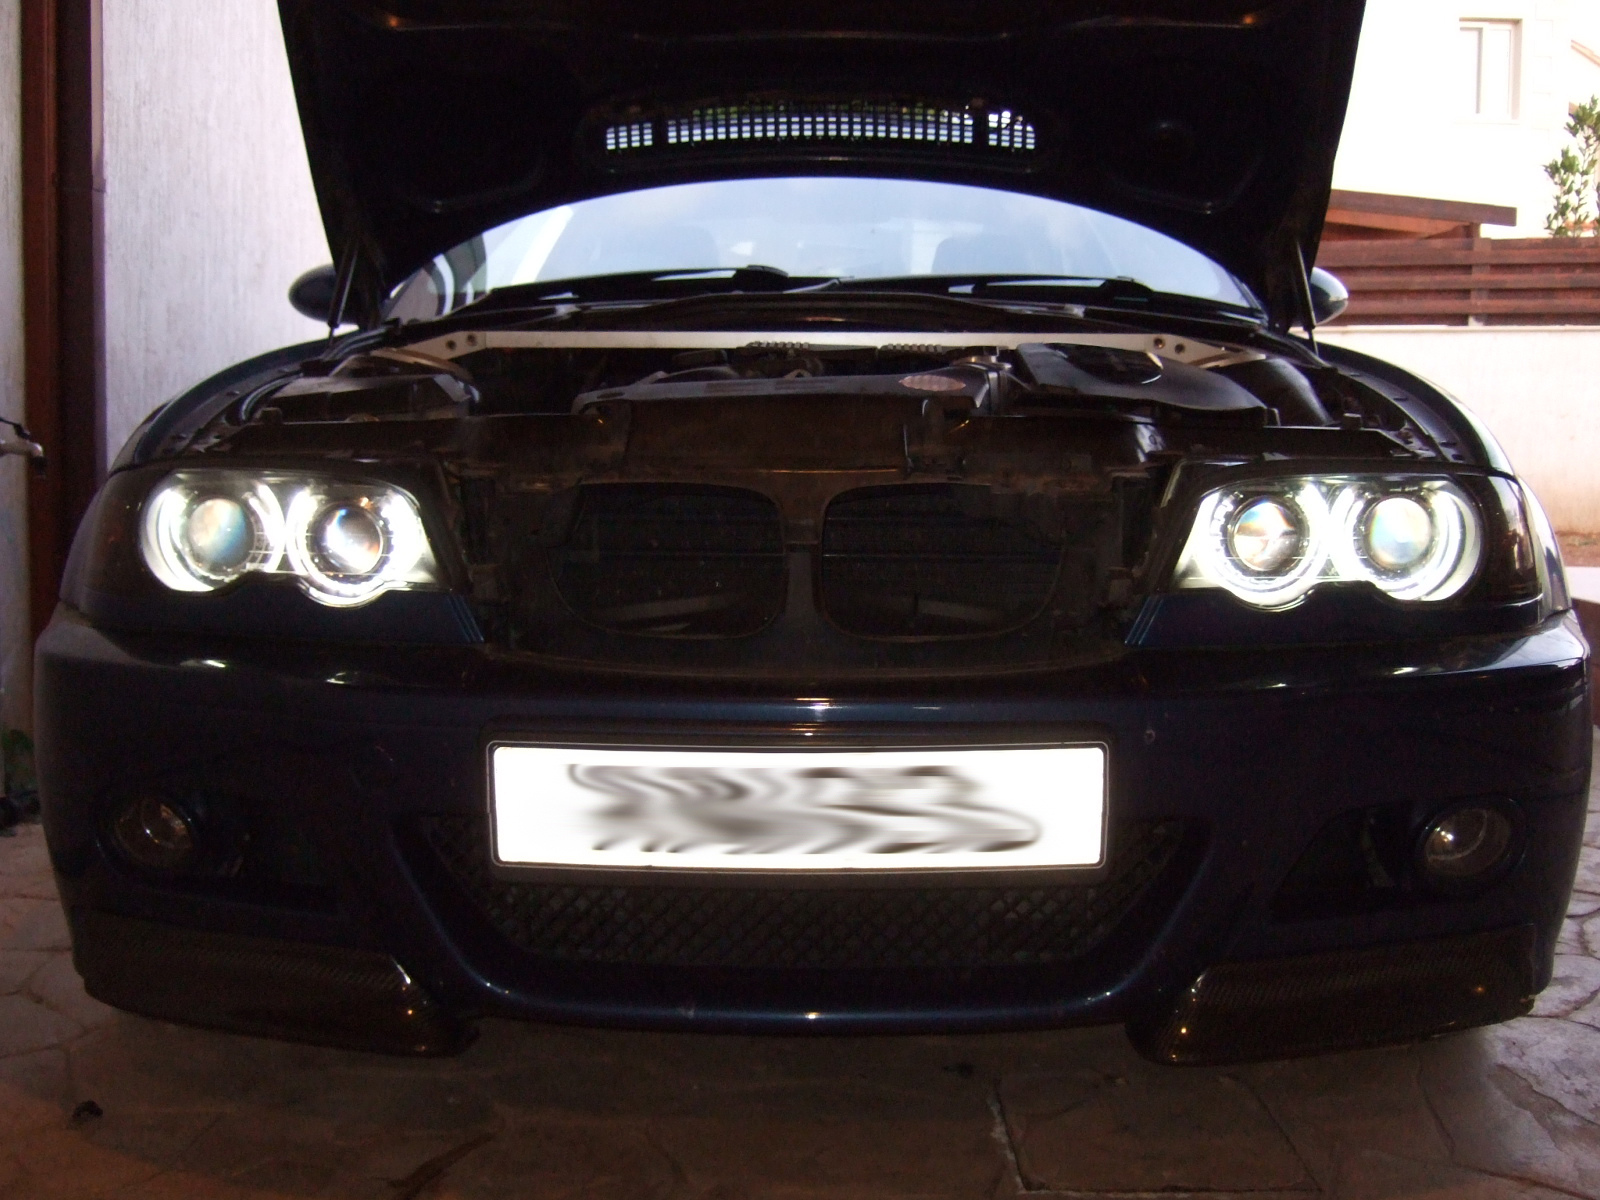
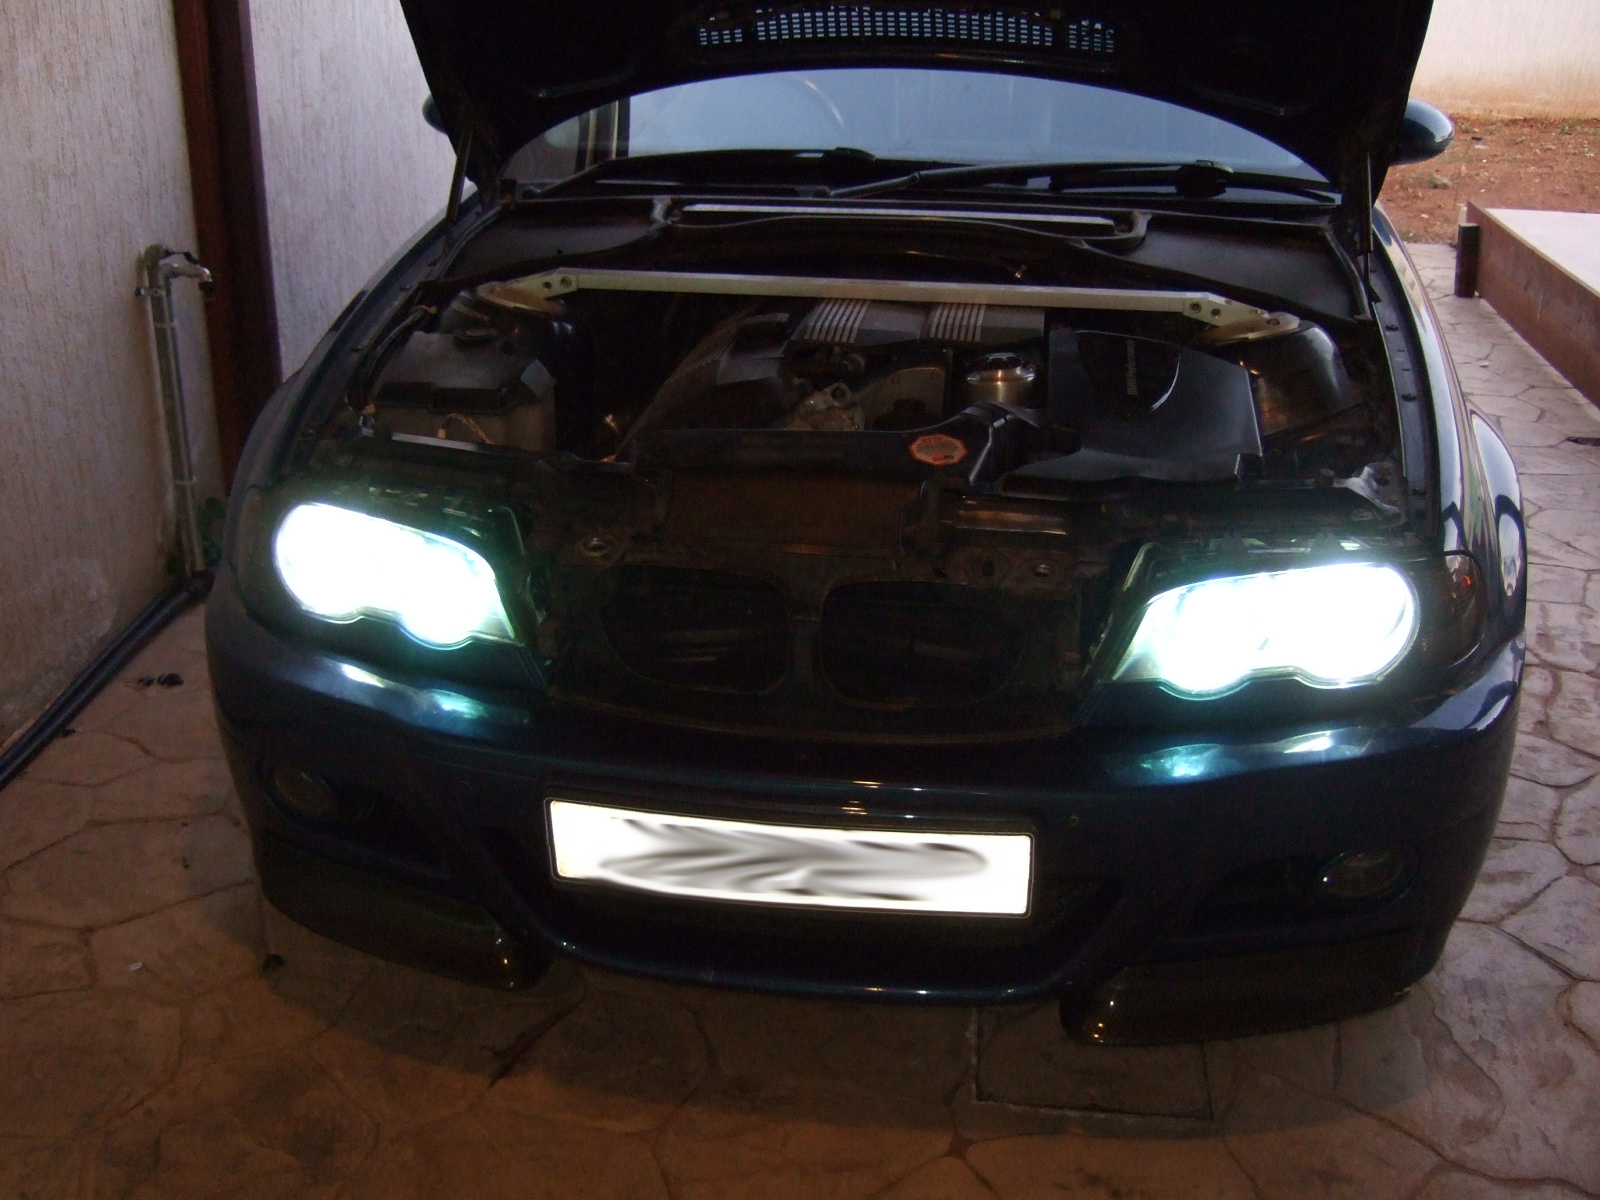
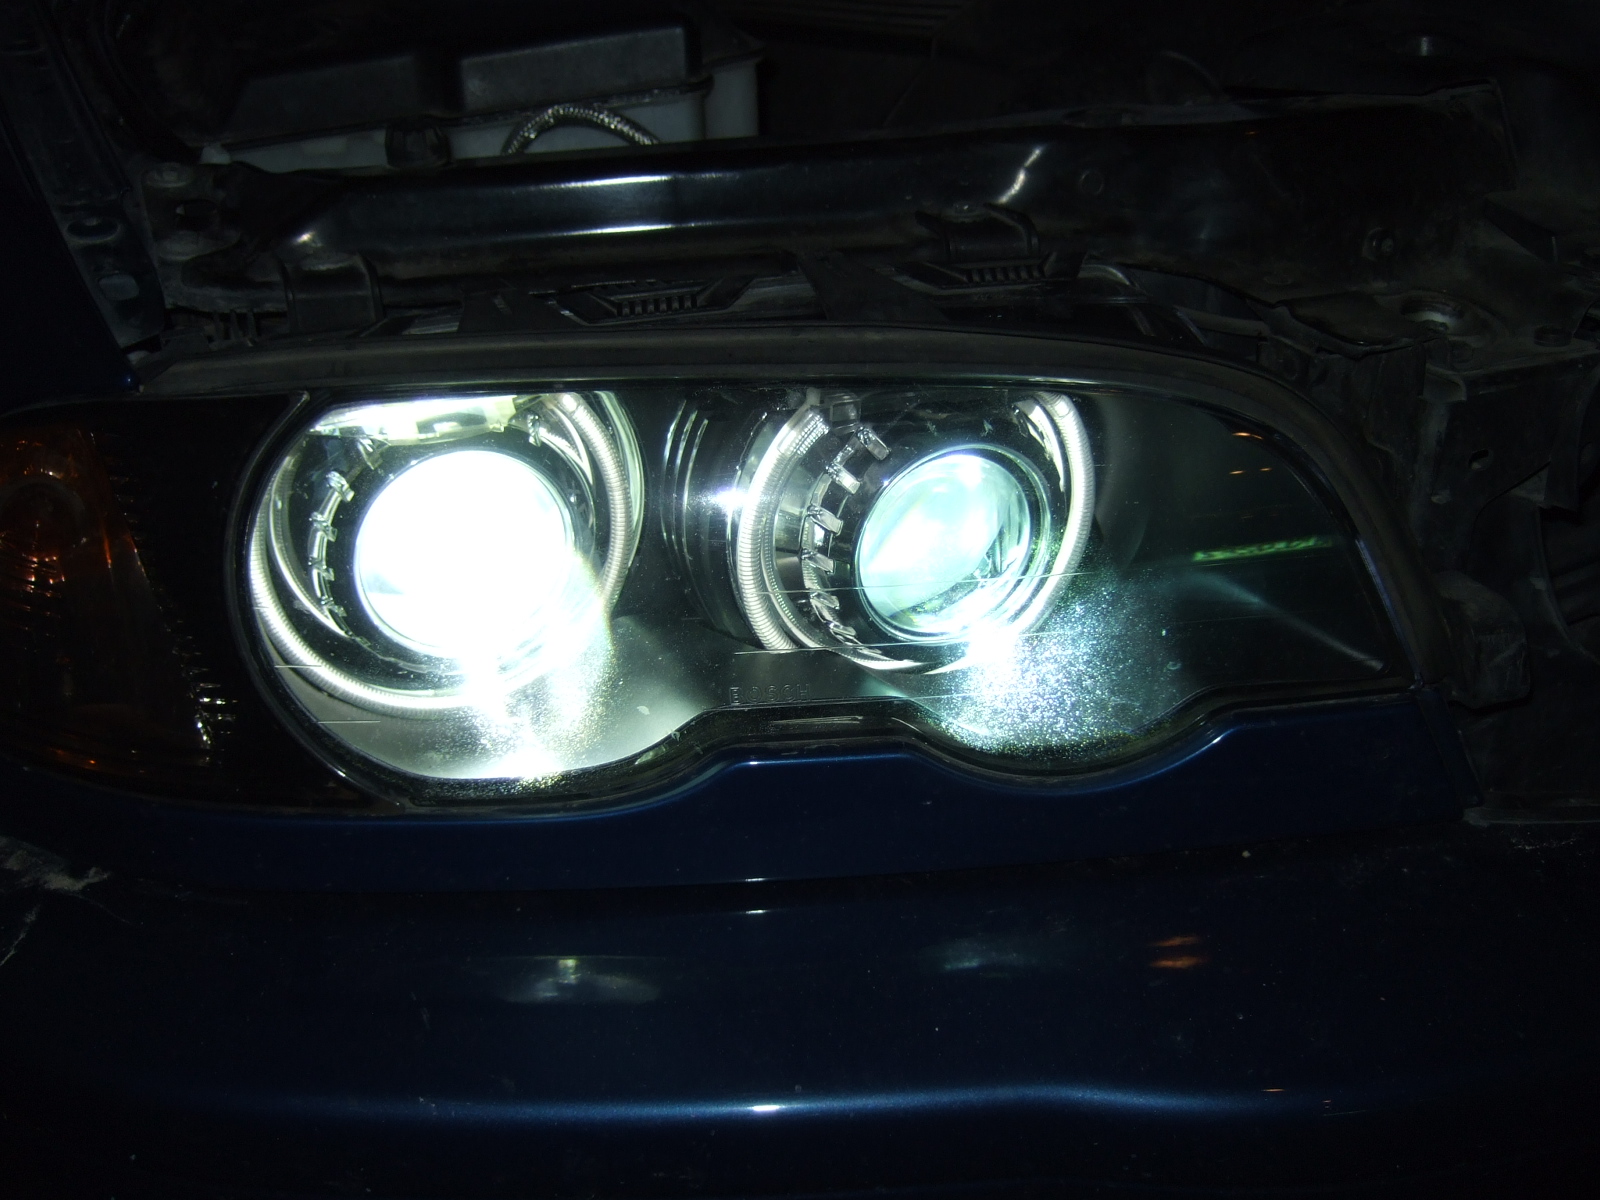
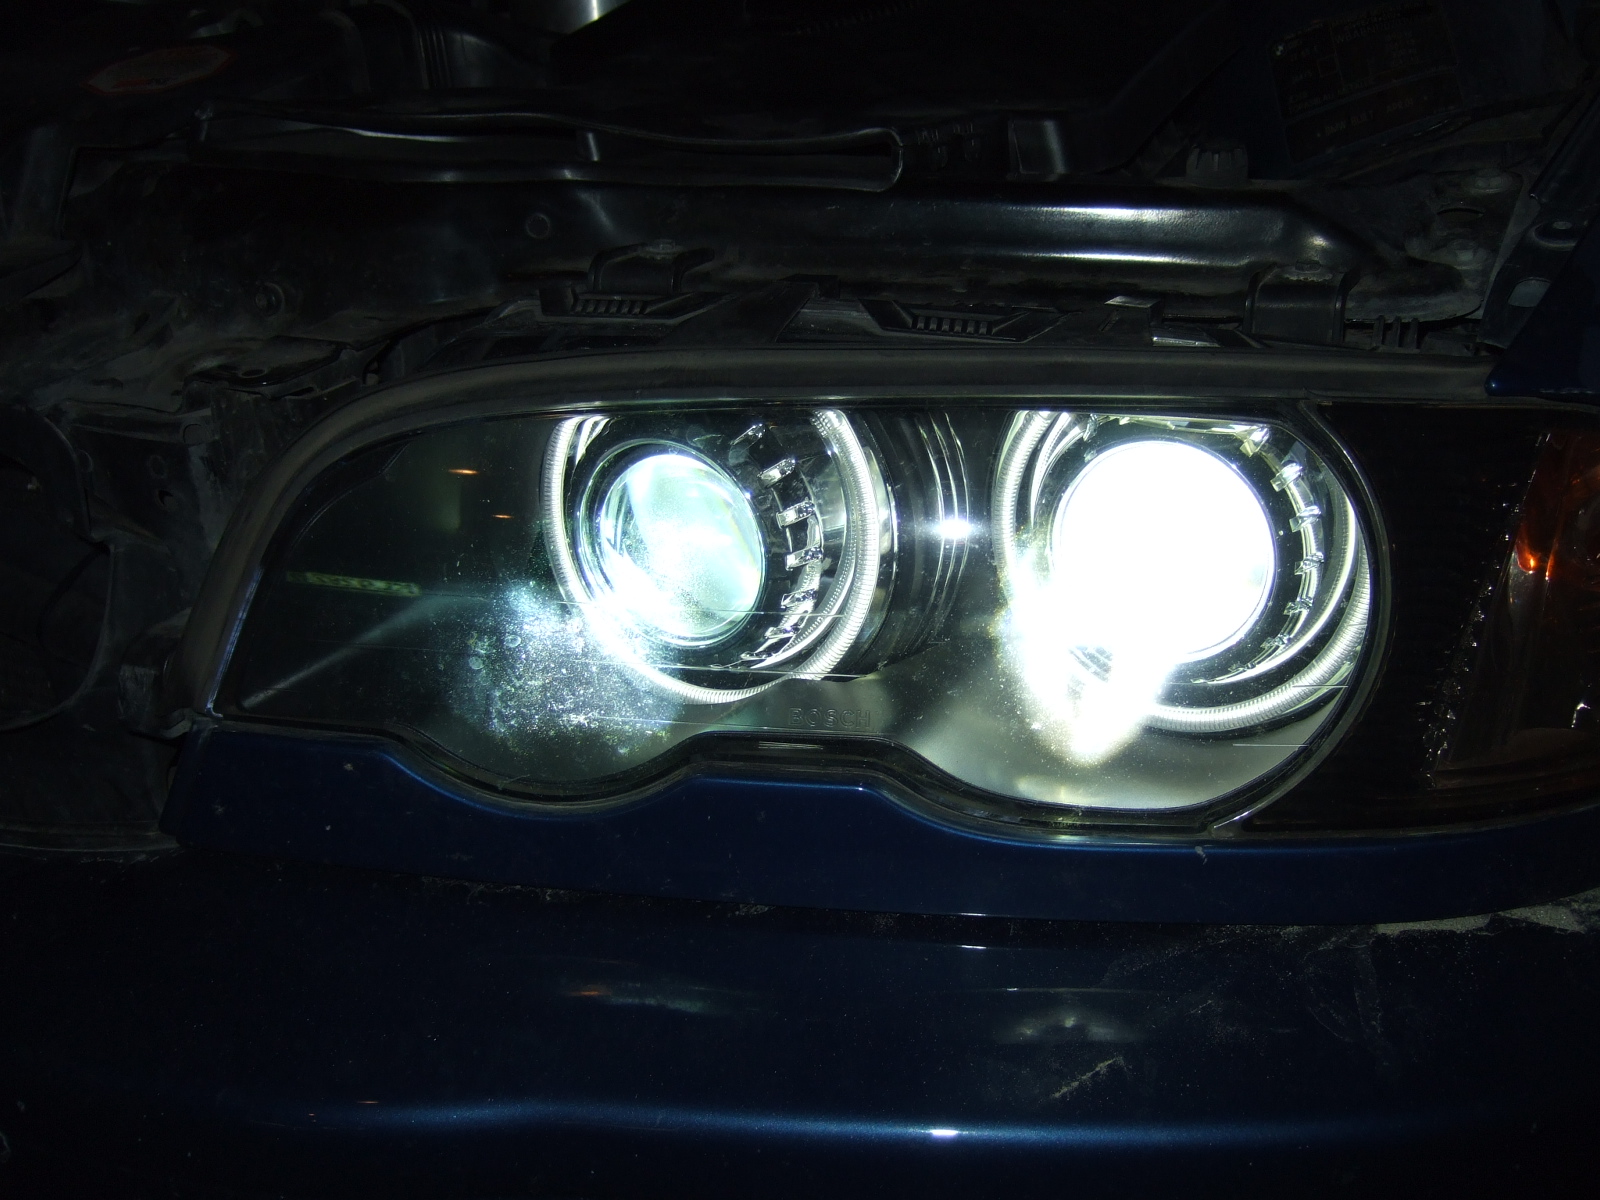
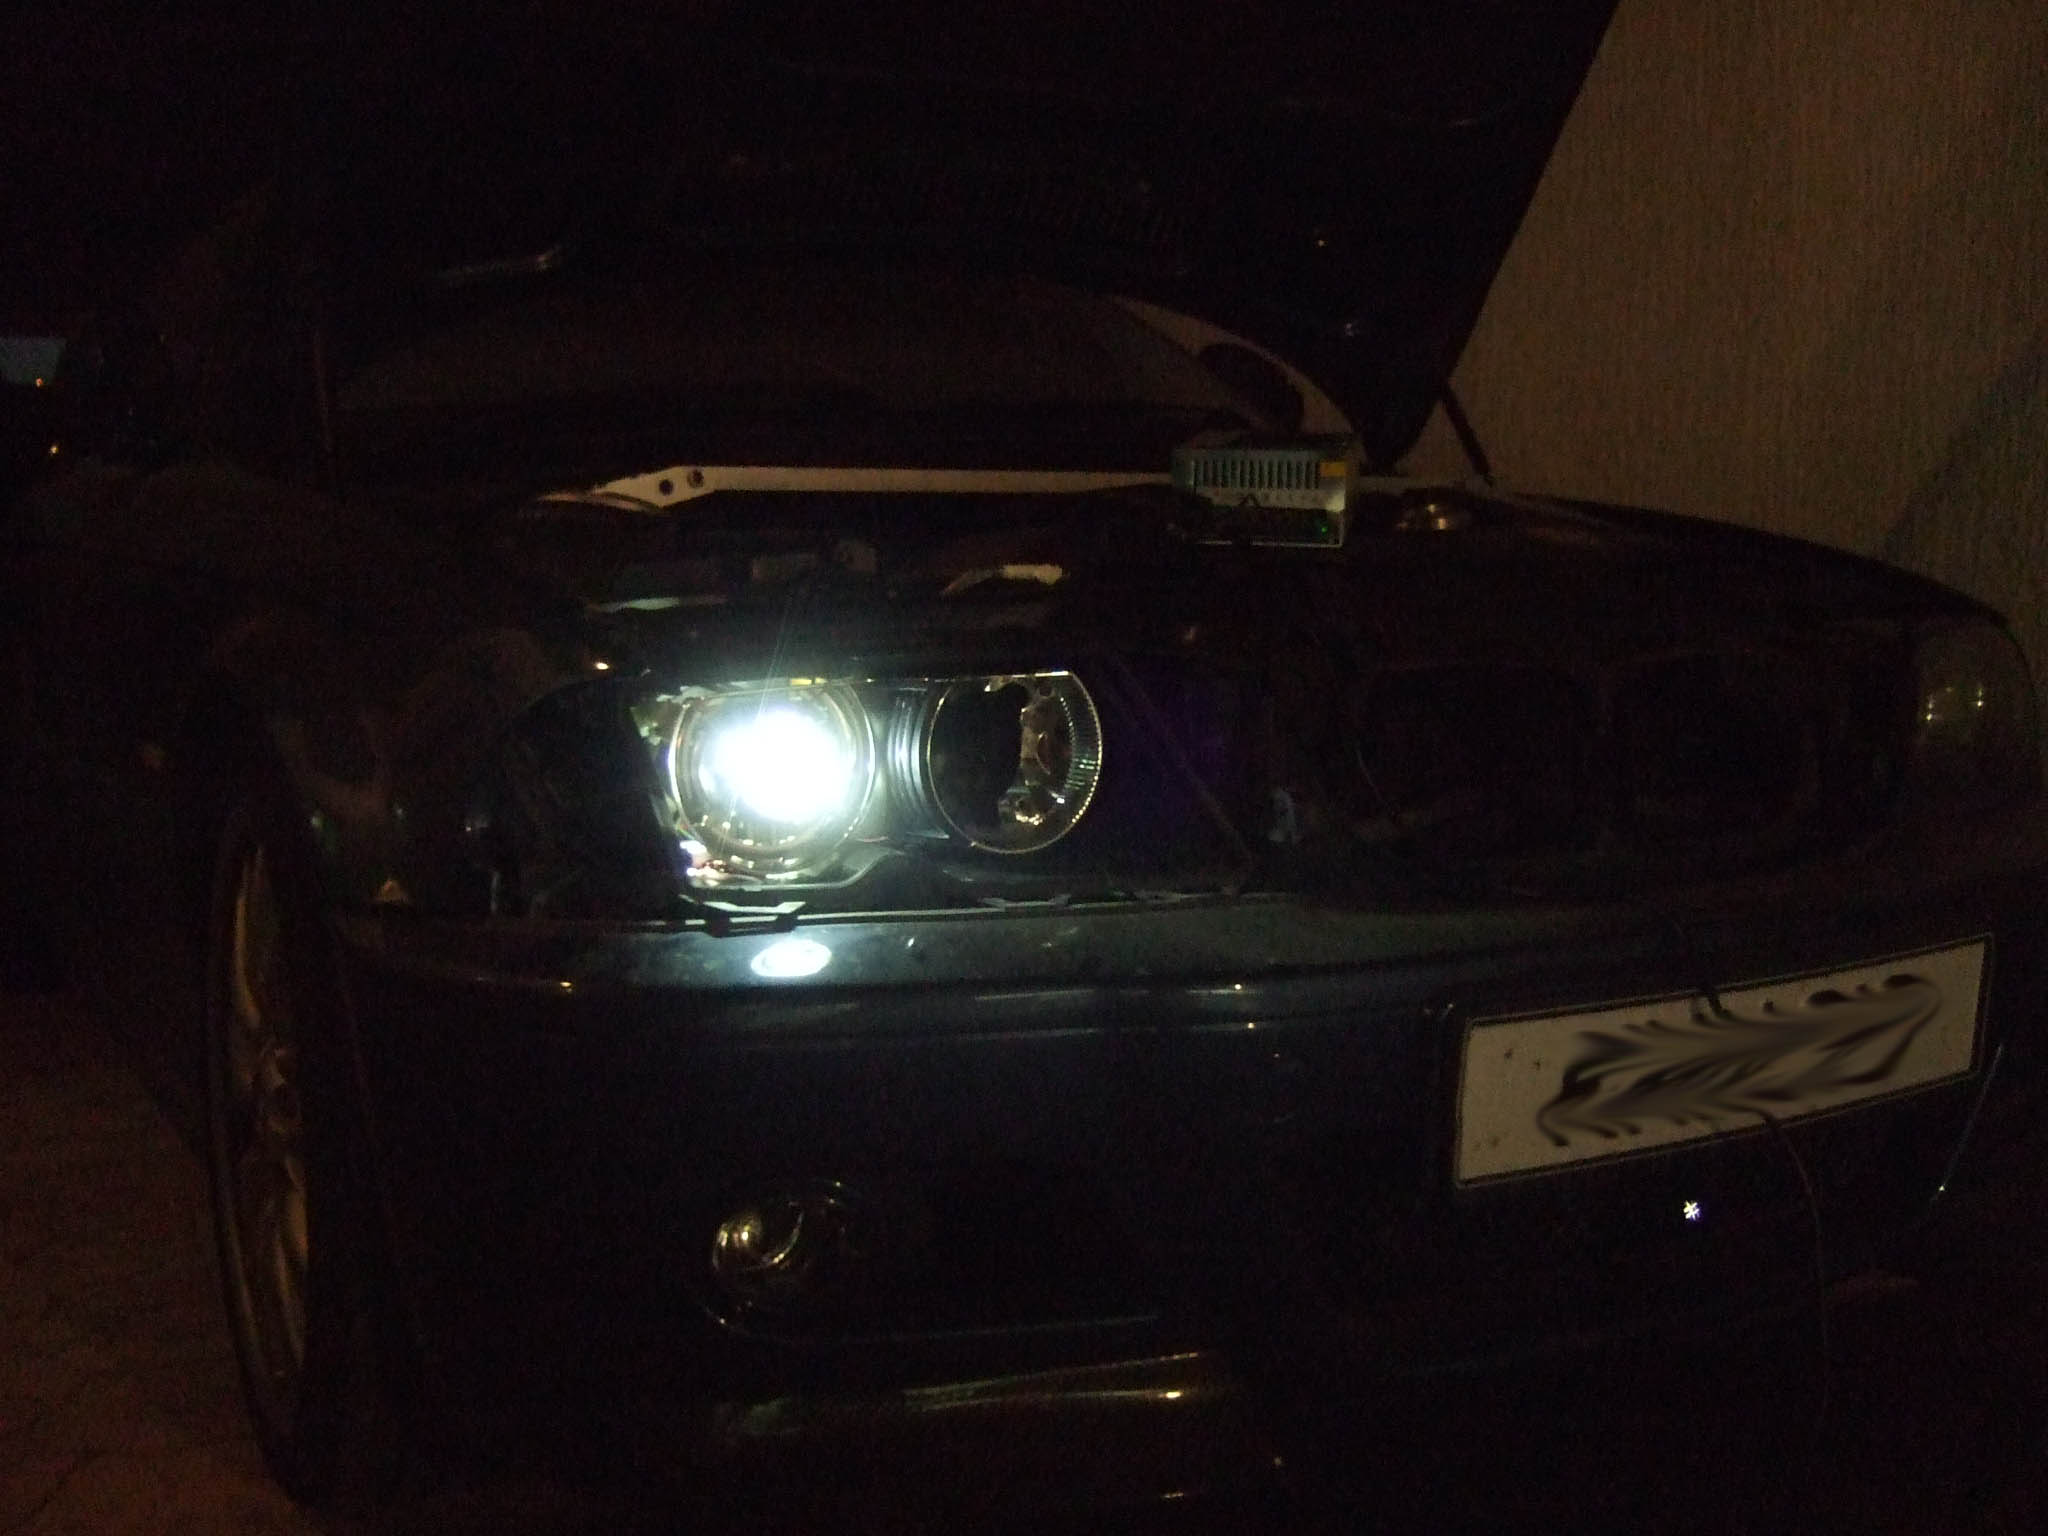
Tiding wires and sealing any naked ones with tape. Cover back in place Moment of truth: Angel eyes on and working! Moment of truth 2: WE SEE THE LIGHT! And that's it basically. Further tasks to complete: 1. Aim headlights 2. Remove warning light on dash by using the capacitor mod 3. Re-enable the flash-to-pass feature. I will use a changeover relay, with the following setup: Lights off -> Provide power to a hybrid halogen-HID bulb (halogen part only, HID is reserved for fog conditions) located in fog lights when driver pulls the stalk for high-beams flash Lights on -> Disable power to the halogen bulb so that the flash to pass uses the actual bi-xenon projectors.
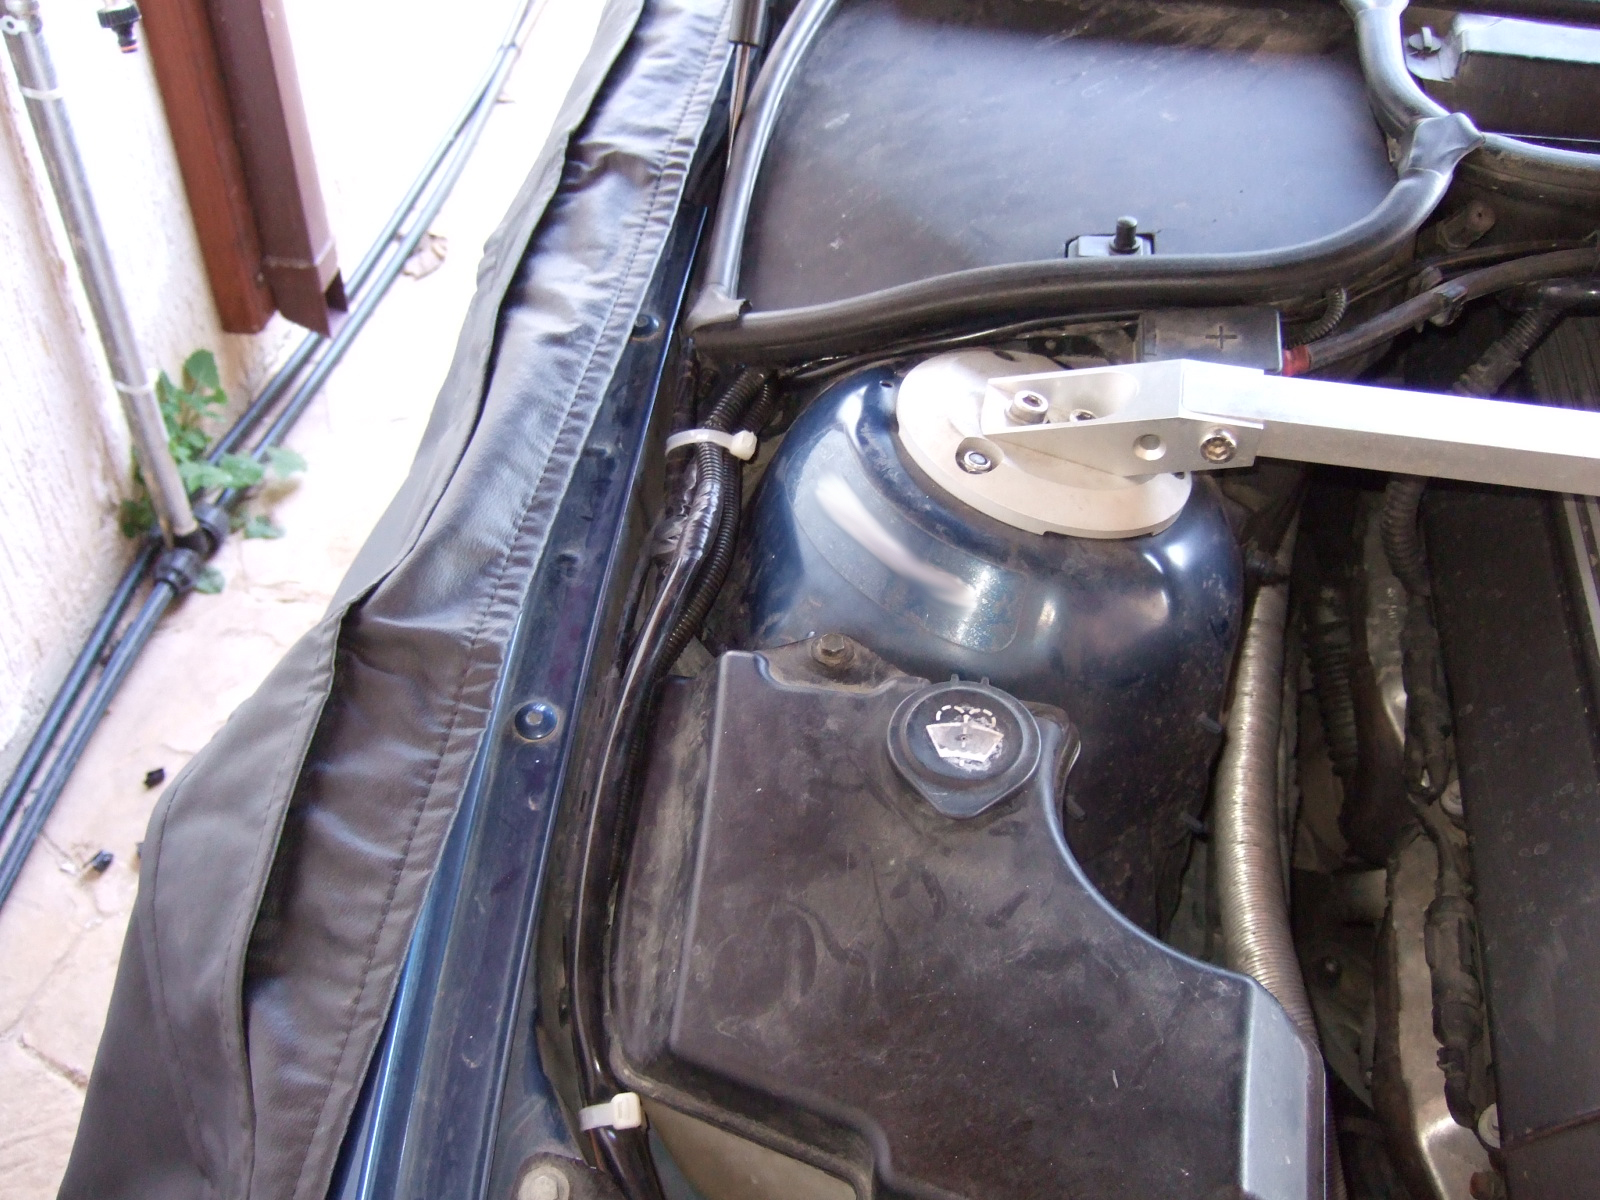
Stage 2 Of the Project Further to the mod above I decided to install a second pair of FXR bi-xenon projectors to replace the OEM Bosch. Reason is the much better cutoff. This time, I took as reference the (epoxied) high-beam projectors in order to align the low-beams vertically and horizontally. The missing high-beam projector in the picture below is because I had to remove it to replace the solenoid inside as it was faulty.
Horizontal alignment in process
When satisfied with the orientation/alignment, I applied generous amounts of high-temp, high-strength epoxy glue to permanently secure the projector on the housing.
Both projectors on for final adjustments before glue starts to settle:
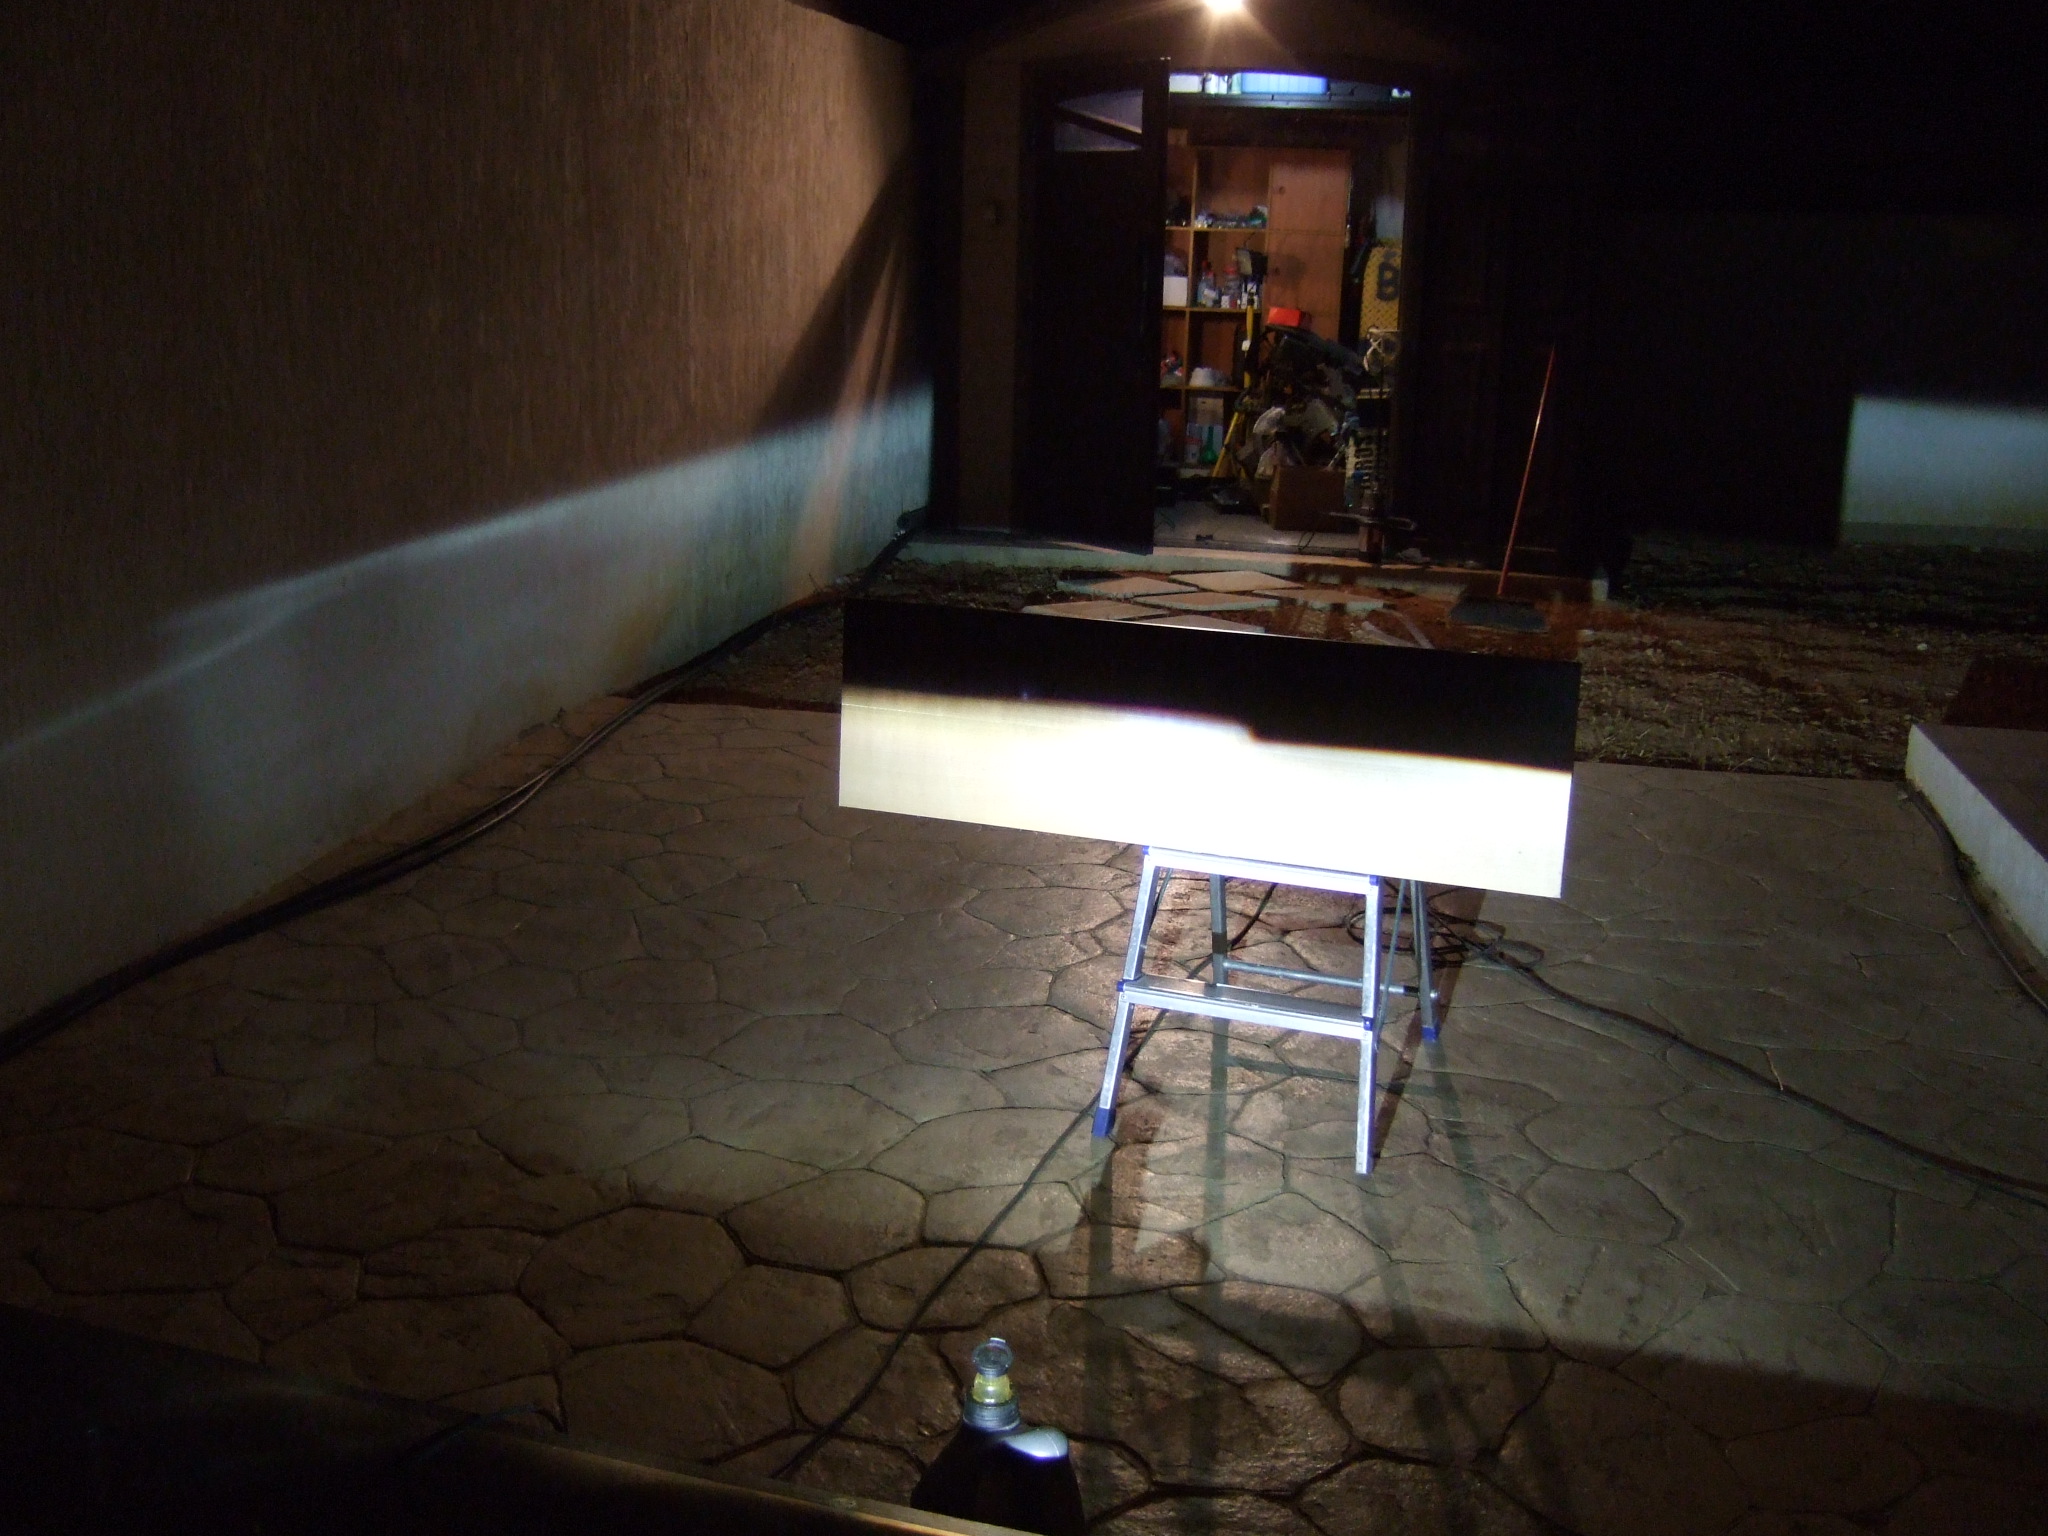
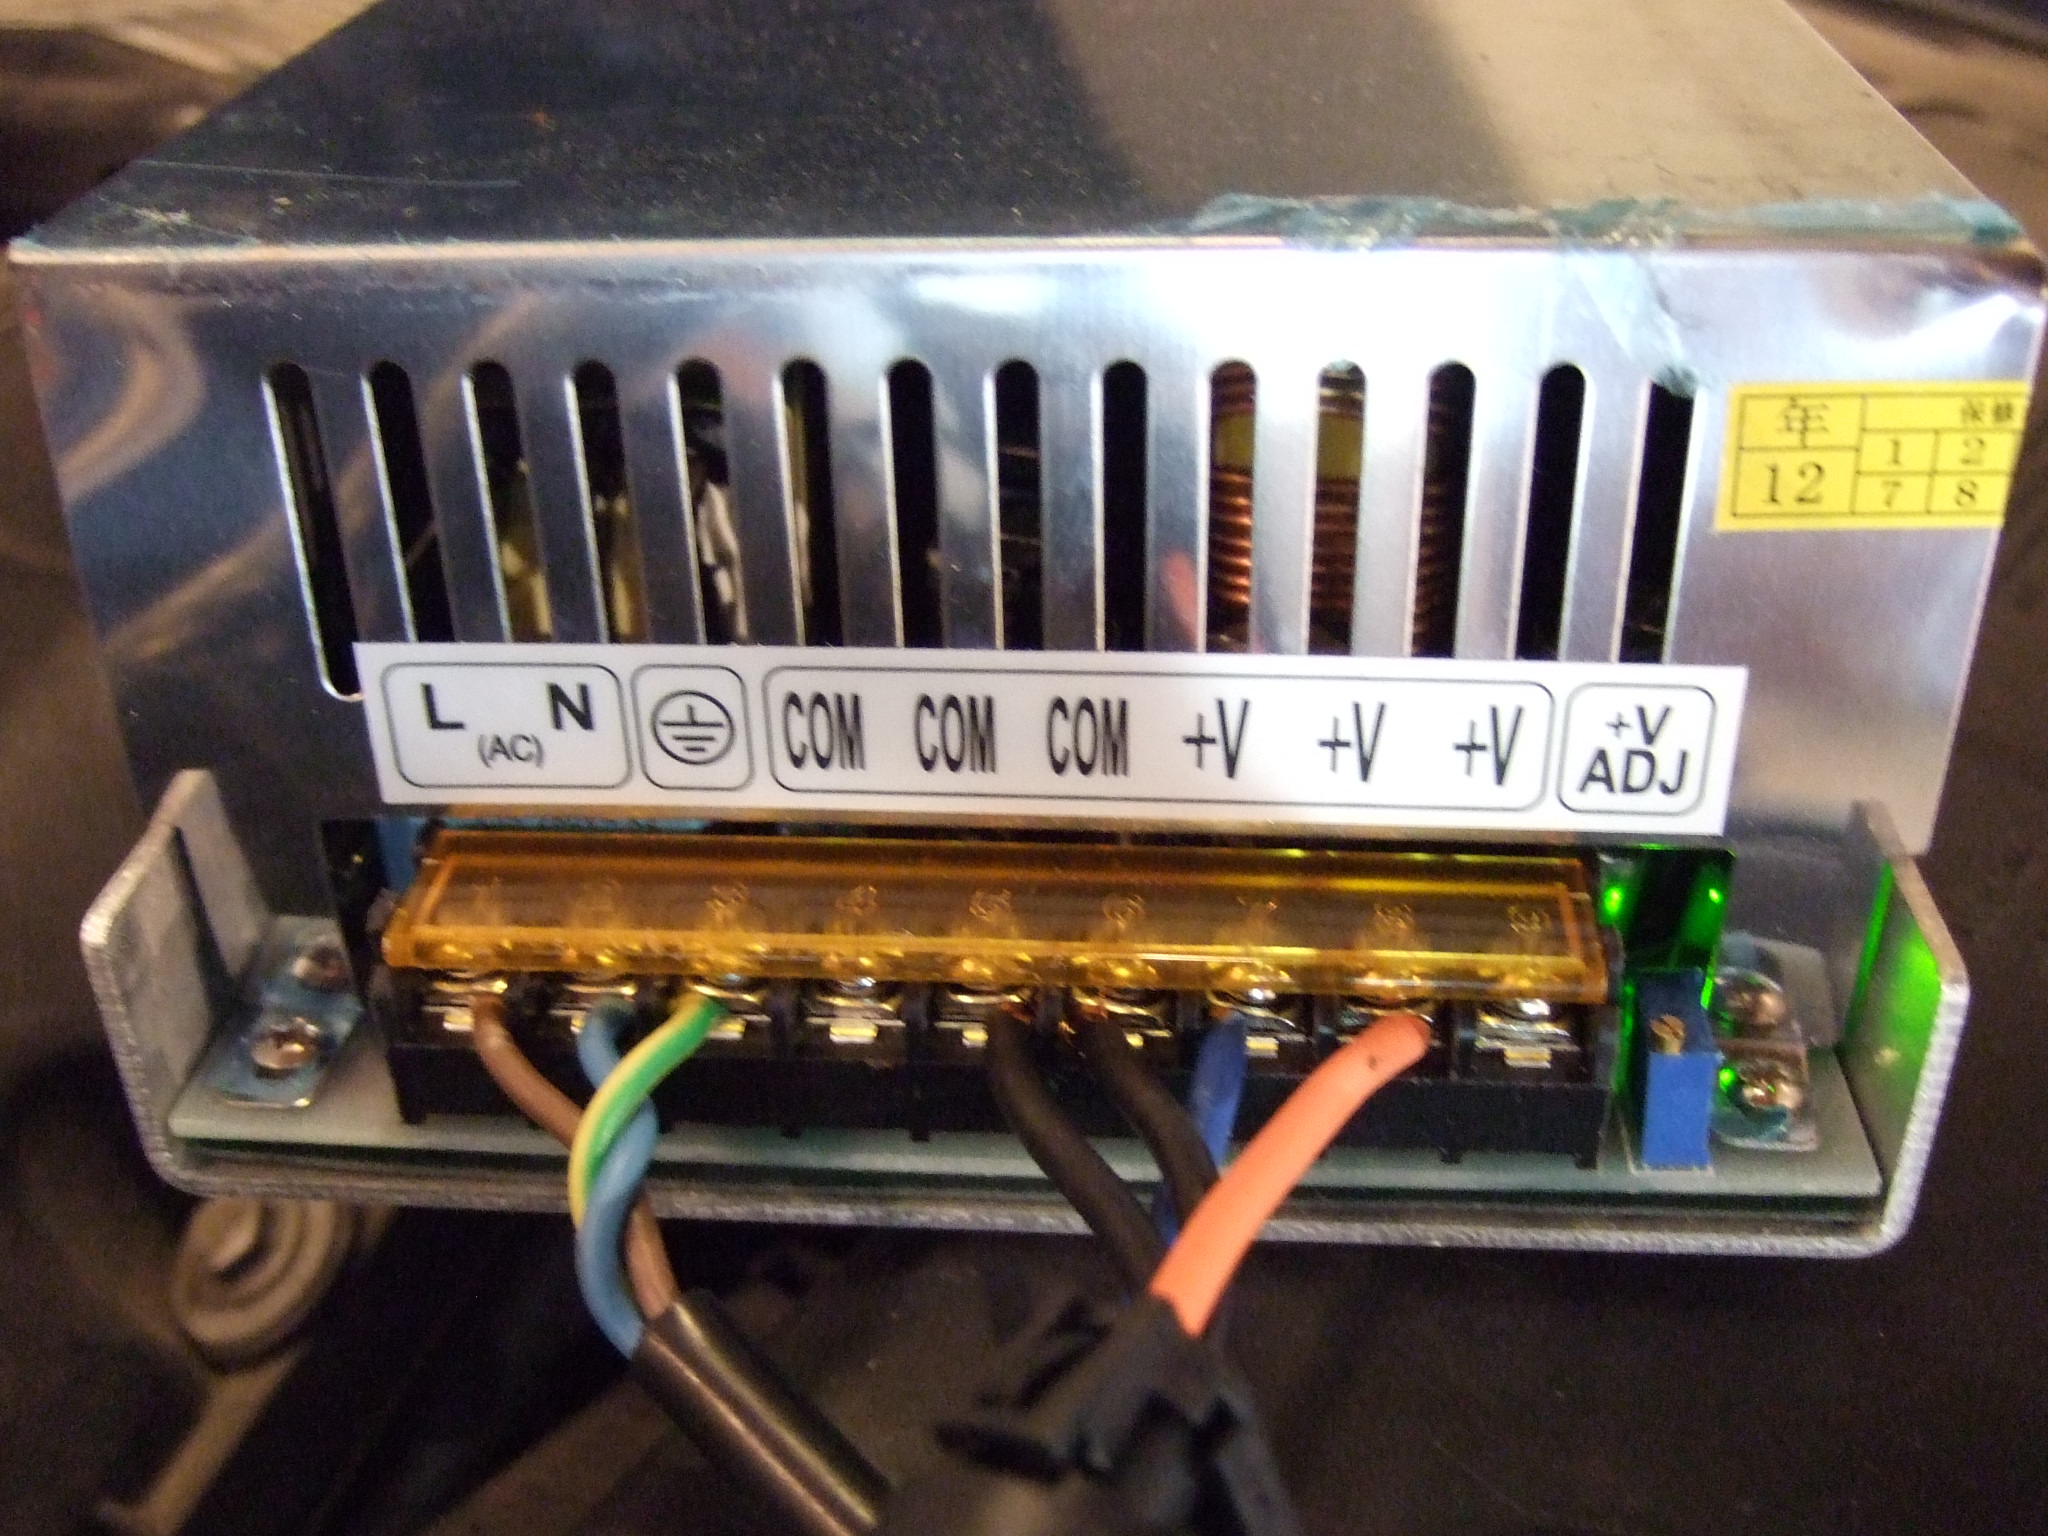
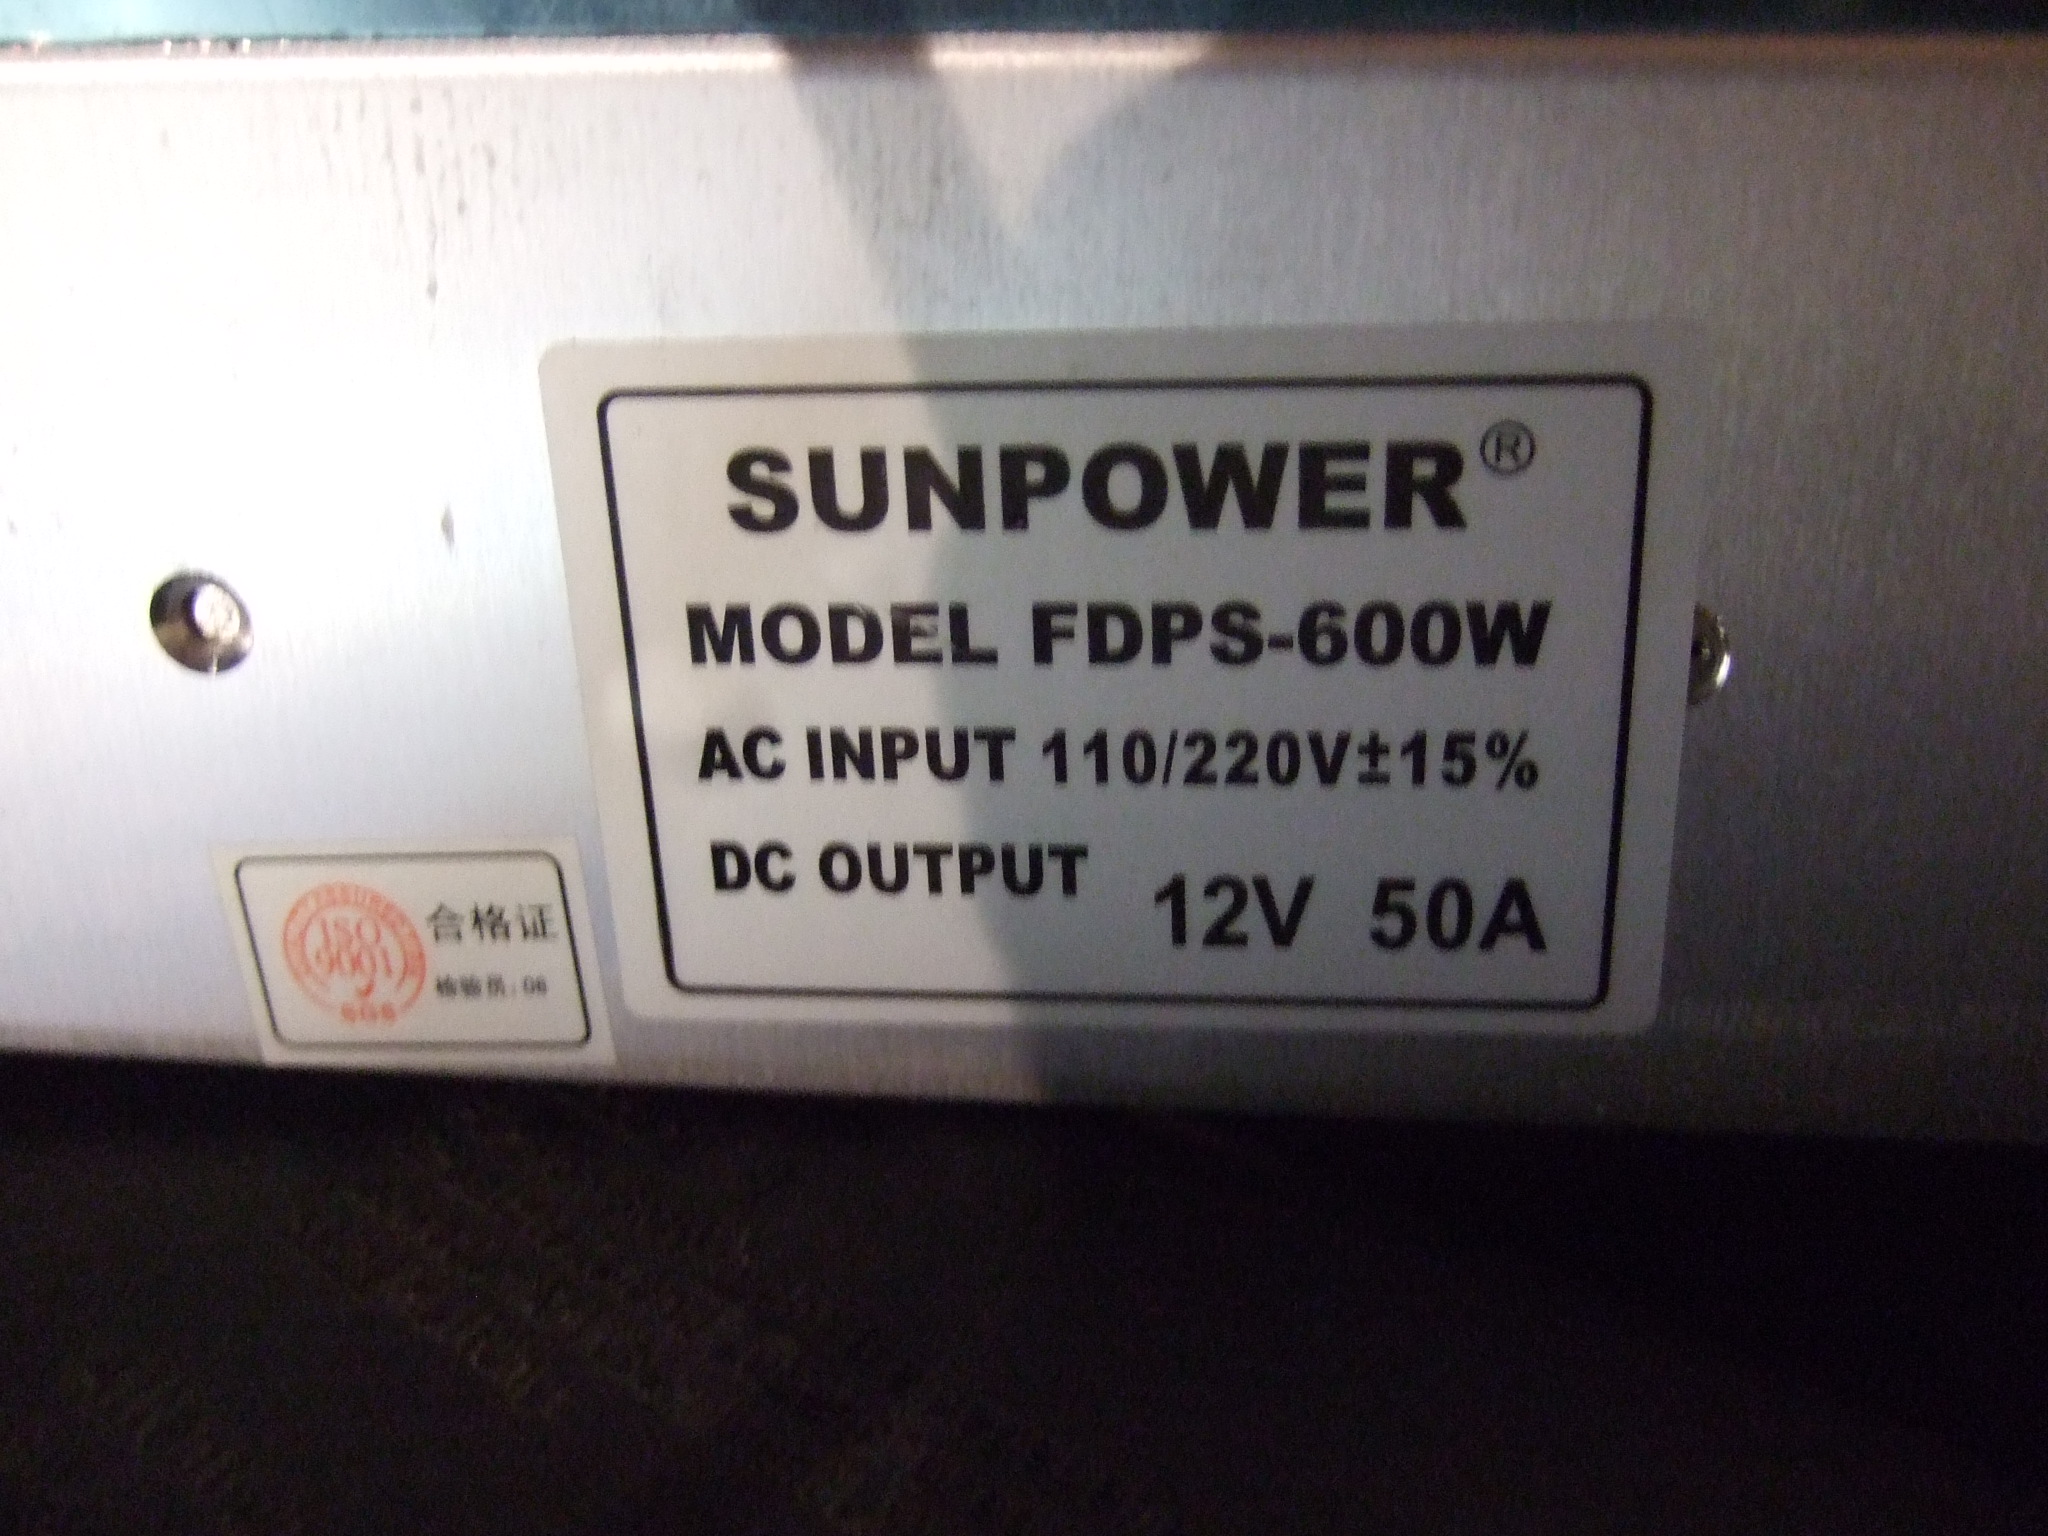
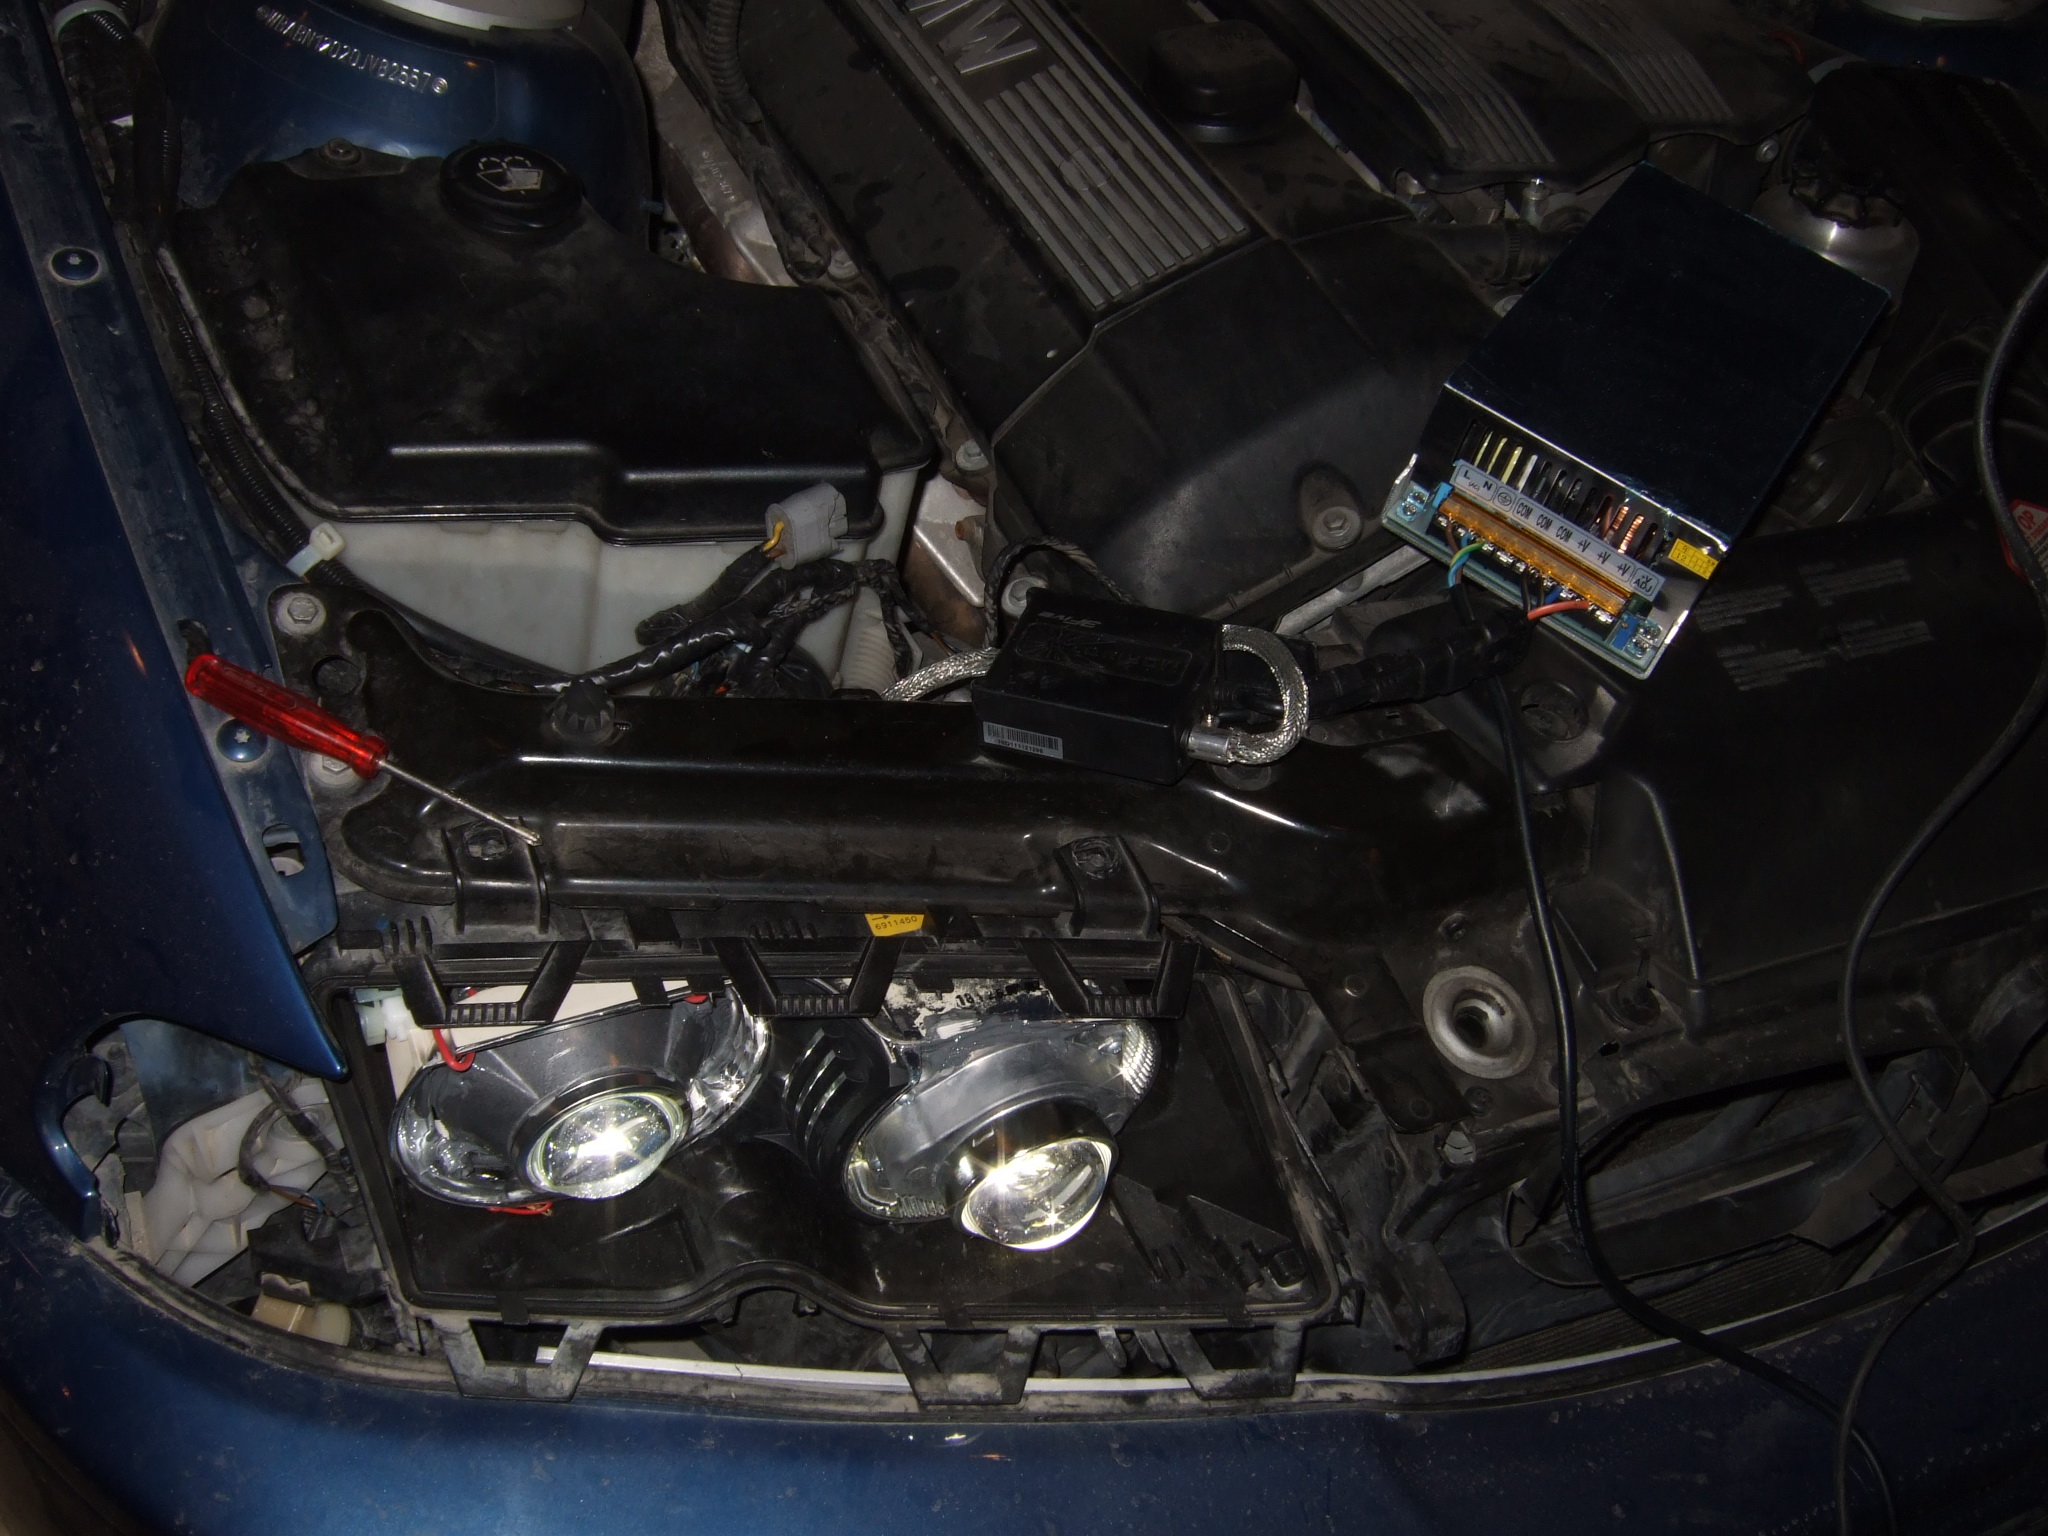
Need some good PSU to power on all HID at once
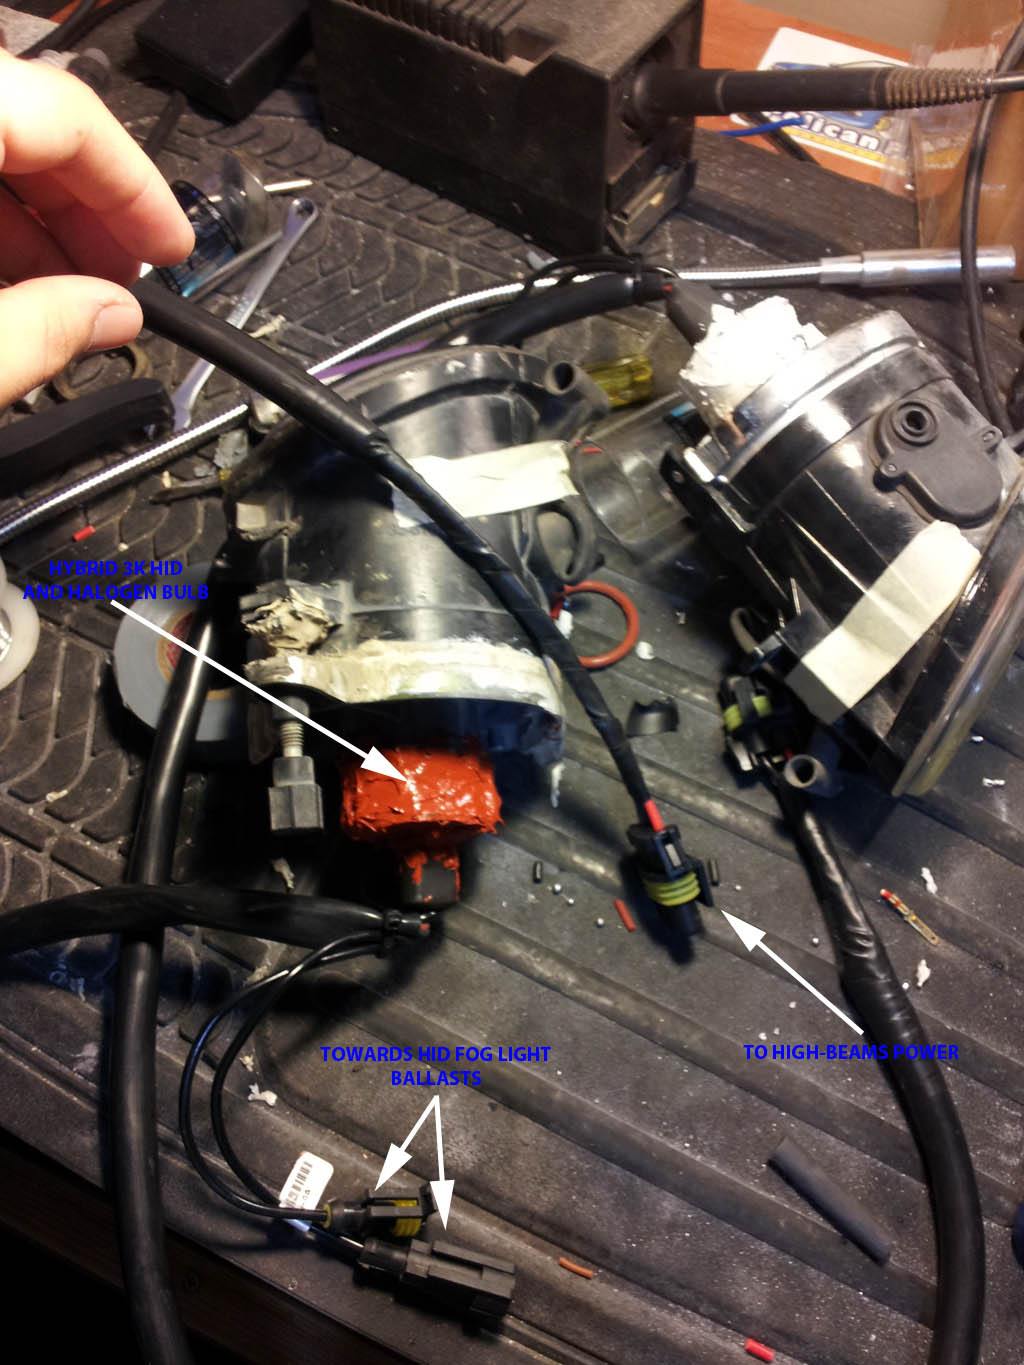
To eliminate the annoying bulb out warning, and to enable the flash-to-pass signal which is the problem with most quad-bi-xenon installs, I did the following: I modified my fog lights (which are 3K HID) to accept the larger HB7000 bulb, and used a hybrid version of this bulb, which is essentially a 3K HID and a halogen one, combined. The HID part was connected as before to the fog light ballasts, and the halogen part, was connected to the high-beam wires by using some splitters I made.
Hybrid bulb inside fog light housing.
So basically, the concept is: 1- Driver enters car, turns on engine, happy to see no warning on dash. Halogen bulb in parallel with the high-beam circuit makes LCM happy. 2- Driver turns on DRL --> Angel Eyes on, cool factor! 3- Driver turns on low-beams --> 4x 4300K HID Bulbs turn on, 2 with factory ballasts wiring and 2 through relay & additional ballasts 4- Driver turns on high-beams --> 4x bi-xenon solenoids activate giving 4 HID bulbs output and halogen bulb in fog lights turns on as well. 6 bulbs to light the road ahead 5- Foggy conditions, driver turns on foglights as well --> LOL 6x HID bulbs activated (8 if you turn on the high-beams as well) Little sun, fog evaporates! 5- Daylight, driver flashes-to-pass annoying driver in front --> halogen bulbs in fog lights turn on, driver ahead never seen such thing, moves over.
:) |