|
GENUINE M3 MIRROR RETROFIT WITH AUTOFOLD FUNCTION |
|||||||||||||||||||||||||||||||||||
|
This is my latest project, a retrofit that I wanted to do from the first day I got the car. It took me a very long time to get the right set of mirrors, relatively low price and to sort all the little things that must be done to allow them to fold/unfold on my car. Special thanks to Simon (320de47m47) for supplying the mirrors and his guidelines to make everything work.
This project was done on my 2001 E46 320CI. Manual seats (no memory), No autofold feature (module or switch). This car comes with a 6-Pin mirror plug. The objective is to make the mirrors to fold upon pressing the button on the mirror switch. The module I bought offers a variety of methods to make the mirrors fold, such as when the lock/unlock is pressed on the key, etc. The mirrors I got where the 12-Pin type, which I had to convert to match my car's plugs (6-Pin)
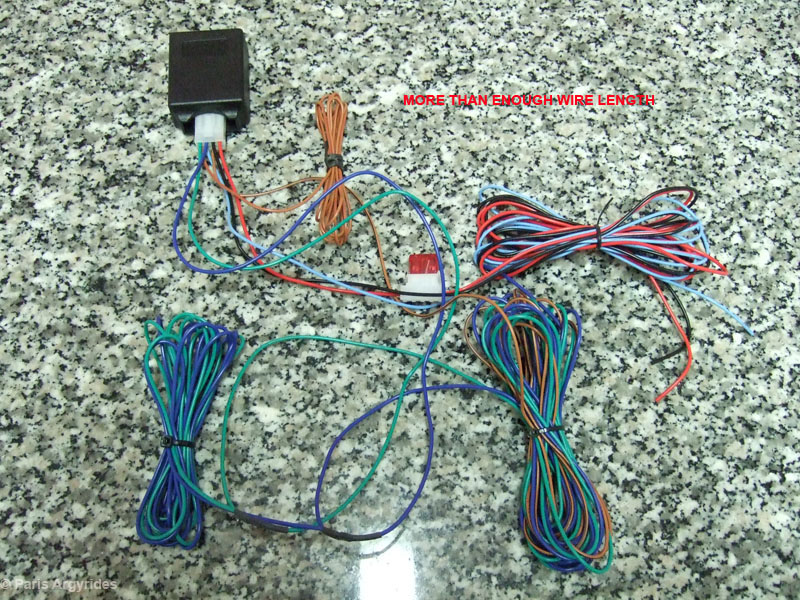
Parts List: Genuine M3 Mirrors with Autofolding functionality. Colour coded: 364 - Topaz Blau Genuine Mirror Switch (2 Plug / T-Shape) with Autofold button Innoparts SAM 1.0 Mirror Folding control Module Plugs
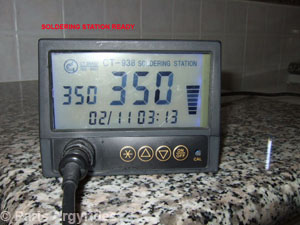
Tools List: Multimeter Soldering Station 8mm bit 10mm bit Flathead screwdriver Philips screwdriver Drill with 5mm bit Torx T20 bit for door panel removal
Disclaimer: Follow this guide at your own risk. You will deal with door panels which have airbags installed, mess with the car's wiring harness, which may become damaged if done incorrectly. For your own safety, disconnect the battery and wait 10 minutes before starting this kind of work.
Difficulty level: 5/10 Time: 6 Hours
Let's start..
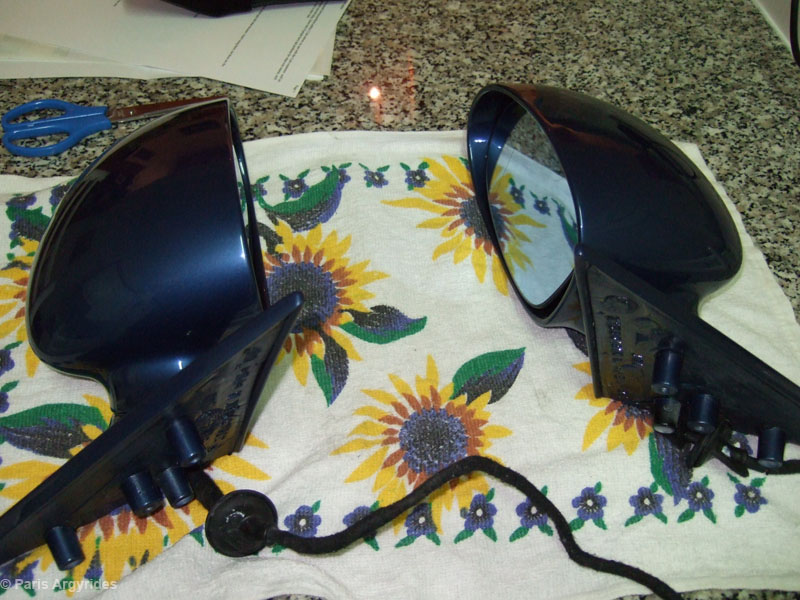
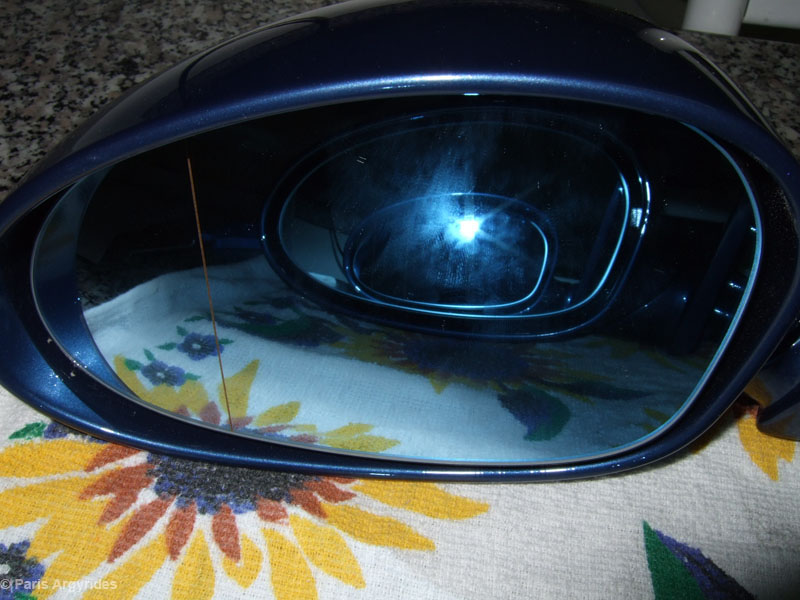
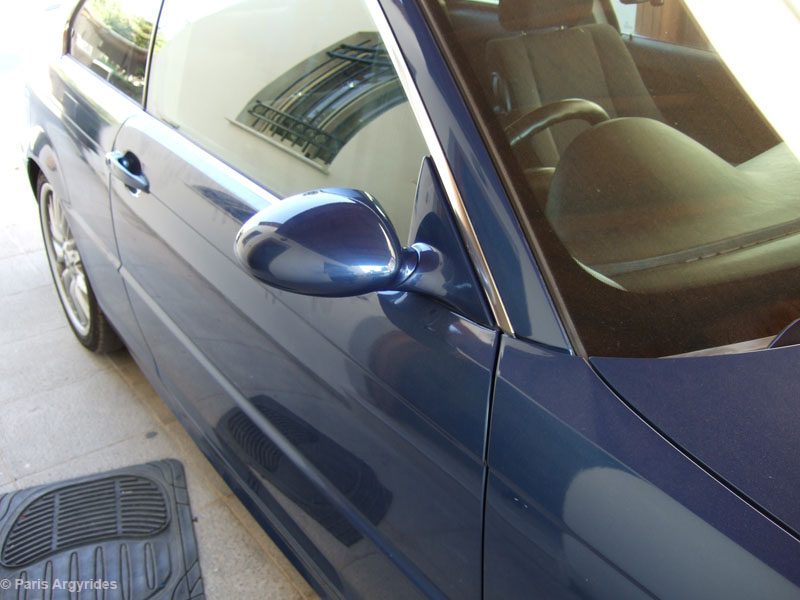
Genuine M3 Mirrors, colour code 364 (Topaz Blue)
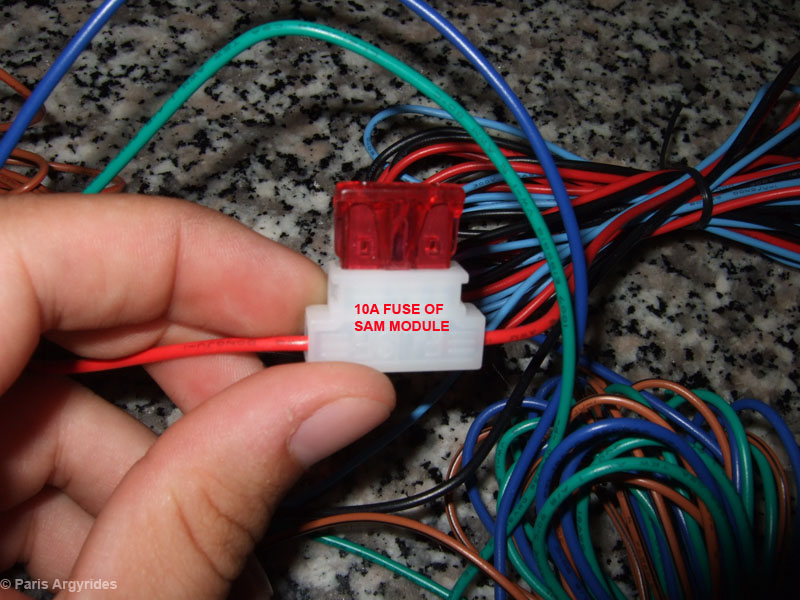
The Innoparts' SAM Folding control module
Remove both door cards. There is a DIY on this site how to do that so I will not get into details. 5 Torx screws and 21 plastic pins hold the card in place
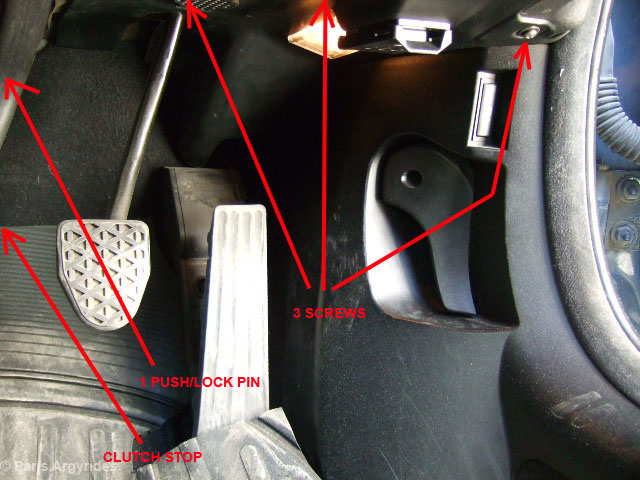
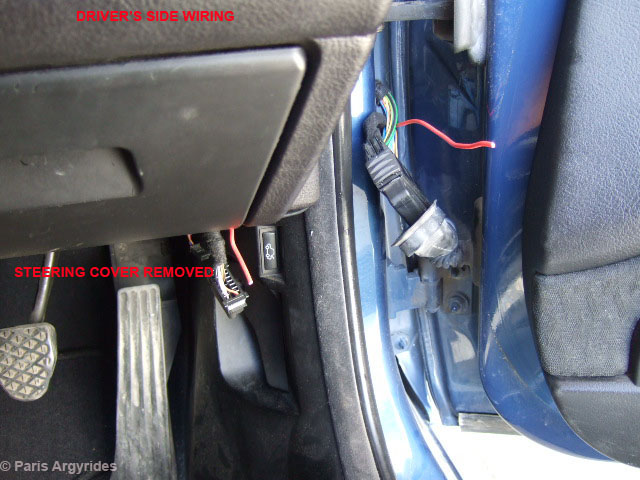
Remove the steering column cover by removing the 3 philips screws, clutch stop, and 1 push/lock pin. Disconnect the foot light, OBD port and the buzzer for the parking sensors. All plugs are not the same hence you can't connect something wrong. Let the cover drop and place it somewhere out of your way.
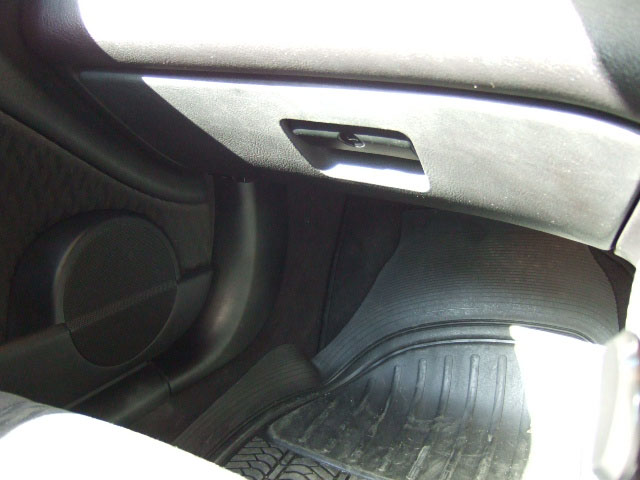
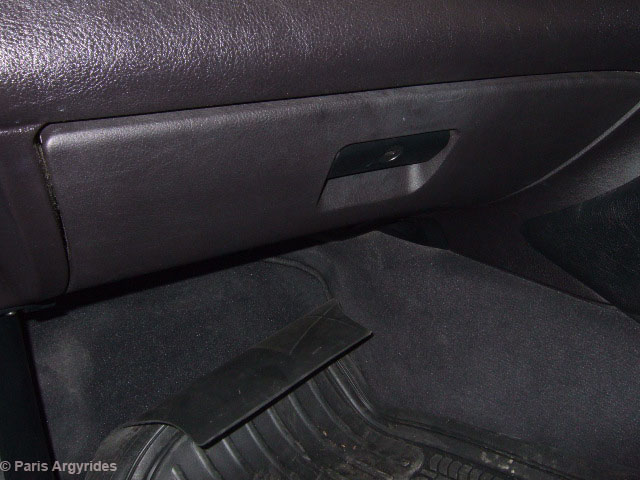
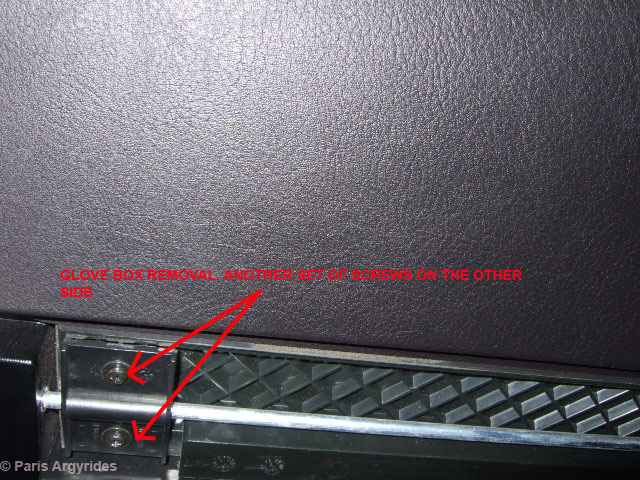
Remove the glovebox on the opposite site. It's held by 4 philips screws on the bottom and 2 plastic pins (1 left strap, 1 right plastic holder)
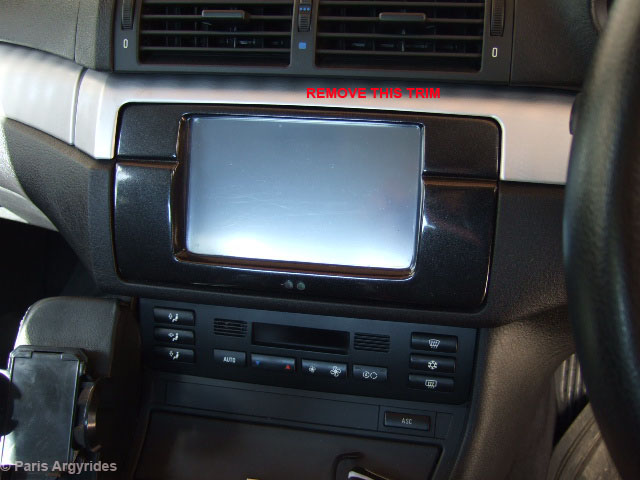
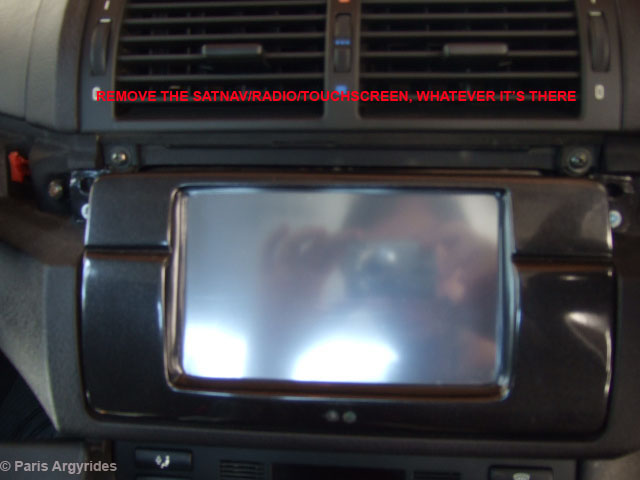
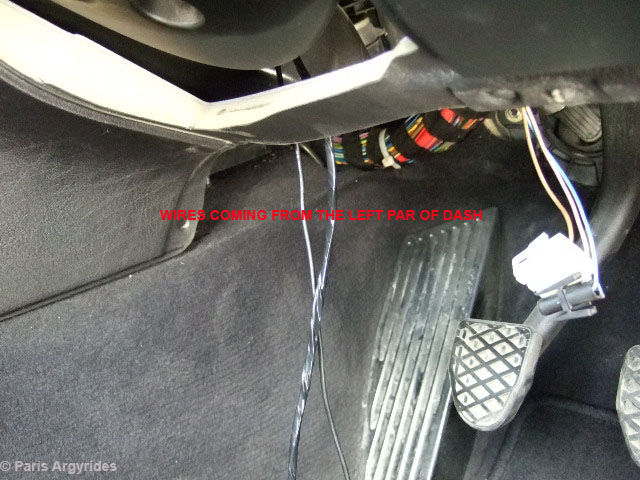
Remove the dash trim to gain access to wires and power.
With glovebox removed, you can see the route of the wires
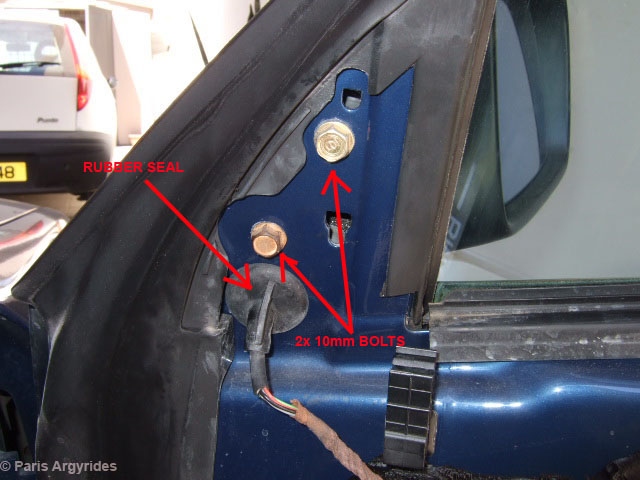
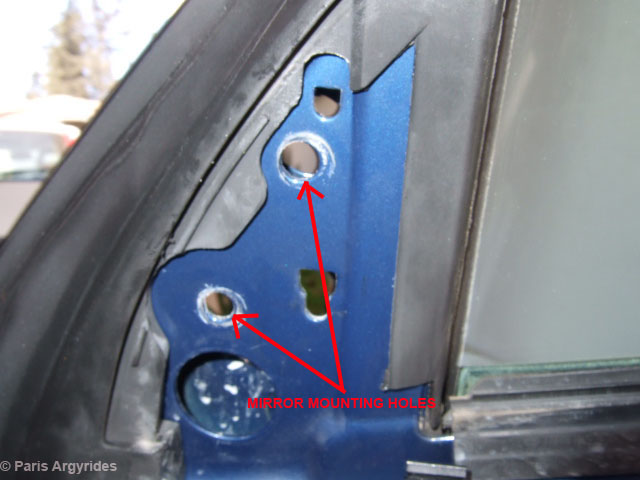
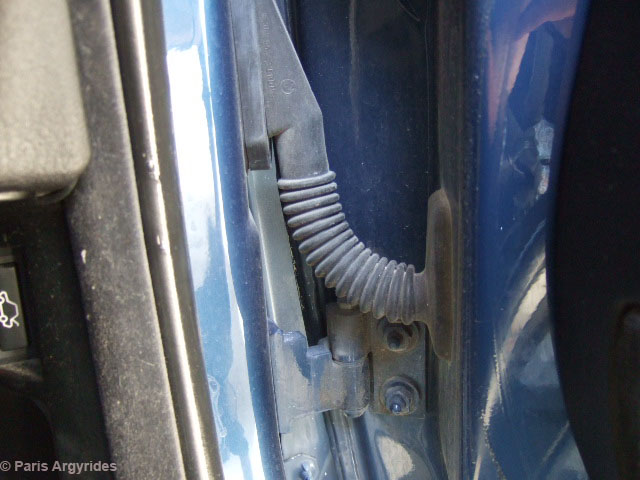
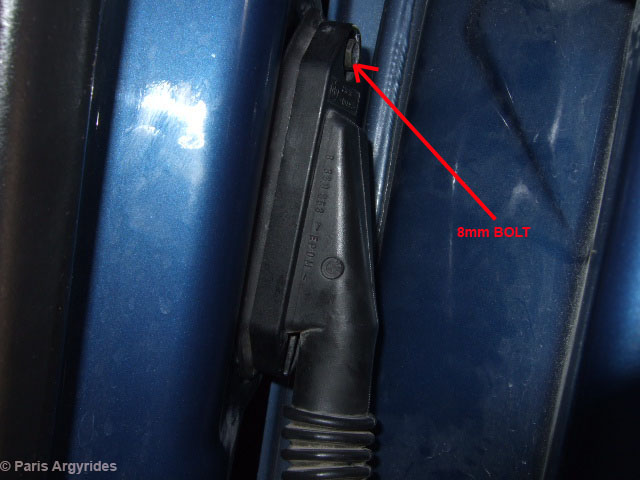
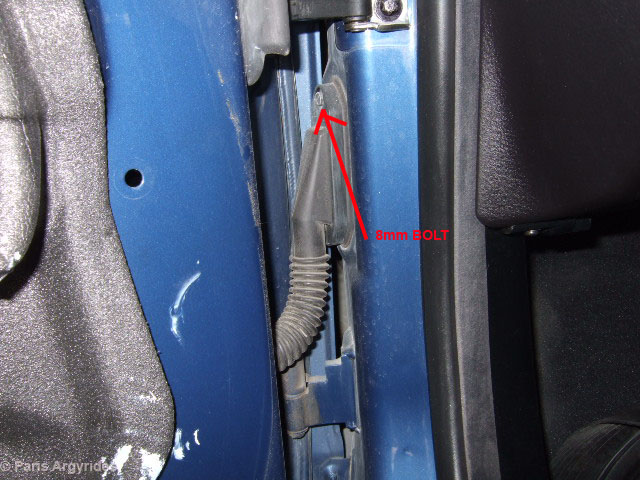
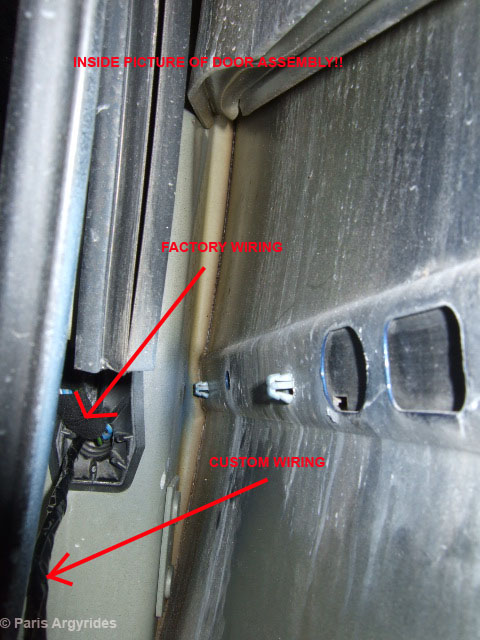
Now, remove the door card and the mirror bolt cover (just pull it while pushing it upwards). The 2 10mm mirror bolts are revealed.
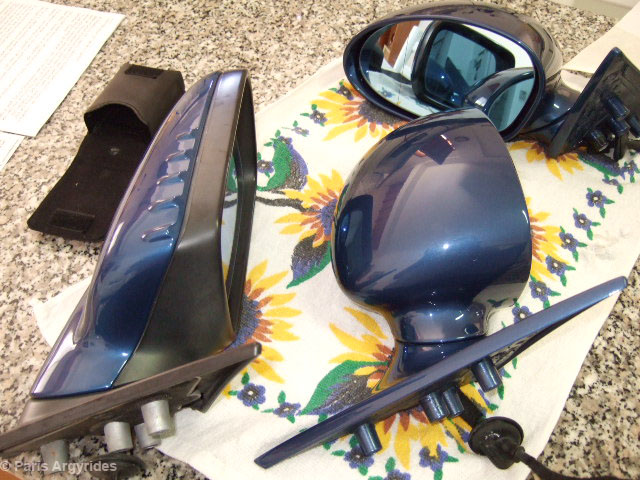
Old mirrors removed and placed next to new ones
Now the fun part begins.
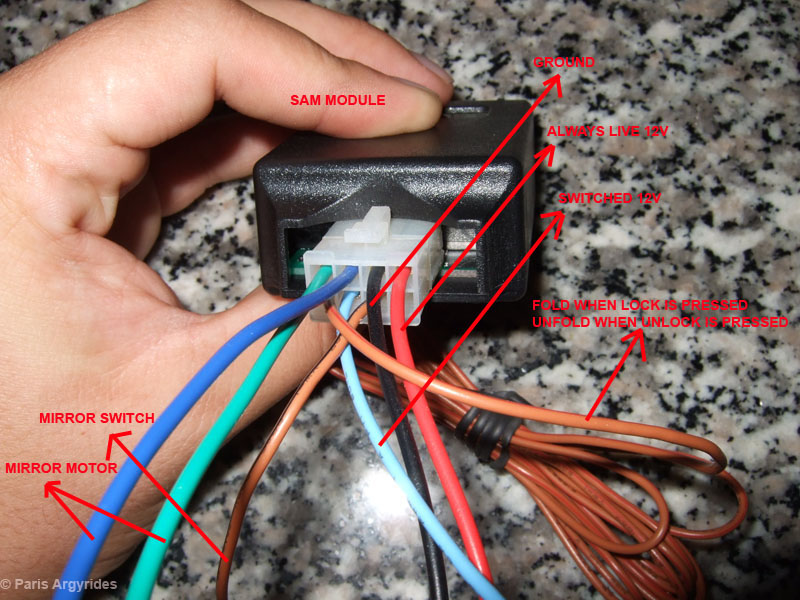
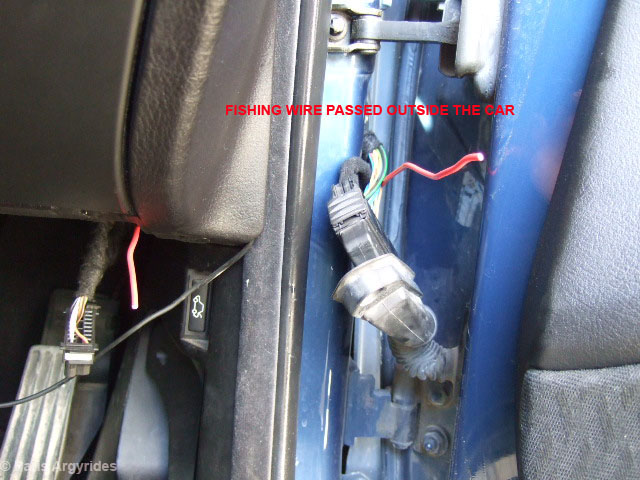
Time to run the SAM module wires, from the center dash to both right and left sides. On the right part (Driver's side) 3 wires must go because the mirror switch is there too. (2 wires for mirror motor and 1 for signal from mirror switch)
Must go through here
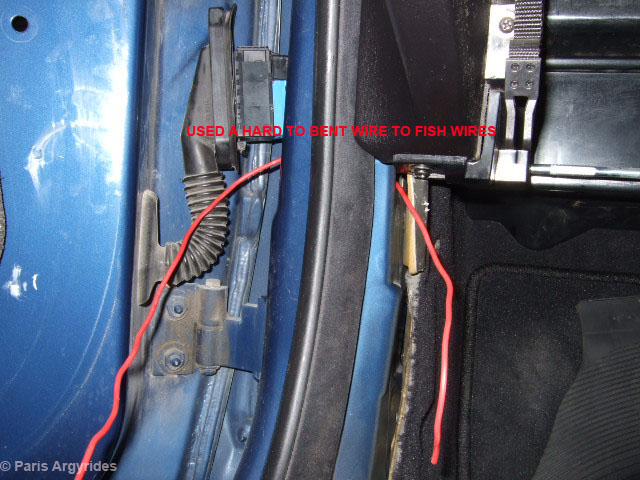
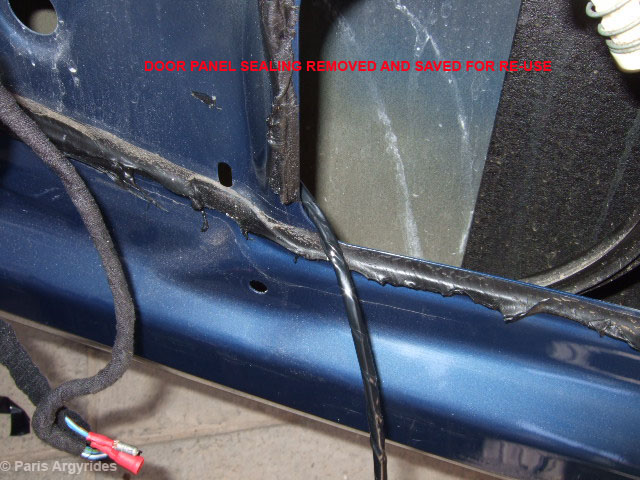
Wiring harness removed and a thick wire is used that will fish the smaller wires.
Same for the opposite side (passenger's side)
Fishing of wires begins
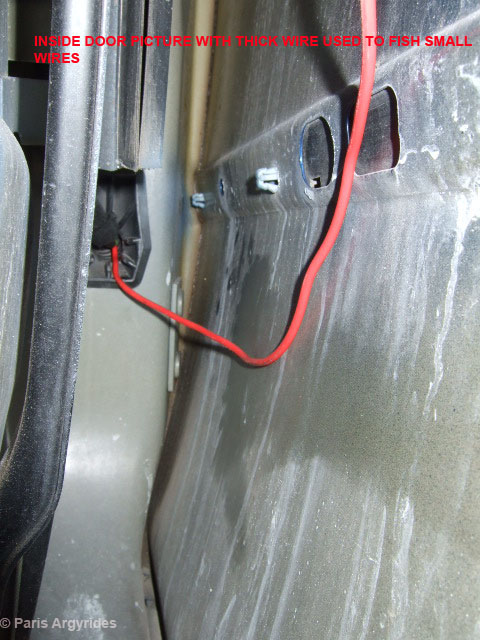
Use the same method to pass the wires inside the door now! I took this picture, it's from the inside of the door
Pull the thick wire until the SAM wires come out
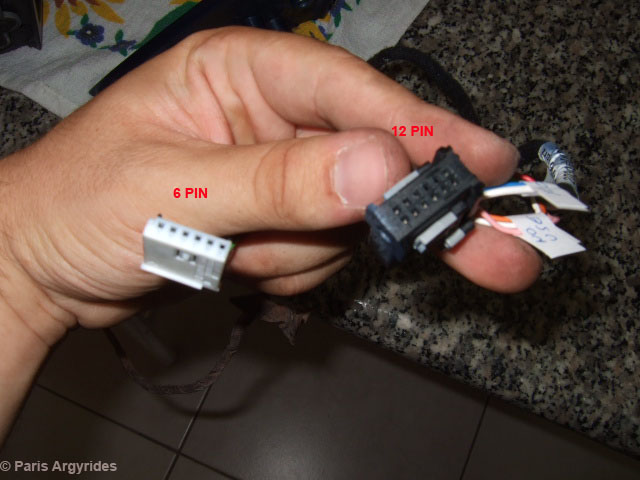
Now once all wires are in place, it's time to do the mirror plug conversion.
Left: Old Mirrors. Right: New M3 Mirrors
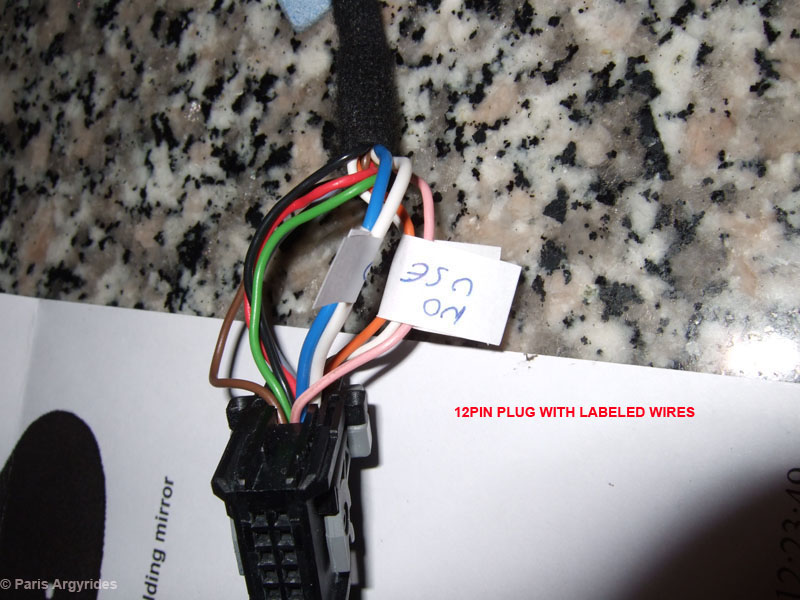
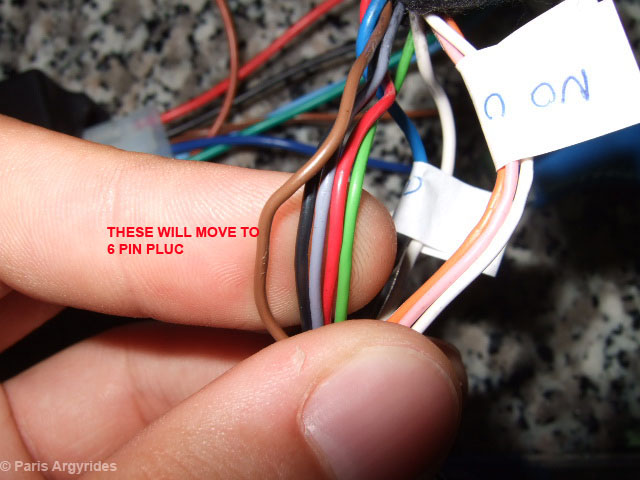
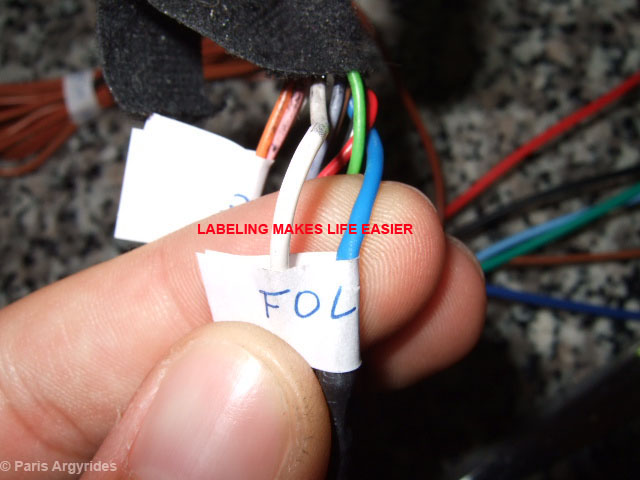
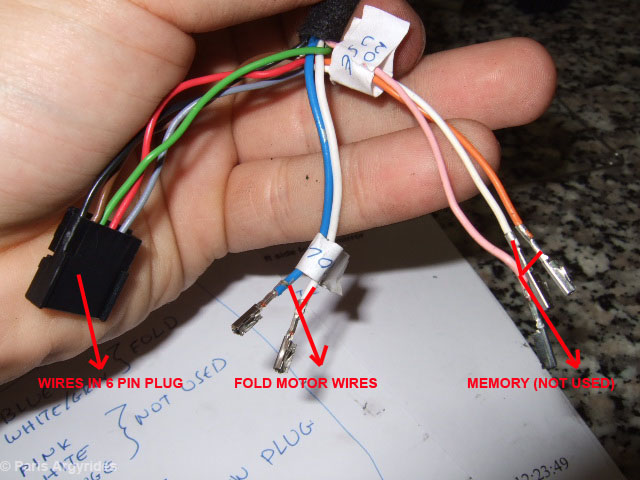
Labeling which goes where. Below the conversion is described better.
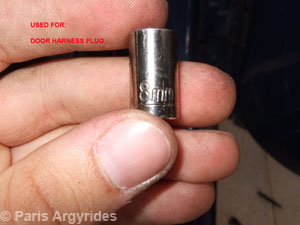
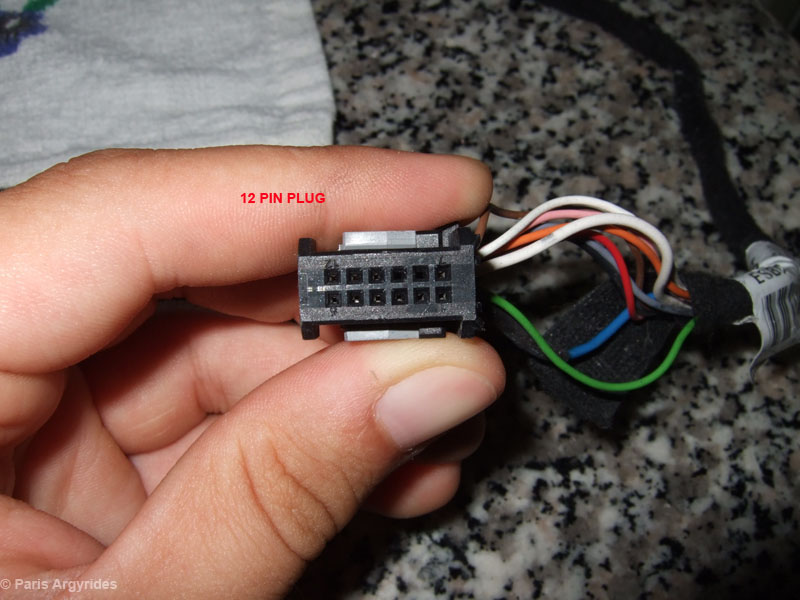
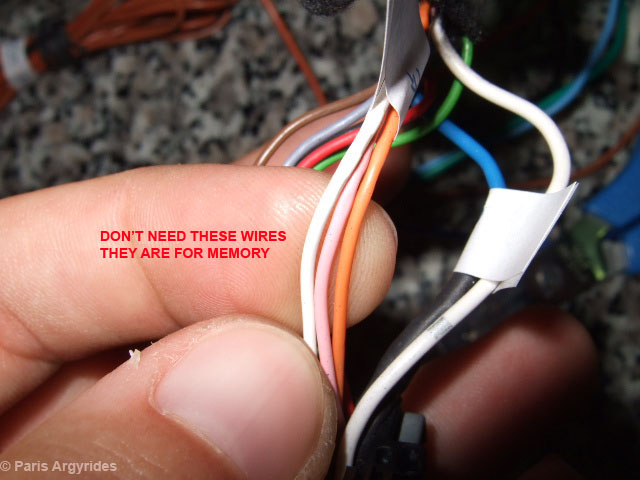
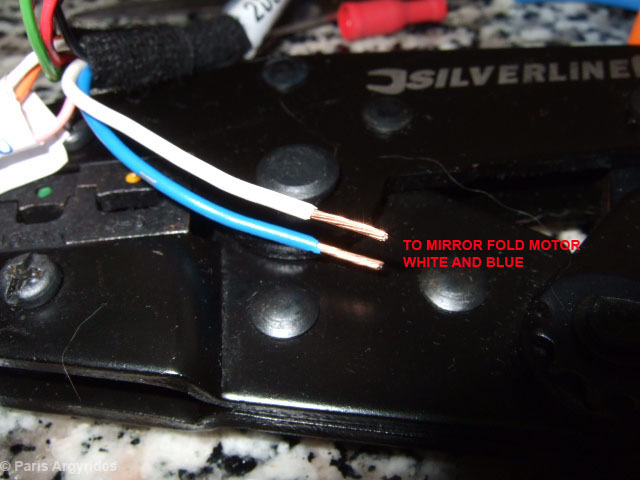
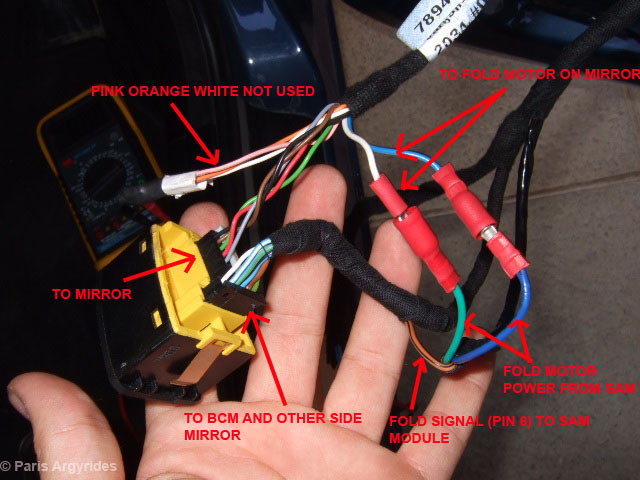
Brown, Black, Grey, Red, Green will go to 6 Pin plug, Orange,Pink,White are not used, and Blue,Thick White are the fold motors' wires
If you had memory seats these would be used.
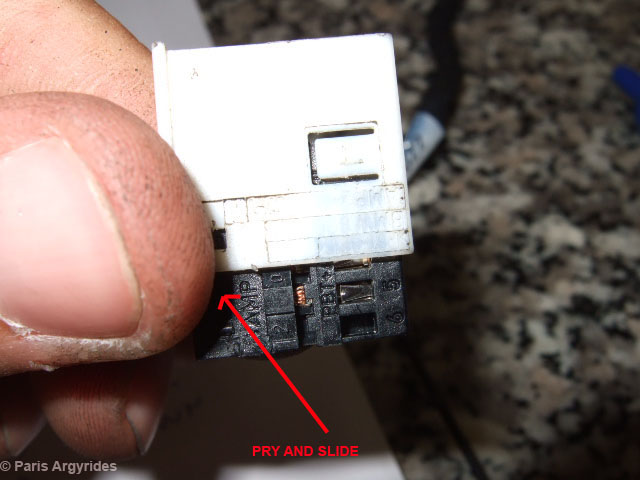
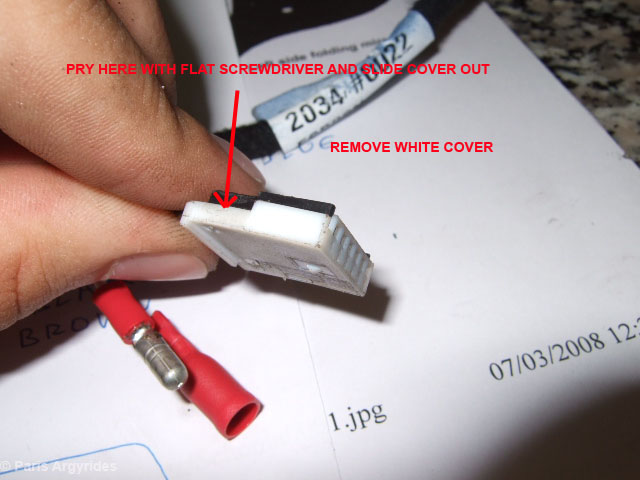
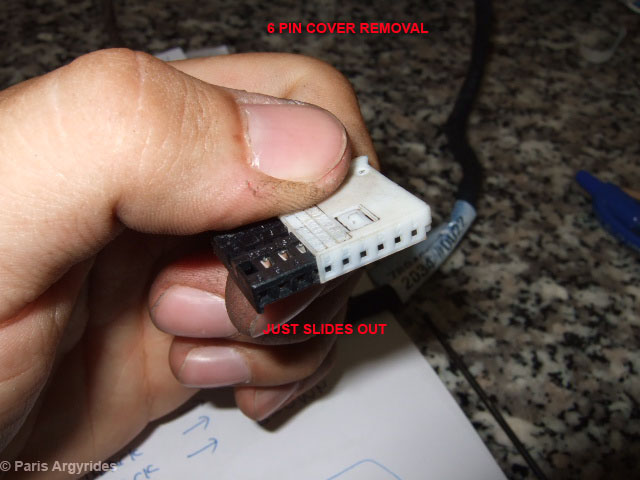
Remove the 6 pin plug white cover
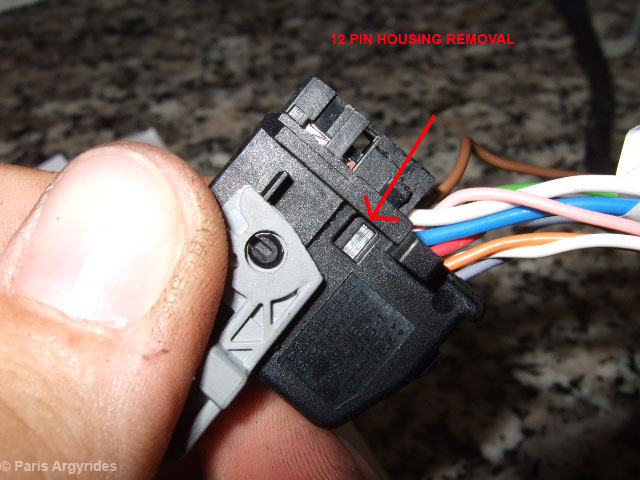
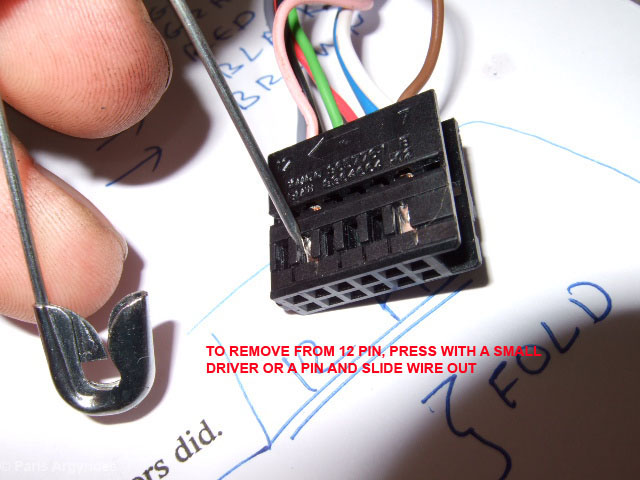
Remove the 12 pin plug housing
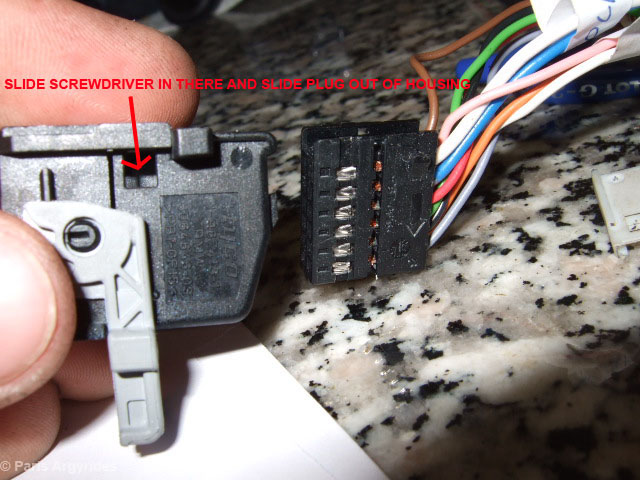
Now the wires are ready to be removed from each plug. Each pin is individually labeled so you can't miss it.
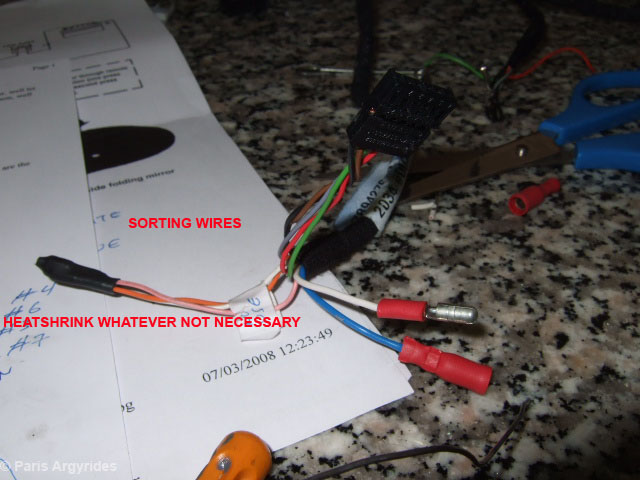
After a while, I managed to transplant the wires from the 12 pin plug to the 6 pin plug as seen below.
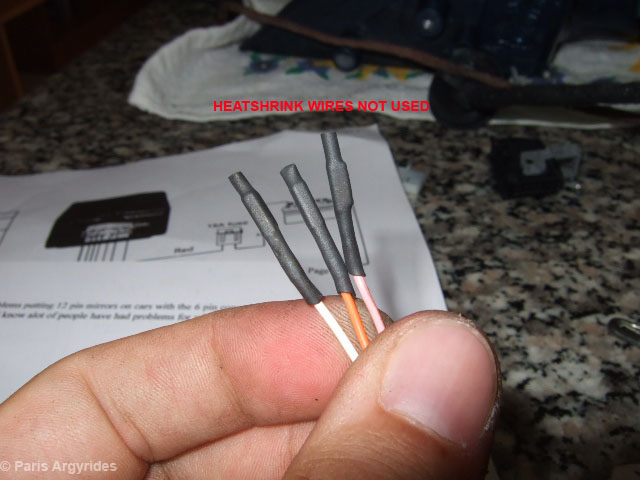
Sealing not used wires
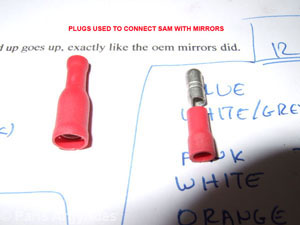
These two wires will be connected to the SAM module
Pressed and soldered plugs on the 2 wires
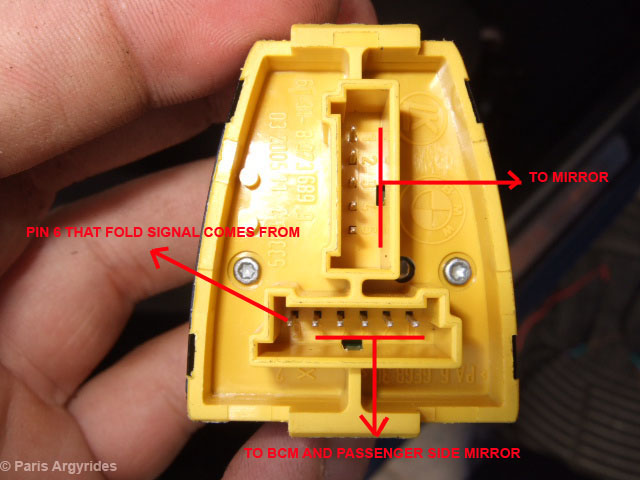
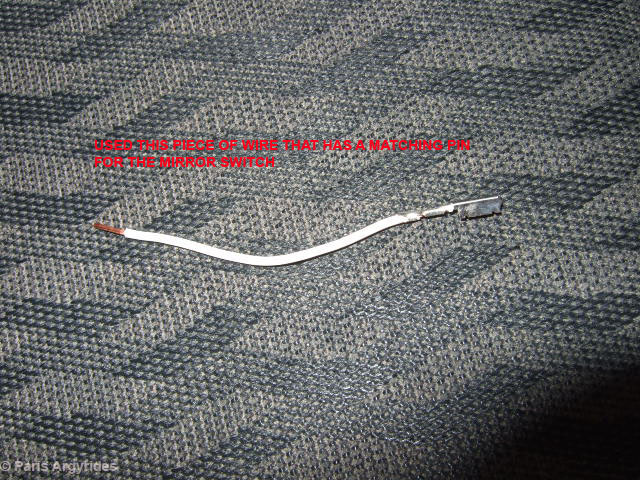
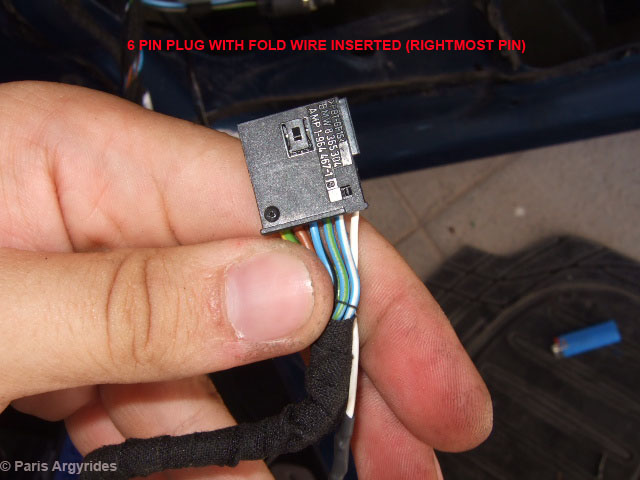
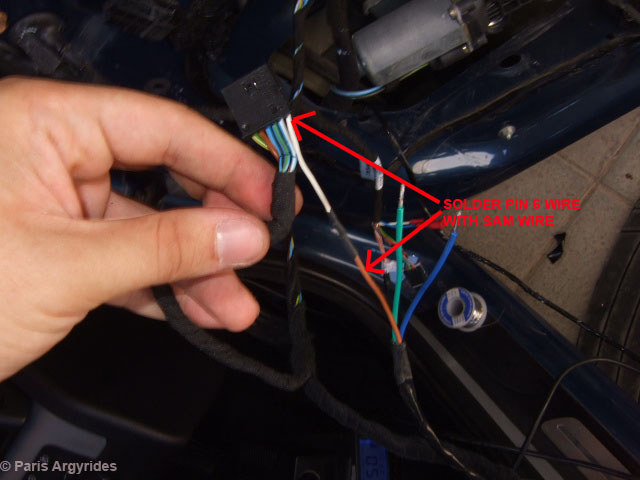
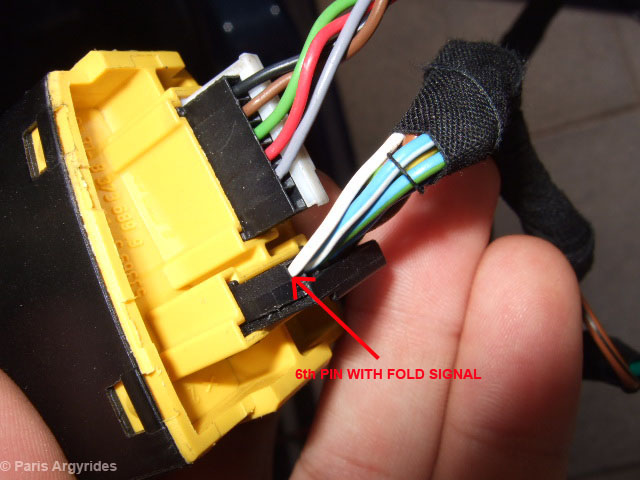
The mirror switch. The fold button sends a signal on pin 6. This pin must be connected to the input of the SAM module (to receive the signal). The 6-pin plug is blank on pin 6, therefore, I cut one of the unused wires (pink or orange or white) from the mirrors to use the plug
White wire slides in place.
Connecting the wires together
Wires coming from SAM module
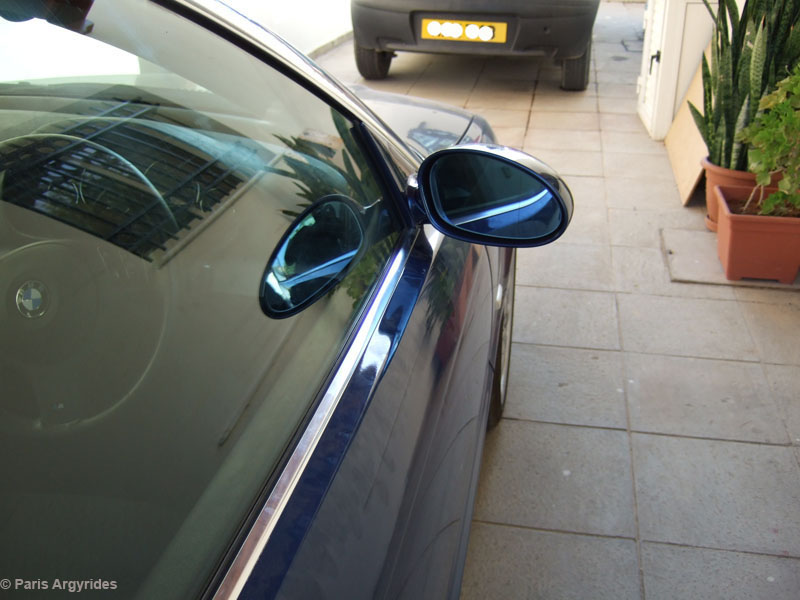
Connecting the wires for testing. This time I secured the M3 mirrors on the car too. Same bolts as the old ones.
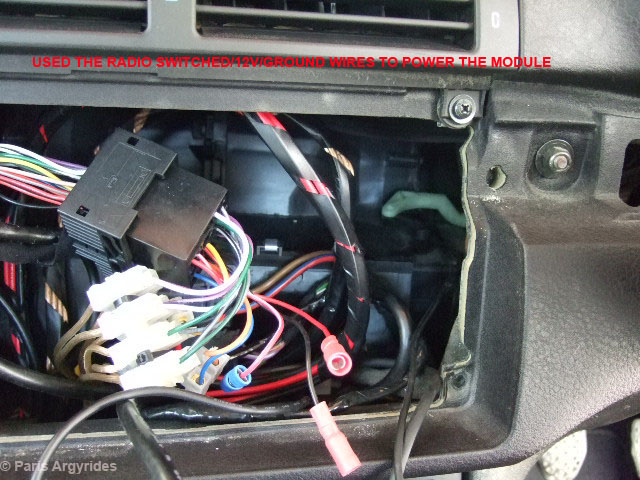
You have a few options where to get power from. I chose the easy way. The radio lines. With a multimeter, it's a mater of 1 minute to find a constant 12v, switched 12v source and ground. You can also use the BCM - Body control Module (shown later) to get power from.
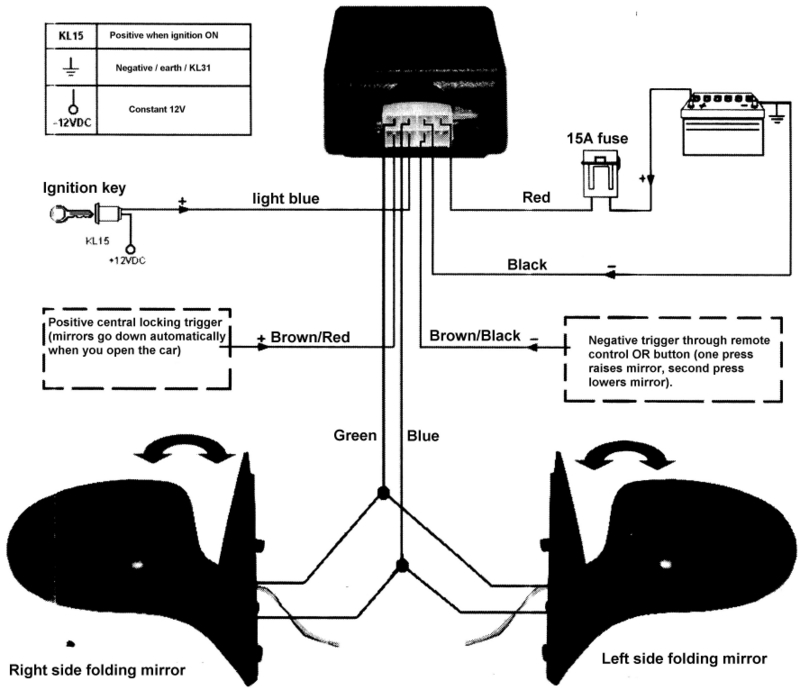
This is the connecting schema from Innoparts. Translated from German
And the final results:
|